It's the first time I've assembled a kit with no instructions. Technically, there were instructions, but a blurry photocopy in Chinese doesn't work for me.
It's amazing that these kits have been around for a long time, yet Ebay sellers and Banggood just say "no English instructions". If you surf around, you can find plenty of photos of the finished item. IMO the only tricky part is mounting the phototransistors and illuminating LEDs, since they are just hanging down and need to be almost scraping on the ground. Maintaining alignment is very important for calibration, but these are easily bent (and/or pads broken off) in a collision when they go off course. I think the kit should include a simple front bumper to hang off the front skid bolt.
The article looks good IMO, editor Robin does a great job on the layout and is super easy to work with. Once again, I encourage everyone here to submit an article for print publication. SERVO is a robot magazine, and the only game in town now that ROBOT magazine is gone. Hopefully it will survive and thrive for a while, but there are no guarantees. So right now. WRITE NOW!
Several forumistas have written for SERVO: Carol Hazlett, Bill Henning, Geo Leeman, Chris Savage, to name a few. It's a nice way to "give back" and get paid to help fund your future projects. Just get in the habit of taking photos and documenting your projects along the way. So much easier than taking your bot apart afterwards to take internal detail photos and trying to remember the tricky parts.
The editors are wide open to subject matter, most anything of general interest. Tech articles, tutorials, construction tips, combat weapons, product reviews, whatever. Check out the writer's guidelines at http://www.servomagazine.com/index.php/writers-guidelines and get crackin'! Tell 'em Mr. Roboto sent you.
Looks like it uses those nice narrow tires. Wish they sold just those (and the gearbox motor). Everyone sells the weakling motors with the fat tires, and those robots have terrible steering problems. The narrow tires are better.
Aren't the 'tires' just O-rings? There are cheap O-ring kits on Ebay and other places. Of course, that doesn't help with the gearbox and motor supply issue.
O-rings mounted on a wheel. The wheel has the proper molded double-D shaft hole, for specific use with the gearmotors. These wheels are not nearly as widely available as the wide-track tires normally sold with these motors.
The LFR kits with gearmotor modules use foam tape for assembly. Simple and quick but it just falls off after a month or so, and the sticky mess is hard to clean up and repair. I'm not normally a fan of worm gears, but these alternative kits (same price, as low as $4) work great and will last much longer if properly assembled.
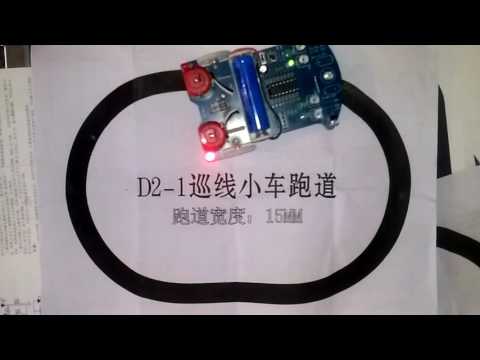
These li'l dudes arrived today and work great. They really hug the line and acquire it easily. I was about to make a video, but turns out there are plenty already. Comes with 4 watch batteries installed.
Building & tweaking some of these cheap analog Line Following Robots for an upcoming Maker Faire. I can't believe how popular these were last time, I plan to give some away at the Faire.
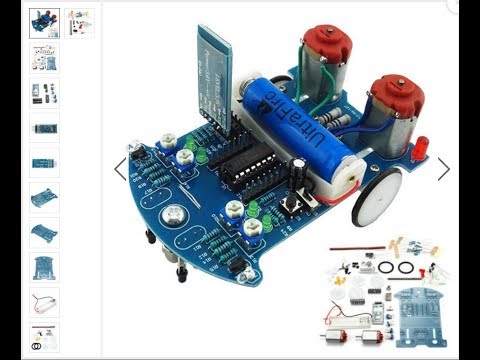
Edit: I just noticed this is a new version of the chassis PCB. It uses metal brackets to hold the gearmotors, and there is a third LED in the center of the board. Hmmm...
I've been reverse engineering the D2-6 (the fancy one with the STC15W201S microcontroller and the Bluetooth interface). The micro runs 8051 code that can be compiled using SDCC which, unlike the Keil compiler, is licence-free. I don't have access to the original code, but once I've worked out exactly what it does, I shall reprogram it for better line-following performance. It's easy to reprogram the chip once you have a hex file: you just use the free stcgal program and a serial interface (FTDI or similar). I'll post links to my source code and resulting hex files if and when I've improved the robot's performance.
With the standard firmware, the line following mode just does full-speed forward on both motors, and then full-speed reverse on one of them when a sensor sees the edge of the line. But the Bluetooth-steered mode uses PWM control of the motors. The PWM runs at a frequency of 427 Hz. The Bluetooth outputs serial to the micro at 9600,N,8,1 The commands are just individual bytes, with a weird encoding format as follows:
Byte Function 0 All stop 1-19 Ignored 20-31 Forward slow->fast 32-35 Ignored 36-47 Reverse slow->fast 48-51 Ignored 52-63 Spinning on the spot, to the left slow->fast 64-67 Ignored 68-79 Spinning on the spot, to the right slow->fast 80-83 Ignored 84-95 Fast forward turn to the left gentle->hard 96-99 Ignored 100-111 Fast forward turn to the right gentle->hard 112-115 Ignored 116-127 Fast reversing turn to the left gentle->hard 128-131 Ignored 132-143 Fast reversing turn to the right gentle->hard 144-255 Ignored
Line following using PWM control should be much faster than the naiive 'forward or reverse' mode. Time will tell...
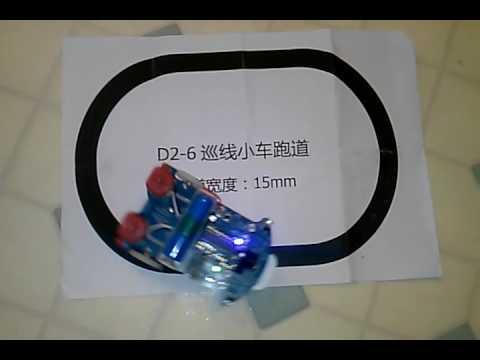
Great sleuthing, ceptimus! I also did some work on the D2-6 a while back. Its line following abilities are actually worse than the cheap D2-1 BECAUSE it uses its H-bridge to reverse:
I replaced the processor (vs your clever reprogramming it) and had some fun:
I've decided to write my own Android app to send commands to the car in (what I think is) a more sensible format. It will still send single-byte commands. 4-bits of x-axis using the range -7 to +7, and 4-bits of y-axis in the same format. This uses 225 (15x15) patterns from the available 256, leaving 31 bytes for 'special functions'.
When either the x-axis or y-axis is 8 (binary 1000) (which is not used for the range -7 to +7) then the other axis can hold one of 15 codes, plus there is 1 extra code where both the x and y-axis hold the special binary 1000 pattern.
An obvious choice for one of the special codes will be to instruct the robot to perform an erco figure-8 challenge manoeuvre.
I'm not sure how well the robot will be able to do a figure-8 without some encoder feedback from the wheels (or their motors); I suspect not very well. A hardware upgrade would be to add some sensors to optically detect the passing of the four holes that are present in each of the wheel drive gears. The microcontroller has only one spare input, but another I/O could be stolen by deleting one of the two LEDs at the rear of the robot, which are currently only really used to indicate 'operating mode'. The operating mode could be indicated just as well by a single flashing LED: e.g. flash-flash-flash-pause for mode 3.


Comments
One transistor was installed backwards. While the bot looks like everything is mirror-imaged (the LEDs are), both transistors face the same way.
http://servo.texterity.com/servo/201707/?folio=8&pg=8#pg8
The article looks good IMO, editor Robin does a great job on the layout and is super easy to work with. Once again, I encourage everyone here to submit an article for print publication. SERVO is a robot magazine, and the only game in town now that ROBOT magazine is gone. Hopefully it will survive and thrive for a while, but there are no guarantees. So right now. WRITE NOW!
Several forumistas have written for SERVO: Carol Hazlett, Bill Henning, Geo Leeman, Chris Savage, to name a few. It's a nice way to "give back" and get paid to help fund your future projects. Just get in the habit of taking photos and documenting your projects along the way. So much easier than taking your bot apart afterwards to take internal detail photos and trying to remember the tricky parts.
The editors are wide open to subject matter, most anything of general interest. Tech articles, tutorials, construction tips, combat weapons, product reviews, whatever. Check out the writer's guidelines at http://www.servomagazine.com/index.php/writers-guidelines and get crackin'! Tell 'em Mr. Roboto sent you.
https://www.ebay.com/itm/2WD-Smart-Car-Tracking-Robot-Car-Chassis-DIY-Kit-Reduction-Motor-Set-For-Arduino/172854089141
https://www.ebay.com/itm/D2-5-Intelligent-Tracking-Line-Car-DIY-Kit-Suite-TT-Motor-Electronic-Component-/192289152912
https://www.ebay.com/itm/202273586488
O-rings mounted on a wheel. The wheel has the proper molded double-D shaft hole, for specific use with the gearmotors. These wheels are not nearly as widely available as the wide-track tires normally sold with these motors.
Free coasting (no binding) may be efficient, but it stops these $4 worm drive LFRs from following the line! Live & learn.
https://www.ebay.com/itm/Intelligent-Tracking-Smart-Car-Robot-Kits-with-TT-Motor-Wheel-Electronic/153026637942
Act fast, ad says only 3 items and 3 hours left!
Stocking stuffers for budding roboticists? "Tis the season all too soon.
https://www.ebay.com/itm/362780819611
Edit: I just noticed this is a new version of the chassis PCB. It uses metal brackets to hold the gearmotors, and there is a third LED in the center of the board. Hmmm...
I've been reverse engineering the D2-6 (the fancy one with the STC15W201S microcontroller and the Bluetooth interface). The micro runs 8051 code that can be compiled using SDCC which, unlike the Keil compiler, is licence-free. I don't have access to the original code, but once I've worked out exactly what it does, I shall reprogram it for better line-following performance. It's easy to reprogram the chip once you have a hex file: you just use the free stcgal program and a serial interface (FTDI or similar). I'll post links to my source code and resulting hex files if and when I've improved the robot's performance.
With the standard firmware, the line following mode just does full-speed forward on both motors, and then full-speed reverse on one of them when a sensor sees the edge of the line. But the Bluetooth-steered mode uses PWM control of the motors. The PWM runs at a frequency of 427 Hz. The Bluetooth outputs serial to the micro at 9600,N,8,1 The commands are just individual bytes, with a weird encoding format as follows:
Byte Function0 All stop1-19 Ignored20-31 Forward slow->fast32-35 Ignored36-47 Reverse slow->fast48-51 Ignored52-63 Spinning on the spot, to the left slow->fast64-67 Ignored68-79 Spinning on the spot, to the right slow->fast80-83 Ignored84-95 Fast forward turn to the left gentle->hard96-99 Ignored100-111 Fast forward turn to the right gentle->hard112-115 Ignored116-127 Fast reversing turn to the left gentle->hard128-131 Ignored132-143 Fast reversing turn to the right gentle->hard144-255 IgnoredLine following using PWM control should be much faster than the naiive 'forward or reverse' mode. Time will tell...
Great sleuthing, ceptimus! I also did some work on the D2-6 a while back. Its line following abilities are actually worse than the cheap D2-1 BECAUSE it uses its H-bridge to reverse:
I replaced the processor (vs your clever reprogramming it) and had some fun:
Here's a demo of the stock unit:
I've decided to write my own Android app to send commands to the car in (what I think is) a more sensible format. It will still send single-byte commands. 4-bits of x-axis using the range -7 to +7, and 4-bits of y-axis in the same format. This uses 225 (15x15) patterns from the available 256, leaving 31 bytes for 'special functions'.
When either the x-axis or y-axis is 8 (binary 1000) (which is not used for the range -7 to +7) then the other axis can hold one of 15 codes, plus there is 1 extra code where both the x and y-axis hold the special binary 1000 pattern.
An obvious choice for one of the special codes will be to instruct the robot to perform an erco figure-8 challenge manoeuvre.")
I'm not sure how well the robot will be able to do a figure-8 without some encoder feedback from the wheels (or their motors); I suspect not very well. A hardware upgrade would be to add some sensors to optically detect the passing of the four holes that are present in each of the wheel drive gears. The microcontroller has only one spare input, but another I/O could be stolen by deleting one of the two LEDs at the rear of the robot, which are currently only really used to indicate 'operating mode'. The operating mode could be indicated just as well by a single flashing LED: e.g. flash-flash-flash-pause for mode 3.