

Cheapo Laser Cutter
 The_Master
Posts: 202
The_Master
Posts: 202
in Robotics
Wow. I'm interested in laser cutting 1/16" plywood for R/C airplane parts. Until yesterday I had no idea such a thing could be had for $400:
https://www.amazon.com/CNCShop-Engraving-Machine-Engraver-Woodworking/dp/B012F0LKHE
I was vaguely aware of homebrew diode-based CNC systems that could burn an image, but thought any usefully powered cutting system would cost $10k++ or whatever.
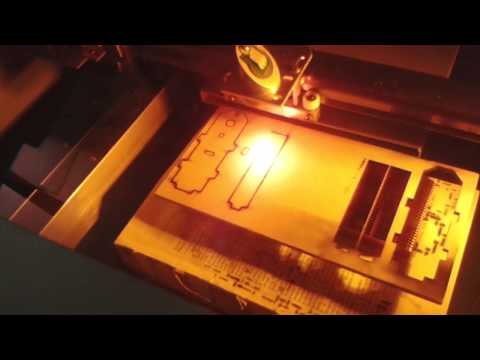
Supposedly the cuts are .001" resolution, burn marks can be minimal, and the cuts are fast. (video below)
According to reviews the software is junk, but I'm just interested in the hardware. Worst case scenario I would spend a couple days interfacing a micro to the stepper drivers, doing a canned production routine.
I'm posting here because some of you might find this interesting, and for getting feedback. For example, if I am envisioning just doing a custom controller, maybe I should be looking at a different (and maybe even cheaper) product in the first place?
https://www.amazon.com/CNCShop-Engraving-Machine-Engraver-Woodworking/dp/B012F0LKHE
I was vaguely aware of homebrew diode-based CNC systems that could burn an image, but thought any usefully powered cutting system would cost $10k++ or whatever.
Supposedly the cuts are .001" resolution, burn marks can be minimal, and the cuts are fast. (video below)
According to reviews the software is junk, but I'm just interested in the hardware. Worst case scenario I would spend a couple days interfacing a micro to the stepper drivers, doing a canned production routine.
I'm posting here because some of you might find this interesting, and for getting feedback. For example, if I am envisioning just doing a custom controller, maybe I should be looking at a different (and maybe even cheaper) product in the first place?
Comments
It seems easier to get this X-Y kit https://www.monoprice.com/Product?p_id=13960 and mount a laser on it. You still need an enclosure, but your work area would be much larger. It would end up costing less and be much easier to fix.
Nice little kit
It is mature, well documented and has a good support community.
Many users have adopted it for laser cutting.
It is also easy to interface the Shapeoko controllers to Fusion360 for an efficient CAM workflow. Once again, there is good forum support.
Those $400 Chinese lasers are junk. Junk hardware, junk laser tube, junk electronics, junk support. You can get a decent Chinese laser for a couple thousand, or a domestic one for five times (or more) as much.
I would definitely stay away from the $400 lasers. Better to get something like a Shapeoko and add a diode laser to it if you really want to laser something.
Then think about the fact that this one, with a solid state 2.5W diode, is *also* $400: https://www.amazon.com/BIQU-Evgraving-Machine-Engraving-Engraver/dp/B01HCX191G/ref=pd_sbs_201_6
The steppers are 17HM3448N-15AD, run at 24V. I was kinda surprised this voltage was used. (I'm new to steppers) I am unsure if any type of current limiting technique is used when the steppers are halted or are running slowly.
Here is what I would like to do today to keep it simple. Use the 24V because it is there. Or I can lower it. Simply run steppers at one quite modest speed. The chosen speed will be slow enough so that the jerk during the acceleration to this discrete speed won't cause any problems with the motor skipping any steps, thus negating the need accel/decel ramps.
The reason I suspect no complex current limiting technique is used is because when I look at sample stepper circuit diagrams online (using L298N), there is no provision for current limiting. (not in the chip either I believe) Although running at 24V in the case of the laser's steppers might be a totally different animal.
Keep in mind this is not a mechanical milling machine. The only load the 'gantry system' has to work against is a beam of light.
I was hoping anyone with stepper motor experience might let me know if I am way off the tracks here.
-Phil
I'm assuming the laser has them already, but if not, there are tons of inexpensive off-the-shelf stepper drivers available for relatively cheap that will handle this, and microstepping, for you. I've used these and like them: http://www.studica.com/us/en/Makeblock/me-2h-microstep-driver/12008.html
I think you will also find that running at constant speed isn't terribly useful. It'll work, but you'll need to limit the beam strength so you don't burn the heck out of everything you're cutting. Proper laser drivers handle acceleration and deceleration, and vary the beam strength with the speed of the laser head so the target sees a consistent power level.
I don't know how effective this is, but it certainly is simple and cheap.
Of course you need to use high power resistors...
Bean