Building Arlo
First of all, the build was a real pleasure! Nearly everything fit together perfectly. All of the threaded items worked perfectly. The screws threaded in and screwed down effortlessly when put in straight, making it easy to avoid cross threading. Once they seated, they tightened up firmly and obviously so that there was no doubt that it was tight, and no temptation to over tighten. The tolerances were just amazing and the end result was sturdy and great looking. I told my wife it was like taking pictures off of a CAD drawing and putting them together in real life, they fit together SO well! That is the kind of thing you don't find in any typical store bought item. Even automotive parts don't fit together like this!
The end result is an amazingly quiet, smooth operating platform. We were all surprised at how quiet it is. The fans on the motor controllers are the loudest part.
I wanted to share my experience, so here are some photos and documentation of a some of the major steps and the issues I found.
Kit addition recommendations:
First, "missing" items. Nothing was missing that was advertised, but there were a few items "in between" items that should have been included in one kit or another, but were not.
Based on my experience I would recommend that you add the following items to your kits:
HB-25 Mounting Bracket kit:
http://www.parallax.com/product/725-29144
Add TWO more screws to each bracket kit. These should be the screws that would be used to attach the bracket to the Arlo Base.
Also, please add another photo to the web page showing the bracket mounted to an Arlo platform. This picture would work well:
http://www.parallax.com/sites/default/files/news/ArloPDB-06.png
HB-25 Motor Controller:
http://www.parallax.com/product/29144
Add a 3 wire servo/extension cable to each kit of suitable length to run from the HB-25 to the Propeller Activity Board location on the Arlo.
Arlo Robot Base Kit:
http://www.parallax.com/product/28960
Add the required stand offs and screws to mount a Prpoeller Activity Board to the Arlo Base platform in the typical location.
Add two additional #4-40 x 5/8 Round Aluminum Standoff and
Add two additional #4-40 x 5/8 Pan-head screw to facilitate additional battery mounting options.
If these few items had been included it would have saved me some hours of rummaging through bins and a trip to the hardware store.
Not to mention it would have made my entire build work without having to source a single part myself!
Problems:
I ran into the following problems:
Assembly report with far too many pictures:
Motor Mount and Wheel Kit:
http://www.parallax.com/sites/default/files/downloads/28962-Motor-Mount-Wheel-Kit-AL-MP-Product-Guide-v1.0.pdf
Step 1: Axle
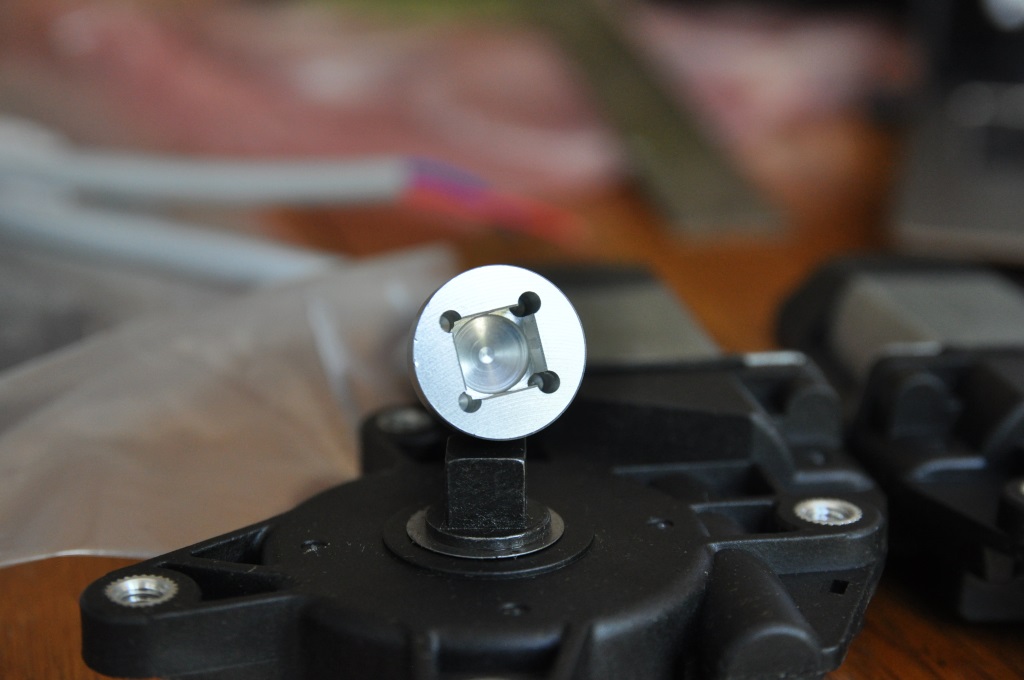
Concern: NO tapping was required, and the fit was not the same left to right:
The shaft on the motor with they grey cable allows the axle to slide on and off easily with no force.
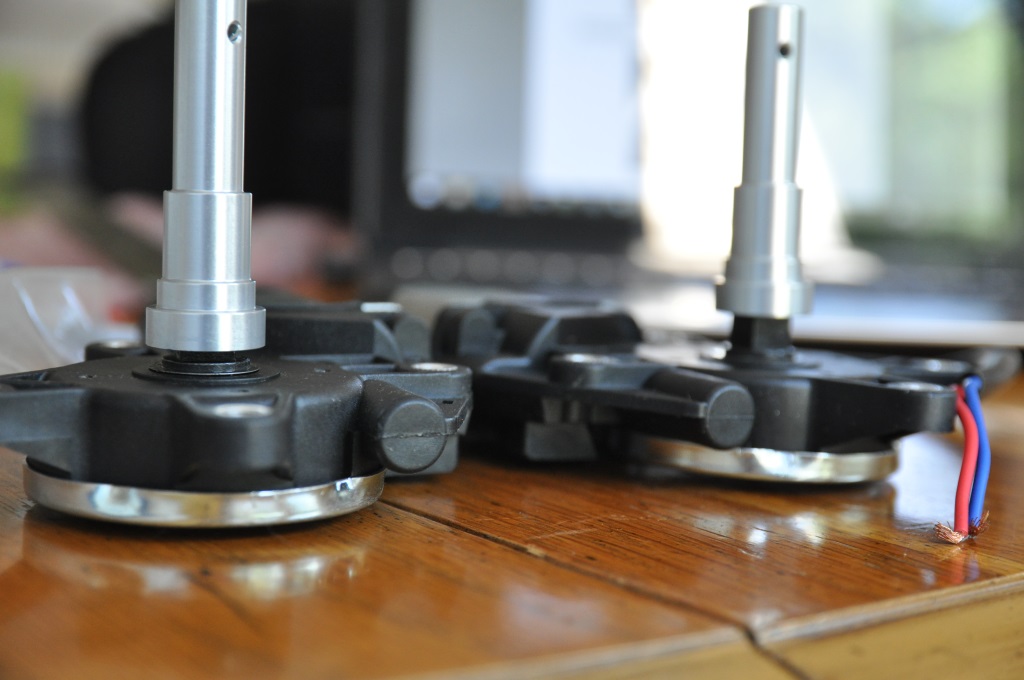
The shaft on the motor with the black cable allowed me to seat the axle with mild hand force, and removal was the same.
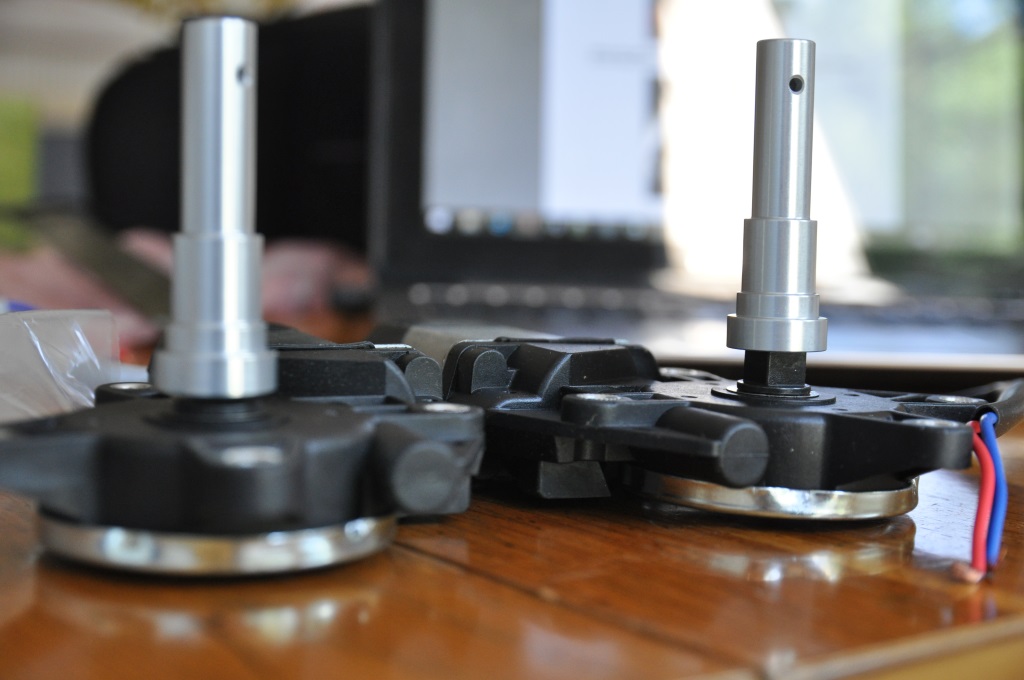
Swapping the axles left/right made no difference, so the difference is in the motor shafts, not the axles.
Once I had everything together there was NO play at all in the axles. Neither rotationally or side to side in any direction. They feel completely solid. So the loose fit on the motor shafts does not seem to be an issue.
Step 2: Encoder Disk
There was a lot of "chaff" in the gears, but this was easy to remove, and it was noted in the instructions.
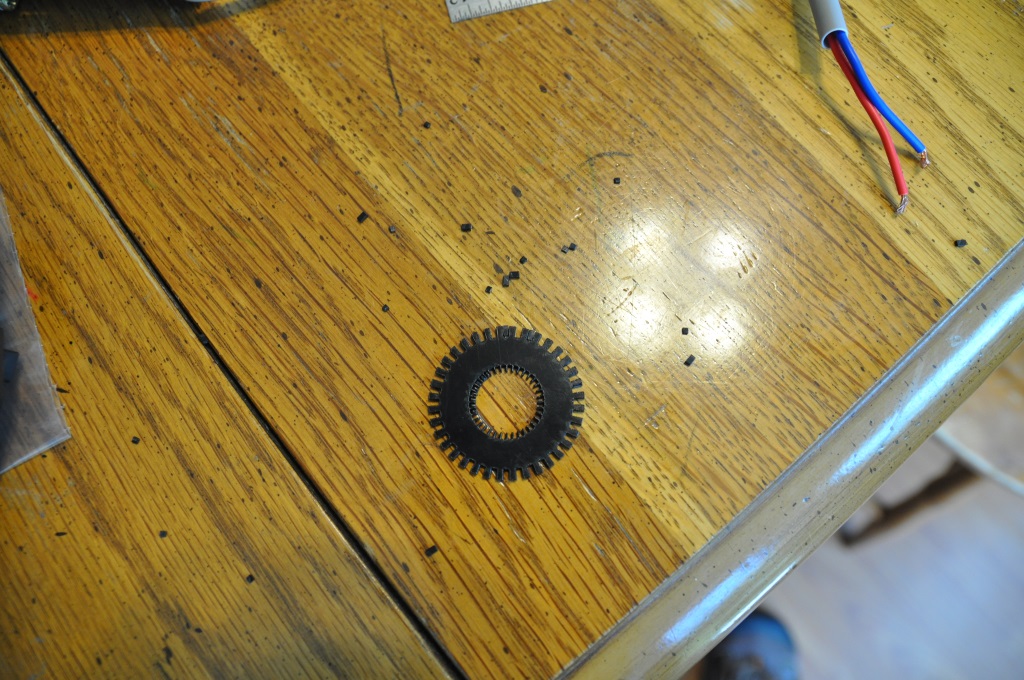
The benefit was lots of little black bits to follow me around for the rest of my project.
Step 3: Bearing
Everything went fine here. the bearings slipped on perfectly
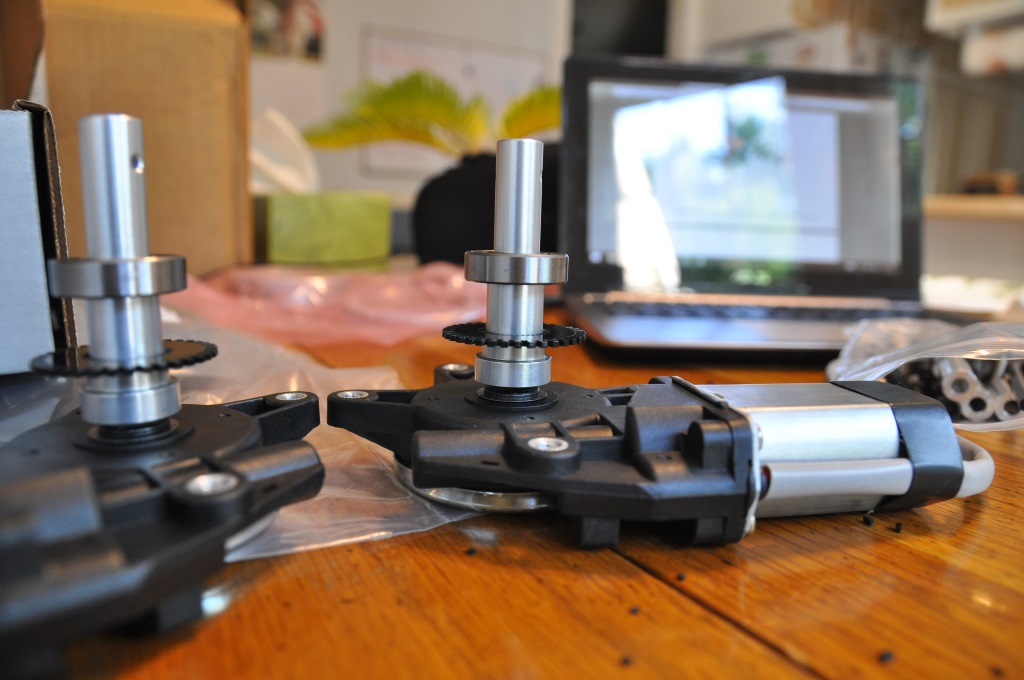
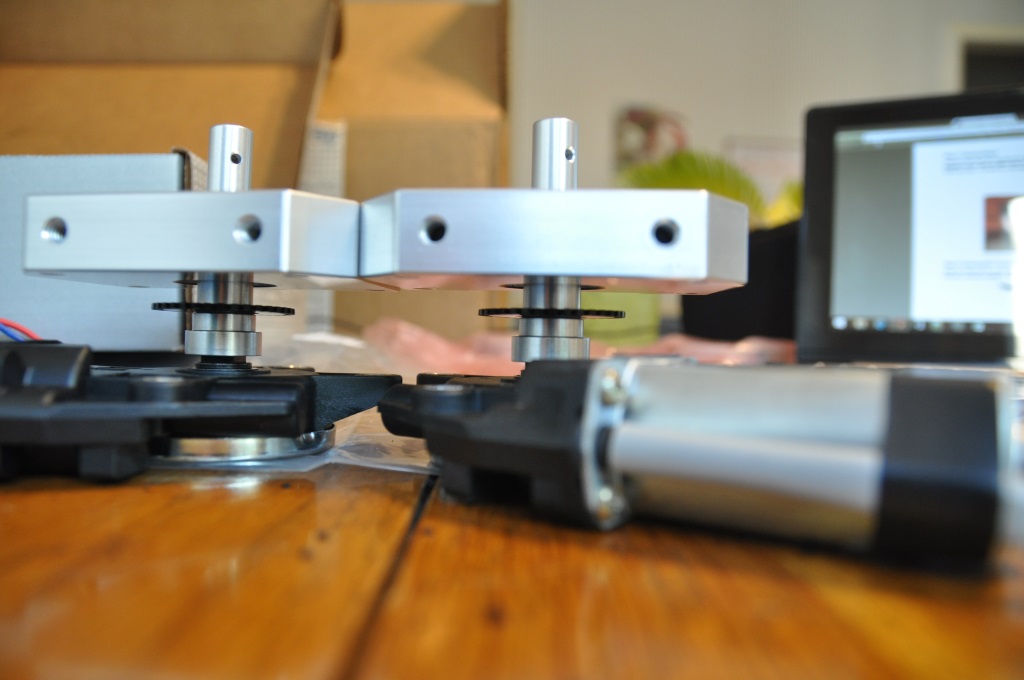
Step 4: Bearing Block
These bearing blocks are really beautiful! Parallax doesn't give themselves enough credit for these!
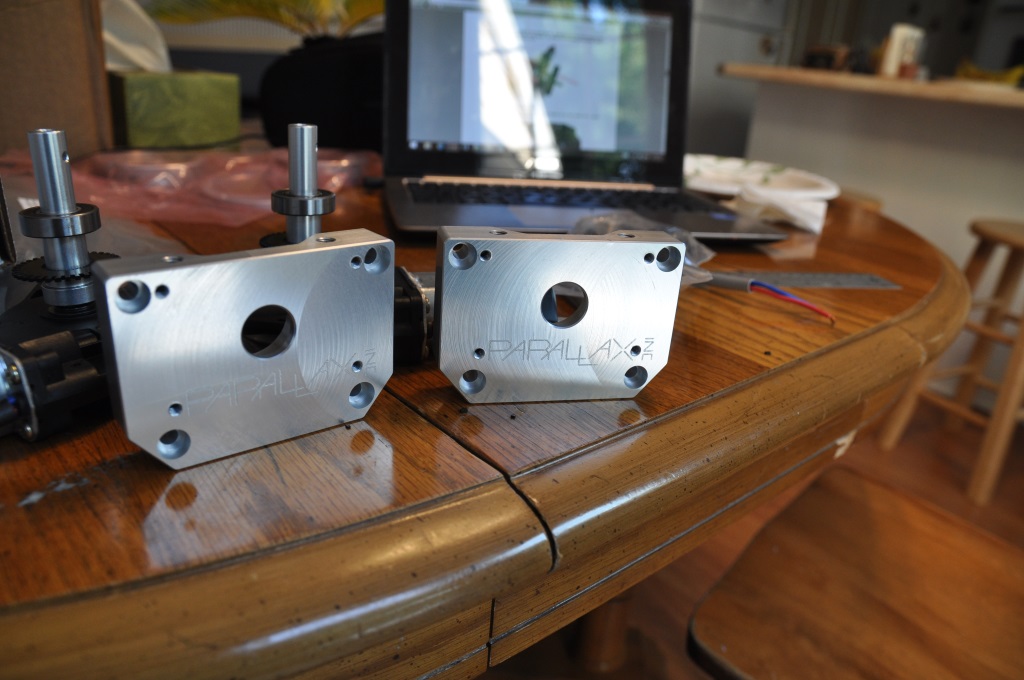
If these were some "air intake spacer" for an American muscle car they would charge $500 for these, and have them spread out on a flashy web page with some models holding them suggestively!
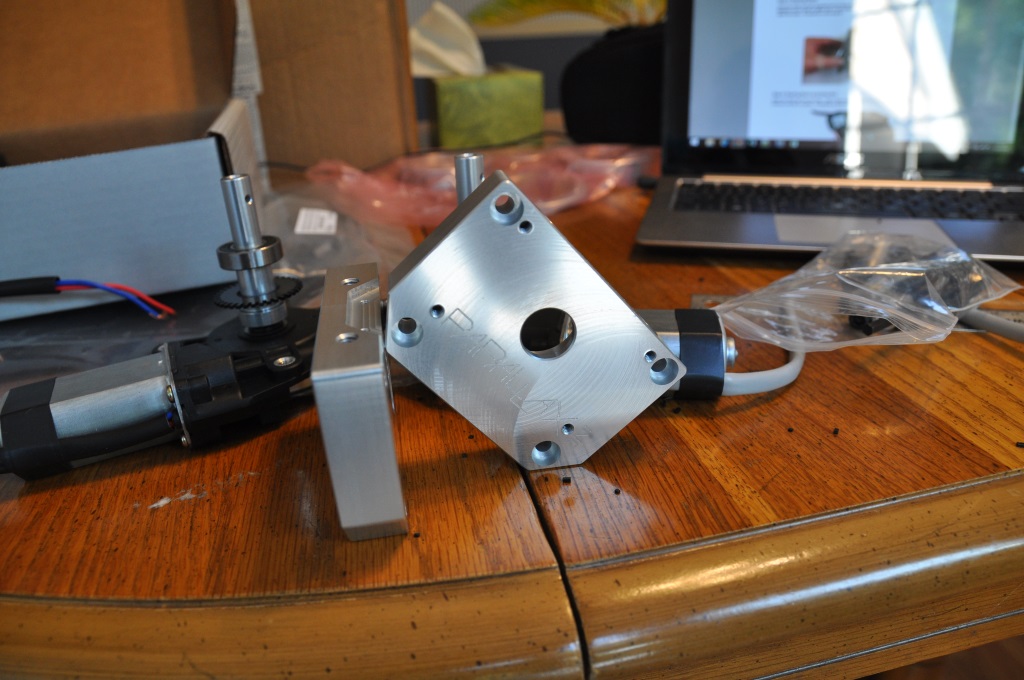
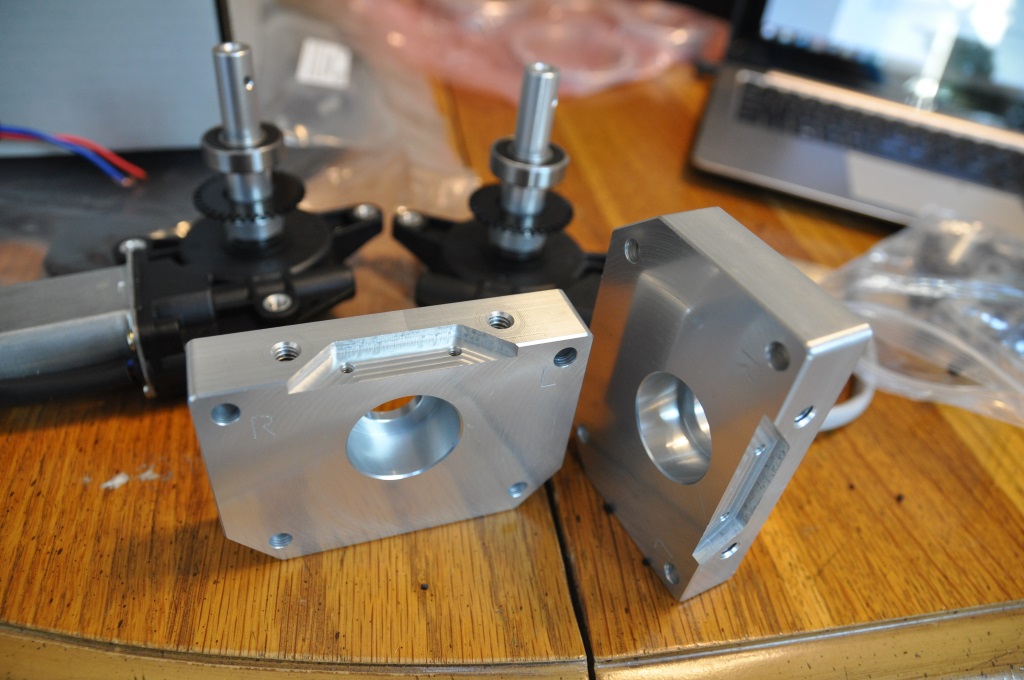
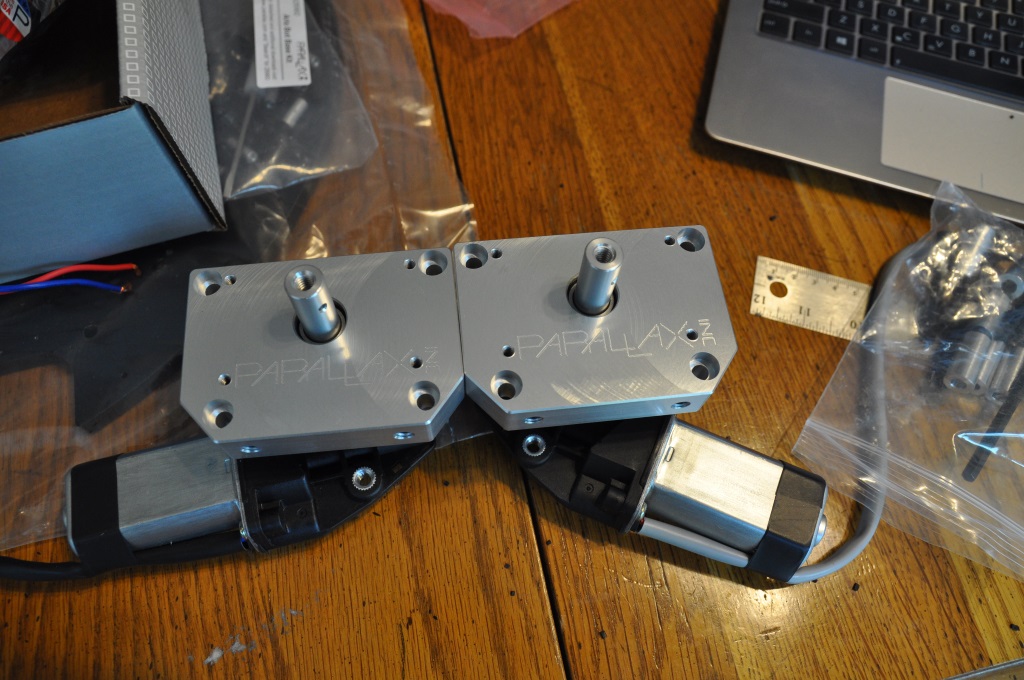
They also fit perfectly, providing the core for that amazingly tight motor drive system.
Continued in next message . . .
The end result is an amazingly quiet, smooth operating platform. We were all surprised at how quiet it is. The fans on the motor controllers are the loudest part.
I wanted to share my experience, so here are some photos and documentation of a some of the major steps and the issues I found.
Kit addition recommendations:
First, "missing" items. Nothing was missing that was advertised, but there were a few items "in between" items that should have been included in one kit or another, but were not.
Based on my experience I would recommend that you add the following items to your kits:
HB-25 Mounting Bracket kit:
http://www.parallax.com/product/725-29144
Add TWO more screws to each bracket kit. These should be the screws that would be used to attach the bracket to the Arlo Base.
Also, please add another photo to the web page showing the bracket mounted to an Arlo platform. This picture would work well:
http://www.parallax.com/sites/default/files/news/ArloPDB-06.png
HB-25 Motor Controller:
http://www.parallax.com/product/29144
Add a 3 wire servo/extension cable to each kit of suitable length to run from the HB-25 to the Propeller Activity Board location on the Arlo.
Arlo Robot Base Kit:
http://www.parallax.com/product/28960
Add the required stand offs and screws to mount a Prpoeller Activity Board to the Arlo Base platform in the typical location.
Add two additional #4-40 x 5/8 Round Aluminum Standoff and
Add two additional #4-40 x 5/8 Pan-head screw to facilitate additional battery mounting options.
If these few items had been included it would have saved me some hours of rummaging through bins and a trip to the hardware store.
Not to mention it would have made my entire build work without having to source a single part myself!
Problems:
I ran into the following problems:
- No tapping was required to fit the Axles to the motor shafts, they just slipped on.
- I had to drill out the holes in the axles to allow the drive pins to fit, otherwise it was impossible.
- The batteries were not held closely by the stand offs on the battery tray.
Assembly report with far too many pictures:
Motor Mount and Wheel Kit:
http://www.parallax.com/sites/default/files/downloads/28962-Motor-Mount-Wheel-Kit-AL-MP-Product-Guide-v1.0.pdf
Step 1: Axle

Concern: NO tapping was required, and the fit was not the same left to right:
The shaft on the motor with they grey cable allows the axle to slide on and off easily with no force.

The shaft on the motor with the black cable allowed me to seat the axle with mild hand force, and removal was the same.

Swapping the axles left/right made no difference, so the difference is in the motor shafts, not the axles.
Once I had everything together there was NO play at all in the axles. Neither rotationally or side to side in any direction. They feel completely solid. So the loose fit on the motor shafts does not seem to be an issue.
Step 2: Encoder Disk
There was a lot of "chaff" in the gears, but this was easy to remove, and it was noted in the instructions.

The benefit was lots of little black bits to follow me around for the rest of my project.
Step 3: Bearing
Everything went fine here. the bearings slipped on perfectly

Step 4: Bearing Block
These bearing blocks are really beautiful! Parallax doesn't give themselves enough credit for these!

If these were some "air intake spacer" for an American muscle car they would charge $500 for these, and have them spread out on a flashy web page with some models holding them suggestively!


They also fit perfectly, providing the core for that amazingly tight motor drive system.

Continued in next message . . .


Comments
Step 5: Bearing Block and Drive Pin
Problem: The pins would NOT fit into the holes in the axles!
I had to drill the hole out bigger, otherwise I was just "driling" a hole with the pin.
Once I drilled the hole out a bit I was able to hammer the pin through. It still took a fair amount of force, but it was possible, and unlike before, it wasn't producing any metal shavings as I pounded them in this time!
The size of the pins or the holes in the axles should be examined.
Step 8: Mount Encoder Boards
See: http://forums.parallax.com/showthread.php/156137-Quadrature-Encoder-Easy-Installation-Tip?highlight=arlo
Step 11: Rims
HINT: I found that the "MADE IN CHINA" side was much harder to insert the rings into than the other. The other side allowed the ring to just slide in, but the "MADE IN CHINA" side was stiff.
So I put the large (deeper) ring into the stiffer "MADE IN CHINA" side, because it was easier to work it in and have it stay. Then the thick ring could sit in the less stiff side without popping out.
The result is that the "MADE IN CHINA" will be on the outside of the tire, but it made assembly easy.
Castor Kit:
http://www.parallax.com/sites/default/files/downloads/28961-Caster-Wheel-Kit-Rev-B-Product-Guide-v1.0.pdf
Note that this kit includes the famous false bottomed zip lock bag developed for smuggling through Vogon check points:
These casters are really nice. My kids say they look like the front wheels on an airplane.
They are tubeless and just maintain their shape with their internal structure. This means that they ride easy over bumps without jarring the robot much, while still keeping the platform stable.
HINT: I wasn't sure how to determine the gap distance, so I set the longest allen wrench between the mounting plate and the top of the swivel block as a gap guide, as it measures about 2.5 mm across. If the Arlo wobbles then I will have to adjust them, but at least I know that they are both the same height to start with.
NOTE: I found that one mounting plates spun freely, while the other was stiff. It seemed to move fine under pressure, but it stopped if not pushed.
I loosened and reset the set screw in the shaft collar a few times and eventually it swiveled more freely, but never as freely as the other.
Arlo Robot Base Kit:
http://www.parallax.com/sites/default/files/downloads/28960-Arlo-Robot-Base-Kit-Product-Guide-v1.0.pdf
It is hard to imagine just how substantial these plates are before you see them, they are impressively thick!
I was a little unsure about the 60 pound payload rating, but after seeing these plates, I am convinced!
Continued in next message . . .
Step 3: Install the Battery Tray Standoffs
Here is one of the two batteries I am using. The PS-1290 which is supposed to be the same size as the 1270, but offer more run time.
I was unable to find a perfect fit for my batteries without adding some padding.
The closest left to right settings left a 6mm gap at the side of the batteries.
I probably could have fit another set of standoffs in the middle between the two batteries, but of course I did not have two more.
I ended up using some foam weather stripping:
6mm of foam equals about 3mm of squish, so I doubled it up, and put three rows of it between the batteries.
This provided a firm fit between the standoffs
HINT: The instructions say to put the batteries on the battery tray, then flip it over onto the base. I laid the batteries on the base and then fit the battery tray over them, since these batteries are VERY heavy and "flipping" them onto the base would not have worked!
The HB-25 mounting bracket location and HB-25 wiring is not well documented:
The pictures from http://www.parallax.com/news/2014-03-28/arlo-power-distribution-board-arlo-robotic-platform-system-heading-kitting help tremendously with mounting locations and wiring.
Also note that with the HB-25's and the mounting brackets, you will still be short 2 screws each to mount them to the base, and you will be short any cable to connect them to the Activity Board.
Here is my mostly completed base:
And here is my fully operational ArloBot!
I haven't put all of the PING/IR sensors on yet, and I am just running the Activity Board from AA batteries, since my make shift Power Distribution Mess (patent pending) has no converters in it. I'm holding out for the Arlo Power Distribution Board for that.
Final Words:
Despite the few, and relatively minor, problems the kits went together very well. Especially considering that I had to purchase about eight different components to make up the kit. Including a trip to Radio Shack and a trip to the hardware store, cobbling together a power distribution mess from scratch with no design and getting the ASUS Xtion mounted along with some programming tweaks, I was still able to start the project on Saturday morning and drive the Arlo around the living room by Sunday night! So assembly time is very good and the finished product is sturdy and ready to run!
Thanks for your feedback, and we'll look into making some tweaks to the "kit" that should mitigate some of the minor issues that you experienced.
We think that Arlo is destined for greatness, and it's with feedback like yours that will help us get him there.
Thanks!
-MattG
All I may be missing is a Ping))) stand or two. PIcked up several more Pings))) when the Shack had them for next to nothing - what a deal.
Wouldn't mind adding the Arlo Power Distribution Board either - though erco says I should brew my own!
-MattG
Matt: I can put 37 homebrew kits together from various & sundry parts I have hoarded. How many do you have on your website again?
Wise advice Whit! :thumb:
...as I'm looking at my "Matt Gilliland Staff Parallax Expo 2012" curvy-written badge hanging above my desk (yes, I still have it...and it is a prized possession) - I realize that erco does have some great ideas.
every so often anyway.
-Matt "pulling out the arrow" G.
ChrisL8 - thanks again for the write-up! We're gonna continue to refine our processes and documentation to make Arlo a household name (at least in those households that want a robot). Reviews like this are greatly appreciated - and knowing what you encountered throughout the build process, helps us make it better for those who come after :thumb:
-MattG
Great review. I had the same problem with the pins and had to drill out the holes with 1/8" bit. Even then it was extremely difficult. I also wish there was a way to mount the motors parallel to the ground like the old ones and not cocked up or down. It reduces ground clearance or sticks into the body of the robot. The kit is gorgeous though.
Dave
Are you using the battery tray that comes with the Base Kit? The cock-eyed mounted motors do stick down further than the tray, but only by about .010" (ten thou). Everybody looks better in Black...and on me, I lose 25 lbs instantly :thumb:
We're always looking to refine the system. The really cool thing is that the components that we don't make ourselves (motors, etc.) are very much in production and not likely to become surplus (like the former models we used). So, aside from refinements along the way (via threads like this) we don't anticipate having to make major design changes for quite a while... we have a seemingly stable source of raw materials.
-MattG
A quick question:
The screws are working their way loose and falling out of the wheels! The wheels don't fall off, because they are on pretty tightly anyway, but I wonder, was I supposed to use something like lock-tite on any of the screws? Or do I just need to crank down harder on them next time?
By "the screws" I mean the big ones that go right in the middle of the wheel and hold it onto the end of the axle.
Yes, you should crank down pretty tight. They shouldn't rotate because of the drive pin, so quick starts and stops should not be un-screwing them. We generally don't use locktite - but that's because we take our systems apart ALOT - what I really mean is that "others" here in the office *steal* from my stuff all the time - so we're always in a state of "re-building" :blank:
In typical installations, where you're not planning on taking it apart routinely, Locktite is a good thing.
Also, as you get to programming the device- think about "soft starts" and "gentle accelerations" - the higher your robot grows, the more *swaying* he'll become (as in a tele-presence application for example)..
"Acceleration and Deceleration are your robot's best friends".
-MattG
No, I'm not using the battery tray or anything like that. The body will be all custom. I had trouble with ground clearance with the previous iteration of the wheel kit and made skid covers so that the grass wouldn't get caught in the encoder.
Speaking about motor sources and encoders, I'm surprised that you don't just have T*******s make custom motors for you with magnetic encoders built in like you do with the "stingray" size motors. http://www.parallax.com/product/570-00080 They make much bigger motors and their MOQ and $$ aren't too bad as I'm sure you already know. A built in magnetic encoder attached to the motor shaft would have much better resolution and reliability. It might even be cheaper and definitely easier than the custom solution you're currently using. A "normal" motor would also allow you to stop having to make the custom shaft and maybe the block?
I wouldn't change anything about the way the rims look though, they're beautiful and the main reason why I bought them compared to other solutions.
Talk to you later,
Dave
Thanks MattG. I'll crank them down and if they come lose again I'll get some Locktite. It could be that I just didn't tighten them well to begin with. With all of the excitement and my wondering about the fit of the axles, maybe I had other plans?
I certainly hope not to be taking it apart regularly.
Of course, with your discussion of taking apart your robots Johnny 5's quip, "No disassemble!" came to mind:
https://www.youtube.com/watch?v=WjeptaI2T8E
Finally, are you accusing me of being a jerky driver?!
If that is the case the only solution is a shorter bolt . . . or a washer . . . even a lock washer . . . or Loctite. Clearly our options are finite
Anyway, if I have to tighten them again I'll try one of the above and report back. If you have a stainless wheel and axle with the pin in it handy play around with threading that bolt in and see if you agree about it hitting the pin before it is truly tight enough.
The "Servo32v9" object has a built in ramping function that controls the speed that that servo moves to the new position. In the case of using HB-25 motor controllers, the ramping function smoothly brings your robot up to speed (or stop). You can adjust how much ramping you want in the code.
Here's a link to the object: http://obex.parallax.com/object/524
Dave
Thanks. I've been using the arlo libraries (arlodrive.h), which incorporate the ramping when used with the drive_rampStep() function, which I am using.
I don't know if arlodrive's ramping is the same as that in Servo32v9 or not? I should compare them. Is one better than the other?
I still have to make sure it stops quickly when an obstacle is suddenly detected (like something moving in front of the robot's path), so I'm still playing with all of the numbers to find the right balance.
So far the screws are still tight after the last time I tightened them, so maybe I just didn't try hard enough? Or maybe they just need to be tightened again every 1,000 millimeters?
http://youtu.be/7qJaA6K_WPE
[video=youtube_share;7qJaA6K_WPE]
Very cool experiment!
ROS seems very interesting!
p.s If you post your video link between "video" and "/video" tags we 'll have a nice preview
But is that bot up to "Figure 8 Challenge"? No one has done an Arlo yet. Be the first and get your name on the board!
I'd love to hear more about how you have linked Arlo with the ROS. Which Propeller control board are you using? Propeller Activity Board or Propeller Baord of Education or something else. Super project and ideas.
Edit - just found your get-hub stuff. Will study this and then ask better questions! Thanks!
VERY cool stuff. I need to pull your source material and tear through it. That is super cool stuff.
-MattG
with ChrisL8's work here. You could use Chris cheaper, smaller sensor (Kinect like) and the ROS with a S2 and single board computer (Raspberry Pi?) for a really inexpensive platform. I think that the S2 encoders and accuracy are good enough for this sort of work.
Any thoughts?
Edit - Hey ChrisL8 and others - I would love to have your input, but to keep this discussion in one place and so as not to hijack this thread - I started a new thread for this discussion here - http://forums.parallax.com/showthread.php/157157-S2-ROS-ala-ChrisL8-and-Arlo-Brainstorming-Thread
http://forums.parallax.com/content.php
Very nice write-up.
I worked up a "parts list" for my build and posted it on my blog at http://ekpyroticfrood.net/?p=65 to help others in compiling their wish list for building an Arlo.
Seriously, this is a seriously fine robot! Nice job.