I have to comment on PLA being better than one might think! It is great material and darn near magic, in terms of what one can get away with doing compared to other filaments.
Re: Acceleration
YES! Great addition to the discussion. I should not have missed it. On printers that move the actual part, not being able to get the higher values without risking the part itself losing grip to the build plate has a big impact on print speed. I tend to have both conservative values for large objects and aggressive ones for low profile parts.
Edit: And ringing will happen at speeds closer to max. Software can do wonders on that problem. Mostly, I run just under ringing myself. Even a single failure is time I lose and prefer to get parts the first time.
Software also can offer geometrical solutions. Cura, for example, can make thin wall parts with almost no infill! It creates shelves inside the part that grow outward at 40 degree elevations to support top surfaces. These are fast! But are also low integrity. One can see a third faster on some parts doing tricks like that, and if the part does not need to be robust, game on!
On this part, I chose to not support some features for speed and ease of post print cleanup. The oval shapes seen in the part will print with no support but will also look crappy on the downward side. Nobody cares in this case. That gained a half hour.
This part is large, standing about 10 inches tall. Print time on the Creality CR-10 is a little under 2 days with conservative values, and can be a few hours faster with aggressive settings. Having to move the large part around shows it way down.
But, PLA makes a great prototype and the part quality is often better than required! Just don't get it too hot.
The build plate is garolite. I rarely have to level the machine. Whatever you get, put time into making the frame rigid. Pays off big time. Auto leveling and that surface grid mapping software both work, and can work well, but a rigid frame that does not drift off level is the best. Things just stay put. And that means running Marlin, or whatever firmware in simple, fast, robust mode. Will work everytime.
My experience has been each variance potential adds right up. It is just stats in action. Ridding your process, materials, and machine of those is what really takes the pain out of all this.
For that cheapo Creality, it was some mechanical work on the frame. Not much needed. I can move it around and start jobs without leveling.
Dry materials matter. I dry them, and print from a dried spool. Exception is PLA. (And PLA is always the exception because magic, remember?) Wet materials do all sorts of stuff you do not want or need done.
Software updates. I keep my golden software and settings archived. I keep the software version too. There are small changes happening all the time. A year or two gap in time equals sometimes huge differences in how things can go!
It is easy to lose our way and get lost too.
I always start from those proven setups. I keep gcode too. When doing an odd part, you will end up doing tweaks. Those will be in the gcode. Most software does that. It is super valuable to keep a part image and gcode and setup details: build plate prep, material, whatever.
Later, like maybe years later you bump into another odd part similar to the one you archived. Simple! Run the software version that was successful, repeat the setup, material and import settings from gcode or project file.
That all may seem complicated, but I promise you it really isn't once you get into a routine. The time and effort savings are huge. Seriously. And when you have time to burn, or an open machine, use current software so you migrate known good knowledge forward over time.
That process is basically how I managed CNC equipment in the 80's and 90's mapped onto 3D printing. Works and is ultra hard to beat.
And I have a few sheets of the G10 and FR10 handy. Just put one in and go. When print is done, clamp in another one and start a job while the recently used sheet gets part removed and prepped with a light ScotchBrite buff and alcohol wipe down. When this material gets warm it will lay flat matching the build plate perfectly.
I use 75C for adhesive free PLA bonding. Cannot recommend this material enough. It is simply great and many polymers stick to it with no other materials being required.
Garolite will release most polymers when it cools down.
Here is that same part printed with support material in less than half the time on a higher end machine. Material is ASA and HIPS. Final target material for this one may be carbon fiber something or other.
That machine moves print head only and has 3 extruders. The head is super lightweight and it has crazy high accelleration values. It is a bowden system.
On long builds, you can get maybe half the time by spending a TON of money. Let me say I could get a room full of CR-10 machines for what the fast, high end one costs. People buy those for capabilities, like multiple build and support polymers in the same part or print job, or size, or the ability to print expensive high temp polymers. But many people do not need that stuff.
And where that is true, these low cost machines are great! And being low cost, I see people forget about having more than one and spend enough to get several to get faster performance on a single machine that is very likely to not end up life changing faster.
Overall, getting fast parts means having a machine free and starting a job you know will not fail. The moment you have a CAD model done, the clock is running!
Having more than one machine is often your biggest net speed boost, unless your one machine is not busy. And the real potential difference being a factor of about 2.[0]
Now, if the goal is to get a part like yesterday, more machines rarely help, unless the part can be made in pieces and assembled. The fastest machines make some sense.
But, for every other case, either optimizing parts, or having more than one machine actually makes the most sense! I just want to make sure people think that part through and not miss out on what could be a sweet setup possibility.
That should put FDM type printing into context as far as speed goes. : )
[0] It could be as high as a factor of 4 when one counts the under $200 machines. A friend has one that is small and was $100. He put another $50 into it and it is slower than I expected. Personally, I don't count those machines and would only use one if nothing else was an option, or I want to tinker with it more than I want to make parts.
Otherwise, most machines of a similar type are similar in speed and from there it is more about software and your specific tradeoffs.
Are any of you running this firmware? Most of the "bed slinger" type machines are similar in performance, and that's generally slow. I have had some luck using software to pre-process code, but the Kilpper people have taken this to an advanced level.
Print times could be half on some geometries!! It could take one of these inexpensive machines up to near high-end performance. And I do wonder what a high end machine can do. I may attempt it on one of the ones I have handy.
And that's very likely true on most inexpensive printers. I may set this up on my CR-10. The Marlin firmware on that machine is rock solid right now. You've seen the pictures. That cheap printer should not do parts as well as it does. But it does all that very slowly...
Almost 2 years ago I bought a Creality3D Ender-5 DIY 3D Printer Kit, but haven't yet taken it out of the box for various reasons. Hoping to get to it this winter. Meanwhile several people are telling me that I should sell it and upgrade to a Creality3D Ender-3 Pro.
After a trip down the rabbit hole (thanks mostly to potatohead, though others share the blame), I just pulled the trigger on the ender 3 neo max. currently $311 on amazon prime. Should see it around Monday. May help resolve the issue of custom mounts and enclosures. who knows what else will bubble up.... (edited to remove unexpected bold text)
If you put the time into that kit, make sure it is square, movements orthogonal, you will probably get good prints. You will still want to do that with the Ender machine, but it will be far easier to do.
Those are the two difficult items, and nailing those is why my CR-10 does as well it does. Bed level is a skill to learn. Having learned it, I can actually just do the stupid drag paper trick and get a really level bed first time. The trick is to pull the paper while turning the bed level knob. When you feel it grip the paper, stop and repeat on the other corners. Once it is done, it stays done until some real force is applied to the bed.
Part removal is enough, and so I unclamp my Garolite and do part removal off machine.
I had someone swing by the office to pull the PLA part. Excellent! That's on a fairly old CR-10. V2 I believe.
CURA has proven profiles for the Creality printers BTW. You should be able to download and use the 0.4mm PLA profiles and go.
Oh, and do a scale operation! Print a 1x1x1" or 2x2x2" cube and measure it. Then divide to get the percent error and input that into your slicer. Once you have done it for a given material, nozzle and machine combo, parts will be less than 0.010" off nominal, often half that. PLA does not warp or shrink much. Neither does PETG. ASA, ABS, Nylons do without a warm chamber, and that is true for many polymers. Often, a scale is needed for each material.
The reason you do one initial scale for PLA is to understand your particular machine error. For my CR10, it was .99x in all three axis. Not much, but it does add right up on larger parts.
Do you have any links or write-ups on set up that can show/explain some of things you have mentioned. I can be a bit of an uhhhm, stickler for lack of a better word when it comes to mechanical adjustments. Maybe my day job or just me. Just good enough isn't often good enough. And the links and hints would not be a hijack, as the things done after the decision point seem almost more important than the acquisition, or at least why some people get frustrated with what comes out of the machine.
And yes, thank you for the info already posted. Helped the decision process.
I need to go looking for some info. For me, insuring the motion on a 3D printer is true, orthogonal, sort of comes naturally. There is the intended motion and there is what the machine actually does!
And you are right! "just good enough" really isn't a thing in this context. It needs to be good. Damn good. 3D printers are kind of like CRT's in that every single thing that can be off shows up somewhere, somehow on the part. It's the same with a CRT. We really only get that great image when all the circuits and magnetics are dead on where they should be.
If you want to know about the science related to this stuff, I cannot recommend this guy enough:
Stephan has performed exemplary explorations of pretty much all aspects of 3D printing. It's a real education to just watch his channel from early on to present day catching up on stuff you find interesting.
I may post up some more later. If, somehow, this discussion needs to be organized differently, I will find where things ended up and add info there. No worries on my end.
Here is an example of how great CNCkitchen really is.
Once you have your 3D printer square and it's motion is true, your next concern is harmonics. Can you live with the thing, and is it getting out of its own way. By that, I mean its motion is not resonant somehow that affects the part.
Here is a video on that topic and how to seriously dampen your printer motion for a couple bucks:
Doh!! It seems a lot of my post didn't end up here. So, I've fixed that below:
Here is a rundown on part strength as a function of layer height:
And those blobs a lot of people see on their prints? This one actually has a lot of technical detail shown in context.
This is a topic close to my heart. Part strength. In general, infill contributes very little to part strength. Failures come from stress and or strain, both of which happen at the exterior surfaces of a part. Longer, continuous chains of polymer, coupled with more mass at the failure areas, combine to make a very significant improvement in part strength. Many would increase infill, perhaps making a part solid, which can improve a part, but not for the most common failure modes.
And a controversial one! Less part cooling = stronger parts.
This also means more ugly parts, but the message with 3D printing in general is the whole affair is a game of trade-offs. In my nice parts above, the trade-off was print speed being traded for part integrity and overall surface quality.
A lot of what I put here earlier is derived from me, and my team, printing thousands of parts out of over 50 polymers, over the course of a few years! It's a HUGE problem space. Way bigger than one might expect.
On that note, sticking with a given material and more fully exploring it along with the other variables, such as: Nozzle size, nozzle type, movement speeds, accelerations, temperatures, and more --sticking with a given material constrains the problem space to a manageable size one can learn from and then map that understanding to requirements and get successful prints. I cannot understate how important doing that really is, and today we can all get a jump start from people like CNCKitchen, who have done that and published.
To me, the good news is PLA is extremely forgiving. It's darn near magic sometimes. Just be ready for other polymers to be less forgiving. The more desirable properties always come with downsides. Usually those are less overhang, greater need for support, and the big one: Difficulty self-supporting parts. By self supporting I mean using one build material for both the part and supports.
There are two ways to get at that problem when you eventually bump into it:
Get two extruders. This is the first upgrade I would do for one of these inexpensive machines.
Design the problem away! Often one can change the topology such that support is just not needed.
2.5 (lol) ...and or build the part in pieces and then assemble them after it's all printed.
One thing I would not mind seeing is some sharing of experiences good and bad.
I've not done much of that myself over these last few years because of time constraints. Building up a business takes a lot of work and additive is a very young industry that is demanding as heck!! Milling and turning are mature, 150 years plus, considering reasonably modern approaches and machinery. Additive is basically 40 years old and a good chunk of that was patent walled off preventing the kind of innovation going on right now. The two super important patents were: Having motion systems outside the part chamber. This is why many machines produced recently had everything inside the hot box and why the hot box temps were generally lower than needed. The other one was about the basic tech itself, making the extrude happen essentially.
As everyone ramps up with their machines, or is printing now like I am, perhaps we can have a running discussion? We all would benefit.
Secondly, you all have no idea (or maybe you do) how much I would love to setup a P2 based system. One area just begging for action is sensors and to a lesser degree, more real time control made possible.
On the topic of real time control, it's all about understanding the dynamics in play when they are happening. Back a long time ago when I was working with industrial lasers to cut sheet metal, I installed and operated an AMADA laser system. It was basically their turret punch design with a laser replacing the punch. Frankly, those machines were pretty great. Made lots of parts on them and ended up getting supreme quality, but it took a while to ramp up on a new material. Nearby a college setup a machine that offered real time controls like those you might see on the better CNC milling machines. Basically some buttons and dials.
The difference was dramatic! I learned more in an hour with that machine than I did months with the one requiring me to set parameters up in advance in the program. It's a lot like the instant feedback many of us talk about with real time, type it in interpreter type languages, such as BASIC, or Python, and compiled ones. Setup a new sensor or incoming signal on a breadboard, and then inputs. Turn the dials and watch the data. Could be numbers, graphics, sounds, motions. The understanding one gets is fundamental and gets mapped right to our senses and motor skills, both of which can feed data into our analytic and visionary parts of our minds, getting us to where we want to be, or helping us find out where we want to be!
For 3D printing, I would setup one with dials for X,Y motion, extrude flow rate, extruder temp, and one assignable dial to be linked to a parameter the operator would want to adjust or tweak. On a new material, first layer action can be adjusted and outcomes seen in real time. Same goes for many other areas in a model. Overhangs, detail features, all sorts of stuff that can and will come up. Iterating with whole prints is SLOW. The learning is slow, and coarse and murky in my experience.
On many machines, there are adjustments via some sort of "tune" menu, on Marlin for example. These are close. And I use them, but super clunky, and one can't make two adjustments at the same time in real time.
For learning and or getting going on new polymers this would be killer!!
Obviously for motion and sensors, I need say nothing about the P2. We all know what's possible there.
Thank you Potatohead!! The link to truing the frame was solid info. Ran all of the suggestions regarding setup and checking resulting in a flawless first print (other than my setting the z-offset to close on setting). Some things were sloppier than others out of the box, not bad, but tuning surely helped.
One thing to consider regarding less expensive 3D printers is how the X-axis gantry is supported. Mine is supported on the left side by the Z-axis lead screw, along with a T-square-like roller arrangement to keep it square to the Z-axis. Nonetheless, because the right-hand side does not have its own lead screw, it sags just a tiny bit. When I "level" my bed, it's not really level, in the sense that it's perfectly perpendicular to the Z-axis. Rather, it's level in relation to the X- and Y-axis mechanics. So, in the X-axis, a "level" bed will have a very slight tilt that matches the X-axis gantry's sag.
In most cases, this won't matter a bit, and you won't notice anything wrong with the parts the machine produces -- especially small ones. But if you're producing large parts, and if they have one X/Y dimension that's substantially larger than the other one, it might be wise to orient the part so that the longer dimension lies along the Y-axis.
@"frank freedman" said:
Thank you Potatohead!! The link to truing the frame was solid info. Ran all of the suggestions regarding setup and checking resulting in a flawless first print (other than my setting the z-offset to close on setting). Some things were sloppier than others out of the box, not bad, but tuning surely helped.
Nice! I'm really glad you got ahead of that and had a good outcome.
I ended up going with the Ender 3 Neo Max. the X direction is controlled by a dual linked stepper worm shaft and therefore supported on both sides. I am guessing one of the guys I work with has planned to upgrade his unit with the dual drive for the reasons Phil has mentioned. This small difference was noted in one of the set up references listed earlier, and was one of the adjustments high on my list. Left and right sides were tuned to less than a half mm. With the gantry set, it was pretty easy to get manual level pretty dead on. The rabbit (3D hello world?) came out really nice with the defaults, so far I have printed some lithophanes with the last being vertical. That really came out well. Almost looks like a old timey tin-type copy of the photo I used.
Learning to create the things I want to make may take a bit of time. Starting with Tinkercad..... Some things will just be find a model and be done with it, others not so much. I have watched from the early rep rap days, amazing how far it has come, though making one of these things just does not seem the challenge I one thought it would be. Aside from hot ends and bed temp control. Easier to buy those from the looks of it, but there are a few things I would like to have seen tighter on this not so bottom feeder. But for a few $K, I am sure I would have had those addressed.
Hi
I have absolutely NO experience using these but have been considering taking the plunge- its an itch I've been wanting to scratch!
Anyway- just came across this budget printer on offer to early adopters $239 ($299 full price) 2days left....
good reviews- see below
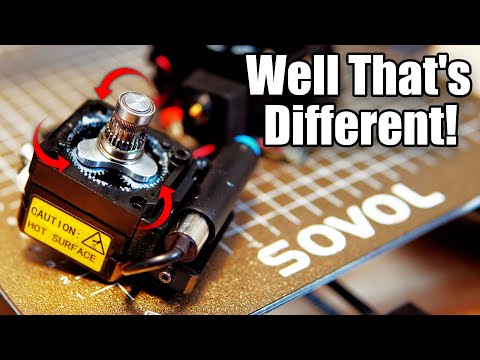
Sovol SV06 specs'
all metal planetary direct drive extruder
all metal hot end
auto bed levelling
pei magnetic build plate
32 bit main board
auto x levelling
dual z axis (only one driver- motors share)
belt tensioners
resume printing
I've had two Monoprice Mini v2 printers for several years and recently added a Creality CR-10 V3.
The Monoprice Mini were an easy way to get started, the small form factor makes it easy to just put them away when not in use. I purchased the first from Amazon on a black Friday sale, the second from eBay for $100 as "doesn't work, filament won't extrude...". They had overheated it and destroyed the PTFE liner; simple fix and I had a great second printer. Over time the printing surface degraded and I have since removed it and print on borosilicate glass using Aqua Net hairspray for adhesion.
I added the CR-10 V3 to allow much larger size printing, I really like it so far.
I've been using FreeCAD as a modeling tool and CURA for slicing.
For what it is worth, the PTFE section in a heat break or bridge can be omitted.
A friend and I had parts made with a smooth coating and had basically no issues. I have also tested well machined stainless steel with pretty much identical results.
An exception can be TPU. It can bind in the heat break. I have found this can become a concern starting at about 92 Shore A and below. The lower, the softer, the more potential there is.
Otherwise, not having that tube means printing above 260C as well as easier recovery from filament stall or out events, both of which will generally damage the tube.
On many hot ends, it is possible to clear blockages with a dowel, torx screwdriver or other thing that is close to the size. 1.75 mm in most cases.
Just run the heat up and either push the dowel into the tube, and or insert other filament and then push that through. My favorites are a simple nylon 6 and or a carbon filled nylon of any type.
First step is to get flow of any kind. On a failure, some polymer has generally crystalized, burned, and is harder than usual. That's your block.
To be of it, use a temp higher than it was formed by. For most cases, 280C will work. Heat up, let it stand for a minute and then push stuff through. If you are using nylon to push with, you can also put it in there, push, then yank it out quickly. Same goes for the screwdriver or other metal.
You will often get material to follow that action and if so, great! That is something you won't need to push through.
Once you have flow, using the carbon filled is great to scrub the feed path clean. Put it in there and use pliers to push the filament through manually, until you get a smooth flow. Follow that with nylon, until you get a clear, smooth flow and with the nylon in there, reduce temperature to your intended printing temp and continue pushing the nylon through as the nozzle reaches that target temp.
Finally, turn the extruder off and push the nylon a little, until temp falls below 220, then wait until it hits about 140 and then pull it out quickly.
Done right, the end of the nylon will be an impression of the inside of your nozzle. And if it looks great, you are done. If there are chunks missing, or other material comes out of your feed path, repeat this process to remove all old filament.
The reason to do that is to reduce turbulence caused by filament having to flow around something.
As a preventative, you can run nylon in the way I have described. Set temp to 250C, push your nylon through and you should see a nice, clear purge. Do the cool cycle by turning the hot end off. Keep nylon moving slowly through the drop below 220C, and then pull at 140.
Done once a month, this process takes 5 to 10 minutes, and will keep your filament flow turbulence free and prints looming factory new.
Or... change nozzles.
And on that note, really cheap nozzles have a rough, non uniform path inside. They are more turbulent than more expensive ones are.
The way I see it, one can frequently change cheap nozzles, or run cleaning cycles on better ones.
Either works fine.
The key in all of this is to understand why print quality changes over time and what you can do about it.
I can't add much to this convo, but I used to buy only Prusa printers. Years ago I had a bad experience with Creality. Recently, I discovered Creality printers are great. Their Core XY Ender 6 was my first Core XY despite some minor issues and odd design choices, I was sold on the brand again. That's on the east coast at my dad's place now so I don't see it much. I still use the Prusa slicer however it's unlikely I'd buy anything but Creality. I'm currently running (west coast) the Ender 3 V2 Neo and the Prusa Mini.
Also echoing the advice about start out low cost, plan on printing a lot in PLA to get started. Plan on lots of tinkering and you'll learn valuable info along the way. Fusion360 is free for non-commercial use so there's that. I highly recommend TinkerCAD and or Fusion360, Prusa slicer and OctoPrint. All free, no hardware included of course.
Here's a festive tree I found on Thingiverse. It's an Octolapse video, which is a time lapse created by a plugin in Octoprint, running on Raspbery Pi 4. Webcam is a Logitech DCS 920. It's not printing in 'vase' mode because I wanted it to be stronger and last a long time. The original plan was to make an IOTree, IOT+Tree, get it? Haha. DWIN touchscreen, 8 core uC, the whole 9 yards but I tried to change careers and it turned into a huge mess so yeah... Anyhow, making these time lapse videos and watching them are a lot of fun for me.
Unfortunately, I forgot to lock the focus and exposure. Sorry.
I 'asked' OpenAI's ChatGPT this thread's title and;
When deciding to get a 3D printer, the most important consideration is likely the intended use for the printer. Factors such as the size and complexity of the objects you want to print, the materials you want to use, and your budget will all play a role in determining the best printer for your needs. Additionally, it may be important to consider the ease of use and the availability of support and resources for the printer you are considering.
Sounds pretty good. I would have at least thrown in some of the other advice mentioned by the humans in this thread. Sorry chatbot but the humans won this round : )
I’ve been 3D printing 10 years. When I first was looking there were printer frames made of laser cut plywood or acrylic. I went with a MakersToolWorks (now defunct) MendelMax 2. It was $1700 at the time but was all extrusion and aluminum plate frame. Solid printer but had z banding issues. Upgraded it to the MendelMax 3. The Ender 5 came out and I picked one up. It needed as much in upgrades as the printer cost to print decent. Same with the Ender 5 plus I have. Needed a bunch of upgrades. Ender 3s with one Z lead screw….yeah. Better buy the second lead screw kit.
I still have both MendelMax printers and the Ender 5 plus. Sold the Ender 5.
I’ve moved on to multicolor printing with the Bambu Lab X1-Carbon with 2 AMS units. I can do 8 color prints. So far since November I have almost 800 hours of print time on it and no issues. No upgrades needed either unless you count the 2nd AMS. Prints TPU too without issues. It is closed source firmware but hasn’t been an issue yet.
That is one awesome print. Was it all one pass or more? No answer required, but what was the price on this unit (certainly put of my budget).
Speaking of cost, I am printing a rack of trays. color coded to help find parts (visual acuity seems to be inverse to experience). I also want to print some trays for semiconductors, but the cost of ESD PLA is almost 4X the cost of standard PLA. There does appear to be one PETG that may be more reasonable. I have also printed a tray with a recess for my P2 dev board, to protect the bottom from contacting stray stuff on the desk and provide support for boards plugged into the side connectors.


Comments
It'll depend on the UV protective additives in the plastic.
I have to comment on PLA being better than one might think! It is great material and darn near magic, in terms of what one can get away with doing compared to other filaments.
Re: Acceleration
YES! Great addition to the discussion. I should not have missed it. On printers that move the actual part, not being able to get the higher values without risking the part itself losing grip to the build plate has a big impact on print speed. I tend to have both conservative values for large objects and aggressive ones for low profile parts.
Edit: And ringing will happen at speeds closer to max. Software can do wonders on that problem. Mostly, I run just under ringing myself. Even a single failure is time I lose and prefer to get parts the first time.
Software also can offer geometrical solutions. Cura, for example, can make thin wall parts with almost no infill! It creates shelves inside the part that grow outward at 40 degree elevations to support top surfaces. These are fast! But are also low integrity. One can see a third faster on some parts doing tricks like that, and if the part does not need to be robust, game on!
On this part, I chose to not support some features for speed and ease of post print cleanup. The oval shapes seen in the part will print with no support but will also look crappy on the downward side. Nobody cares in this case. That gained a half hour.
This part is large, standing about 10 inches tall. Print time on the Creality CR-10 is a little under 2 days with conservative values, and can be a few hours faster with aggressive settings. Having to move the large part around shows it way down.
But, PLA makes a great prototype and the part quality is often better than required! Just don't get it too hot.
The build plate is garolite. I rarely have to level the machine. Whatever you get, put time into making the frame rigid. Pays off big time. Auto leveling and that surface grid mapping software both work, and can work well, but a rigid frame that does not drift off level is the best. Things just stay put. And that means running Marlin, or whatever firmware in simple, fast, robust mode. Will work everytime.
My experience has been each variance potential adds right up. It is just stats in action. Ridding your process, materials, and machine of those is what really takes the pain out of all this.
For that cheapo Creality, it was some mechanical work on the frame. Not much needed. I can move it around and start jobs without leveling.
Dry materials matter. I dry them, and print from a dried spool. Exception is PLA. (And PLA is always the exception because magic, remember?) Wet materials do all sorts of stuff you do not want or need done.
Software updates. I keep my golden software and settings archived. I keep the software version too. There are small changes happening all the time. A year or two gap in time equals sometimes huge differences in how things can go!
It is easy to lose our way and get lost too.
I always start from those proven setups. I keep gcode too. When doing an odd part, you will end up doing tweaks. Those will be in the gcode. Most software does that. It is super valuable to keep a part image and gcode and setup details: build plate prep, material, whatever.
Later, like maybe years later you bump into another odd part similar to the one you archived. Simple! Run the software version that was successful, repeat the setup, material and import settings from gcode or project file.
That all may seem complicated, but I promise you it really isn't once you get into a routine. The time and effort savings are huge. Seriously. And when you have time to burn, or an open machine, use current software so you migrate known good knowledge forward over time.
That process is basically how I managed CNC equipment in the 80's and 90's mapped onto 3D printing. Works and is ultra hard to beat.
And I have a few sheets of the G10 and FR10 handy. Just put one in and go. When print is done, clamp in another one and start a job while the recently used sheet gets part removed and prepped with a light ScotchBrite buff and alcohol wipe down. When this material gets warm it will lay flat matching the build plate perfectly.
I use 75C for adhesive free PLA bonding. Cannot recommend this material enough. It is simply great and many polymers stick to it with no other materials being required.
Garolite will release most polymers when it cools down.
Here is that same part printed with support material in less than half the time on a higher end machine. Material is ASA and HIPS. Final target material for this one may be carbon fiber something or other.
That machine moves print head only and has 3 extruders. The head is super lightweight and it has crazy high accelleration values. It is a bowden system.
Regarding speed, think about two printers vs one.
On long builds, you can get maybe half the time by spending a TON of money. Let me say I could get a room full of CR-10 machines for what the fast, high end one costs. People buy those for capabilities, like multiple build and support polymers in the same part or print job, or size, or the ability to print expensive high temp polymers. But many people do not need that stuff.
And where that is true, these low cost machines are great! And being low cost, I see people forget about having more than one and spend enough to get several to get faster performance on a single machine that is very likely to not end up life changing faster.
Overall, getting fast parts means having a machine free and starting a job you know will not fail. The moment you have a CAD model done, the clock is running!
Having more than one machine is often your biggest net speed boost, unless your one machine is not busy. And the real potential difference being a factor of about 2.[0]
Now, if the goal is to get a part like yesterday, more machines rarely help, unless the part can be made in pieces and assembled. The fastest machines make some sense.
But, for every other case, either optimizing parts, or having more than one machine actually makes the most sense! I just want to make sure people think that part through and not miss out on what could be a sweet setup possibility.
That should put FDM type printing into context as far as speed goes. : )
[0] It could be as high as a factor of 4 when one counts the under $200 machines. A friend has one that is small and was $100. He put another $50 into it and it is slower than I expected. Personally, I don't count those machines and would only use one if nothing else was an option, or I want to tinker with it more than I want to make parts.
Otherwise, most machines of a similar type are similar in speed and from there it is more about software and your specific tradeoffs.
Are any of you running this firmware? Most of the "bed slinger" type machines are similar in performance, and that's generally slow. I have had some luck using software to pre-process code, but the Kilpper people have taken this to an advanced level.
Print times could be half on some geometries!! It could take one of these inexpensive machines up to near high-end performance. And I do wonder what a high end machine can do. I may attempt it on one of the ones I have handy.
And that's very likely true on most inexpensive printers. I may set this up on my CR-10. The Marlin firmware on that machine is rock solid right now. You've seen the pictures. That cheap printer should not do parts as well as it does. But it does all that very slowly...
Almost 2 years ago I bought a Creality3D Ender-5 DIY 3D Printer Kit, but haven't yet taken it out of the box for various reasons. Hoping to get to it this winter. Meanwhile several people are telling me that I should sell it and upgrade to a Creality3D Ender-3 Pro.
After a trip down the rabbit hole (thanks mostly to potatohead, though others share the blame), I just pulled the trigger on the ender 3 neo max. currently $311 on amazon prime. Should see it around Monday. May help resolve the issue of custom mounts and enclosures. who knows what else will bubble up.... (edited to remove unexpected bold text)
If you put the time into that kit, make sure it is square, movements orthogonal, you will probably get good prints. You will still want to do that with the Ender machine, but it will be far easier to do.
Those are the two difficult items, and nailing those is why my CR-10 does as well it does. Bed level is a skill to learn. Having learned it, I can actually just do the stupid drag paper trick and get a really level bed first time. The trick is to pull the paper while turning the bed level knob. When you feel it grip the paper, stop and repeat on the other corners. Once it is done, it stays done until some real force is applied to the bed.
Part removal is enough, and so I unclamp my Garolite and do part removal off machine.
I had someone swing by the office to pull the PLA part. Excellent! That's on a fairly old CR-10. V2 I believe.
CURA has proven profiles for the Creality printers BTW. You should be able to download and use the 0.4mm PLA profiles and go.
Oh, and do a scale operation! Print a 1x1x1" or 2x2x2" cube and measure it. Then divide to get the percent error and input that into your slicer. Once you have done it for a given material, nozzle and machine combo, parts will be less than 0.010" off nominal, often half that. PLA does not warp or shrink much. Neither does PETG. ASA, ABS, Nylons do without a warm chamber, and that is true for many polymers. Often, a scale is needed for each material.
The reason you do one initial scale for PLA is to understand your particular machine error. For my CR10, it was .99x in all three axis. Not much, but it does add right up on larger parts.
Do you have any links or write-ups on set up that can show/explain some of things you have mentioned. I can be a bit of an uhhhm, stickler for lack of a better word when it comes to mechanical adjustments. Maybe my day job or just me. Just good enough isn't often good enough. And the links and hints would not be a hijack, as the things done after the decision point seem almost more important than the acquisition, or at least why some people get frustrated with what comes out of the machine.
And yes, thank you for the info already posted. Helped the decision process.
I need to go looking for some info. For me, insuring the motion on a 3D printer is true, orthogonal, sort of comes naturally. There is the intended motion and there is what the machine actually does!
https://3dprinterly.com/how-to-square-3d-printer-frame-properly-ender-3-more/
That looks to me like a reasonable overview.
And you are right! "just good enough" really isn't a thing in this context. It needs to be good. Damn good. 3D printers are kind of like CRT's in that every single thing that can be off shows up somewhere, somehow on the part. It's the same with a CRT. We really only get that great image when all the circuits and magnetics are dead on where they should be.
If you want to know about the science related to this stuff, I cannot recommend this guy enough:
https://www.youtube.com/@CNCKitchen
Stephan has performed exemplary explorations of pretty much all aspects of 3D printing. It's a real education to just watch his channel from early on to present day catching up on stuff you find interesting.
I may post up some more later. If, somehow, this discussion needs to be organized differently, I will find where things ended up and add info there. No worries on my end.
Here is an example of how great CNCkitchen really is.
Once you have your 3D printer square and it's motion is true, your next concern is harmonics. Can you live with the thing, and is it getting out of its own way. By that, I mean its motion is not resonant somehow that affects the part.
Here is a video on that topic and how to seriously dampen your printer motion for a couple bucks:
Doh!! It seems a lot of my post didn't end up here. So, I've fixed that below:
Here is a rundown on part strength as a function of layer height:
And those blobs a lot of people see on their prints? This one actually has a lot of technical detail shown in context.
This is a topic close to my heart. Part strength. In general, infill contributes very little to part strength. Failures come from stress and or strain, both of which happen at the exterior surfaces of a part. Longer, continuous chains of polymer, coupled with more mass at the failure areas, combine to make a very significant improvement in part strength. Many would increase infill, perhaps making a part solid, which can improve a part, but not for the most common failure modes.
And a controversial one! Less part cooling = stronger parts.
This also means more ugly parts, but the message with 3D printing in general is the whole affair is a game of trade-offs. In my nice parts above, the trade-off was print speed being traded for part integrity and overall surface quality.
A lot of what I put here earlier is derived from me, and my team, printing thousands of parts out of over 50 polymers, over the course of a few years! It's a HUGE problem space. Way bigger than one might expect.
On that note, sticking with a given material and more fully exploring it along with the other variables, such as: Nozzle size, nozzle type, movement speeds, accelerations, temperatures, and more --sticking with a given material constrains the problem space to a manageable size one can learn from and then map that understanding to requirements and get successful prints. I cannot understate how important doing that really is, and today we can all get a jump start from people like CNCKitchen, who have done that and published.
To me, the good news is PLA is extremely forgiving. It's darn near magic sometimes. Just be ready for other polymers to be less forgiving. The more desirable properties always come with downsides. Usually those are less overhang, greater need for support, and the big one: Difficulty self-supporting parts. By self supporting I mean using one build material for both the part and supports.
There are two ways to get at that problem when you eventually bump into it:
Get two extruders. This is the first upgrade I would do for one of these inexpensive machines.
Design the problem away! Often one can change the topology such that support is just not needed.
2.5 (lol) ...and or build the part in pieces and then assemble them after it's all printed.
One thing I would not mind seeing is some sharing of experiences good and bad.
I've not done much of that myself over these last few years because of time constraints. Building up a business takes a lot of work and additive is a very young industry that is demanding as heck!! Milling and turning are mature, 150 years plus, considering reasonably modern approaches and machinery. Additive is basically 40 years old and a good chunk of that was patent walled off preventing the kind of innovation going on right now. The two super important patents were: Having motion systems outside the part chamber. This is why many machines produced recently had everything inside the hot box and why the hot box temps were generally lower than needed. The other one was about the basic tech itself, making the extrude happen essentially.
As everyone ramps up with their machines, or is printing now like I am, perhaps we can have a running discussion? We all would benefit.
Secondly, you all have no idea (or maybe you do) how much I would love to setup a P2 based system. One area just begging for action is sensors and to a lesser degree, more real time control made possible.
On the topic of real time control, it's all about understanding the dynamics in play when they are happening. Back a long time ago when I was working with industrial lasers to cut sheet metal, I installed and operated an AMADA laser system. It was basically their turret punch design with a laser replacing the punch. Frankly, those machines were pretty great. Made lots of parts on them and ended up getting supreme quality, but it took a while to ramp up on a new material. Nearby a college setup a machine that offered real time controls like those you might see on the better CNC milling machines. Basically some buttons and dials.
The difference was dramatic! I learned more in an hour with that machine than I did months with the one requiring me to set parameters up in advance in the program. It's a lot like the instant feedback many of us talk about with real time, type it in interpreter type languages, such as BASIC, or Python, and compiled ones. Setup a new sensor or incoming signal on a breadboard, and then inputs. Turn the dials and watch the data. Could be numbers, graphics, sounds, motions. The understanding one gets is fundamental and gets mapped right to our senses and motor skills, both of which can feed data into our analytic and visionary parts of our minds, getting us to where we want to be, or helping us find out where we want to be!
For 3D printing, I would setup one with dials for X,Y motion, extrude flow rate, extruder temp, and one assignable dial to be linked to a parameter the operator would want to adjust or tweak. On a new material, first layer action can be adjusted and outcomes seen in real time. Same goes for many other areas in a model. Overhangs, detail features, all sorts of stuff that can and will come up. Iterating with whole prints is SLOW. The learning is slow, and coarse and murky in my experience.
On many machines, there are adjustments via some sort of "tune" menu, on Marlin for example. These are close. And I use them, but super clunky, and one can't make two adjustments at the same time in real time.
For learning and or getting going on new polymers this would be killer!!
Obviously for motion and sensors, I need say nothing about the P2. We all know what's possible there.
Thank you Potatohead!! The link to truing the frame was solid info. Ran all of the suggestions regarding setup and checking resulting in a flawless first print (other than my setting the z-offset to close on setting). Some things were sloppier than others out of the box, not bad, but tuning surely helped.
One thing to consider regarding less expensive 3D printers is how the X-axis gantry is supported. Mine is supported on the left side by the Z-axis lead screw, along with a T-square-like roller arrangement to keep it square to the Z-axis. Nonetheless, because the right-hand side does not have its own lead screw, it sags just a tiny bit. When I "level" my bed, it's not really level, in the sense that it's perfectly perpendicular to the Z-axis. Rather, it's level in relation to the X- and Y-axis mechanics. So, in the X-axis, a "level" bed will have a very slight tilt that matches the X-axis gantry's sag.
In most cases, this won't matter a bit, and you won't notice anything wrong with the parts the machine produces -- especially small ones. But if you're producing large parts, and if they have one X/Y dimension that's substantially larger than the other one, it might be wise to orient the part so that the longer dimension lies along the Y-axis.
-Phil
Nice! I'm really glad you got ahead of that and had a good outcome.
I ended up going with the Ender 3 Neo Max. the X direction is controlled by a dual linked stepper worm shaft and therefore supported on both sides. I am guessing one of the guys I work with has planned to upgrade his unit with the dual drive for the reasons Phil has mentioned. This small difference was noted in one of the set up references listed earlier, and was one of the adjustments high on my list. Left and right sides were tuned to less than a half mm. With the gantry set, it was pretty easy to get manual level pretty dead on. The rabbit (3D hello world?) came out really nice with the defaults, so far I have printed some lithophanes with the last being vertical. That really came out well. Almost looks like a old timey tin-type copy of the photo I used.
Learning to create the things I want to make may take a bit of time. Starting with Tinkercad..... Some things will just be find a model and be done with it, others not so much. I have watched from the early rep rap days, amazing how far it has come, though making one of these things just does not seem the challenge I one thought it would be. Aside from hot ends and bed temp control. Easier to buy those from the looks of it, but there are a few things I would like to have seen tighter on this not so bottom feeder. But for a few $K, I am sure I would have had those addressed.
Has anyone used the Creality Ender-3 S1 3D Printer yet?
Hi
I have absolutely NO experience using these but have been considering taking the plunge- its an itch I've been wanting to scratch!
Anyway- just came across this budget printer on offer to early adopters $239 ($299 full price) 2days left....
good reviews- see below
Sovol SV06 specs'
all metal planetary direct drive extruder
all metal hot end
auto bed levelling
pei magnetic build plate
32 bit main board
auto x levelling
dual z axis (only one driver- motors share)
belt tensioners
resume printing
review
shop
https://sovol3d.com/products/sovol-sv06-direct-drive-3d-printer
Anybody an opinion before I flash the cash?
Dave
The primary advantage you get with an established printer is known print profiles or recipes.
One can always develop those from first principles and that is not too difficult, but it will take some time and effort.
If this is something you feel may frustrate you, I would pass on the machine
I've had two Monoprice Mini v2 printers for several years and recently added a Creality CR-10 V3.
The Monoprice Mini were an easy way to get started, the small form factor makes it easy to just put them away when not in use. I purchased the first from Amazon on a black Friday sale, the second from eBay for $100 as "doesn't work, filament won't extrude...". They had overheated it and destroyed the PTFE liner; simple fix and I had a great second printer. Over time the printing surface degraded and I have since removed it and print on borosilicate glass using Aqua Net hairspray for adhesion.
I added the CR-10 V3 to allow much larger size printing, I really like it so far.
I've been using FreeCAD as a modeling tool and CURA for slicing.
C.W.
Nice!
For what it is worth, the PTFE section in a heat break or bridge can be omitted.
A friend and I had parts made with a smooth coating and had basically no issues. I have also tested well machined stainless steel with pretty much identical results.
An exception can be TPU. It can bind in the heat break. I have found this can become a concern starting at about 92 Shore A and below. The lower, the softer, the more potential there is.
Otherwise, not having that tube means printing above 260C as well as easier recovery from filament stall or out events, both of which will generally damage the tube.
On many hot ends, it is possible to clear blockages with a dowel, torx screwdriver or other thing that is close to the size. 1.75 mm in most cases.
Just run the heat up and either push the dowel into the tube, and or insert other filament and then push that through. My favorites are a simple nylon 6 and or a carbon filled nylon of any type.
First step is to get flow of any kind. On a failure, some polymer has generally crystalized, burned, and is harder than usual. That's your block.
To be of it, use a temp higher than it was formed by. For most cases, 280C will work. Heat up, let it stand for a minute and then push stuff through. If you are using nylon to push with, you can also put it in there, push, then yank it out quickly. Same goes for the screwdriver or other metal.
You will often get material to follow that action and if so, great! That is something you won't need to push through.
Once you have flow, using the carbon filled is great to scrub the feed path clean. Put it in there and use pliers to push the filament through manually, until you get a smooth flow. Follow that with nylon, until you get a clear, smooth flow and with the nylon in there, reduce temperature to your intended printing temp and continue pushing the nylon through as the nozzle reaches that target temp.
Finally, turn the extruder off and push the nylon a little, until temp falls below 220, then wait until it hits about 140 and then pull it out quickly.
Done right, the end of the nylon will be an impression of the inside of your nozzle. And if it looks great, you are done. If there are chunks missing, or other material comes out of your feed path, repeat this process to remove all old filament.
The reason to do that is to reduce turbulence caused by filament having to flow around something.
As a preventative, you can run nylon in the way I have described. Set temp to 250C, push your nylon through and you should see a nice, clear purge. Do the cool cycle by turning the hot end off. Keep nylon moving slowly through the drop below 220C, and then pull at 140.
Done once a month, this process takes 5 to 10 minutes, and will keep your filament flow turbulence free and prints looming factory new.
Or... change nozzles.
And on that note, really cheap nozzles have a rough, non uniform path inside. They are more turbulent than more expensive ones are.
The way I see it, one can frequently change cheap nozzles, or run cleaning cycles on better ones.
Either works fine.
The key in all of this is to understand why print quality changes over time and what you can do about it.
I can't add much to this convo, but I used to buy only Prusa printers. Years ago I had a bad experience with Creality. Recently, I discovered Creality printers are great. Their Core XY Ender 6 was my first Core XY despite some minor issues and odd design choices, I was sold on the brand again. That's on the east coast at my dad's place now so I don't see it much. I still use the Prusa slicer however it's unlikely I'd buy anything but Creality. I'm currently running (west coast) the Ender 3 V2 Neo and the Prusa Mini.
Also echoing the advice about start out low cost, plan on printing a lot in PLA to get started. Plan on lots of tinkering and you'll learn valuable info along the way. Fusion360 is free for non-commercial use so there's that. I highly recommend TinkerCAD and or Fusion360, Prusa slicer and OctoPrint. All free, no hardware included of course.
Here's a festive tree I found on Thingiverse. It's an Octolapse video, which is a time lapse created by a plugin in Octoprint, running on Raspbery Pi 4. Webcam is a Logitech DCS 920. It's not printing in 'vase' mode because I wanted it to be stronger and last a long time. The original plan was to make an IOTree, IOT+Tree, get it? Haha. DWIN touchscreen, 8 core uC, the whole 9 yards but I tried to change careers and it turned into a huge mess so yeah... Anyhow, making these time lapse videos and watching them are a lot of fun for me.
Unfortunately, I forgot to lock the focus and exposure. Sorry.
I 'asked' OpenAI's ChatGPT this thread's title and;
When deciding to get a 3D printer, the most important consideration is likely the intended use for the printer. Factors such as the size and complexity of the objects you want to print, the materials you want to use, and your budget will all play a role in determining the best printer for your needs. Additionally, it may be important to consider the ease of use and the availability of support and resources for the printer you are considering.
Sounds pretty good. I would have at least thrown in some of the other advice mentioned by the humans in this thread. Sorry chatbot but the humans won this round : )
I’ve been 3D printing 10 years. When I first was looking there were printer frames made of laser cut plywood or acrylic. I went with a MakersToolWorks (now defunct) MendelMax 2. It was $1700 at the time but was all extrusion and aluminum plate frame. Solid printer but had z banding issues. Upgraded it to the MendelMax 3. The Ender 5 came out and I picked one up. It needed as much in upgrades as the printer cost to print decent. Same with the Ender 5 plus I have. Needed a bunch of upgrades. Ender 3s with one Z lead screw….yeah. Better buy the second lead screw kit.
I still have both MendelMax printers and the Ender 5 plus. Sold the Ender 5.
I’ve moved on to multicolor printing with the Bambu Lab X1-Carbon with 2 AMS units. I can do 8 color prints. So far since November I have almost 800 hours of print time on it and no issues. No upgrades needed either unless you count the 2nd AMS. Prints TPU too without issues. It is closed source firmware but hasn’t been an issue yet.
That is one awesome print. Was it all one pass or more? No answer required, but what was the price on this unit (certainly put of my budget).
Speaking of cost, I am printing a rack of trays. color coded to help find parts (visual acuity seems to be inverse to experience). I also want to print some trays for semiconductors, but the cost of ESD PLA is almost 4X the cost of standard PLA. There does appear to be one PETG that may be more reasonable. I have also printed a tray with a recess for my P2 dev board, to protect the bottom from contacting stray stuff on the desk and provide support for boards plugged into the side connectors.