

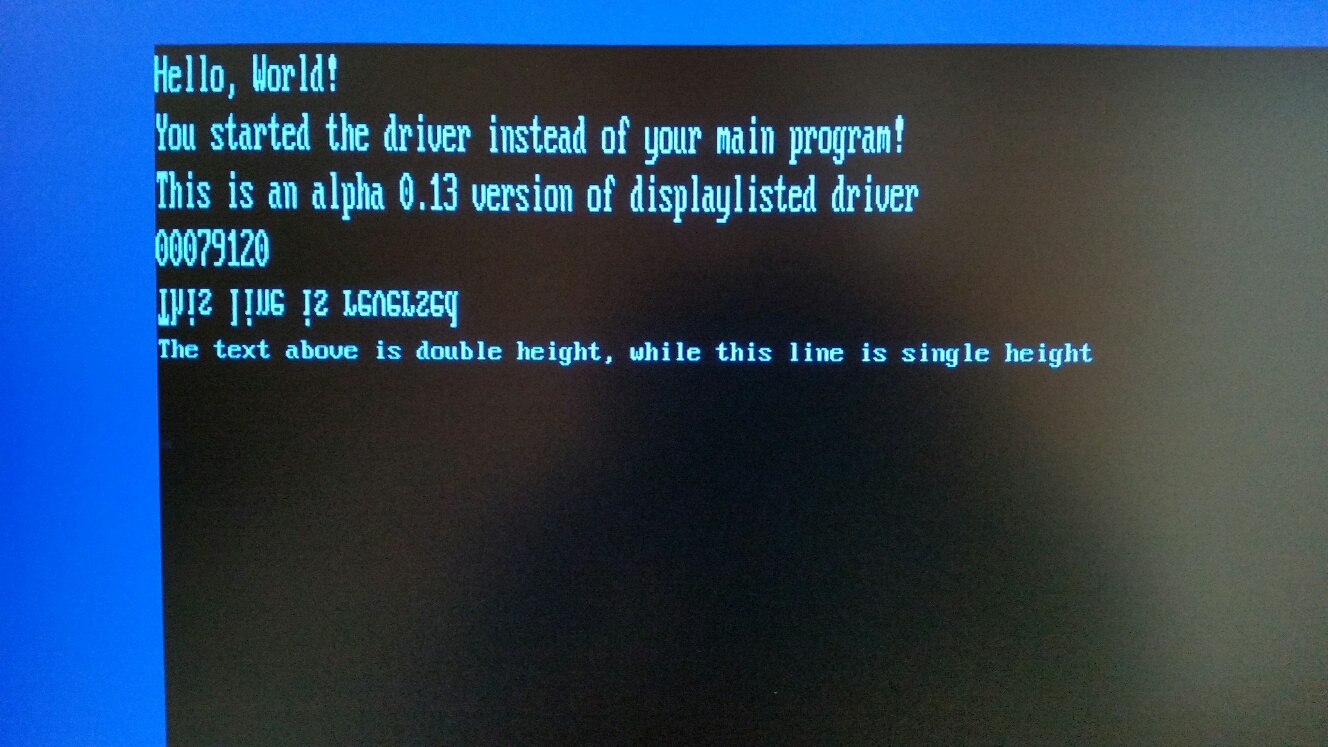
A display list is fun :) [0.50a beta+0.07g - PSRAM command list used]
 pik33
Posts: 2,419
pik33
Posts: 2,419
2 branches now in development: universal, text/graphics/borders driver (now at beta stage) and graphics-only, PSRAM-only 1024x576x8bpp driver with sprites.
0.07g: PSRAM command list used
0.50a: bugs fixed, the updated file added here
0.50: first beta, attached and available on Github
0.42: PSRAM full support
0.38: the driver can use PSRAM as the display data source
0.37: a lot of bugs fixed, several new commands implemented
0.35: removed bug which after repeat command moved the current DL pointer far away
0.34: Vertical split in text mode added, horizontal scrolling in progress
0.33: DL font height and font definition pointer added; 8x8 font added
0.25: DL repeat command added,
I started to make a displaylisted HDMI driver based on "nostalgic" text driver from this topic https://forums.parallax.com/discussion/172937/a-nostalgic-hdmi-display-driver-0-90-beta-in-post-34-beta-stage-reached#latest
The display list is fun. It allows the contorl of what you display and from where. Text and graphic lines can be mixed, they can be displayed in any possible order and repeated.
Now every screen line is controlled by one displaylist entry (long) but I only started to play with a displaylist and I want to display more lines using one entry or using more entries for one line.
To be continued.
The working directory is now here: https://github.com/pik33/P2-retromachine/tree/main/Propeller/Videodriver
Moved to https://gitlab.com/pik33/P2-retromachine
Comments
Good luck! I'd like to see this working.
How to double pixels and convert 2 colors (1bpp) to 16 colors (4 bpp) A fragment of the driver code. Only P2 can do it in such an easy way...")
                        rdbyte  t1,char                 ' get 8 pixels
                        sub     cursorpos,#1 wz         ' if there is a cursor                      '
                if_z    xor     t1, #$FF                ' reverse the colors                        '

                        getnib t3,t1,#1                  ' 4 pixels to t3
                        getnib t1,t1,#0                  '  4 pixels to t1
                        mergew t1                         ' make 01010101 from 1111
                        mul t1,#3                         ' now make 11111111 out of this
                        mergeb  t1                        ' convert to 16-color mode
                        xcont   m_lut1,t1                 ' and display this
                        mergew t3                         ' repeat with another 4 pixels
                        mul t3,#3
                        mergeb t3
                        xcont   m_lut1,t3
The result: double sized font. It looks huge on 32" monitor")
Predefined text modes for 624 lines timings and PASM code for text modes are now
(4x4 resized font via dislaylist)
deleted
I have no place for more typing, as I have now 31 instruction in skipf block which makes 1/2/4x zoom. As there is simpler way to make 4x zoom, this block will be rewritten.
getnib t1,t1,#0 is another way to write
and t1,#$0Fdeleted
It zeroes all the rest of the long.
I had to give up skipf. The problem was: to make colors where they are to be, the LUT modifying has to be done directly after the first xcont. (of 2 or 4 when zooming) This made instructions count in the loop >32. I have still about 200 longs free with all planned text modes and 8-bit graphic mode working.
You could chain SKIPFs.
If you were to setup the second and subsequent skip patterns in a register prior to starting the first SKIPF, then each sequence can be followed by a SKIPF D to keep the skipping going.
Yes that is quite a powerful technique, I have used it before too. Nested SKIPFs get tricky to manage especially when they become conditional or are put in REP loops as the number of paths grows in complexity. Also a new SKIPF can alter an existing one too, as long as it is not skipped itself.
0.15 available in the working directory https://github.com/pik33/ultibo-propeller/tree/main/hng012
The driver can display a text, 8bpp graphics, blank text or border scan line.
Text modes works the same as in Nostalgic text driver: every char is a long, foreground-background-reserved-charcode
Blank text displays a blank text line as if there were spaces in this line, using colors from the pointed buffer
Border displays a single color line
Graphics doesn't need any further explanation, it is a line with pixels in it.
A lot of predefined modes available in format gn_bb_cc_vv_hh
g - 1 graphics, 0 text
n -1 NTSC based clock, 0 PAL based clock
bb - 00 wide border, 01 medium border, 10 narrow border, 11 no border
cc - 00 1 bpp, 01 2 bpp 10 4 bpp 11 8 bpp - for graphic modes, (only 8 bpp works in 0.15)
vv - vertical zoom 1/2/4/8x
hh - horizontal zoom, 1/2/4/8 (8 for graphics only)
Every scanline has a display list entry in format bbbb_bbbb_bbbb_bbbb_bbzz_xxxx_xxxx_xxxx
bbbb_bbbb_bbbb_bbbb_bb00 is the start address for this line buffer
zz is horizontal zoom
xxxx_xxxx_xxxx is:
nnnn_llll_ll_01 for text:
nnnn: font line (0 to 15 for 8x16 font definition)
llll_ll: character line - for determining if a blinking text cursor (Y coordinate) has to be displayed there (normally 0-upper line,29..35 - lower, added 1 every 16 scanlines
rrrr_rrrr_cc_10 - graph
rrrr_rrrr - unused, reserved
cc -color depth, 1/2/4/8 bpp
The driver sets the clock itself according to the selected mode; 3 clock speed groups are used: ~280 MHz (bb=10), ~320 MHz (bb=01) or ~360 MHz (bb=00 or 11)
The graphics buffer in predefined modes ends at $80000 (TODO: allow selecting the address, it is now a constant in the code which can be changed to $7C000 to enable debug)
It starts where it needs to fit
The display list is placed before the buffer.
You don't need any frame buffer while playing with DL. Select a mode to initialize timings, prepare your own DL and point the driver to it. The modes and DLs may be changed on the fly, they are updated by a cog every frame.
By manipulating 576-long display DL you can easily scroll the screen horizontally or vertically, make a small graphics area and bigger text area, use different sized text, etc, etd.
To do until first beta:
0.16. Point #1 of 0.15 TODO cleared.
I tried to do things too fast, too simple. What is good for 8 bpp is not good for any other color depth. The horizontal zooming procedures cannot be simply reused and every bpp needs its own piece of code.
1 bpp now works as expected, from 128x72 to 1024x576 with independent horizontal and vertical zoom. Todo: zoom for 2 and 4 bpp. 4 bpp can be simple, there is getnib and rolnib, 2 bpp seems to be harder.
2bpp completed.
0.20 alpha added to github: all planned modes work.
0.23 available on Github.
https://github.com/pik33/ultibo-propeller/tree/main/hng012
Added high level graphics functions: line, box, frame, circle and filled circle. Written in Spin, slow, but working.
What is the display list and what can be done?
As it is now, every single scan line has one long DL entry. Todo is (there is a reserved entry type for this) make the entry repeat to save HUB space.
An entry can describe:
a border line. There is defined border color to display
All of these lines can be mixed in one frame.
To make vertical zoom you simply repeat the same DL entry n times
This means you can for example display 100 "border lines" from top (0 bytes needed for the framebuffer). Then 32 text mode lines with 4x horizontal and 2 x vertical zoom (16 longs in fb). Then another 32 border lines. Then 100 lines of 2 bpp graphics., etc.
As the DL is reinterpreted every frame you can (best while in vblank, which is signalled) change your DL or even prepare a new one and switch it. Scrolling and animations can do this way.
If you want 8x8 text, simply use 0..7 for font line #, then change the start address and increment the Y for the next 8 entries.
If you reverse fontline order, you will get your text upside down.
There is setmode method for setting "ordinary" text and graphic modes. It gets the mode number in format %gf_tt_cc_ which get
The driver can display a text, 8bpp graphics, blank text or border scan line.
Text modes works the same as in Nostalgic text driver: every char is a long, foreground-background-reserved-charcode
Blank text displays a blank text line as if there were spaces in this line, using colors from the pointed buffer
Border displays a single color line
Graphics doesn't need any further explanation, it is a line with pixels in it.
A lot of predefined modes available in format gn_bb_cc_vv_hh
g - 1 graphics, 0 text
n -1 NTSC based clock, 0 PAL based clock
bb - 00 wide border, 01 medium border, 10 narrow border, 11 no border
cc - 00 1 bpp, 01 2 bpp 10 4 bpp 11 8 bpp - for graphic modes, (only 8 bpp works in 0.15)
vv - vertical zoom 1/2/4/8x
hh - horizontal zoom, 1/2/4/8 (8 for graphics only)
Every scanline has a display list entry in format bbbb_bbbb_bbbb_bbbb_bbzz_xxxx_xxxx_xxxx
bbbb_bbbb_bbbb_bbbb_bb00 is the start address for this line buffer
zz is horizontal zoom
xxxx_xxxx_xxxx is:
nnnn_llll_ll_01 for text:
nnnn: font line (0 to 15 for 8x16 font definition)
llll_ll: character line - for determining if a blinking text cursor (Y coordinate) has to be displayed there (normally 0-upper line,29..35 - lower, added 1 every 16 scanlines
rrrr_rrrr_cc_10 - graph
rrrr_rrrr - unused, reserved
cc -color depth, 1/2/4/8 bpp
The driver sets the clock itself according to the selected mode; 3 clock speed groups are used: ~280 MHz (bb=10), ~320 MHz (bb=01) or ~360 MHz (bb=00 or 11)
The graphics buffer in predefined modes ends at $80000 (TODO: allow selecting the address, it is now a constant in the code which can be changed to $7C000 to enable debug)
It starts where it needs to fit
The display list is placed before the buffer.
You don't need any frame buffer while playing with DL. Select a mode to initialize timings, prepare your own DL and point the driver to it. The modes and DLs may be changed on the fly, they are updated by a cog every frame.
By manipulating 576-long display DL you can easily scroll the screen horizontally or vertically, make a small graphics area and bigger text area, use different sized text, etc, etd.
To do until first beta:
0.24. Repeat command added.
The main drawback of displaylist as it was before 0.24 was its size. Regardless of the buffer length it added 576 longs occupied by DL itself.
Now there is a DL command in format %nnnn_nnnn_nnnn_qqqq_mmmm_mmmm_mmmm_0111
n is repeat count
q is additional repeat count before adding an offset to the line start address
m is the offset
So, to make a 1024x576 screen with 800x480 active area the displaylist will look like this:
      long[dl_ptr+4*i]:=%0000_0111_0000_0000_0000_0000_0000_0111             ' repeat 112 times
      long[dl_ptr+4*i+4]:=0                                                  ' 0 - display a border color
      long[dl_ptr+4*i+8]:=%0001_1110_0000_0000_0011_0010_0000_0111           ' repeat 480 times, add #800 to the addres after each line
      long[dl_ptr+4*i+12]:=(buf_ptr<<12)+2+48>>2                             ' 256-color mode graphics from buf_ptr  (plus offset added each line)
      long[dl_ptr+4*i+16]:=%0000_0111_0000_0000_0000_0000_0000_0111          ' repeat 112 times
      long[dl_ptr+4*i+20]:=0                                                 ' 0 - display a border color
Now there is 6 longs instead of 576 to do the job
Change %0001_1110_0000_0000_0011_0010_0000_0111 to %0001_1110_0000_0001_0011_0010_0000_0111 and you will get 2x vertical zoom as the offset will be added to every second line.
As it is now, this will not work for the text modes as there is a font line # in the DL entry. To do.
0.25.
A strange bug fixed. The symptom: while in borderless mode, the 15" TV set displayed a picture while the 32" monitor displayed "no signal"
This "no signal" was only when horizontal zoom was >1
The problem was too long instruction sequence between the last xconts displaying pixels and the next xcont.
In the bordered mode the code checks if there is a border to display and use xcont "on time" In the borderless mode this checking takes time, then the program calls hblank, which then does xcont, too late. The TV was still able to display the picture, while the monitor was not.
Fixed now.
As I am trying to make something like PropPlay 2 - Amiga mod and SID player on a P2 - the main developing on this driver is now moved to this repository https://github.com/pik33/P2-retromachine/tree/main/Propeller/Tracker player
After several months of "no time to play" I found a lot of bugs and unimplemented features in the driver, including:
I partially implemented the #3, adding a special command which sets the font height. I also need another command which will set the font pointer, to enable switching fonts between lines.
The #1 bug is found and will be corrected.
I also decided to work at one resolution: 960x540. This is FullHD/2: the goal is to display the same buffer on HDMI and VGA using 2x2 pixels and the same DL style.
Edit: 8x8 and font switching works.
l> @pik33 said:
Looking forward to it! Have my own fork of P1 PropPlay (mostly just changes it to NTSC out, but also added some MIDI playback into it at some point) and that is loads of fun.
You can find not one, but two mostly-working VGM format players included with OPN2Cog, so that should be easy to add, too (and as said, I was thinking maybe of writing YM2608 and S-SMP cogs, which I guess would come in handy, too).
0.34. The DL command can split the line horizontally. While changing the display mode is not possible (yet?), what is possible is reloading the display data address and a font line #. The switch can be done at any character in line
I also managed to add horizontal fine scrolling in the text mode - a proper DL entry has to be added. There was a battle for nops to implement both things... No nops left in the loop after this....
The split screen enables effect like this. The screen is in character mode, I only rotate 240 DL entries at every vblank.
You must be getting your head around the streamer's command buffering then.
This is a main character line display loop now, displaying 8 pixels (one line of one character). Realtime stuff, no buffering, no nops left here - 8 pixels=80 clocks maximum for this loop:
p400 cmp cpl2,lc_char wz ' check if switch needed '5 if_nz skipf #%111 ' if not, skip. Make skip instead of if_nz or jmp saves a nop sub t2,fontline ' switch the fontline add t2,lc_fontline mov framebuf2,lc_address ' update the address rdlong char,framebuf2 ' read a long char getbyte backcolor,char,#2 ' byte #2 - background color getbyte charcolor,char,#3 ' byte #3 - foreground color getbyte char,char, #0 ' word #0 - char code add framebuf2,#4 ' point to the next long shl char,fontsize ' 1 char=8 or 16 bytes in font def add char,t2 ' add this to font/line pointer rdbyte t1,char ' and get 8 pixels prom there setbyte rolbuf,t1,#3 shr rolbuf, #24 ' (24-scroll) fine hscroll. Todo: regs and DL entry for this mov t1,rolbuf shl rolbuf, #16 '(16-scroll) sub cursorpos,#1 wz ' if there is a cursor if_z xor t1, #$FF ' reverse the colors xcont m_lut2,t1 rdlut t5,backcolor ' read a background color from palette wrlut t5,lutaddr ' and write it to LUT #0 or #32 add lutaddr,#1 rdlut t5,charcolor ' the same for the foreground wrlut t5,lutaddr sub lutaddr,#1 bitnot m_lut2,#16 xor lutaddr,#32 ' use LUT #0-1 and 32-33 djnz cpl2,#p400 p401 jmp #p103It works because XCONT is buffered and adjoins with prior XCONT. While the cog is processing/looping, the issued XCONT is actually waiting its turn to stream. Effective, but can be confusing when bashing I/O for timing diagnostics.
Ah, I'm guessing the NOPs had been needed to time the palette changes. ie: You had to extend the cog loop time to match the tile rate so as to minimise the hardware buffering time.
That's nice. My video driver can't do that horizontal split. Its regions are only ever split vertically. Although I can see how you do it, and it would be a low cost impact staying in the same mode but changing the font line and source address half way along the line.
I'm so intrigued by this. I've not worked on a display-list based system since my Atari-800 days. Now I just have to figure out how to hook up a display to my Edge to try out this nifty stuff!
You need either a HDMI accessory board from Parallax or anything which can connect 8 P2 pins to a HDMI or DVI socket.
I bought several Adafruit boards: https://botland.com.pl/raspberry-pi-pico-hat-ekspandery-wyprowadzen/19784-dvi-breakout-board-adapter-ze-zlaczem-hdmidvi-do-raspberry-pi-pico-adafruit-4984-5904422347543.html
They are much cheaper and, what is more important, they were available. I soldered one to the P2 Edge breakout board and maybe I will try this today. The problem can be 220 Ohm resistors on it. BITDACs on HDMI have to be switched off - the board was made for Raspberry Pico.
if_nz skipf #%111takes 4 cycles if_nz because next instruction is being skipped and is executed as a hidden NOP, therefore you could useif_nz jmp ...instead as timing is identical.zerox char,#7is simpler thangetbyte char,char, #0.add ...can be avoided withrdlong char,ptra++(or ptrb).djnz cursorpos,#...to jump overxor ...avoids using z, which might be useful elsewhere if not here.add ...andsub ...can be avoided withwrlut t5,ptrb++andwrlut t5,ptrb--(or ptra).sub/if_z are 4 clocks while djnz is also 4 clock and maybe reloading the pipeline after the jump can also add time. The experiment will show: I have no more time left so if it adds to the loop time, the driver will stop working.
I wrote this loop several monts ago and I didn't know about ptrb++ syntax then (I got a hint about it in the audio driver topic.. and didn't notice I can use it here). This will save 2 (or 3) nops which maybe can be used for more useful things