

What wrong with My HMC5883 on multiwii
 darklizard
Posts: 5
darklizard
Posts: 5
I use this code
/*
An Arduino code example for interfacing with the HMC5883
by: Jordan McConnell
SparkFun Electronics
created on: 6/30/11
license: OSHW 1.0, http://freedomdefined.org/OSHW
Analog input 4 I2C SDA
Analog input 5 I2C SCL
*/
#include <Wire.h> //I2C Arduino Library
#define address 0x1E //0011110b, I2C 7bit address of HMC5883
void setup(){
//Initialize Serial and I2C communications
Serial.begin(9600);
Wire.begin();
//Put the HMC5883 IC into the correct operating mode
Wire.beginTransmission(address); //open communication with HMC5883
Wire.write(0x02); //select mode register
Wire.write(0x00); //continuous measurement mode
Wire.endTransmission();
}
void loop(){
int x,y,z; //triple axis data
//Tell the HMC5883 where to begin reading data
Wire.beginTransmission(address);
Wire.write(0x03); //select register 3, X MSB register
Wire.endTransmission();
//Read data from each axis, 2 registers per axis
Wire.requestFrom(address, 6);
if(6<=Wire.available()){
x = Wire.read()<<8; //X msb
x |= Wire.read(); //X lsb
z = Wire.read()<<8; //Z msb
z |= Wire.read(); //Z lsb
y = Wire.read()<<8; //Y msb
y |= Wire.read(); //Y lsb
}
//Print out values of each axis
Serial.print("x: ");
Serial.print(x);
Serial.print(" y: ");
Serial.print(y);
Serial.print(" z: ");
Serial.println(z);
delay(250);
}
But my result is""
Comments
Were you expecting something different?
I don't see anything wrong with your HMC5883 based on what you wrote. The program is only displaying the raw values. You need to do some trig to calculate the heading.
As you can see, the forum software removes extra spaces from the posted code. To post code to the forum follow this tutorial.
When asking a question, it's a good idea to tell us what you were expecting to happen and not just what did happen.
It is my first time in this webboard
and now I use code below. I turn it around but results don't change . It give me 180 Deg all time
/* 3-Axis 16-Bit Compass Module (HMC5883) Demo code. 2011 Copyright (c)Robosoft Systems, India. All right reserved. Author: Rohan Soni ( Code Design and Comments) This demo code is free software; you can redistribute it and/or modify it under the terms of the GNU Lesser General Public License as published by the Free Software Foundation; either version 2.1 of the License, or (at your option) any later version. This library is distributed in the hope that it will be useful, but WITHOUT ANY WARRANTY; without even the implied warranty of MERCHANTABILITY or FITNESS FOR A PARTICULAR PURPOSE. See the GNU Lesser General Public License for more details. You should have received a copy of the GNU Lesser General Public License along with this library; if not, write to the Free Software Foundation, Inc., 51 Franklin St, Fifth Floor, Boston, MA 02110-1301 USA For more details about the product please check http://www.robosoftsystems.co.in/roboshop# */ #include <Wire.h> #include <math.h> // Shift the device's documented slave address (0x3C) for write operation // 1 bit right.This compensates for how the TWI library only wants the // 7 most significant bits (with the high bit padded with 0) #define HMC5883_WriteAddress 0x1E // i.e 0x3C >> 1 #define HMC5883_ModeRegisterAddress 0x02 #define HMC5883_ContinuousModeCommand 0x00 #define HMC5883_DataOutputXMSBAddress 0x03 int regb=0x01; int regbdata=0x40; int outputData[6]; void setup() { Serial.begin(9600); Wire.begin(); //Initiate the Wire library and join the I2C bus as a master } void loop() { int i,x,y,z; double angle; Wire.beginTransmission(HMC5883_WriteAddress); Wire.write(regb); Wire.write(regbdata); Wire.endTransmission(); delay(10); Wire.beginTransmission(HMC5883_WriteAddress); //Initiate a transmission with HMC5883 (Write address). Wire.write(HMC5883_ModeRegisterAddress); //Place the Mode Register Address in send-buffer. Wire.write(HMC5883_ContinuousModeCommand); //Place the command for Continuous operation Mode in send-buffer. Wire.endTransmission(); //Send the send-buffer to HMC5883 and end the I2C transmission. delay(10); Wire.beginTransmission(HMC5883_WriteAddress); //Initiate a transmission with HMC5883 (Write address). Wire.requestFrom(HMC5883_WriteAddress,6); //Request 6 bytes of data from the address specified. delay(10); //Read the value of magnetic components X,Y and Z if(6 <= Wire.available()) // If the number of bytes available for reading be <=6. { for(i=0;i<6;i++) { outputData[i]=Wire.read(); //Store the data in outputData buffer } } x=outputData[0] << 8 | outputData[1]; //Combine MSB and LSB of X Data output register z=outputData[2] << 8 | outputData[3]; //Combine MSB and LSB of Z Data output register y=outputData[4] << 8 | outputData[5]; //Combine MSB and LSB of Y Data output register angle= atan2((double)y,(double)x) * (180 / 3.14159265) + 180; // angle in degrees /* Refer the following application note for heading calculation. http://www.ssec.honeywell.com/magnetic/datasheets/lowcost.pdf ---------------------------------------------------------------------------------------- atan2(y, x) is the angle in radians between the positive x-axis of a plane and the point given by the coordinates (x, y) on it. ---------------------------------------------------------------------------------------- This sketch does not utilize the magnetic component Z as tilt compensation can not be done without an Accelerometer ----------------->y | | | | | | \/ x N NW | NE | W----------E | SW | SE S */ //Print the approximate direction Serial.print("You are heading "); if((angle < 22.5) || (angle > 337.5 )) Serial.print("South"); if((angle > 22.5) && (angle < 67.5 )) Serial.print("South-West"); if((angle > 67.5) && (angle < 112.5 )) Serial.print("West"); if((angle > 112.5) && (angle < 157.5 )) Serial.print("North-West"); if((angle > 157.5) && (angle < 202.5 )) Serial.print("North"); if((angle > 202.5) && (angle < 247.5 )) Serial.print("NorthEast"); if((angle > 247.5) && (angle < 292.5 )) Serial.print("East"); if((angle > 292.5) && (angle < 337.5 )) Serial.print("SouthEast"); Serial.print(": Angle between X-axis and the South direction "); if((0 < angle) && (angle < 180) ) { angle=angle; } else { angle=360-angle; } Serial.print(angle,2); Serial.println(" Deg"); delay(200); }Then yes, you have a problem.
A diagram of how you've wired your sensor to your board would help as would a clear picture of your wiring.
A link to the exact board you are using would probably be helpful.
I2C lines need pull-up resistors, the Arduino library might be using the internal pull-ups but I'm not sure. Someone more familiar with the Arduino may be able to help if you provide the above information.
BTW, This is the Basic Stamp forum (not that I personally care much), I think the sensor forum would have probably been a better place to post your question (but don't do it now). If the moderators are inclined, they may move this thread.
While there are several people around here who use the Arduino, you might get better help on an Arduino forum. I have an Arduino but I haven't used it much.
I bet if you post the additional information (picture, link, etc.) someone around here will probably be able to help.
@darklizard
You might want to try some Arduino code from the learn site:
http://learn.parallax.com/KickStart/29133
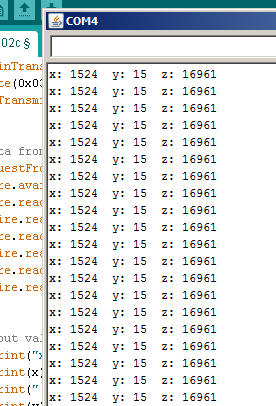
Now I use that code,but results are
I use multiwii se v2.5 connect via USB Stlab ----> tx rx
>multiwii broad
thanks every one ^^
..............................Magnetic connect through aux_sda , aux scl on mpu6050. this is the code that I used
[COLOR=#000000][FONT=Consolas]// ---------------------------------------------------------------------------[/FONT][/COLOR]
[COLOR=#000000][FONT=Consolas]// Receive all measurements from an 9 DOF sensor board. [/FONT][/COLOR]
[COLOR=#000000][FONT=Consolas]//[/FONT][/COLOR]
[COLOR=#000000][FONT=Consolas]// Sebastian Zug[/FONT][/COLOR]
[COLOR=#000000][FONT=Consolas]// Otto-von-Guericke University, Magdeburg, Germany[/FONT][/COLOR]
[COLOR=#000000][FONT=Consolas]// 09/2013[/FONT][/COLOR]
[COLOR=#000000][FONT=Consolas]// ---------------------------------------------------------------------------[/FONT][/COLOR]
[COLOR=#000000][FONT=Consolas]//[/FONT][/COLOR]
[COLOR=#000000][FONT=Consolas]// Structure:[/FONT][/COLOR]
[COLOR=#000000][FONT=Consolas]//                                         [/FONT][/COLOR]
[COLOR=#000000][FONT=Consolas]//                                           Sub I2C[/FONT][/COLOR]
[COLOR=#000000][FONT=Consolas]//                                        ______^ ______[/FONT][/COLOR]
[COLOR=#000000][FONT=Consolas]//                                       |              |[/FONT][/COLOR]
[COLOR=#000000][FONT=Consolas]// ----------[/FONT][/COLOR]
[COLOR=#000000][FONT=Consolas]//  Arduino  |               ----------------          -------------[/FONT][/COLOR]
[COLOR=#000000][FONT=Consolas]//  2560     |- 3.3 V ------ | MPU 6050     |          |  HMC5883  |[/FONT][/COLOR]
[COLOR=#000000][FONT=Consolas]//           |- GND ---------| Acceleration,|---SDA ---|  Compass  |[/FONT][/COLOR]
[COLOR=#000000][FONT=Consolas]//           |- SDA ---------| Gyro, Temp   |---SCL ---|           |[/FONT][/COLOR]
[COLOR=#000000][FONT=Consolas]//           |- SCL ---------|              |          |           |[/FONT][/COLOR]
[COLOR=#000000][FONT=Consolas]//           |               ----------------          -------------[/FONT][/COLOR]
[COLOR=#000000][FONT=Consolas]//-----------[/FONT][/COLOR]
[COLOR=#000000][FONT=Consolas]//                       |___________________ _______________________|[/FONT][/COLOR]
[COLOR=#000000][FONT=Consolas]//                                           V[/FONT][/COLOR]
[COLOR=#000000][FONT=Consolas]//                                   Integrated IMU sensor [/FONT][/COLOR]
[COLOR=#000000][FONT=Consolas]//[/FONT][/COLOR]
[COLOR=#000000][FONT=Consolas]// Pull-up resistors are integrated in the sensor board.[/FONT][/COLOR]
[COLOR=#000000][FONT=Consolas]//[/FONT][/COLOR]
[COLOR=#000000][FONT=Consolas]// IMPORTANT: When I connect the sensor board to a 5V power supply, it was [/FONT][/COLOR]
[COLOR=#000000][FONT=Consolas]//            not possible to realize a I2C connection in this case. I made[/FONT][/COLOR]
[COLOR=#000000][FONT=Consolas]//            some experiments with additional pull-upps on the I2C but [/FONT][/COLOR]
[COLOR=#000000][FONT=Consolas]//            without any results.[/FONT][/COLOR]
[COLOR=#000000][FONT=Consolas]//[/FONT][/COLOR]
[COLOR=#000000][FONT=Consolas]// ---------------------------------------------------------------------------[/FONT][/COLOR]
[COLOR=#000000][FONT=Consolas]//[/FONT][/COLOR]
[COLOR=#000000][FONT=Consolas]// It exists a very good library for I2C communication based on Arduino "Wire"[/FONT][/COLOR]
[COLOR=#000000][FONT=Consolas]// provided by Jeff Rowberg. It integrates specific controllers as MPU 6050 [/FONT][/COLOR]
[COLOR=#000000][FONT=Consolas]// and HMC 5883. Take a view on https://github.com/jrowberg/i2cdevlib[/FONT][/COLOR]
[COLOR=#000000][FONT=Consolas]//[/FONT][/COLOR]
[COLOR=#000000][FONT=Consolas]// The example was implement with i2cdevlib Version and extends the existing [/FONT][/COLOR]
[COLOR=#000000][FONT=Consolas]// MPU_6050_raw // example. It uses the code proposed by @muzhig on i2cdevlib [/FONT][/COLOR]
[COLOR=#000000][FONT=Consolas]// https://github.com/jrowberg/i2cdevlib/issues/18[/FONT][/COLOR]
[COLOR=#000000][FONT=Consolas]// ---------------------------------------------------------------------------[/FONT][/COLOR]
[COLOR=#000000][FONT=Consolas] [/FONT][/COLOR]
[COLOR=#000000][FONT=Consolas]#include "Wire.h"[/FONT][/COLOR]
[COLOR=#000000][FONT=Consolas]#include "I2Cdev.h"[/FONT][/COLOR]
[COLOR=#000000][FONT=Consolas]#include "MPU6050.h"[/FONT][/COLOR]
[COLOR=#000000][FONT=Consolas]#include "HMC5883L.h"[/FONT][/COLOR]
[COLOR=#000000][FONT=Consolas] [/FONT][/COLOR]
[COLOR=#000000][FONT=Consolas]// The default I2C address is defined [/FONT][/COLOR]
[COLOR=#000000][FONT=Consolas]// MPU 6050 - 0x68 - MPU6050_DEFAULT_ADDRESS[/FONT][/COLOR]
[COLOR=#000000][FONT=Consolas]// HMC5883L - 0x1E - HMC5883L_DEFAULT_ADDRESS    [/FONT][/COLOR]
[COLOR=#000000][FONT=Consolas]MPU6050 mpu6050;[/FONT][/COLOR]
[COLOR=#000000][FONT=Consolas]HMC5883L hmc5883l;[/FONT][/COLOR]
[COLOR=#000000][FONT=Consolas] [/FONT][/COLOR]
[COLOR=#000000][FONT=Consolas]int16_t ax, ay, az;[/FONT][/COLOR]
[COLOR=#000000][FONT=Consolas]int16_t gx, gy, gz;[/FONT][/COLOR]
[COLOR=#000000][FONT=Consolas]int16_t mx, my, mz;[/FONT][/COLOR]
[COLOR=#000000][FONT=Consolas]double temp;[/FONT][/COLOR]
[COLOR=#000000][FONT=Consolas] [/FONT][/COLOR]
[COLOR=#000000][FONT=Consolas]#define LED_PIN 13[/FONT][/COLOR]
[COLOR=#000000][FONT=Consolas]bool blinkState = false;[/FONT][/COLOR]
[COLOR=#000000][FONT=Consolas] [/FONT][/COLOR]
[COLOR=#000000][FONT=Consolas]// this method is just used to collect different setSlave operations[/FONT][/COLOR]
[COLOR=#000000][FONT=Consolas]void setSlaveControl(uint8_t slaveID){[/FONT][/COLOR]
[COLOR=#000000][FONT=Consolas]    mpu6050.setSlaveEnabled(slaveID, true);[/FONT][/COLOR]
[COLOR=#000000][FONT=Consolas]    mpu6050.setSlaveWordByteSwap(slaveID, false);[/FONT][/COLOR]
[COLOR=#000000][FONT=Consolas]    mpu6050.setSlaveWriteMode(slaveID, false);[/FONT][/COLOR]
[COLOR=#000000][FONT=Consolas]    mpu6050.setSlaveWordGroupOffset(slaveID, false);[/FONT][/COLOR]
[COLOR=#000000][FONT=Consolas]    mpu6050.setSlaveDataLength(slaveID, 2);[/FONT][/COLOR]
[COLOR=#000000][FONT=Consolas]}[/FONT][/COLOR]
[COLOR=#000000][FONT=Consolas] [/FONT][/COLOR]
[COLOR=#000000][FONT=Consolas]void setup() {[/FONT][/COLOR]
[COLOR=#000000][FONT=Consolas]    // join I2C bus (I2Cdev library doesn't do this automatically)[/FONT][/COLOR]
[COLOR=#000000][FONT=Consolas]    Wire.begin();[/FONT][/COLOR]
[COLOR=#000000][FONT=Consolas]    // initialize serial communication[/FONT][/COLOR]
[COLOR=#000000][FONT=Consolas]    Serial.begin(9600);[/FONT][/COLOR]
[COLOR=#000000][FONT=Consolas] [/FONT][/COLOR]
[COLOR=#000000][FONT=Consolas]    Serial.println("Initializing I2C devices...");[/FONT][/COLOR]
[COLOR=#000000][FONT=Consolas] [/FONT][/COLOR]
[COLOR=#000000][FONT=Consolas]    mpu6050.initialize();[/FONT][/COLOR]
[COLOR=#000000][FONT=Consolas]    if (mpu6050.testConnection()){[/FONT][/COLOR]
[COLOR=#000000][FONT=Consolas]      Serial.println("MPU6050 connection successful");[/FONT][/COLOR]
[COLOR=#000000][FONT=Consolas]    }[/FONT][/COLOR]
[COLOR=#000000][FONT=Consolas]    else {[/FONT][/COLOR]
[COLOR=#000000][FONT=Consolas]      Serial.println("MPU6050 connection failed");[/FONT][/COLOR]
[COLOR=#000000][FONT=Consolas]    }[/FONT][/COLOR]
[COLOR=#000000][FONT=Consolas] [/FONT][/COLOR]
[COLOR=#000000][FONT=Consolas]    // configuration of the compass module[/FONT][/COLOR]
[COLOR=#000000][FONT=Consolas]    // activate the I2C bypass to directly access the Sub I2C [/FONT][/COLOR]
[COLOR=#000000][FONT=Consolas]    mpu6050.setI2CMasterModeEnabled(0);[/FONT][/COLOR]
[COLOR=#000000][FONT=Consolas]    mpu6050.setI2CBypassEnabled(1);[/FONT][/COLOR]
[COLOR=#000000][FONT=Consolas] [/FONT][/COLOR]
[COLOR=#000000][FONT=Consolas]    if (hmc5883l.testConnection()) {[/FONT][/COLOR]
[COLOR=#000000][FONT=Consolas]        Serial.println("HMC5883l connection successful");[/FONT][/COLOR]
[COLOR=#000000][FONT=Consolas]        hmc5883l.initialize();[/FONT][/COLOR]
[COLOR=#000000][FONT=Consolas] [/FONT][/COLOR]
[COLOR=#000000][FONT=Consolas]        // unfourtunally [/FONT][/COLOR]
[COLOR=#000000][FONT=Consolas]        // hmc5883l.setMode(HMC5883L_MODE_CONTINUOUS); [/FONT][/COLOR]
[COLOR=#000000][FONT=Consolas]        // does not work correctly. I used the following command to [/FONT][/COLOR]
[COLOR=#000000][FONT=Consolas]        // "manually" switch on continouse measurements[/FONT][/COLOR]
[COLOR=#000000][FONT=Consolas]        I2Cdev::writeByte(HMC5883L_DEFAULT_ADDRESS,[/FONT][/COLOR]
[COLOR=#000000][FONT=Consolas]                          HMC5883L_RA_MODE,[/FONT][/COLOR]
[COLOR=#000000][FONT=Consolas]                          HMC5883L_MODE_CONTINUOUS);[/FONT][/COLOR]
[COLOR=#000000][FONT=Consolas] [/FONT][/COLOR]
[COLOR=#000000][FONT=Consolas]        // the HMC5883l is configured now, we switch back to the MPU 6050[/FONT][/COLOR]
[COLOR=#000000][FONT=Consolas]        mpu6050.setI2CBypassEnabled(0);[/FONT][/COLOR]
[COLOR=#000000][FONT=Consolas] [/FONT][/COLOR]
[COLOR=#000000][FONT=Consolas]        // X axis word[/FONT][/COLOR]
[COLOR=#000000][FONT=Consolas]        mpu6050.setSlaveAddress(0, HMC5883L_DEFAULT_ADDRESS | 0x80); [/FONT][/COLOR]
[COLOR=#000000][FONT=Consolas]        mpu6050.setSlaveRegister(0, HMC5883L_RA_DATAX_H);[/FONT][/COLOR]
[COLOR=#000000][FONT=Consolas]        setSlaveControl(0);[/FONT][/COLOR]
[COLOR=#000000][FONT=Consolas] [/FONT][/COLOR]
[COLOR=#000000][FONT=Consolas]        // Y axis word[/FONT][/COLOR]
[COLOR=#000000][FONT=Consolas]        mpu6050.setSlaveAddress(1, HMC5883L_DEFAULT_ADDRESS | 0x80);[/FONT][/COLOR]
[COLOR=#000000][FONT=Consolas]        mpu6050.setSlaveRegister(1, HMC5883L_RA_DATAY_H);[/FONT][/COLOR]
[COLOR=#000000][FONT=Consolas]        setSlaveControl(1);[/FONT][/COLOR]
[COLOR=#000000][FONT=Consolas] [/FONT][/COLOR]
[COLOR=#000000][FONT=Consolas]        // Z axis word[/FONT][/COLOR]
[COLOR=#000000][FONT=Consolas]        mpu6050.setSlaveAddress(2, HMC5883L_DEFAULT_ADDRESS | 0x80);[/FONT][/COLOR]
[COLOR=#000000][FONT=Consolas]        mpu6050.setSlaveRegister(2, HMC5883L_RA_DATAZ_H);[/FONT][/COLOR]
[COLOR=#000000][FONT=Consolas]        setSlaveControl(2);[/FONT][/COLOR]
[COLOR=#000000][FONT=Consolas] [/FONT][/COLOR]
[COLOR=#000000][FONT=Consolas]        mpu6050.setI2CMasterModeEnabled(1);[/FONT][/COLOR]
[COLOR=#000000][FONT=Consolas]    } else {[/FONT][/COLOR]
[COLOR=#000000][FONT=Consolas]        Serial.println("HMC5883l connection failed");[/FONT][/COLOR]
[COLOR=#000000][FONT=Consolas]    }[/FONT][/COLOR]
[COLOR=#000000][FONT=Consolas] [/FONT][/COLOR]
[COLOR=#000000][FONT=Consolas]    // activate temperature MPU 6050 sensor[/FONT][/COLOR]
[COLOR=#000000][FONT=Consolas]    mpu6050.setTempSensorEnabled(true);[/FONT][/COLOR]
[COLOR=#000000][FONT=Consolas] [/FONT][/COLOR]
[COLOR=#000000][FONT=Consolas]    // configure Arduino LED for[/FONT][/COLOR]
[COLOR=#000000][FONT=Consolas]    pinMode(LED_PIN, OUTPUT);[/FONT][/COLOR]
[COLOR=#000000][FONT=Consolas]}[/FONT][/COLOR]
[COLOR=#000000][FONT=Consolas] [/FONT][/COLOR]
[COLOR=#000000][FONT=Consolas]void loop() {[/FONT][/COLOR]
[COLOR=#000000][FONT=Consolas] [/FONT][/COLOR]
[COLOR=#000000][FONT=Consolas]    // read raw heading measurements from device[/FONT][/COLOR]
[COLOR=#000000][FONT=Consolas]    mx=mpu6050.getExternalSensorWord(0);[/FONT][/COLOR]
[COLOR=#000000][FONT=Consolas]    my=mpu6050.getExternalSensorWord(2);[/FONT][/COLOR]
[COLOR=#000000][FONT=Consolas]    mz=mpu6050.getExternalSensorWord(4);[/FONT][/COLOR]
[COLOR=#000000][FONT=Consolas] [/FONT][/COLOR]
[COLOR=#000000][FONT=Consolas]   // To calculate heading in degrees. 0 degree indicates North[/FONT][/COLOR]
[COLOR=#000000][FONT=Consolas]    float heading = atan2(my, mx);[/FONT][/COLOR]
[COLOR=#000000][FONT=Consolas]    if(heading < 0)[/FONT][/COLOR]
[COLOR=#000000][FONT=Consolas]      heading += 2 * M_PI;[/FONT][/COLOR]
[COLOR=#000000][FONT=Consolas] [/FONT][/COLOR]
[COLOR=#000000][FONT=Consolas]   // read raw accel/gyro measurements from device[/FONT][/COLOR]
[COLOR=#000000][FONT=Consolas]   mpu6050.getMotion6(&ax, &ay, &az, &gx, &gy, &gz);[/FONT][/COLOR]
[COLOR=#000000][FONT=Consolas] [/FONT][/COLOR]
[COLOR=#000000][FONT=Consolas]   // see MPU 6050 datasheet page 31 of 47[/FONT][/COLOR]
[COLOR=#000000][FONT=Consolas]   temp=((double) mpu6050.getTemperature()) /340.0 + 36.53;[/FONT][/COLOR]
[COLOR=#000000][FONT=Consolas] [/FONT][/COLOR]
[COLOR=#000000][FONT=Consolas]   Serial.print(ax); Serial.print("\t");[/FONT][/COLOR]
[COLOR=#000000][FONT=Consolas]   Serial.print(ay); Serial.print("\t");[/FONT][/COLOR]
[COLOR=#000000][FONT=Consolas]   Serial.print(az); Serial.print("|\t");[/FONT][/COLOR]
[COLOR=#000000][FONT=Consolas]   Serial.print(gx); Serial.print("\t");[/FONT][/COLOR]
[COLOR=#000000][FONT=Consolas]   Serial.print(gy); Serial.print("\t");[/FONT][/COLOR]
[COLOR=#000000][FONT=Consolas]   Serial.print(gz); Serial.print("|\t");[/FONT][/COLOR]
[COLOR=#000000][FONT=Consolas]   Serial.print(heading * 180/M_PI); Serial.print("|\t");[/FONT][/COLOR]
[COLOR=#000000][FONT=Consolas]   Serial.println(temp,3);[/FONT][/COLOR]
[COLOR=#000000][FONT=Consolas] [/FONT][/COLOR]
[COLOR=#000000][FONT=Consolas]    // blink LED to indicate activity[/FONT][/COLOR]
[COLOR=#000000][FONT=Consolas]    blinkState = !blinkState;[/FONT][/COLOR]
[COLOR=#000000][FONT=Consolas]    digitalWrite(LED_PIN, blinkState);[/FONT][/COLOR]
[COLOR=#000000][FONT=Consolas]}[/FONT][/COLOR]
It works for me
thanks every one ++++