Bs2 Tank w/HM55B
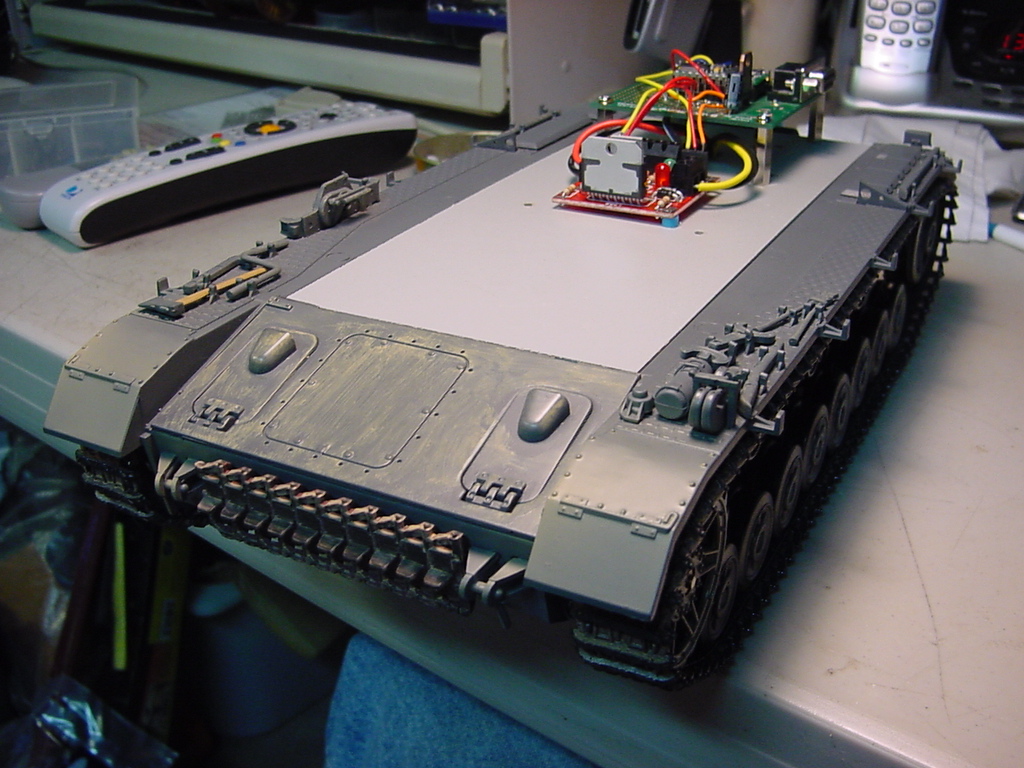
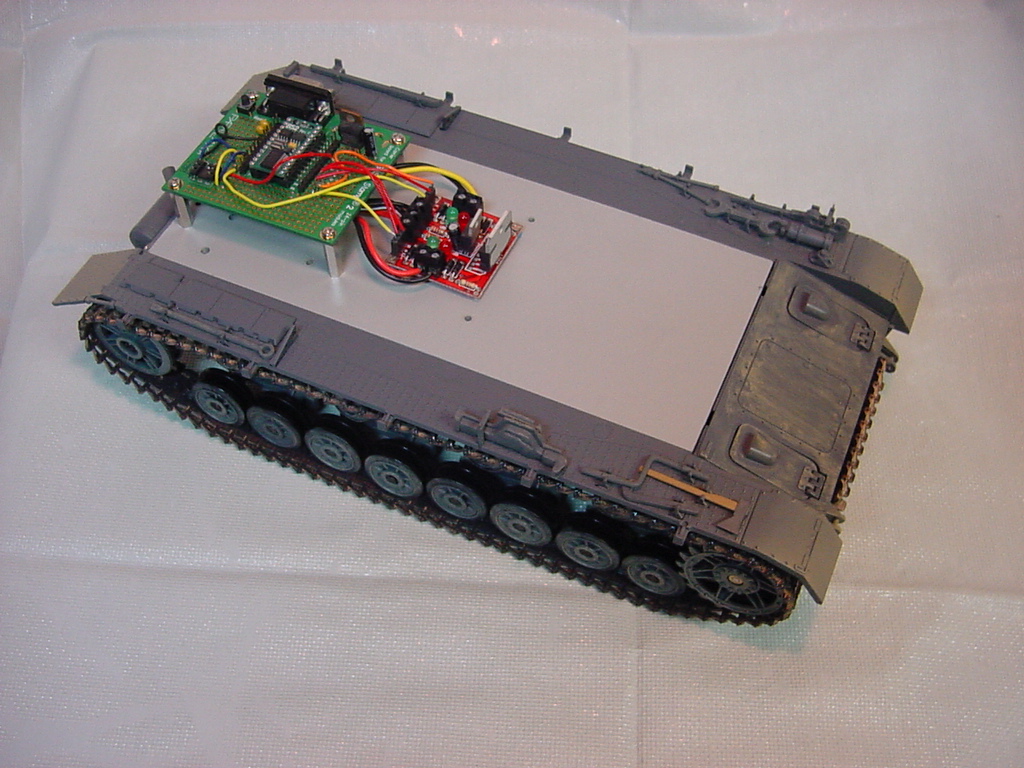
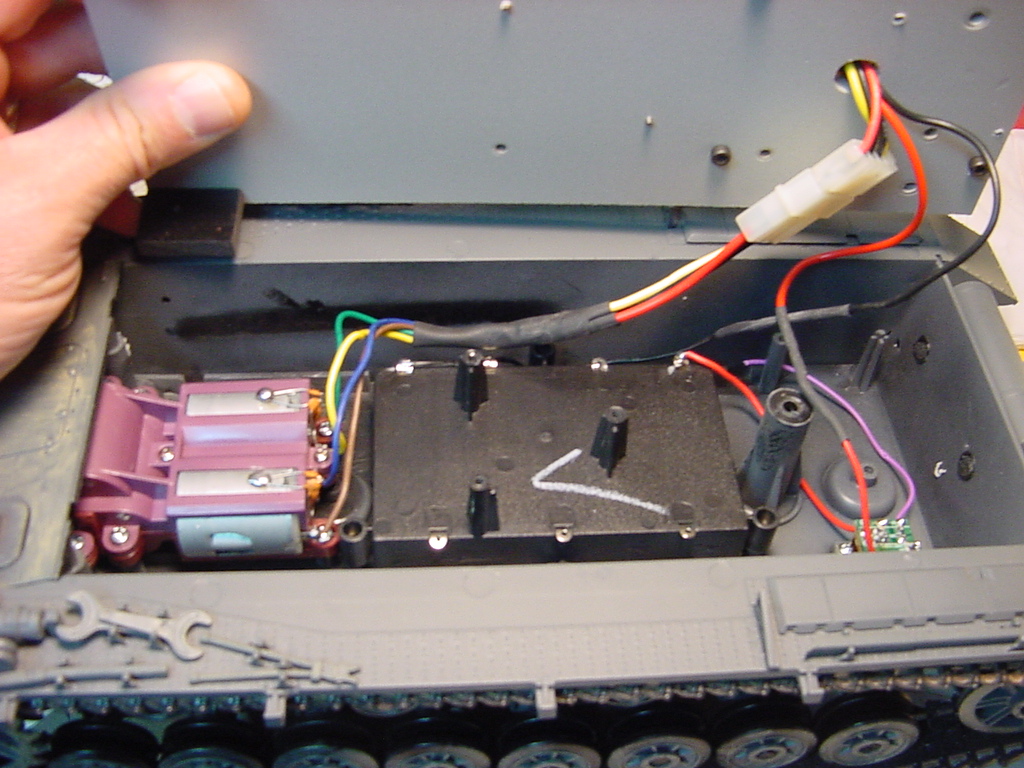
Hi Everyone, I have been away from the forum for awhile, but I'm back·and playing with the Bs2 again. Here are some pics of·my lastest project.
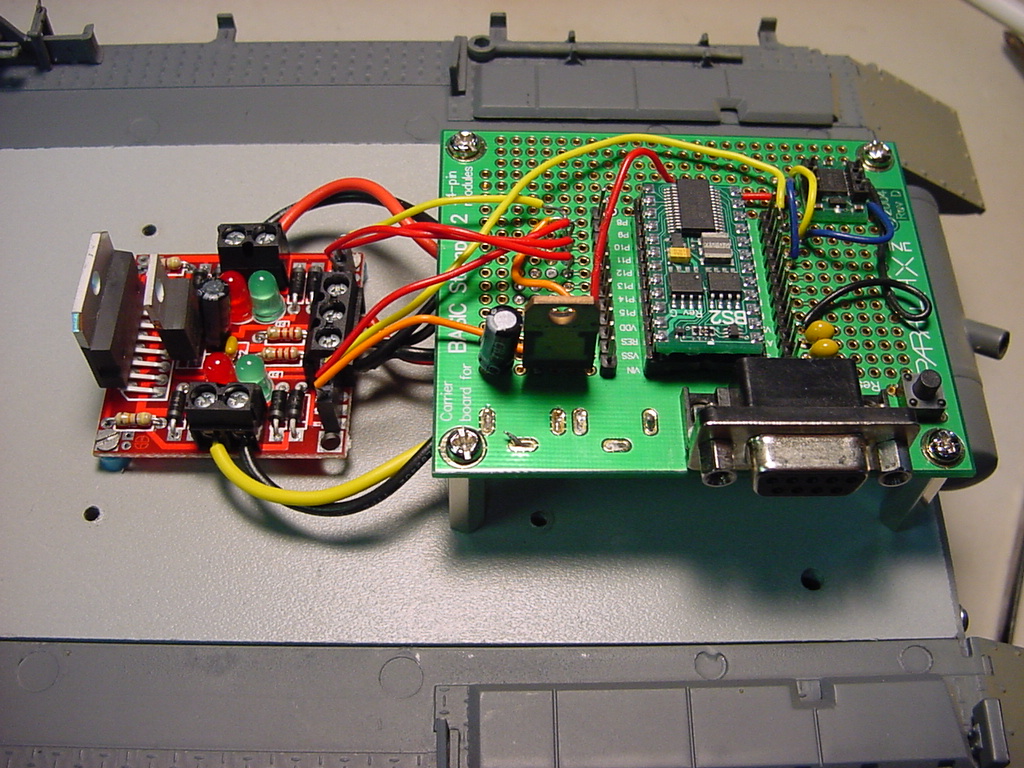
Notice the HM55B is as far as I can get it from the drive motors, I even raised the carrier board 1 inch. This gets it out of the range of the EMF of the DC motors. I wont tell how long it took me to figure out that there was emf interference and not my code (-:·· anyway it works very well now. The robot is programmed to seek magnetic north and move in that direction for a few feet and check for north again etc..
Tom
·
▔▔▔▔▔▔▔▔▔▔▔▔▔▔▔▔▔▔▔▔▔▔▔▔
Robot vision is the the future, and Vision will take us there.
http://www.youtube.com/watch?v=gbf0zaxWjvI
Post Edited (T0m) : 11/25/2007 11:55:54 PM GMT


Comments
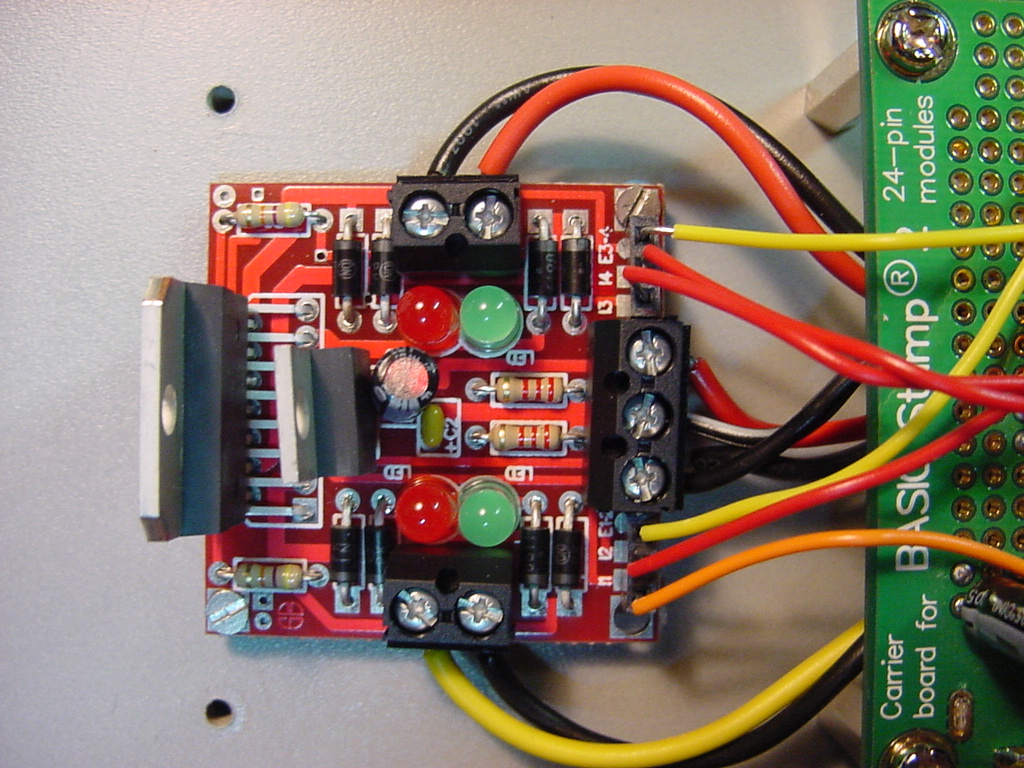
Tom. What is the motor driver you are useing ?
Will you post any code?
Rob7
The motor driver is a Solarbotics L298 kit. The code is a combination of cut and paste and luck. I am not much of a programmer. Here it is. The backward subroutine is not needed, but it is there for future use.
'{$STAMP BS2}
' {$PBASIC 2.5}
'Sample Code for the Parallax BS2 using the
'Solarbotics CMD Motor driver
'Contributions
'Parallax Inc.
'Solarbotics Ltd., 2006
'Dan Gates June 12 2006
'Thomas Amara Nov. 2007
'
Program Description
' This CMD Sample program is for testing your CMD motor driver with a Basic
' Stamp2 or compatable.
' First we declare the motor connection pins in the "Pin Allocation category
' and create a temp register for good measure.
' Then in MAIN we turn OFF both motor enable lines for about 1 second and
' Proceed to turn each motor on in the following sequence as if they were
' driving a robot:
' Forward, Backward, LEFT, and RIGHT each for a brief period of time (about
' two and a half seconds).
' A last we jump back to the beginning of the code and start over in a never
' ending loop.
'
'This program assumes that you connect the CMD to the following BS2 pins;
'Pin7 = E 1-2
'Pin8 = E 3-4
'Pin9 = L1
'Pin10= L2
'Pin11= L3
'Pin12= L4
' Be sure to connect at least 6v to the power input and connect the motors
' to the outputs.
'
Pin Allocations
'Motor control
Enable_Right CON 7 'Enable high, disable low
Enable_Left CON 8 'Enable high, disable low
'
Direction Truth Table
'L1 & L3 | L2 & L4 | M1,M2,M3,M4 Outputs
'
|
|
L1_Direction CON 9 ' HIGH | HIGH | Outputs = High (Motor Break)
L2_Direction CON 10 ' LOW | LOW | Outputs = LOW (Motor Coast)
L3_Direction CON 11 ' HIGH | LOW | Current flows POS.(Direction 1)
L4_Direction CON 12 ' LOW | HIGH | Current flows Neg.(Direction 2)
DinDout PIN 6 ' P6 transceives to/from Din/Dout
Clk PIN 5 ' P5 sends pulses to HM55B's Clk
En PIN 4 ' P4 controls HM55B's /EN(ABLE)
Reset CON %0000 ' Reset command for HM55B
Measure CON %1000 ' Start measurement command
Report CON %1100 ' Get status/axis values command
Ready CON %1100 ' 11 -> Done, 00 -> no errors
NegMask CON %1111100000000000 ' For 11-bit negative to 16-bits
x VAR Word ' x-axis data
y VAR Word ' y-axis data
status VAR Nib ' Status flags
angle VAR Word ' Store angle measurement
'
Temp VAR Word 'Temp register for manipulating bits
'
Start of main program
MAIN:
DO
GOSUB Compass_Get_Axes ' Get x, and y values
angle = x ATN -y ' Convert x and y to brads
angle = angle */ 360 ' Convert brads to degrees
PAUSE 150 ' Debug delay for slower PCs
DEBUG HOME, DEC angle, " degrees", CLREOL
IF angle >355 AND angle <360 THEN GOSUB forward
IF angle >0 AND angle <5 THEN GOSUB Forward
IF angle >1 AND angle <180 THEN GOSUB left
IF angle >179 AND angle <358 THEN GOSUB right
LOOP 'Go back and start again
'
Subroutines
FORWARD:
HIGH Enable_Right
HIGH Enable_Left
LOW L1_Direction
HIGH L2_Direction
LOW L3_Direction
HIGH L4_Direction
PAUSE 200
LOW Enable_Right
LOW Enable_Left
RETURN
BACKWARD:
HIGH Enable_Right
HIGH Enable_Left
LOW L1_Direction
HIGH L2_Direction
LOW L3_Direction
HIGH L4_Direction
PAUSE 40
LOW Enable_Right
LOW Enable_Left
RETURN
LEFT:
HIGH Enable_Right
HIGH Enable_Left
LOW L1_Direction
HIGH L2_Direction
HIGH L3_Direction
LOW L4_Direction
PAUSE 8
LOW Enable_Right
LOW Enable_Left
RETURN
RIGHT:
HIGH Enable_Right
HIGH Enable_Left
HIGH L1_Direction
LOW L2_Direction
LOW L3_Direction
HIGH L4_Direction
PAUSE 8
LOW Enable_Right
LOW Enable_Left
RETURN
Compass_Get_Axes: ' Compass module subroutine
HIGH En: LOW En ' Send reset command to HM55B
SHIFTOUT DinDout,clk,MSBFIRST,[noparse][[/noparse]Reset\4]
HIGH En: LOW En ' HM55B start measurement command
SHIFTOUT DinDout,clk,MSBFIRST,[noparse][[/noparse]Measure\4]
status = 0 ' Clear previous status flags
DO ' Status flag checking loop
HIGH En: LOW En ' Measurement status command
SHIFTOUT DinDout,clk,MSBFIRST,[noparse][[/noparse]Report\4]
SHIFTIN DinDout,clk,MSBPOST,[noparse][[/noparse]Status\4] ' Get Status
LOOP UNTIL status = Ready ' Exit loop when status is ready
SHIFTIN DinDout,clk,MSBPOST,[noparse][[/noparse]x\11,y\11] ' Get x & y axis values
HIGH En ' Disable module
IF (y.BIT10 = 1) THEN y = y | NegMask ' Store 11-bits as signed word
IF (x.BIT10 = 1) THEN x = x | NegMask ' Repeat for other axis
RETURN
'STOP ' Use STOP To Prevent State Change
▔▔▔▔▔▔▔▔▔▔▔▔▔▔▔▔▔▔▔▔▔▔▔▔
Robot vision is the the future, and Vision will take us there.
http://www.youtube.com/watch?v=gbf0zaxWjvI
Post Edited (T0m) : 11/26/2007 12:10:52 AM GMT
Thank's for the info
Rob7
If you work on this code, I would love to have the motors ramp up to speed rather then just turn on and off. Just a thought.
Thanks
Tom
▔▔▔▔▔▔▔▔▔▔▔▔▔▔▔▔▔▔▔▔▔▔▔▔
Robot vision is the the future, and Vision will take us there.
http://www.youtube.com/watch?v=gbf0zaxWjvI
I put the HM55B on my christmas list this year.
"You would like to have your bot to slowly ramp from a stop to full speed then ramp down to stop.
Compass_Get_Axes then ramp back up to full speed then ramp down to stop.
Continue in a loop" ?
Rob7
Thanks
Tom
▔▔▔▔▔▔▔▔▔▔▔▔▔▔▔▔▔▔▔▔▔▔▔▔
Robot vision is the the future, and Vision will take us there.
http://www.youtube.com/watch?v=gbf0zaxWjvI
Enjoyed the images of your tank, and I thought I would show you my attempts to
create something similar.
I have attahed 7 images that show how I started and where I am now.
I am using an·H-bridge control board from Jim Forkin's(Geocities) web site, which is exceptionally well designed and performs faultlessly.
My tank is·30 inches long and one foor wide. I has a cannon that fires pellets. The turret, of course rotates.
I have great plans for it. Now I am in the process of increasing my I/O ports to accomodate for 8 IR sensors(2 on each side). I intend to
use a color sensor·(I have a TCS230 from Parallax) and I intend to use it to detect a red color. Once it does, to aim and fire a pelet!!!!
Ambitious project but the little time that I have I spend it in writing some programs for it.
I would love to exchange ideas withn you.
John
Tom
▔▔▔▔▔▔▔▔▔▔▔▔▔▔▔▔▔▔▔▔▔▔▔▔
Robot vision is the the future, and Vision will take us there.
http://www.youtube.com/watch?v=gbf0zaxWjvI
look at the DIRS command you can really simplify your movement commands leaving room for more programing.
Added: can you post a link for the H-bridge site, I can't find it.
▔▔▔▔▔▔▔▔▔▔▔▔▔▔▔▔▔▔▔▔▔▔▔▔
"A complex design is the sign of an inferior designer." - Jamie Hyneman, Myth Buster
DGSwaner
Post Edited (Dgswaner) : 11/27/2007 4:22:14 AM GMT
Here is the link http://www.solarbotics.com/products/k_cmd/resources/
▔▔▔▔▔▔▔▔▔▔▔▔▔▔▔▔▔▔▔▔▔▔▔▔
Robot vision is the the future, and Vision will take us there.
http://www.youtube.com/watch?v=gbf0zaxWjvI