Interface to a cheap LED badge display
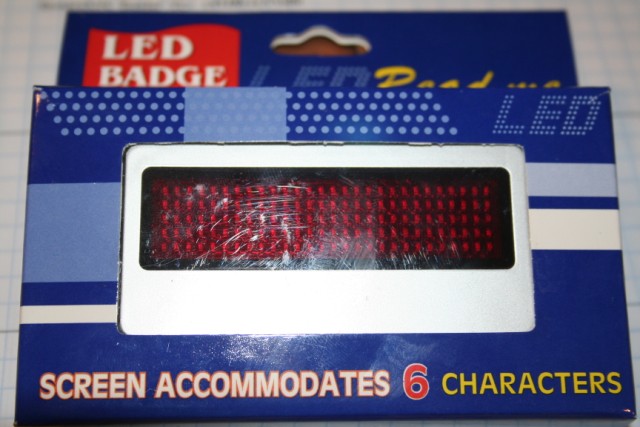
Every time my dad goes on a business trip, he always brings home tons of "chotchkies". Most of it is just stuff like silly putty, pens, and other random company branded items. But, this year was different. I got the usual stuff, but something special  was in this years batch of random items:

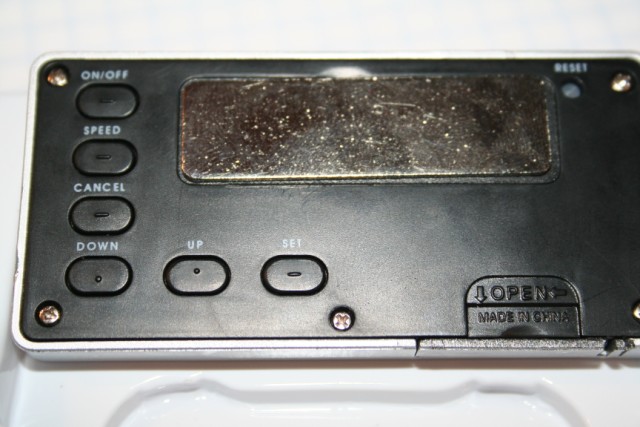
So, this 'display badge' is cool in itself. It's basically a programmable dot matrix display that scrolls text. The controls were simple enough, a button that makes the display enter set mode and move to the next character, and two others to scroll up or down through the character list. Here's a pic of the back of the badge:

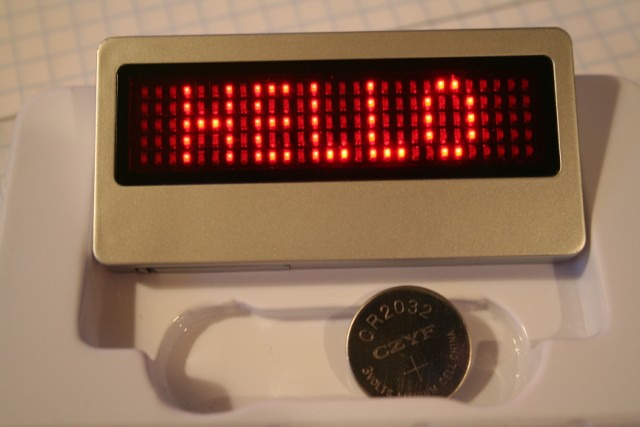
A pic from when it's on:

So, this got me thinking...I decided upon a computer interface that would take a string of text and output it to the display. But first I had to check out how the thing works. When I looked inside the display, it seemed simple enough to interface. All I had to do was hook a couple of transistors up the switches and control them with my BS2...WRONG! As it turns out, a pair of buttons share a common pin and when pressed, connect that common pin to another pin on the microcontroller. So, I needed a different approach (early testing with transistors as switches didn't turn out so well). I checked my IC stock and found a CD4066 Quad Bilateral Switch. It was the perfect chip for the job. So, I hooked everything up on a breadboard and wrote a simple program to make the display enter set mode and pulse the "up" pin as many times needed to get a certain character to display. It worked, but it needed more.
I soon had it working using a 20 byte array to hold the characters to be displayed, and a combination of LOOKUP and LOOKDOWN tables to make a crude character map. Basically the program scanned the array for the number of valid characters (all unused characters were set to zero), looked up each character in the LOOKDOWN table, looked up the pulses to get to that character in the LOOKUP table, did some math, and pulsed the pin to get the character to display. I had to use this approach because the characters that the display can show don't go in ASCII order and they are quite limited; there's 58 possible characters it can display. The difficult part about all this was that when the display moves to the next character, instead of going back to "A" (the starting character) it keeps the previous character. This is where the 'do some math' comes in handy. The math determines whether the next character comes before or after the previous one, or if it is the same. If the character is after, it simply pulses the remaining number of times to get to that character. If it comes before the previous character, the stamp pulses the display through all possible characters and starts from "A". If the character is the same as the previous one, it just skips to the next letter with no pulses.
The input from the computer comes from the DEBUGIN command. It takes individual characters and maps them to the 20 byte array mentioned above. When a caret (^) is entered, the stamp starts outputting characters to the display. This is so one can have a text string less that 20 characters go out to the display. The caret was chosen as it isn't a character the display can output.
I will attach the code in the next post (I'm at the 5 attachment limit on this one). If you need explanation of any part just ask...
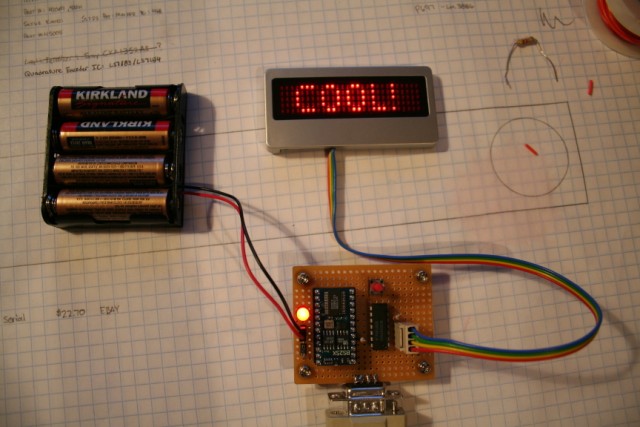
So the final design came out like this:

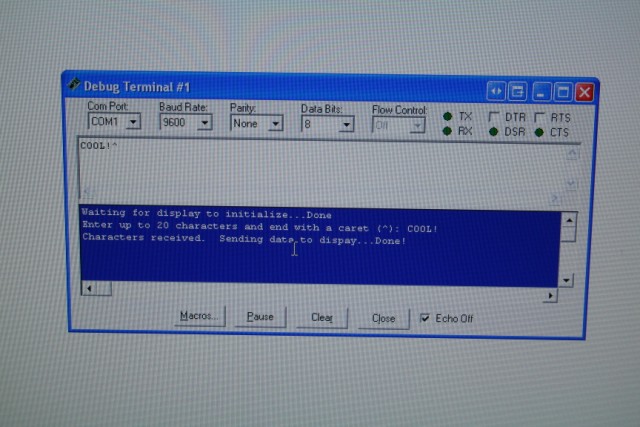
Here's what the debug terminal looks like:

I did this project mainly because it tested my programming abilities (I'm only 16, so I have limited knowledge of it) and it allowed me to use PBASIC 2.5 for the first time. I had never used some of the commands (LOOKUP and LOOKDOWN) or used arrays before, so it was a good chance to try them out too. I'm one of those people who just can't leave anything the way it is. I always need to change it and make it better...
Let me know what you guys think and if you have any suggestions.
On and BTW, the next step is wireless programming! More on that later...
-Dan
Post Edited (Ductapemaster) : 5/28/2007 5:54:11 PM GMT
 was in this years batch of random items:
So, this 'display badge' is cool in itself. It's basically a programmable dot matrix display that scrolls text. The controls were simple enough, a button that makes the display enter set mode and move to the next character, and two others to scroll up or down through the character list. Here's a pic of the back of the badge:
A pic from when it's on:
So, this got me thinking...I decided upon a computer interface that would take a string of text and output it to the display. But first I had to check out how the thing works. When I looked inside the display, it seemed simple enough to interface. All I had to do was hook a couple of transistors up the switches and control them with my BS2...WRONG! As it turns out, a pair of buttons share a common pin and when pressed, connect that common pin to another pin on the microcontroller. So, I needed a different approach (early testing with transistors as switches didn't turn out so well). I checked my IC stock and found a CD4066 Quad Bilateral Switch. It was the perfect chip for the job. So, I hooked everything up on a breadboard and wrote a simple program to make the display enter set mode and pulse the "up" pin as many times needed to get a certain character to display. It worked, but it needed more.
I soon had it working using a 20 byte array to hold the characters to be displayed, and a combination of LOOKUP and LOOKDOWN tables to make a crude character map. Basically the program scanned the array for the number of valid characters (all unused characters were set to zero), looked up each character in the LOOKDOWN table, looked up the pulses to get to that character in the LOOKUP table, did some math, and pulsed the pin to get the character to display. I had to use this approach because the characters that the display can show don't go in ASCII order and they are quite limited; there's 58 possible characters it can display. The difficult part about all this was that when the display moves to the next character, instead of going back to "A" (the starting character) it keeps the previous character. This is where the 'do some math' comes in handy. The math determines whether the next character comes before or after the previous one, or if it is the same. If the character is after, it simply pulses the remaining number of times to get to that character. If it comes before the previous character, the stamp pulses the display through all possible characters and starts from "A". If the character is the same as the previous one, it just skips to the next letter with no pulses.
The input from the computer comes from the DEBUGIN command. It takes individual characters and maps them to the 20 byte array mentioned above. When a caret (^) is entered, the stamp starts outputting characters to the display. This is so one can have a text string less that 20 characters go out to the display. The caret was chosen as it isn't a character the display can output.
I will attach the code in the next post (I'm at the 5 attachment limit on this one). If you need explanation of any part just ask...
So the final design came out like this:
Here's what the debug terminal looks like:
I did this project mainly because it tested my programming abilities (I'm only 16, so I have limited knowledge of it) and it allowed me to use PBASIC 2.5 for the first time. I had never used some of the commands (LOOKUP and LOOKDOWN) or used arrays before, so it was a good chance to try them out too. I'm one of those people who just can't leave anything the way it is. I always need to change it and make it better...
Let me know what you guys think and if you have any suggestions.
On and BTW, the next step is wireless programming! More on that later...
-Dan
Post Edited (Ductapemaster) : 5/28/2007 5:54:11 PM GMT


Comments
It's fully commented, so understanding what's going on should be easy
P.S. I would love to get a video of this in action (It's pretty cool to watch) but sadly, I don't have a video camera and neither do my parents. Sorry!
▔▔▔▔▔▔▔▔▔▔▔▔▔▔▔▔▔▔▔▔▔▔▔▔
Post Edited (Ductapemaster) : 5/28/2007 8:19:46 AM GMT
phil
Great job!
Rob7
I would love to find one, but the only hindering fact is that the box is very sparse. It contains no indication as to a manufacturer. The closest thing to that is "Made in China". Other than that, the box just has all the features of the display.
I will do some googling for some more info and possible where to buy one. I wish I had a schematic. It would have made my job a bit easier, but thats what hacking is all about. I will post a pic of the insides of the thing sometime tonight.
Also, the interesting thing is that the box nor the display is branded by a company in any way. Usually these things have company logos all over them.
Thanks for the comments guys!
-Dan
http://www.z-import.net/ZHotnewitems.html
The badge seems to be a different color than the one I have, and it says "Read Me" on the front, but no big deal. Also, here are the pics I promised...
Front:
Back:
Hehe...they spelled 'power' wrong:
Well, good luck if you choose to buy them and try this for yourself. Let me know if anybody needs any info.
Oh, and sorry for the horrendous flash spots on the pictures...I'm still learning how to use the camera!
-Dan
Post Edited (Ductapemaster) : 5/30/2007 6:12:28 AM GMT
I attached the revised code.
Also, I found out that I have my grandparents video camera hanging around and I will post up a video (on youtube) probably tomorrow of this thing in action. Beforehand I have some soldering to do however...the new button needs wires.
-Dan
Very cool hack on the freebie display badge. It came out great. Can't wait for the video. If the text is long enough, how does it scroll?
Thanks for the source too.
▔▔▔▔▔▔▔▔▔▔▔▔▔▔▔▔▔▔▔▔▔▔▔▔
Whit+
"We keep moving forward, opening new doors, and doing new things, because we're curious and curiosity keeps leading us down new paths." - Walt Disney
The display scroll at four different speed, selectable by a button on the back. Eventually I will add in some code for selectable speeds in the debug terminal, but finals, SAT 2's and the ACT are fast approaching so this is on hold for a bit...
I'll try and make the video tonight when I'm done with my homework/studying duties
Sure. I like to not be so stingy with my code so people can understand how my project works...as long as they don't steal it I'm fine with them looking at it. I have had countless time where just looking at someone elses code gives me some sort of inspiration or the solution to a problem.
-Dan
-Dan
Check this out - http://www.pro-lite.com/specialty-xpression.htm
Look at the download section too! Don't know what they cost though.
▔▔▔▔▔▔▔▔▔▔▔▔▔▔▔▔▔▔▔▔▔▔▔▔
Whit+
"We keep moving forward, opening new doors, and doing new things, because we're curious and curiosity keeps leading us down new paths." - Walt Disney
Post Edited (Whit) : 6/1/2007 4:18:51 AM GMT
Well, I was messing with the board tonight and I could not get the 'down' button working for over an hour, so I decided to go back to the original idea of cycling through all the letters. I can't believe it gives up on me now, after it was just working this afternoon! Darnit. Maybe I'm just missing somethign stupid.
Also, the display is having some trouble at the moment. I think it's running out of batteries...or so I hope. It's just optuptting garbage at the moment, and I didn't change the program at all. I'll buy a pack of batteries this weekend and see how it turns out. At the moment the video will have to wait until I get it working again...sorry!
Wish me and my display luck...
-Dan
Let me know what you guys think.
Thanks,
Dan
[noparse][[/noparse]Link activated by Moderator]
Post Edited By Moderator (Chris Savage (Parallax)) : 6/8/2007 2:39:04 PM GMT
great project and very well documented on the forum and the source too.
Keep up the good works. I liked the video very much.
Success,
Ed
-Dan
▔▔▔▔▔▔▔▔▔▔▔▔▔▔▔▔▔▔▔▔▔▔▔▔
Whit+
"We keep moving forward, opening new doors, and doing new things, because we're curious and curiosity keeps leading us down new paths." - Walt Disney
▔▔▔▔▔▔▔▔▔▔▔▔▔▔▔▔▔▔▔▔▔▔▔▔
Whit+
"We keep moving forward, opening new doors, and doing new things, because we're curious and curiosity keeps leading us down new paths." - Walt Disney
Enjoyed the video, Keep us posted on your progress !
Rob7
Post Edited (Rob7) : 6/10/2007 5:17:01 PM GMT