"Super-Liesl" - A P2-Controlled CNC Linear Knitting Loom
Hi,
This is about another fun project. Again it is about a knitting machine controlled by P2. I am very much fascinated, what you can do with yarn. And I was always fascinated by automated machine tools like CNC lathes.
This time the goal is to make a machine, that can make scarfs with knitting patterns.
I don't kow, if I should name this machine "Super-Liesl" or better "Cordula"?
"Cordula", because "she" is doing cordels right now. Well, I do hope, that she will learn much more. But at the moment I am quite happy, that she has mastered this first critical step, because I didn't know, if this would work at all….
"Super-Liesl" would be, because "she" is a big automated Sister of "Strick-Liesel" the German name of "Knitting Jenny".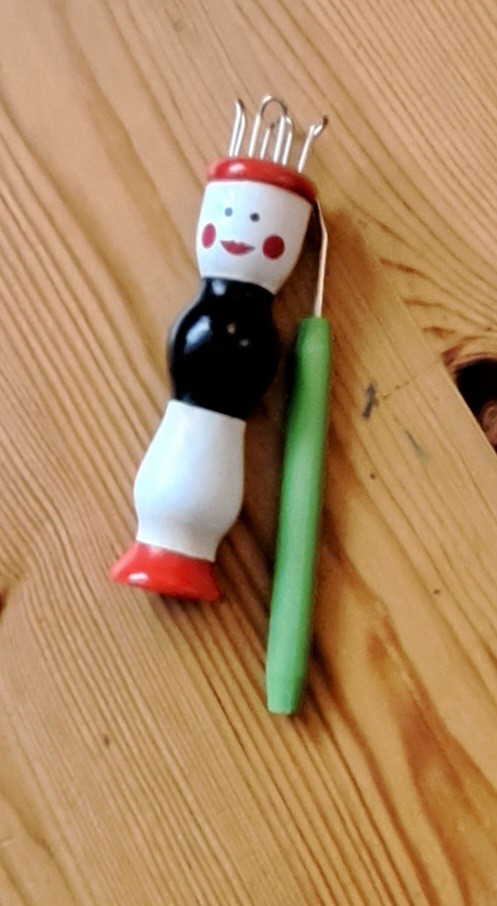
Strick-Liesl is a small form of a Knitting Loom. Which can be circular or linear. While knitting machines normally use many very special type of needles with flaps to form the stitches, with a loom, you need to do the stitches with an additional moving needle. The loom has one peg for every stich. The two rows of the loom can be used in two ways. Either you can create something hollow like a hat or you can make a fabric with plain stitches (rechte Maschen) and purls (linke Maschen). Purls than use the 2nd row of pegs.
Top view: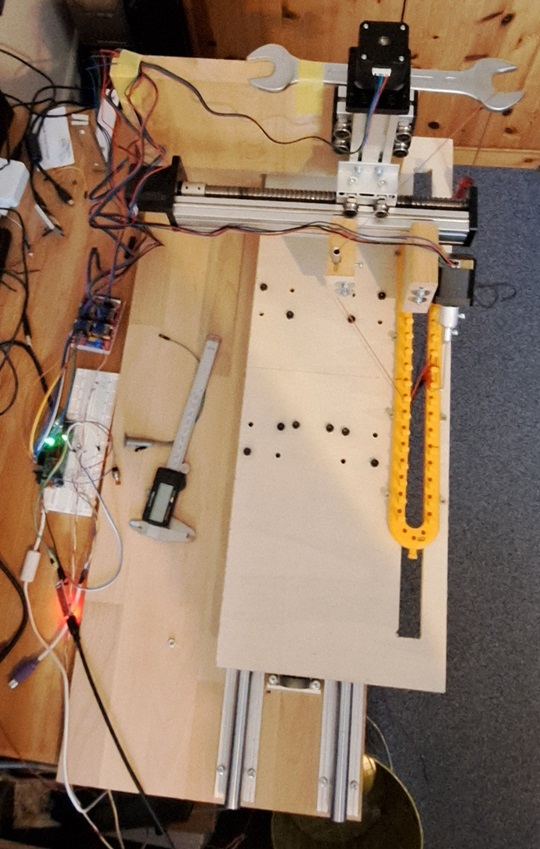
The machine consists of a P2 "Kiss Board" (Running Taqoz Forth), a "CNC-shield" with step motor controllers and the mechanics.
There are 3 axis XYZ and one rotating axle to turn the moving needle. The X-axis has about 54cm of possible travel to accommodate long looms. The orange coloured loom is mounted on a sled (X-axis), which has to have a long slot under the loom to let pass the new fabric. X uses a acme thread with pitch 8mm.
Y and Z are two linear actuators with ball screws, which I bought ready made. They have 5mm pitch.
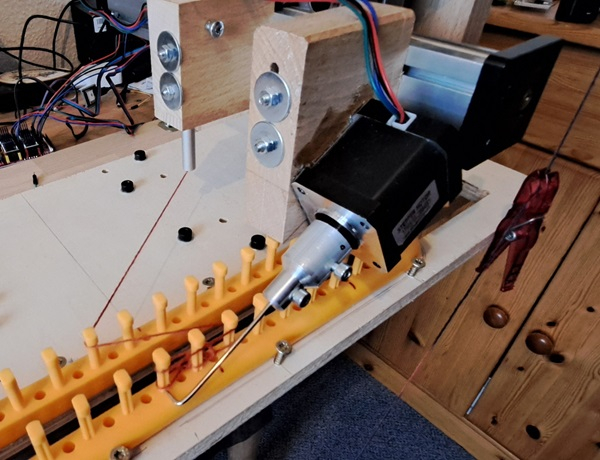
The rotating axle is for the needle tool. The idea was to make it in a way, that in can handle both rows of pegs. So the needle has an angle of 30 degrees to horizontal. -It was a great question, if it would be possible to handle the yarn with such needle. The needle is an old 2mm steel needle for fine hand knitting. It has a good balance of stiffness. If there is a crash, the needle bends and can be bended back later. - Has happened....
The Y-Z table holds a second tool, which feeds the yarn around the pegs. It is just a tube with 6mm inner diameter. The red peg on the right hand side of the picture acts as a weight to give tension on the yarn and also this weight will pull back the yarn as needed, when the tube or the sled moves.
Each row of stitches needs 3 separate operations:
- Feed fresh yarn around the tops of the pegs (this operation will allow variations for patterns later).
- Do the stitches on every peg: Lift the old sling over the new yarn and the head of the peg towards the middle of the loom.
- Push down the new sling to the bottom of the peg.
There are two major difficulties in the process:
The yarn has it's own will and life. A human knitter does use his eyes very much to check and correct, while the machine must work blindly.
Knitting is not at all forgiving. If the yarn splits up or if the moving needle did not find the loop at all or if the needle takes both new and old slings, there will be an issue from now on for the next rows too. So you need very high reliability.
Status is at the moment, that Super-Liesel can do rows of 3 stitches. After 8 rows the weight, which provides tension onto the yarn has to be shifted manually. Reliability seems to be quite good. 150 stitches without failure. Speed is low, about 1 minute for one row of 3 stitches. Tested with yarn 2.5mm and 4mm.
A product: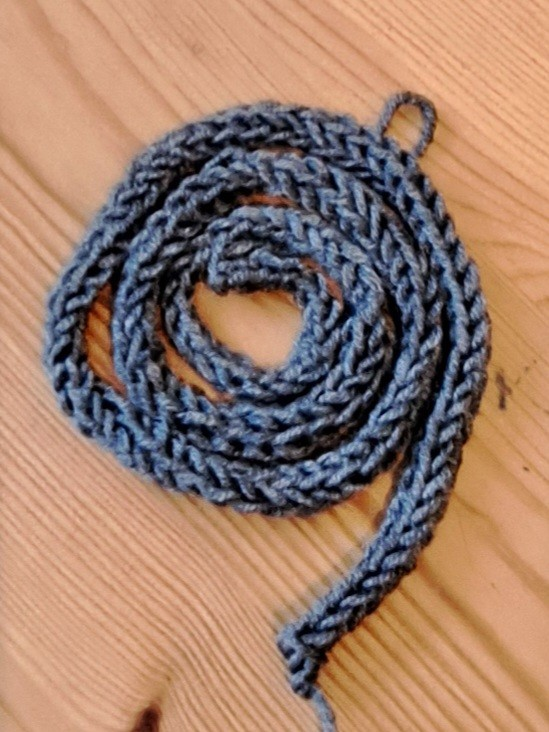
A little video of the workings. 
Have fun!
Christof


Comments
....Video added.
So now it can do stitches on the back row, which shall give purls one day. The pattern is the classic "Strick-Liesl / Knitting Jenny" thingy now.

There are a some inefficient movements in this video, so timing could be improved somewhat. I had to swap the order of the stitches. Here some braided yarn is used, which does not split so easily.
It is hard to believe, how difficult it was to make the step from the one sided to this double sided work.
Most difficult is the fact, that the vertical position of the two slings on the peg is not well defined. The slings move along the peg. And they are not well separated. Perhaps I will be forced to create pegs with separate areas for the two slings.
A step further. A yarn brake which has also ability to pull back the yarn.
This type of yarn brake I find fascinating, because it has the ability to regulate the yarn tension and it "uses" the Euler-Eytelwein-formula. The yarn goes over circular hills with valleys between them. At the position of a valley there is a weight (here: some steel wire) on the yarn. If you put tension onto the yarn, this will lift the weight and this in turn will lower the angle of contact between yarn and hill. With less angle there is less friction. https://en.wikipedia.org/wiki/Capstan_equation There are 5 brakes in series, which add up their friction.
Here we want to have just a little bit more friction force, than the force of the weight of the pull back device - hook and peg. If the hook is pulled up fully, the yarn is pulled through the brakes.
So after some pause, I have resumed the project.
I had been frustrated, because I did not achieve reliability good enough. While it worked not too bad with rather thin yarn of weight 400m/100g, it did not work well with the yarn I was aiming at. Acryl is more easy than wool.
So meanwhile I designed several iterations of pegs. The picture shows the current version. It has two distinct areas for the two upper and lower slings. So their positions are defined much more clearly.
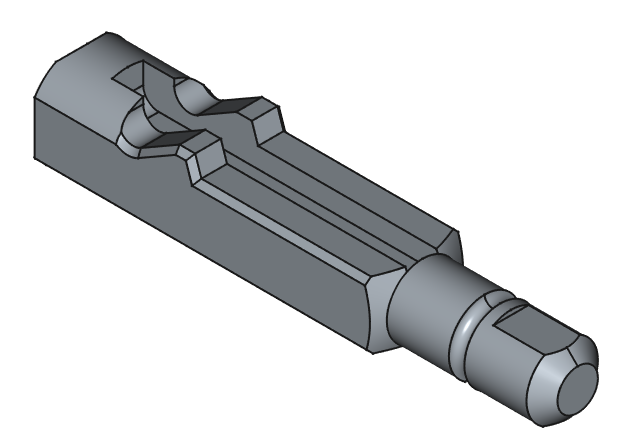
It also has a long groove, which goes up into the head. The needle can use the groove to catch the lower sling and it also can later use the top of the groove to push down the upper sling. The peg has a width of 6mm to give room for the groove. Original has diameter 4,6mm. The peg is printed from ABS.
With this modifications it is now possible to do the Strickliesl/Knitting-Jenny - pattern (2x2) with a 100% wool yarn of weight 192m/100g. This is the target material.
this is all super cool.
Some update:
Because of lost steps I switched back and fore between TMC2209 and DRV8825 motor driver modules. Both are set up to work with 32 microsteps. A strange discovery was, that the speed limit due to resonance of spindles (I think it's bending resonance of the spindles) is dependant from the driver module. DRV8825 run clearly faster but very hot and needed a fan cooling. The driver even switched off because temperature protection. Back to TMC2209. I now switched over to a mixture of 8 (was 4) microsteps interpolated by the smart pin, while the software in Forth does the rest of the linear movement of the 4 axis. This gives extra margin of safety for the step frequency. I hope the issue of lost steps is now really solved....
So after the peg design brought a lot of improvement, I now went towards the target of a scarf. I choose a width of 2x15pegs and a "criss-cross pattern".
The plastic loom is not straight. The distance between the two rows is smaller in the centre of the loom than at the ends. This difference is about 2,8mm so it is not at all neglectable. So I had to introduce a correction method for the Y-coordinate, which also covers misalignment. It uses linear interpolation in a table of measurements.
The criss-cross stitch pattern is described very well here: https://msyarn.ca/loom-knit-criss-cross-stitch-scarf/ and in the very good YT-video there. Catherine describes a width of 2x11 pegs, while I wanted a scarf with more width. But it seems, that problems grow with this step, so I might go back here.

The picture shows, that automatic laying of the yarn works (for both row patterns). For this Forth is very nice, because the variability of Forth allows it to be turned into a "Pattern Description Language".
If you know it, you can also see in the picture, that at the right end the tension of the yarn is rather high. The yarn also is not very elastic. So you need a lot of force to knit over at the last peg, which the machine cannot produce. So yarn tension again is one of the problems I am now struggling with. I have seen, that somebody used a yarn containing some Elastan....
Ha, got it working! :-) At least it has done >10 rows, >300 stitches, now without an issue with this test yarn. I actually dared to take a nap, while it was running...
The yarn tension was reduced by additional travels of the sled pulling the yarn from the wool wad and through the break, which leaves the tension of the pull-back weight only.
The idea to turn the needle downward during push-down also turned out to be really helpful. Perhaps the pegs become a little bit smoother with some break-in?
Laying the pattern for a row needs about 3 minutes. Knit over including push down is done in about 9 minutes, so together you need about 12 minutes per row. A row has a height of roughly 1 cm. A scarf in one day? - Say two days.
Should have two machines now, one for production and one for improvements.....
Good news and bad news.
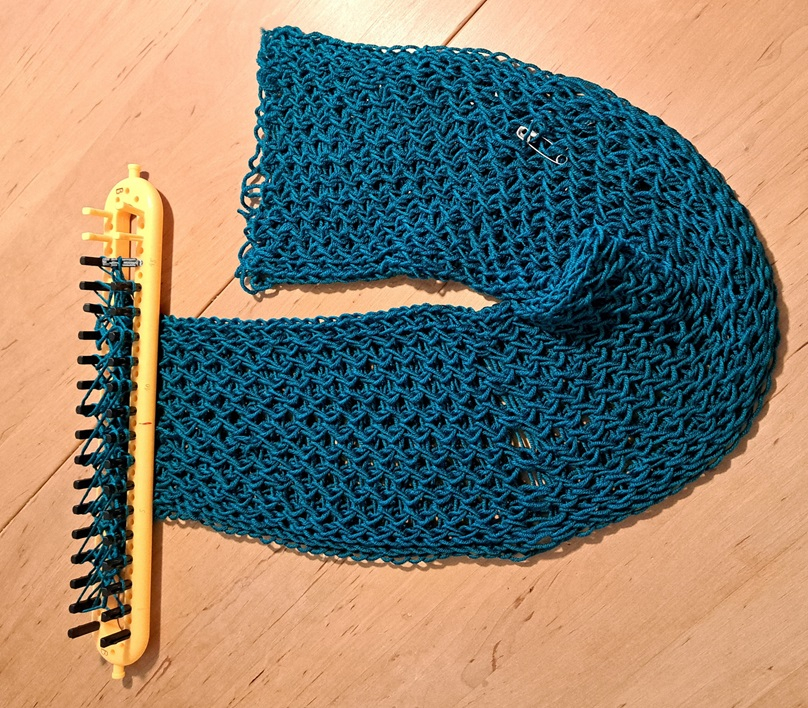
Good news: The machine worked for some hours with only minor difficulties. It produced a test-scarf of about 85cm length. Some splits of yarn and two lost stitches, which I saw and was therefore able to mend. The criss-cross pattern is nice, but gives a rather "airy" fabric with this yarn weight (Acryl 235m/100gr), no wonder Cathrin used 75m/100gr. You can see variations in yarn tension.
Bad news: When I was not at home some entanglement of yarn happened as root cause (I believe), which blocked the yarn supply. The machine did not stall, but two pegs broke partly and the yarn also broke. The machine then collided with a half-broken peg and moved the loom from it's fixture. That was some luck
  because the loom was shifted out of the working area. Which prevented more damage and preserved the work piece.
I like to watch the machine for a row, but not for hours, so we need some improvements. I have already seen entanglement at the pull-back device, so here I should "do something".
Also I have now had a first look at sensors to detect yarn breaking. - An interesting field. As far as I understand they do detect yarn movement. One principle seems to work with a piezo contact microphone and it seems to measure the tiny noise of the yarn scratching it. (???) The other, optical one, seems to measure very small variations of surface of the yarn.
So I went to the target wool material 192m/100gr, which -as already seen before- was and is significantly more difficult to handle. So lost slings and split yarn in every row again .
.
A couple of measures to improve reliability:
The pull-back device has now a rope-roll D=34mm, which shall give more stability against entanglement and also less friction there.
The movements are done in a way, that for each stitch first yarn is pulled and then released and pulled back by the pull-back device. This minimises variation of yarn tension. Friction of the brake and of the spool is no more relevant for the fabric. Here the cost of the improvement is time: About 13min per row now.
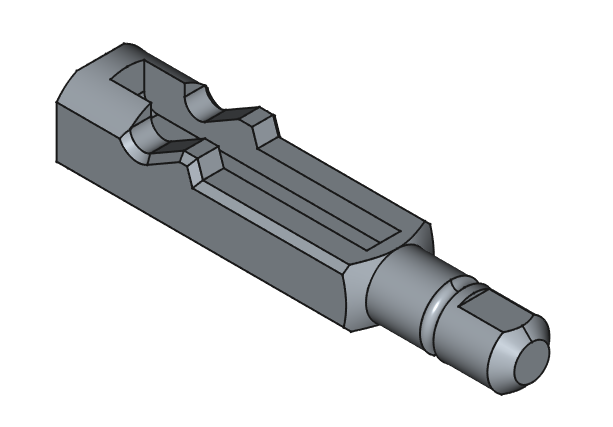
Peg design Peg7A has some modifications: The grove goes higher in the head, is slightly deeper and has a width of 2,5mm now. To make this feasible, the width of the peg is now 6,5mm. The overhang of the head is increased to prevent slip over more consistently. All in all the new design is a major improvement.
Code is about 1450 lines with a lot of test code. About 100 more lines can be handled by my Forth editor. Lost steps seem to be resolved.
Christof
[edit] Oh, I see in the history here the talk about it.
Working to improve reliability.
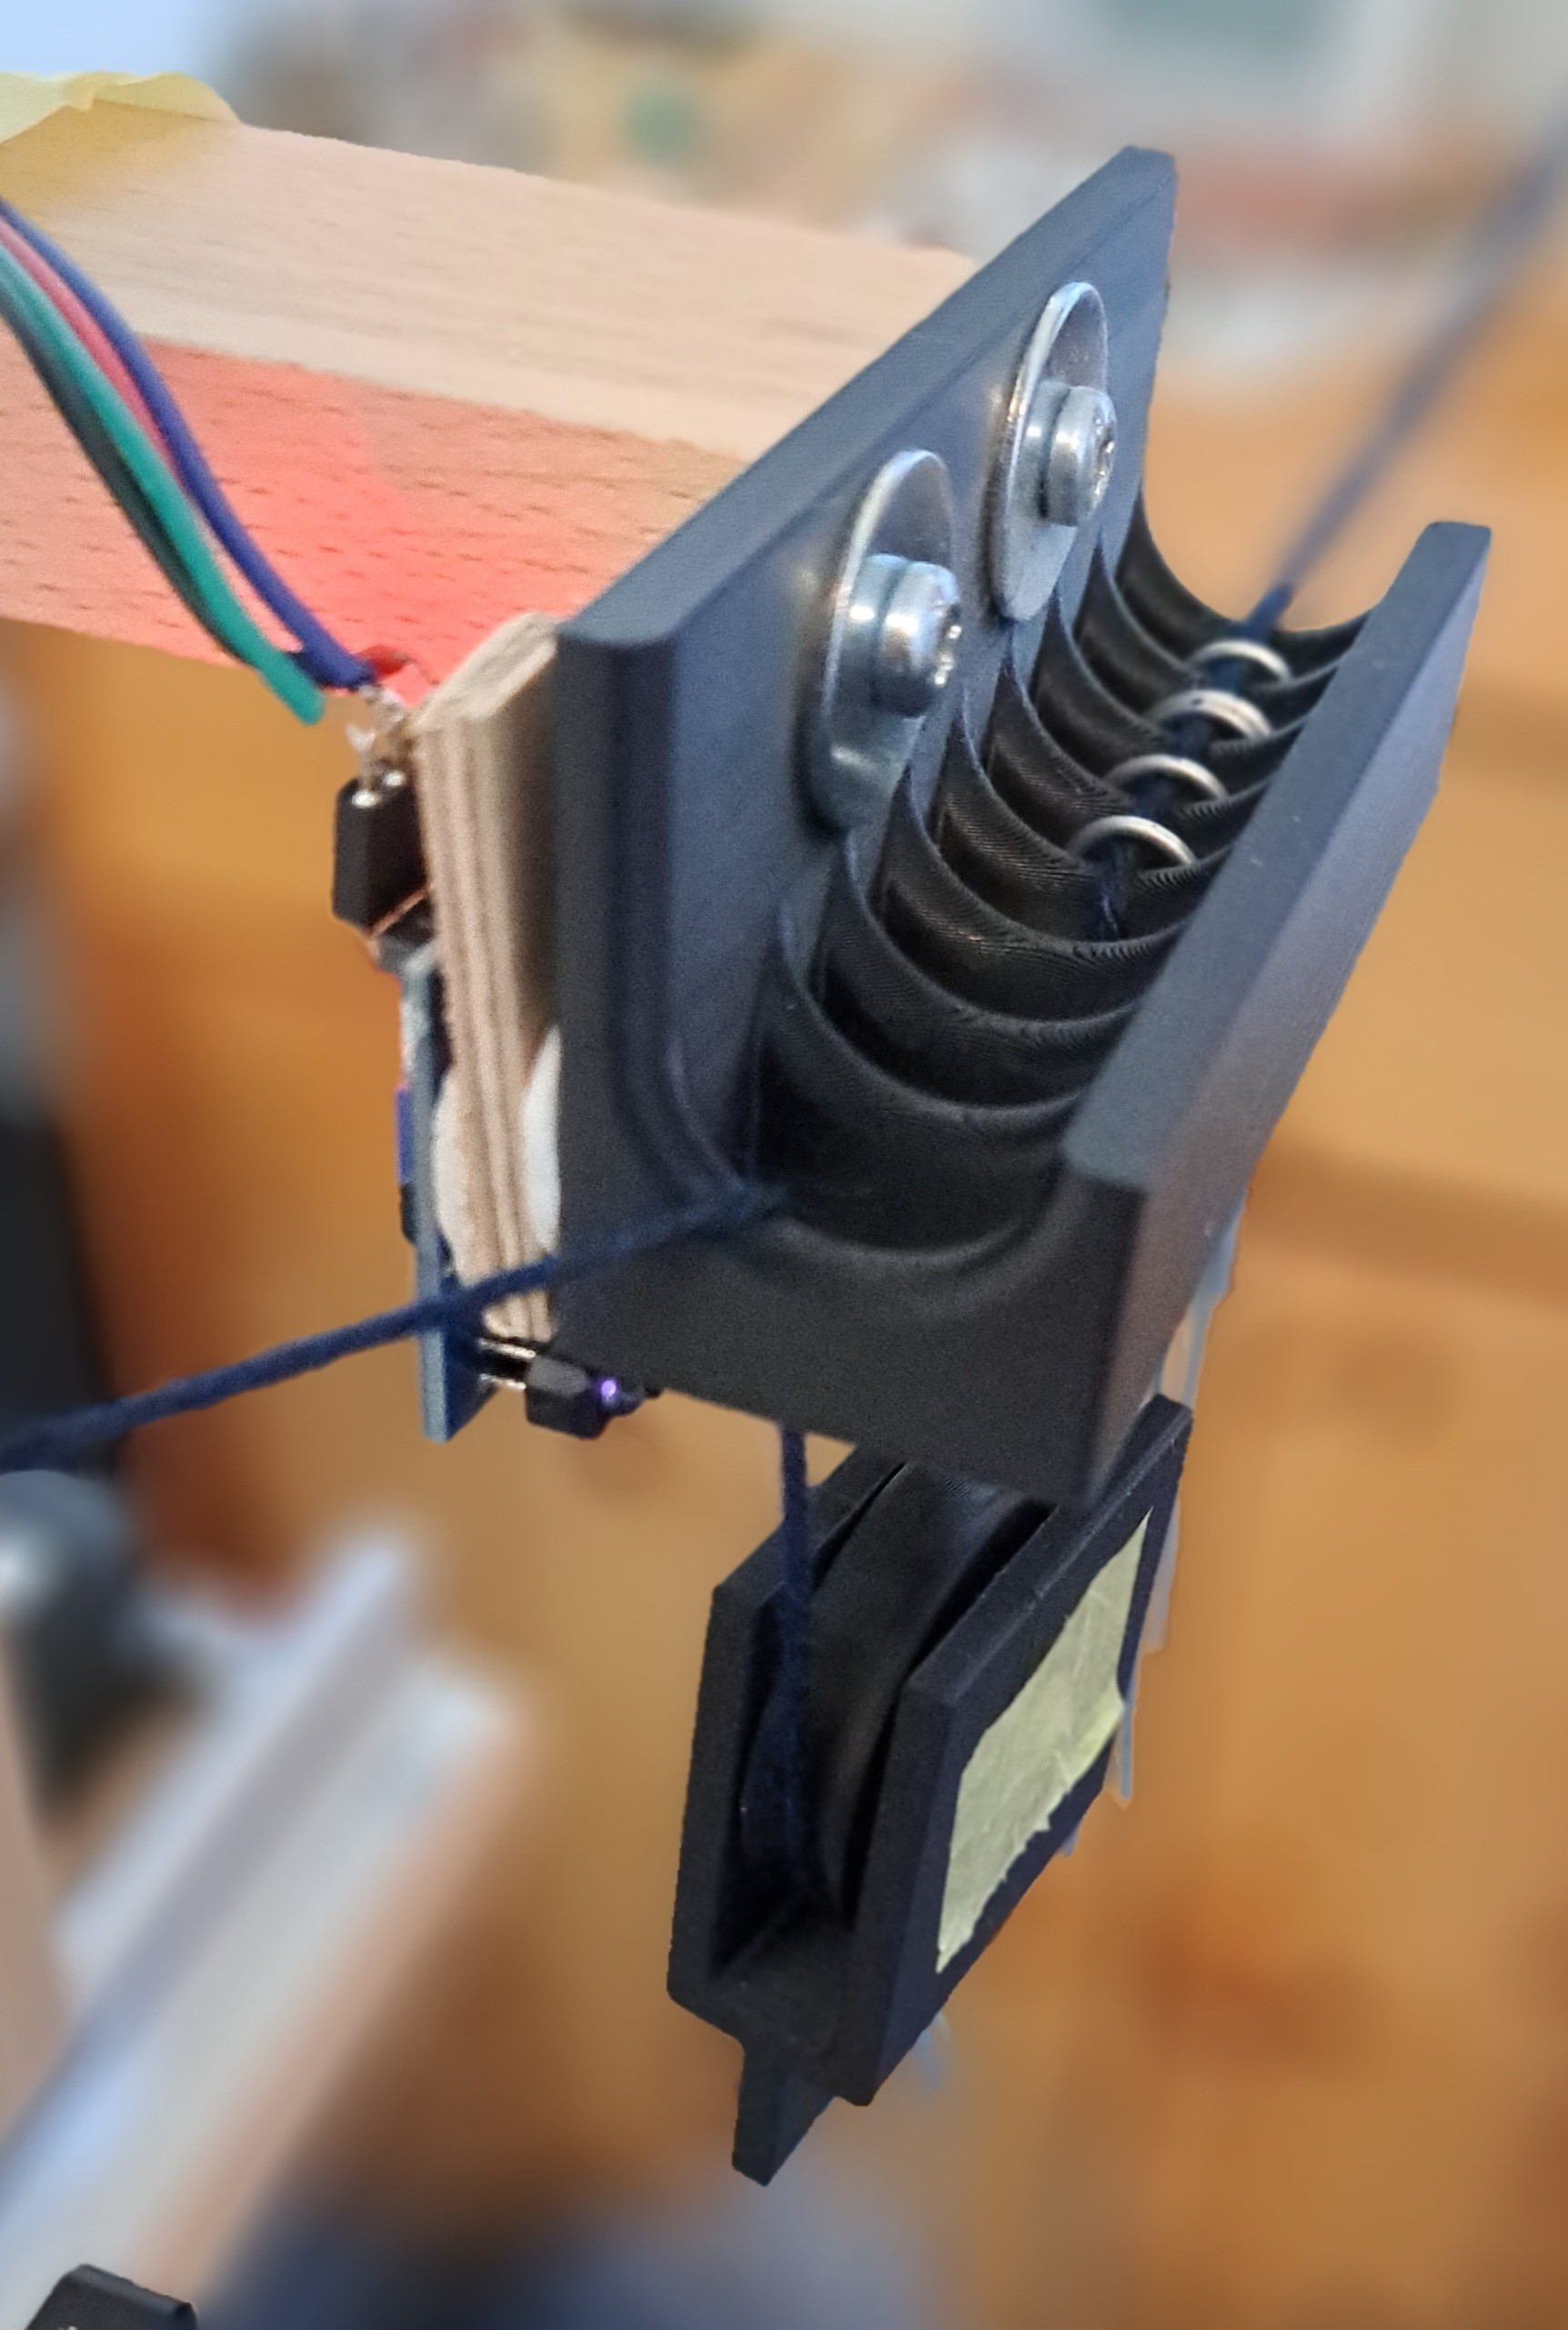
Picture shows the rope roll of the pull back device and also the new IR reflection detector for the thread. It shall react on yarn breaking and on end of thread. As the diameter of the yarn is small in comparison to it's range of movements, it is non-trivial. It always kept stopping the machine. I have for the time being resolved to only stop, if "no yarn" for 40 seconds in a row. It's a "line follower module" which has a digital and an analogue output. The analogue one might later be the basis for "movement-detection".
Furthermore Peg8B is in the making. It has a reduced head height to allow for more tolerance of the upper sling position. Also it's groove depth is enlarged once more. I am not sure, if the stop limit at the lower end will be helpful, as there is not enough room for the needle to go under the lower sling. Already for Peg7A I had introduced a little bit of hand-sanding to reduce friction.
Looks good, 24 rows without an issue right now.

And here you can watch it:
Cheers Christof
PRI-TEE-COOL!
During the production of my first scarf, there had been loss of position of the vertical axis around row 50. When I stopped the machine, the needle was about 1...2mm too high. I still have no idea, what happened. The problem did not occur again. One of my wild speculations is, that mains power had a very short drop out. Too short to stop P2. (????)
I decided to go on with the scarf and mend the lost stitches.
For the last 120 rows Super-Liesl worked without any problem. :-) The IR sensor stopped the machine as intended, when the 1st spool of the yarn was finished.
So we proudly present the first final product:
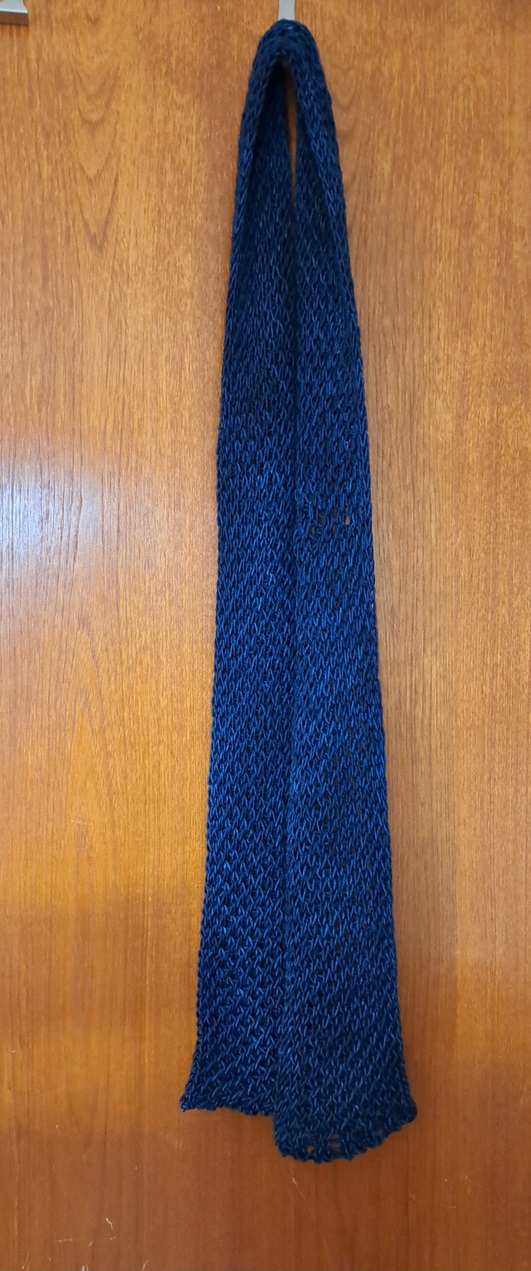
If somebody should be interested:
This scarf is 180 rows long. The material is 150gr of pure Merino wool coming from Peru. The name is "Malabrigo Rios 150 Azul Profundo", 4 ply, 192m/100gr. It is hand-dyed, which gives nice variations in colour.
that came out really nice! your family and friends will be warm, as you work all the final kinks out. stack 'em up for the next holidays? or, is this strictly for the fun of it?
Yes for me this for the fun of it. I like to make pretty or beautiful things. And I also like to do microcontroller projects. In this project again there is multidimensional learning for me.
Interesting reads about technics and history of industry. I my town too, the first industries was about wool, cotton and yarn, driven by the river.
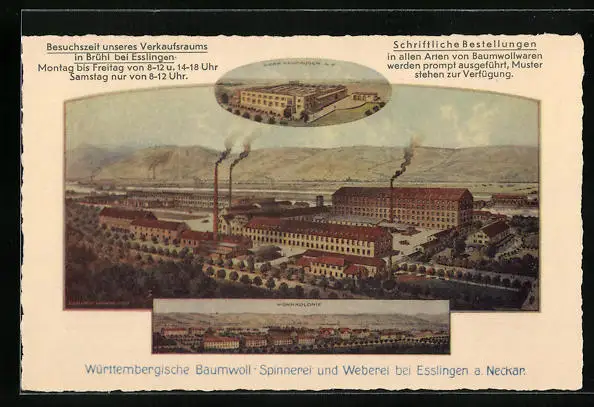 This was before a great factory for steam engines was founded.
CAD (Beckercad) for sketches of the overall design, I did not make detailed design.
It seems thinkable, that this new type of knitting machine could find more interest. It is very much cheaper to build than a conventional knitting machine. It needs about the same parts as a 3D printer. The trade off is speed, so it is not suitable for mass production. And it is not clear, how fine you could go. It is thinkable to have more than one needle working in parallel.
While I am writing this, the machine has finished the second identical scarf. At the end of the first spool the loose yarn got entangled and I (not the machine) made some mistakes, when I had to go over to the next spool of yarn but otherwise the machine worked without any problems for all 180 rows. It worked when we left the house fore several hours and it also worked during the two nights. (This scarf needs 3 days and 1,5 nights.) Nothing to mend this time. I only have to bind off manually now.
When I started the project end of August, I have had some hope, that I could make some Christmas presents. This did not work out. :-)
As yarn tension is so very important for the sake of completeness I should add some information about my yarn spool. At the beginning I tried to directly pull from the yarn ball, but this method is too inconsistent.
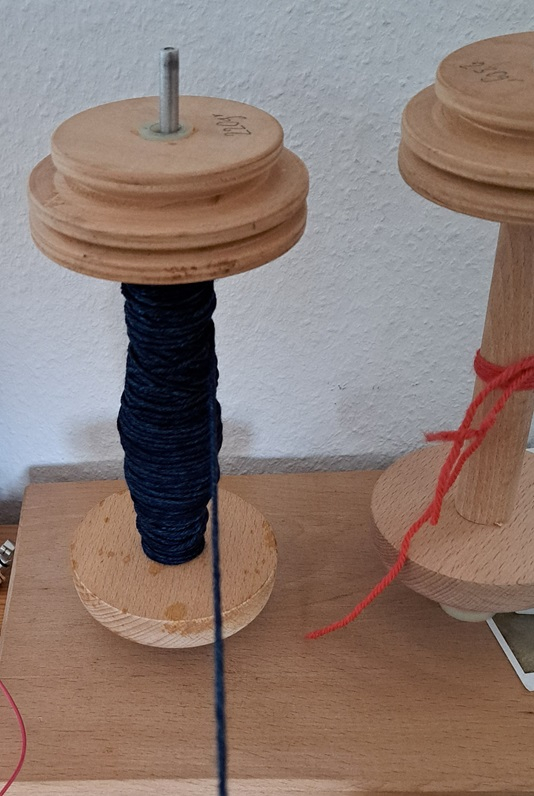
This spool can hold 100gr wool and has a diameter of 90mm. I did not make it but added a ball bearing at the bottom because the nylon sliding bearing had too much friction. The yarn comes from the spool, goes through the break, down and through the pull-back weight, up again and then through the feeding tube. The break prevents the pull-back weight to pull from the spool. Only if the weight is at the top stop, the yarn can be pulled through the break. There are additional movements necessary to do this, because at this moment the tensions of the yarn is rather high.
It could perhaps be possible to have a motor driving the spool depending from the height of the weight making the break and the pulling movements obsolete. This is one of the ideas to speed up the process somewhat. So I am wondering, what would be the best way to measure the height of the weight....