

P2 Edge Secure Holder?
 jonyjib
Posts: 20
jonyjib
Posts: 20
in Propeller 2
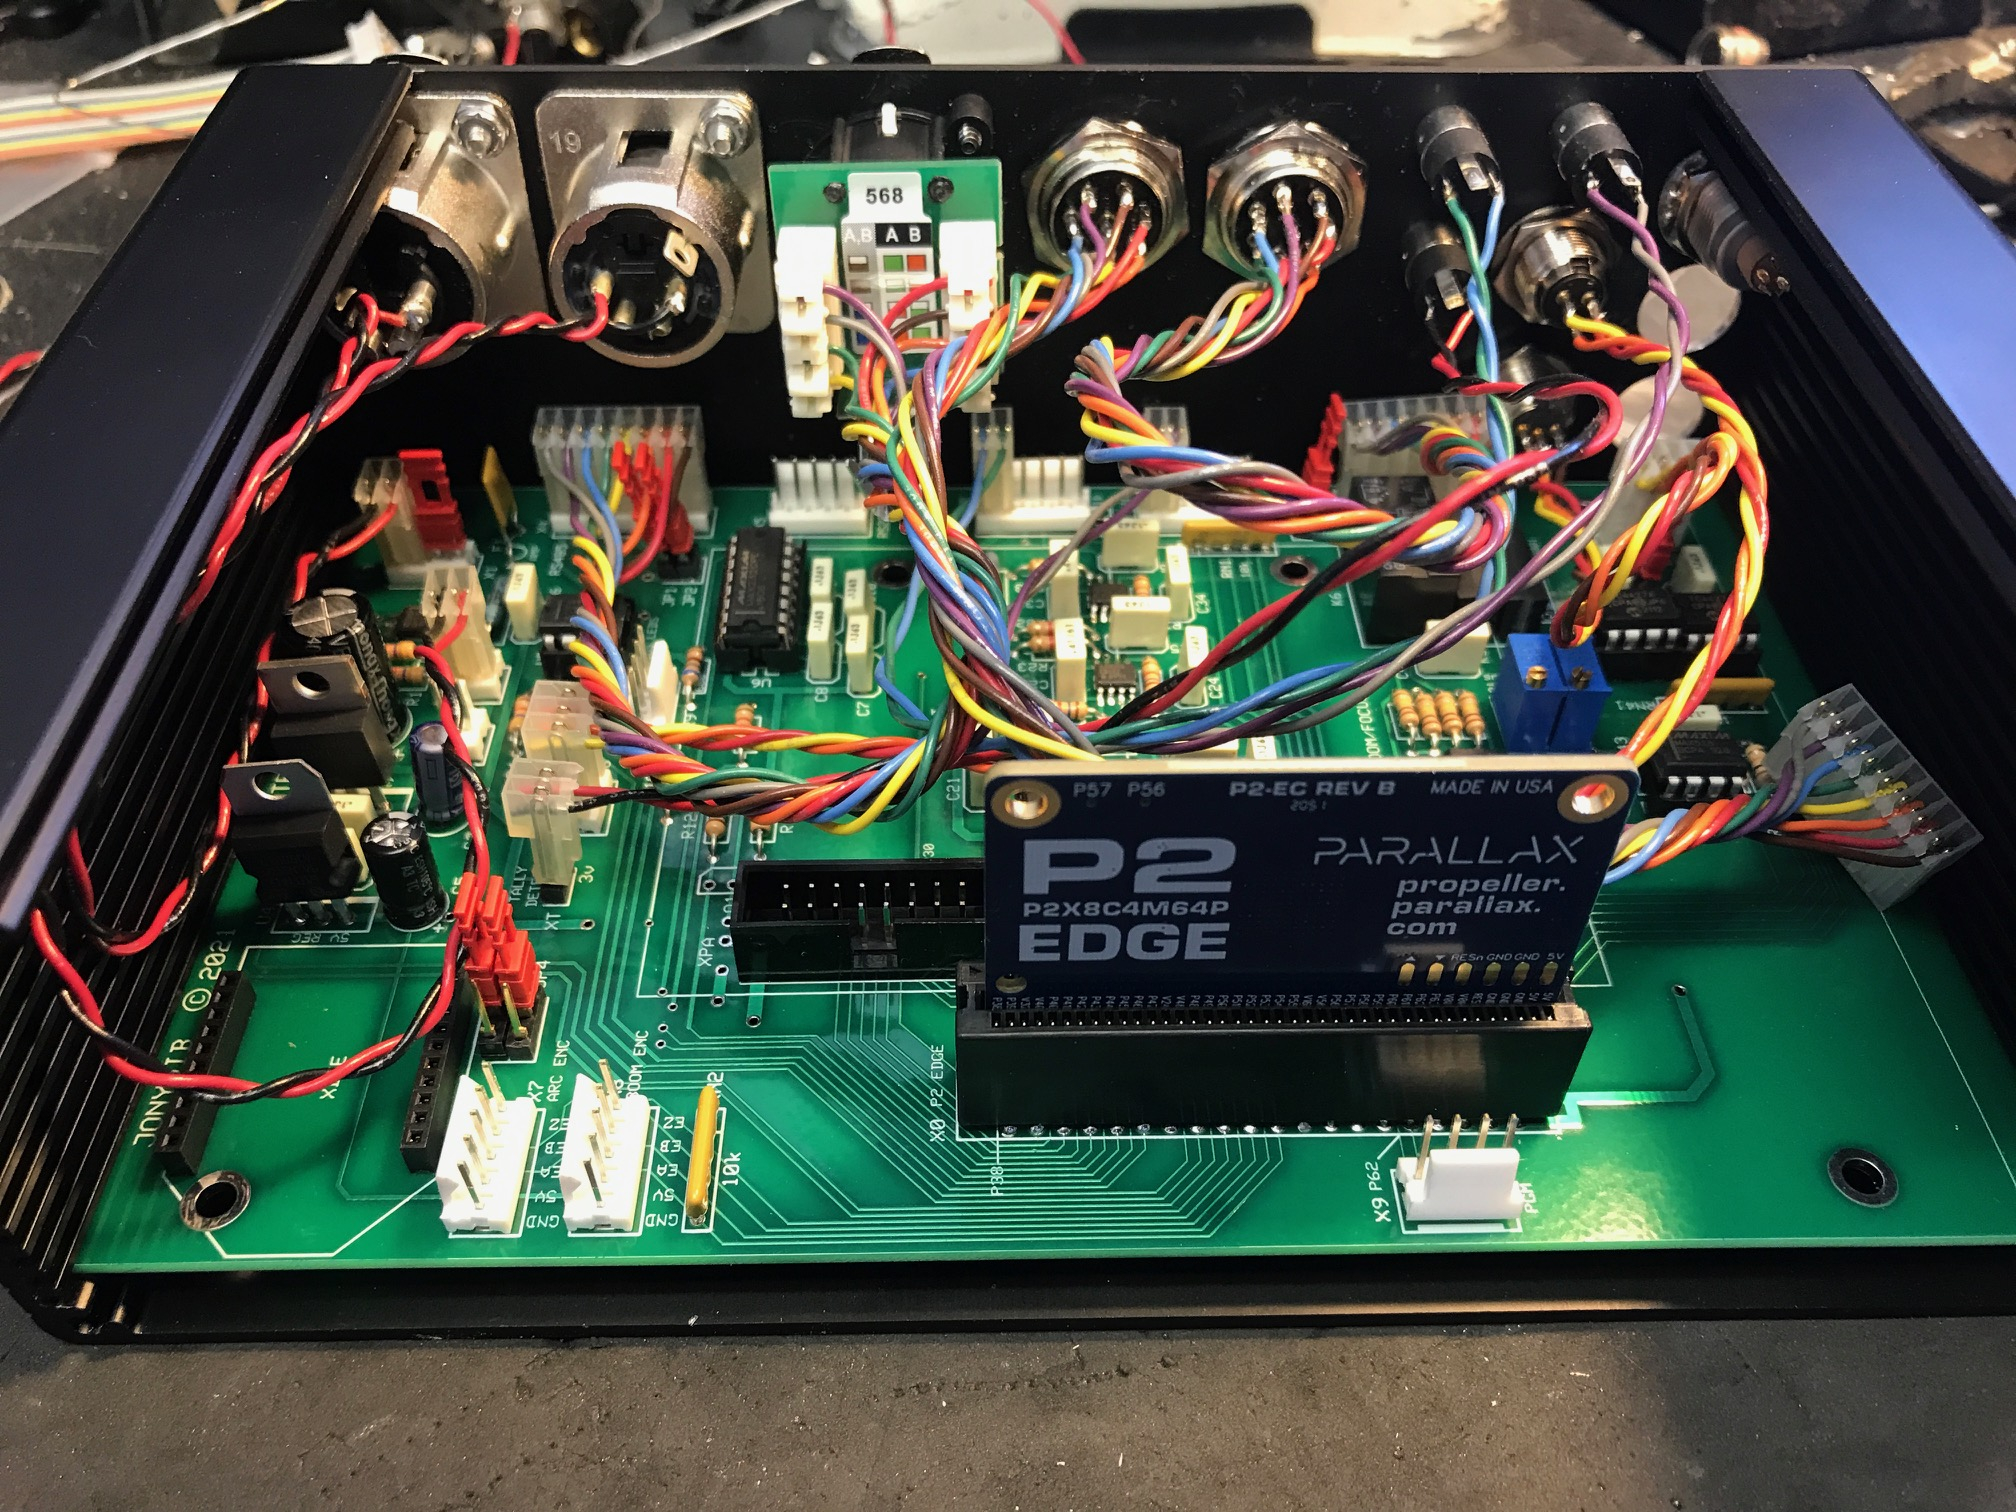
We're using the P2 Edge card in our products with the 80 pin connector, but the Edge sometimes pops out 'during shipment' to customers. Has anyone deployed anything that keeps the P2 processor board intact/locked in place and does not pop out of the edge connector?
We have entertained gluing it in place, but don't want to make it permanent. The Edge has two mounting holes that we could connect with hardware down and into the motherboard.
I just wanted to see if anyone has already done something similar and how you did it?
Comments
I haven't, but looking at your board, I see two unused holes kind of inline with P2.
My first thought would be to 3D print a brace that connects to those holes and the ones on the edge...
Guess another option would be to cut a thin piece of PCB, same width as this one to slide in the case and attach to the P2 holes...
Maybe even easier is to run some kind of string though the holes and then glue to either side of the connector with epoxy.
Just cut the string if need to replace P2 board...
My thoughts are to get some (very) small D shackles and elastic bands, to pull down from the two top P2 edge holes, towards those two free mounting holes near the corner of the motherboard.
Great to see such a tidy and functional P2 project enclosure, btw
On your future board boards place 1/8"-3/16" holes on either side of the connector and run a tie wrap around the P2
My first thought was similar to Rayman- to add some material (pcb or aluminum perhaps) that fits the slots of the width of the case, and sits just above the edge module so the module can't rise up. No need for bolting the Edge if you are lucky on the clearance and can prevent the brace bar from sliding.
If you are thinking to add holes to the PCB, then also consider the through-hole right-angle Edge socket, as that would be much simpler (and lower cost) to allow a direct nylon bolt (or two) to pass through the Edge mounting holes and into the base PCB. I'd consider not adding nuts on the Edge module side to relieve stress from the module. Just fix the bolts on the base PCB side. Essentially you'd have PCB mounted studs, and the R/A installed Edge won't be able to move anywhere. (Possibly the pop-in style nylon studs would work too- so quick assembly is possible.)
Use a right-angle edge socket and lay the Edge down flat.
Assuming your enclosure has a top cover, a simple solution would be to put a rubber strip across the point above the P2 to gently keep it in place when the cover is on. Low cost simple to do. Another alternative would be to put a small 1-2" notched strip with angled sides to guide the top of the P2 to a notch in the strip to act like a guide. Add two countersunk holes to the top to mount the strip while maintaining a smooth even top outer surface.
I like the foam block from the lid idea. Here's the profile view with the lift off lid.
We made several robots at the university. Our mainboard has an angle connector: the Edge is parallel to the board and secured by 2 screws using these 2 holes on the top of it.
Possible solutions:
1. glue a piece of EP foam to the cover of the case to press onto the top edge of the board
2. drill two holes in the main board and wrap a cable strap around the boards and through the holes
3. use an angled socket and screws
just be careful with the foam heat rating (and glue-heat rating), in-case your application is running hard and warming the Edge (especially in the "sealed" enclosure).
Run a couple of short blops of hot melt glue in the corners. Easily picked-off if you need to remove the board, but very hardy during shipping. Its a 1 cent solution.
Or that rubber/RTV goop they use on heavier parts of rotating CT boards; caps, some connectors etc.
Craig
Going nowhere 😁👍
Craig