

Introducing the "P2 Me, too!" Edge Cartridge
 CJMJ
Posts: 226
CJMJ
Posts: 226
UPDATE: I've placed the Halo information and files in message #19 below.
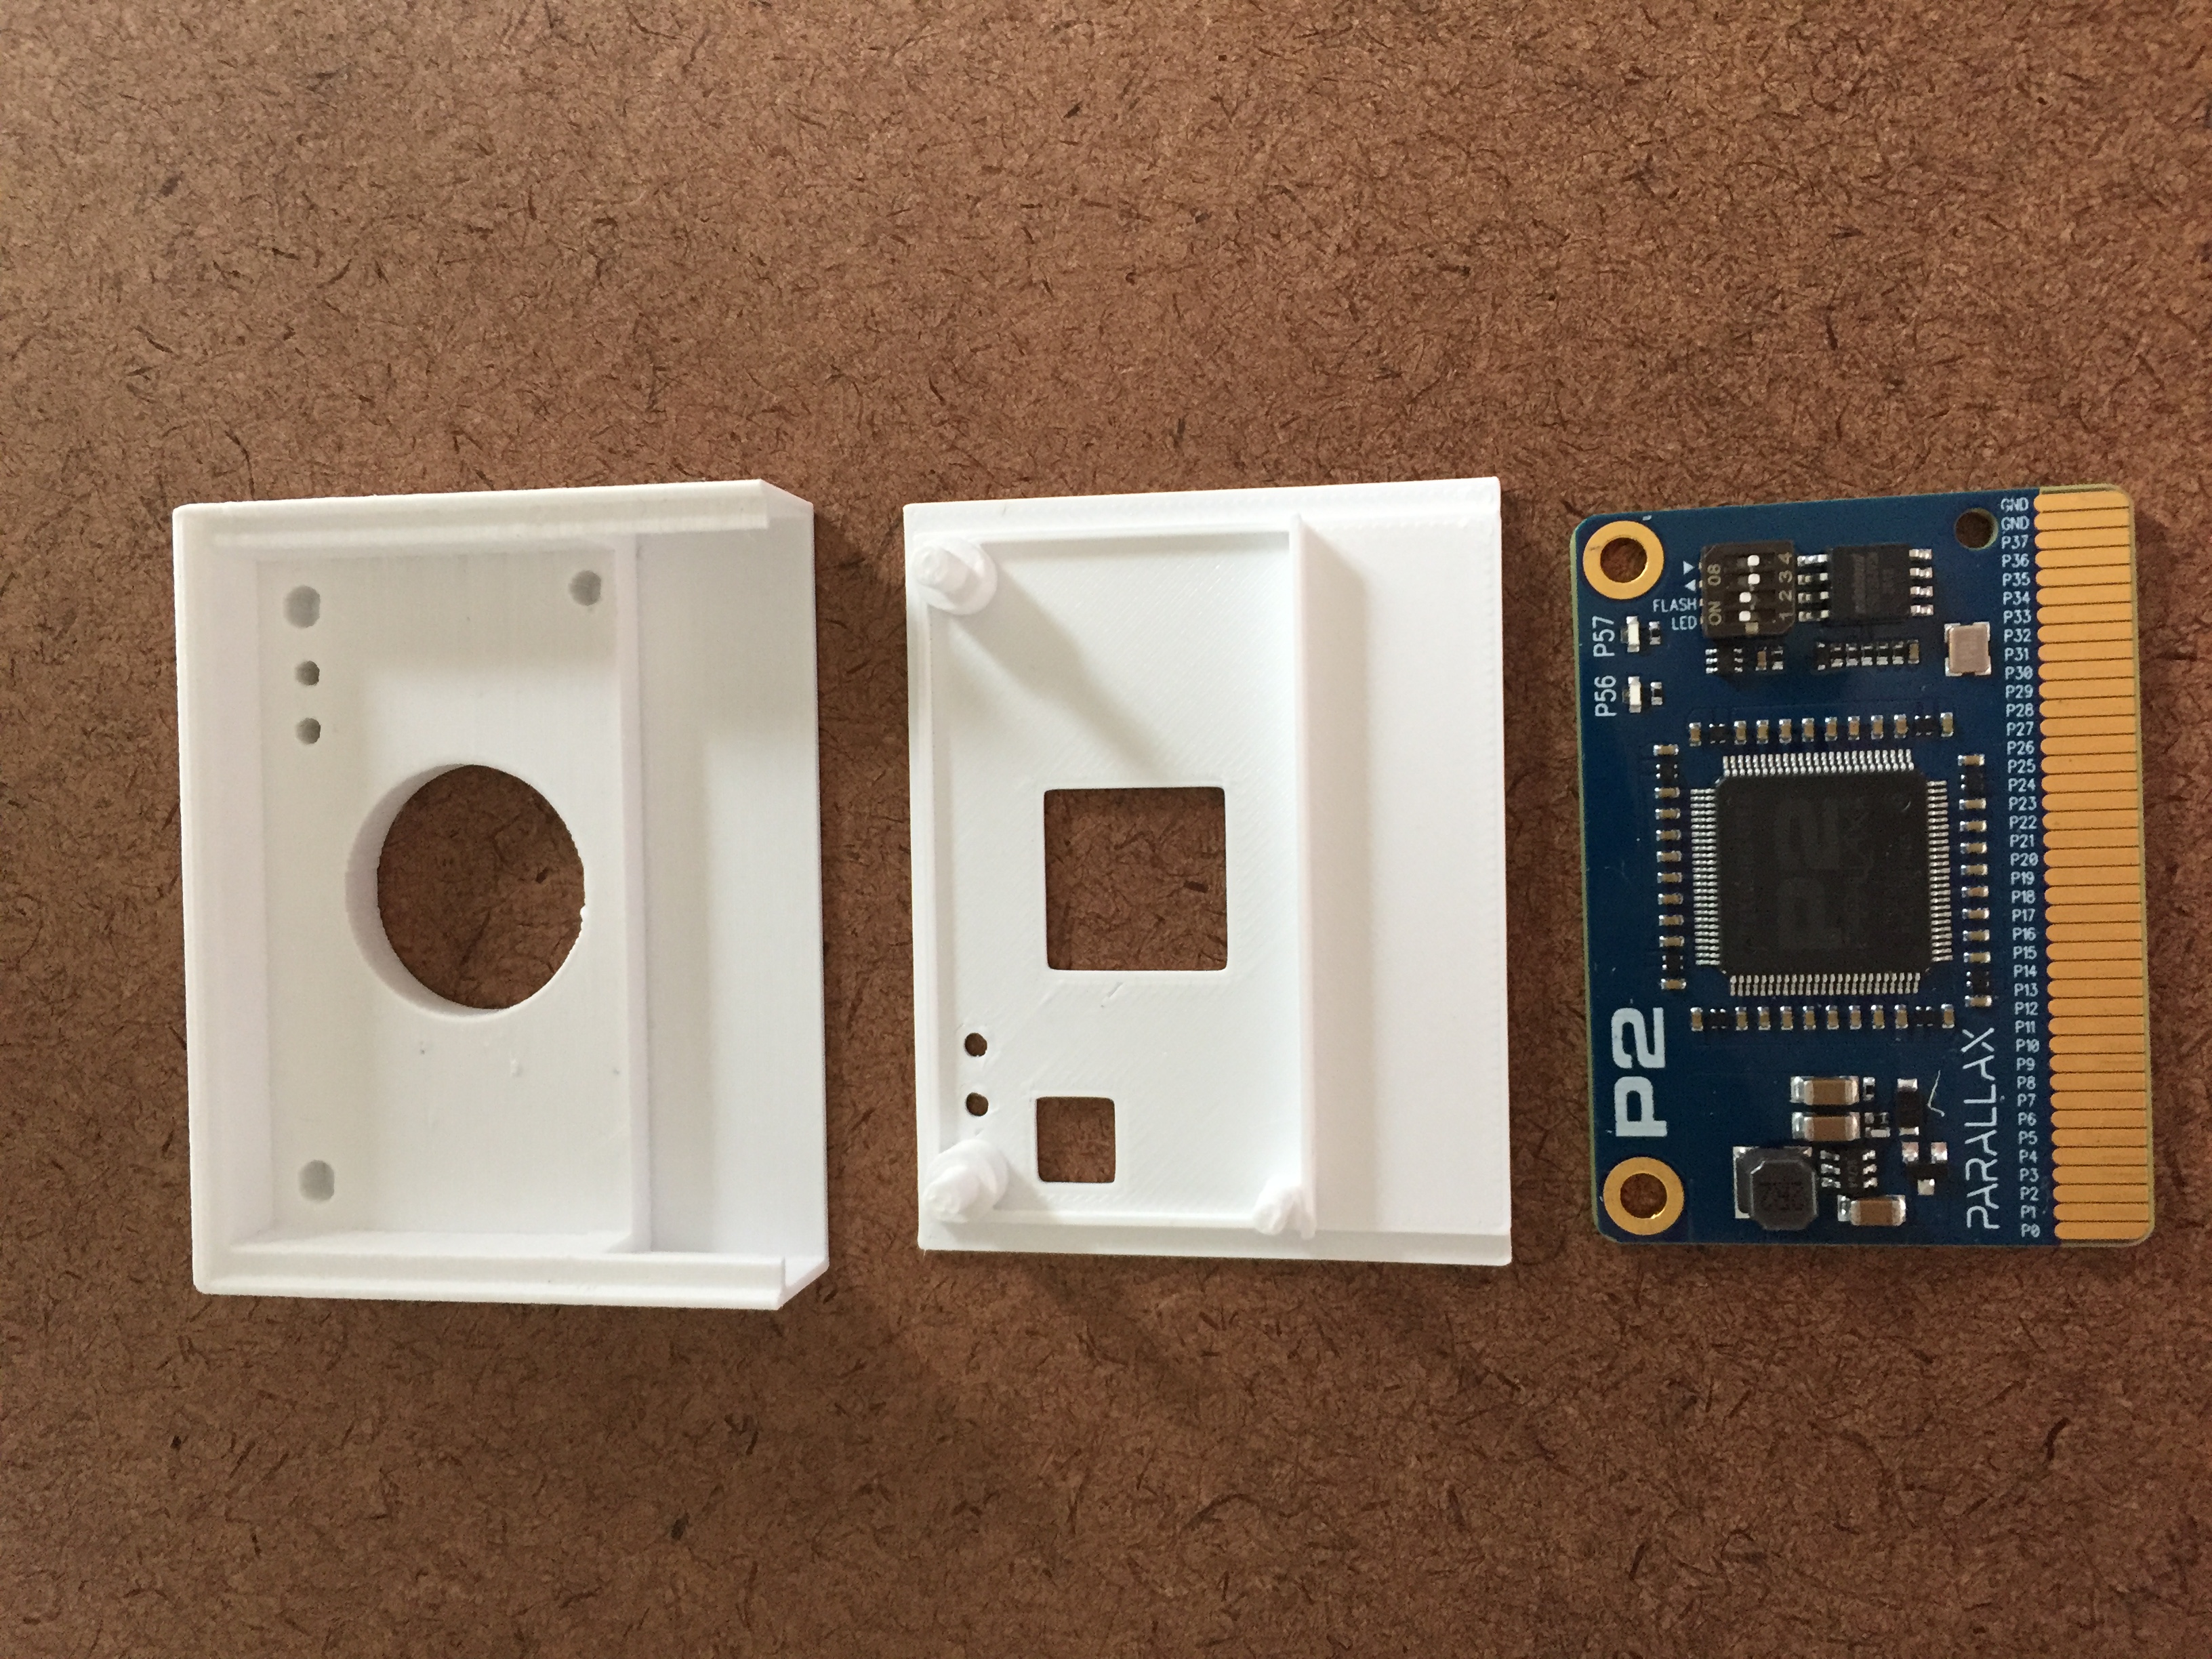
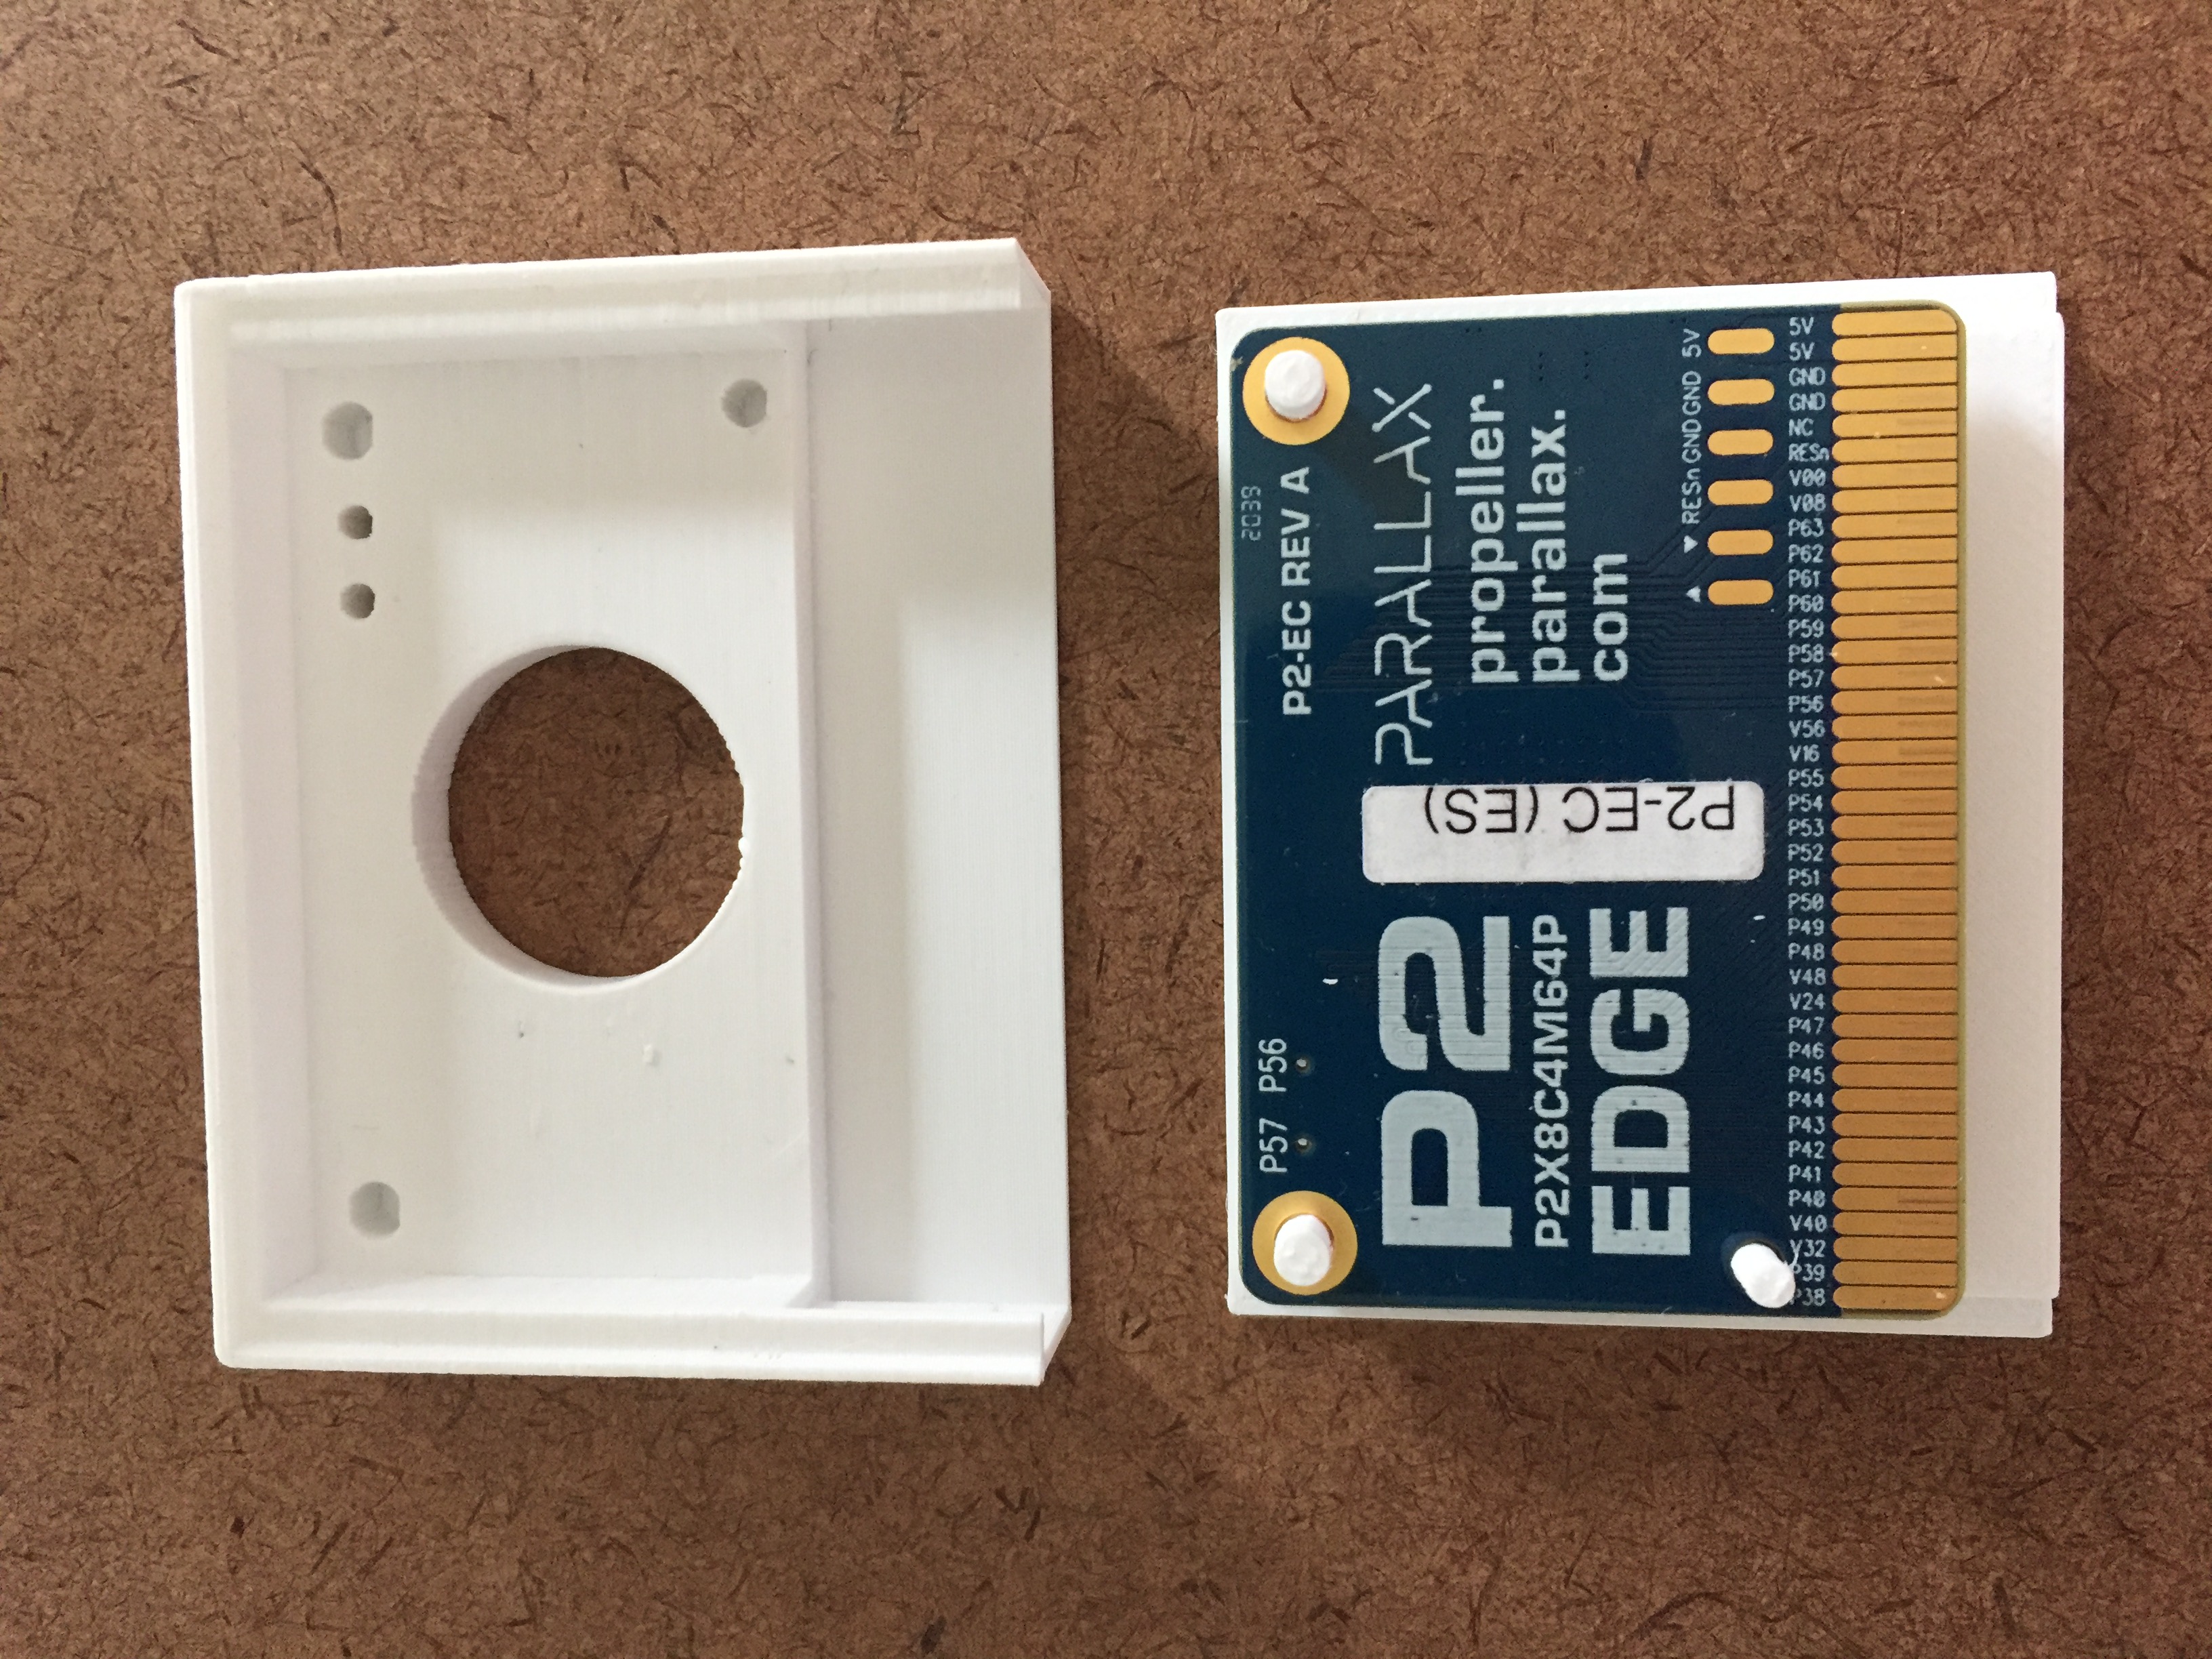
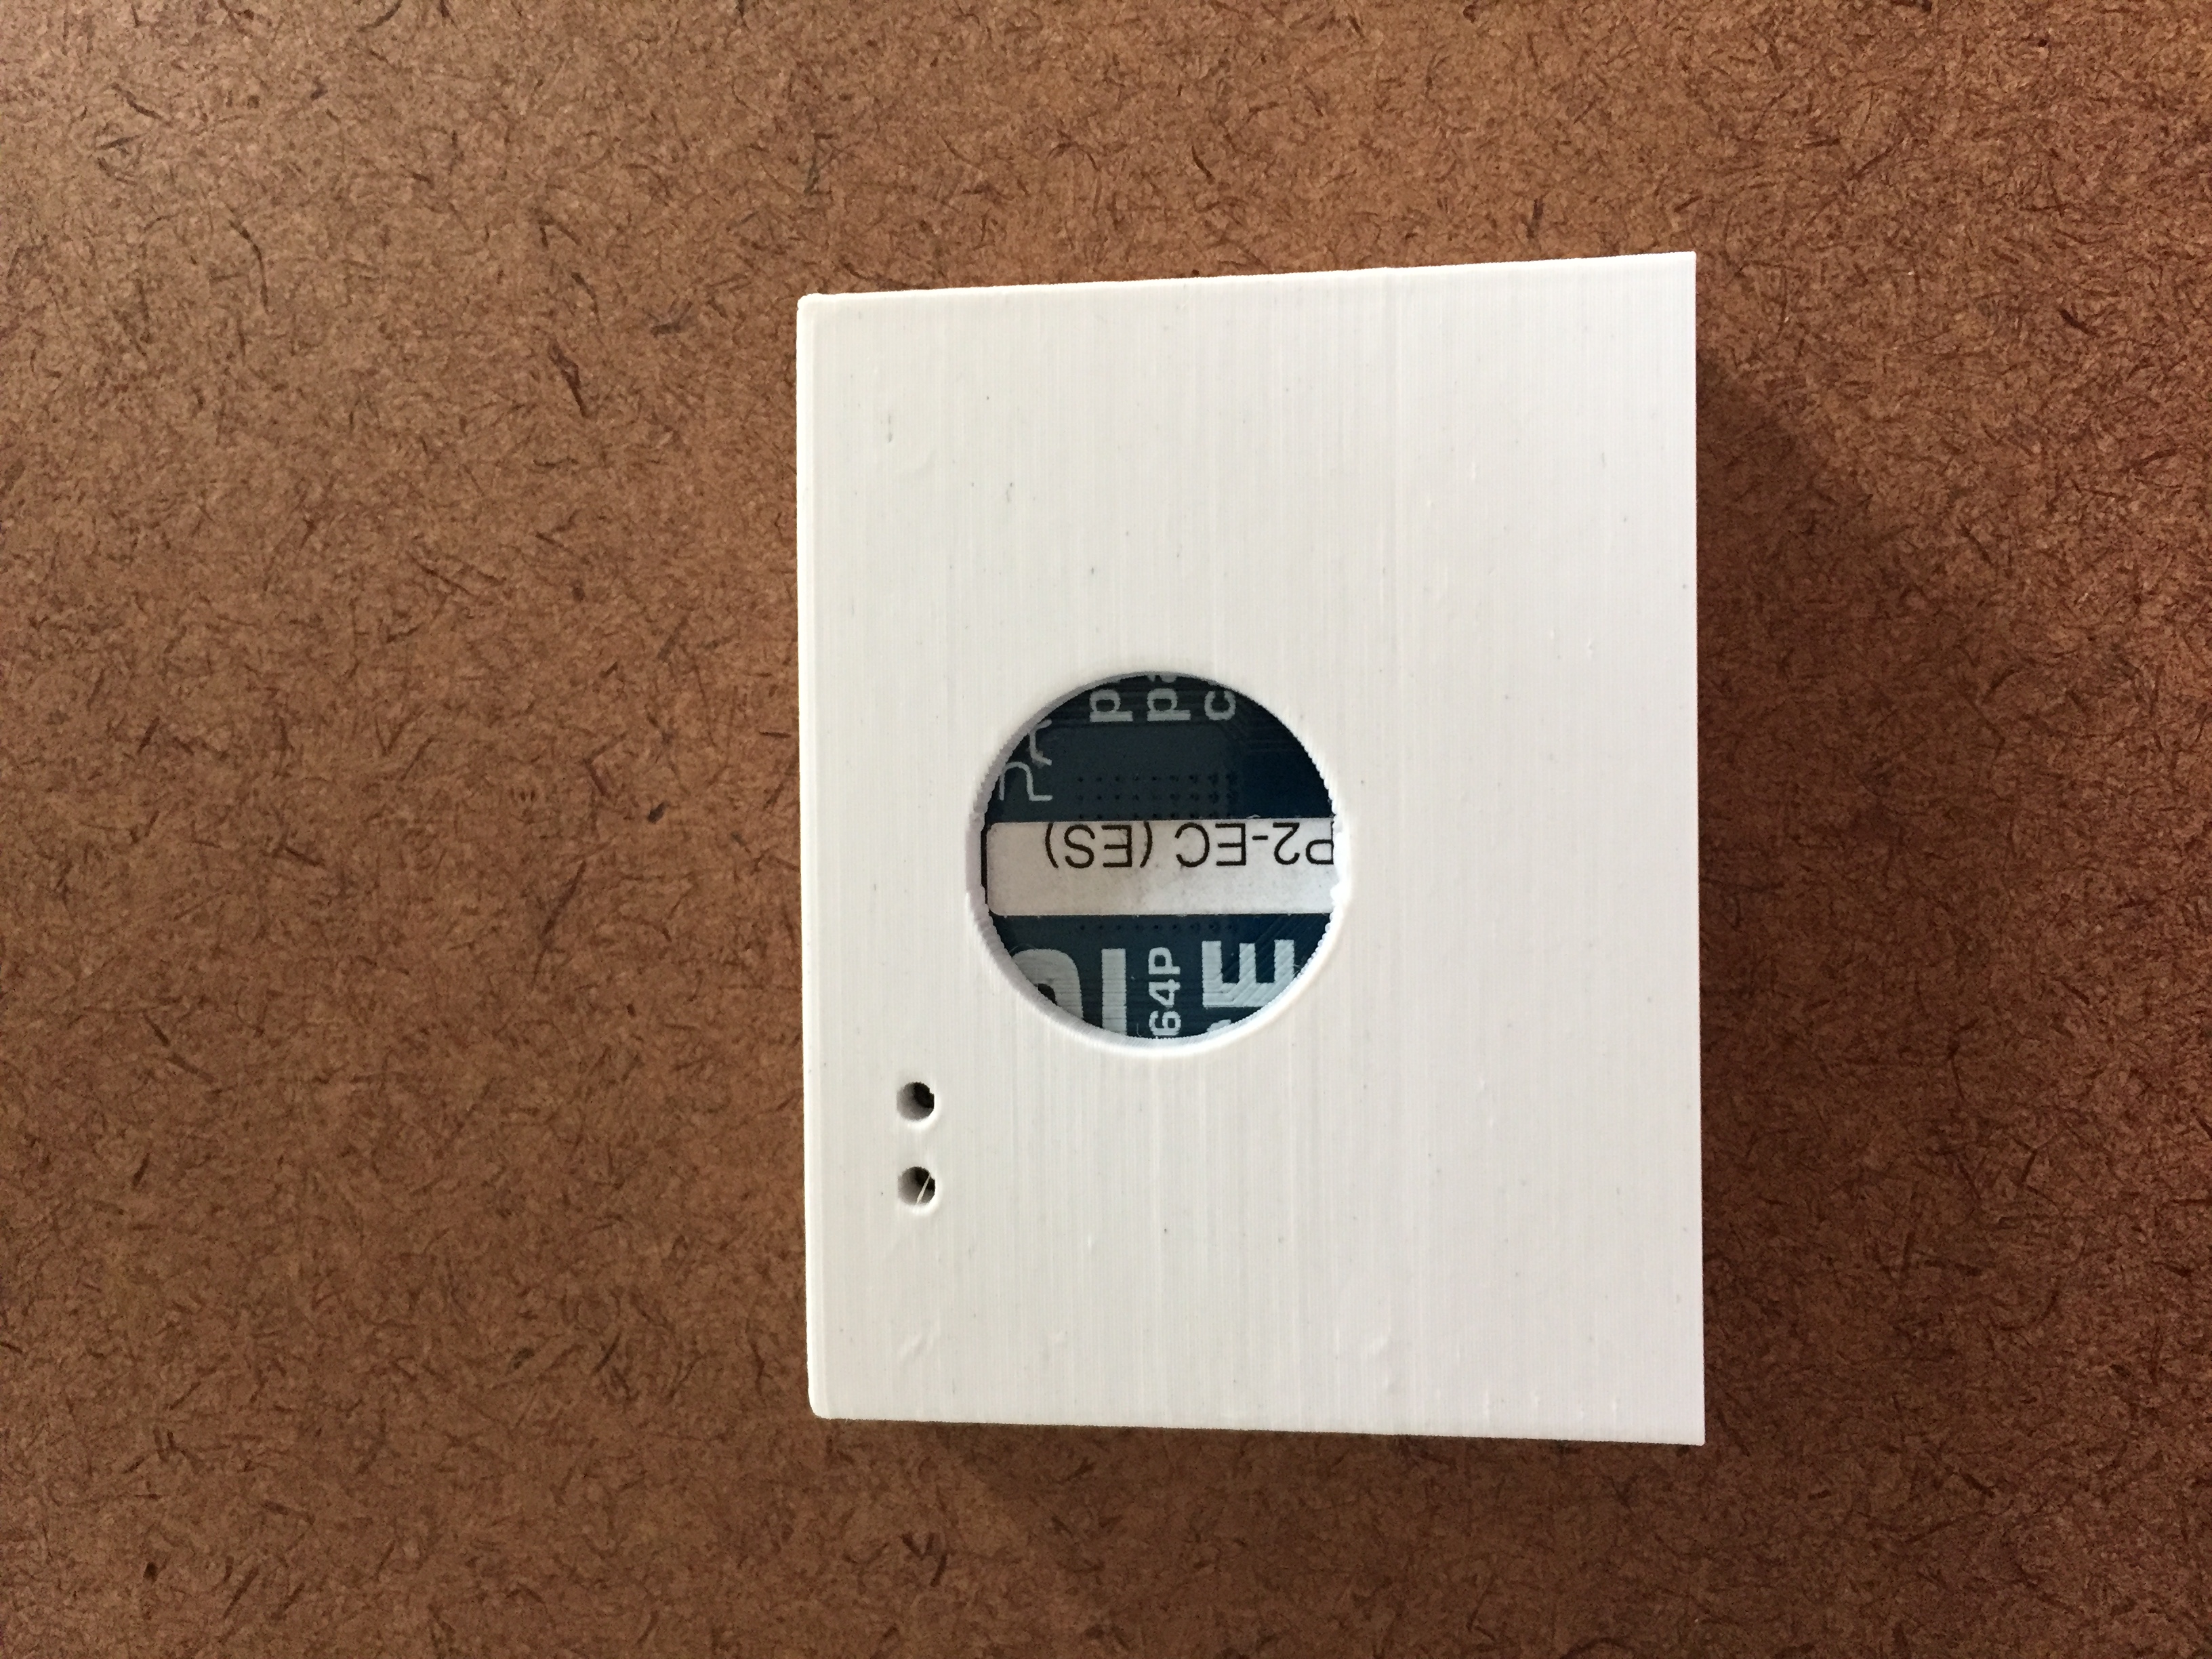
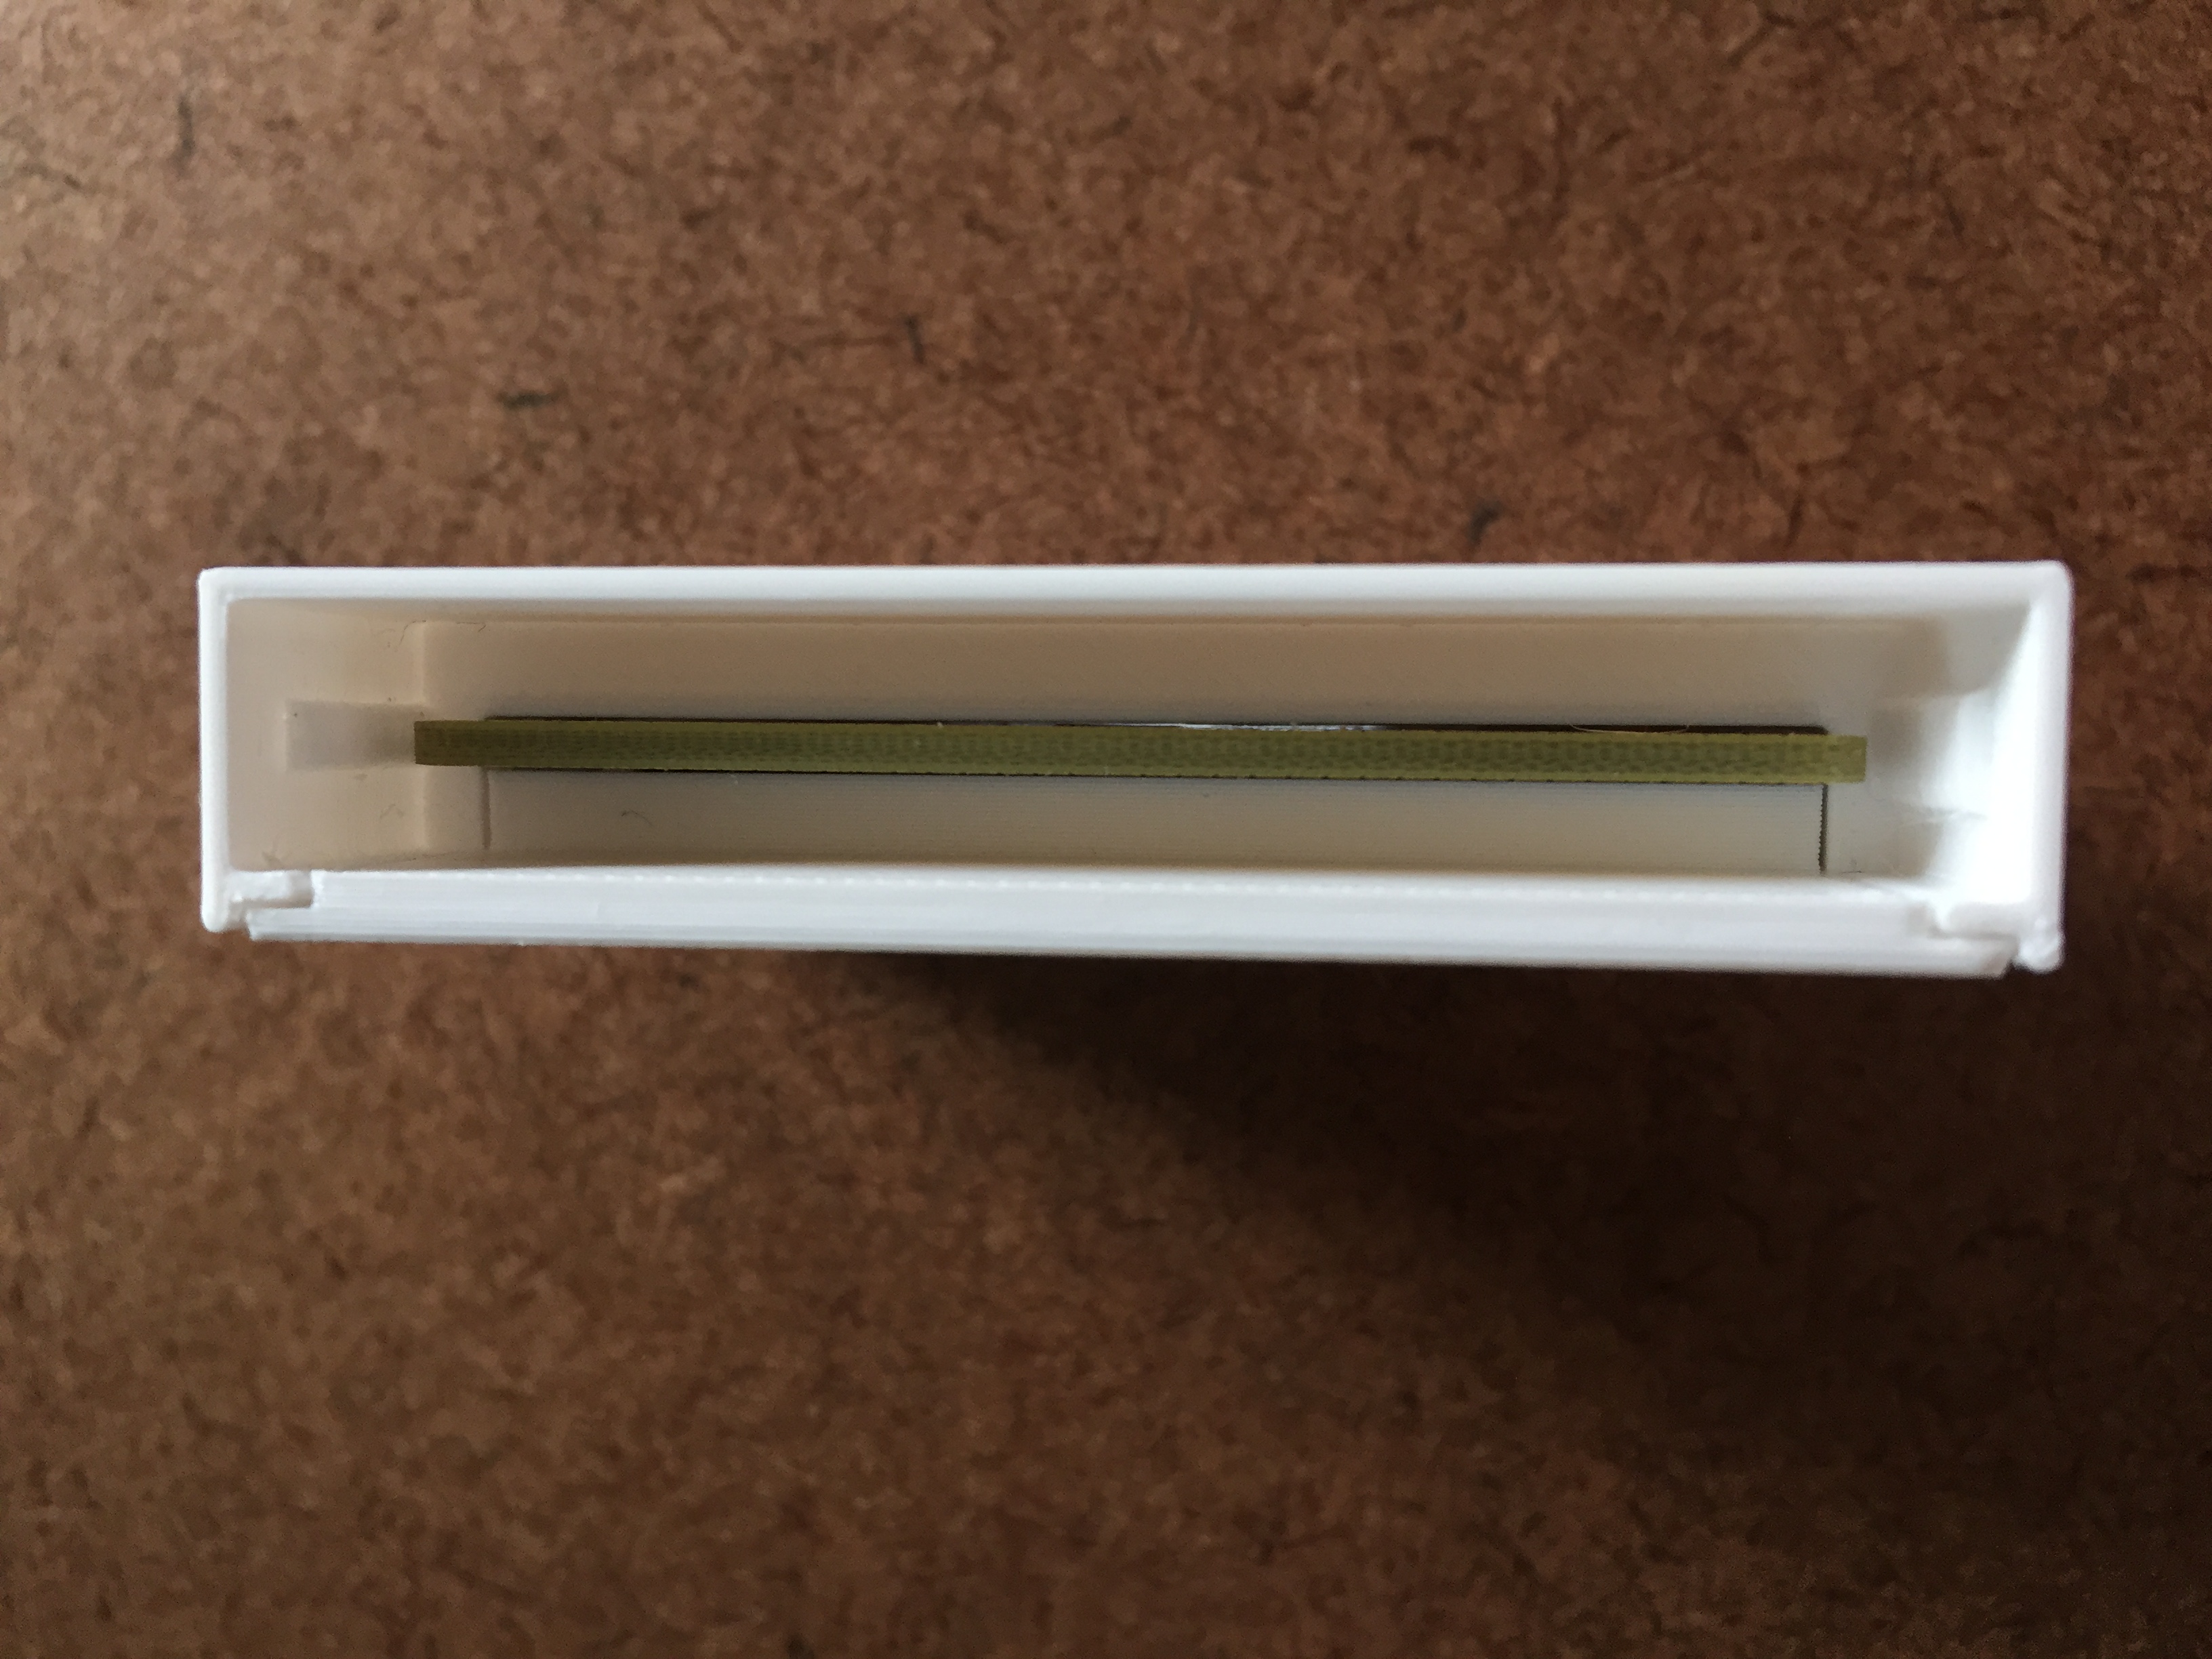
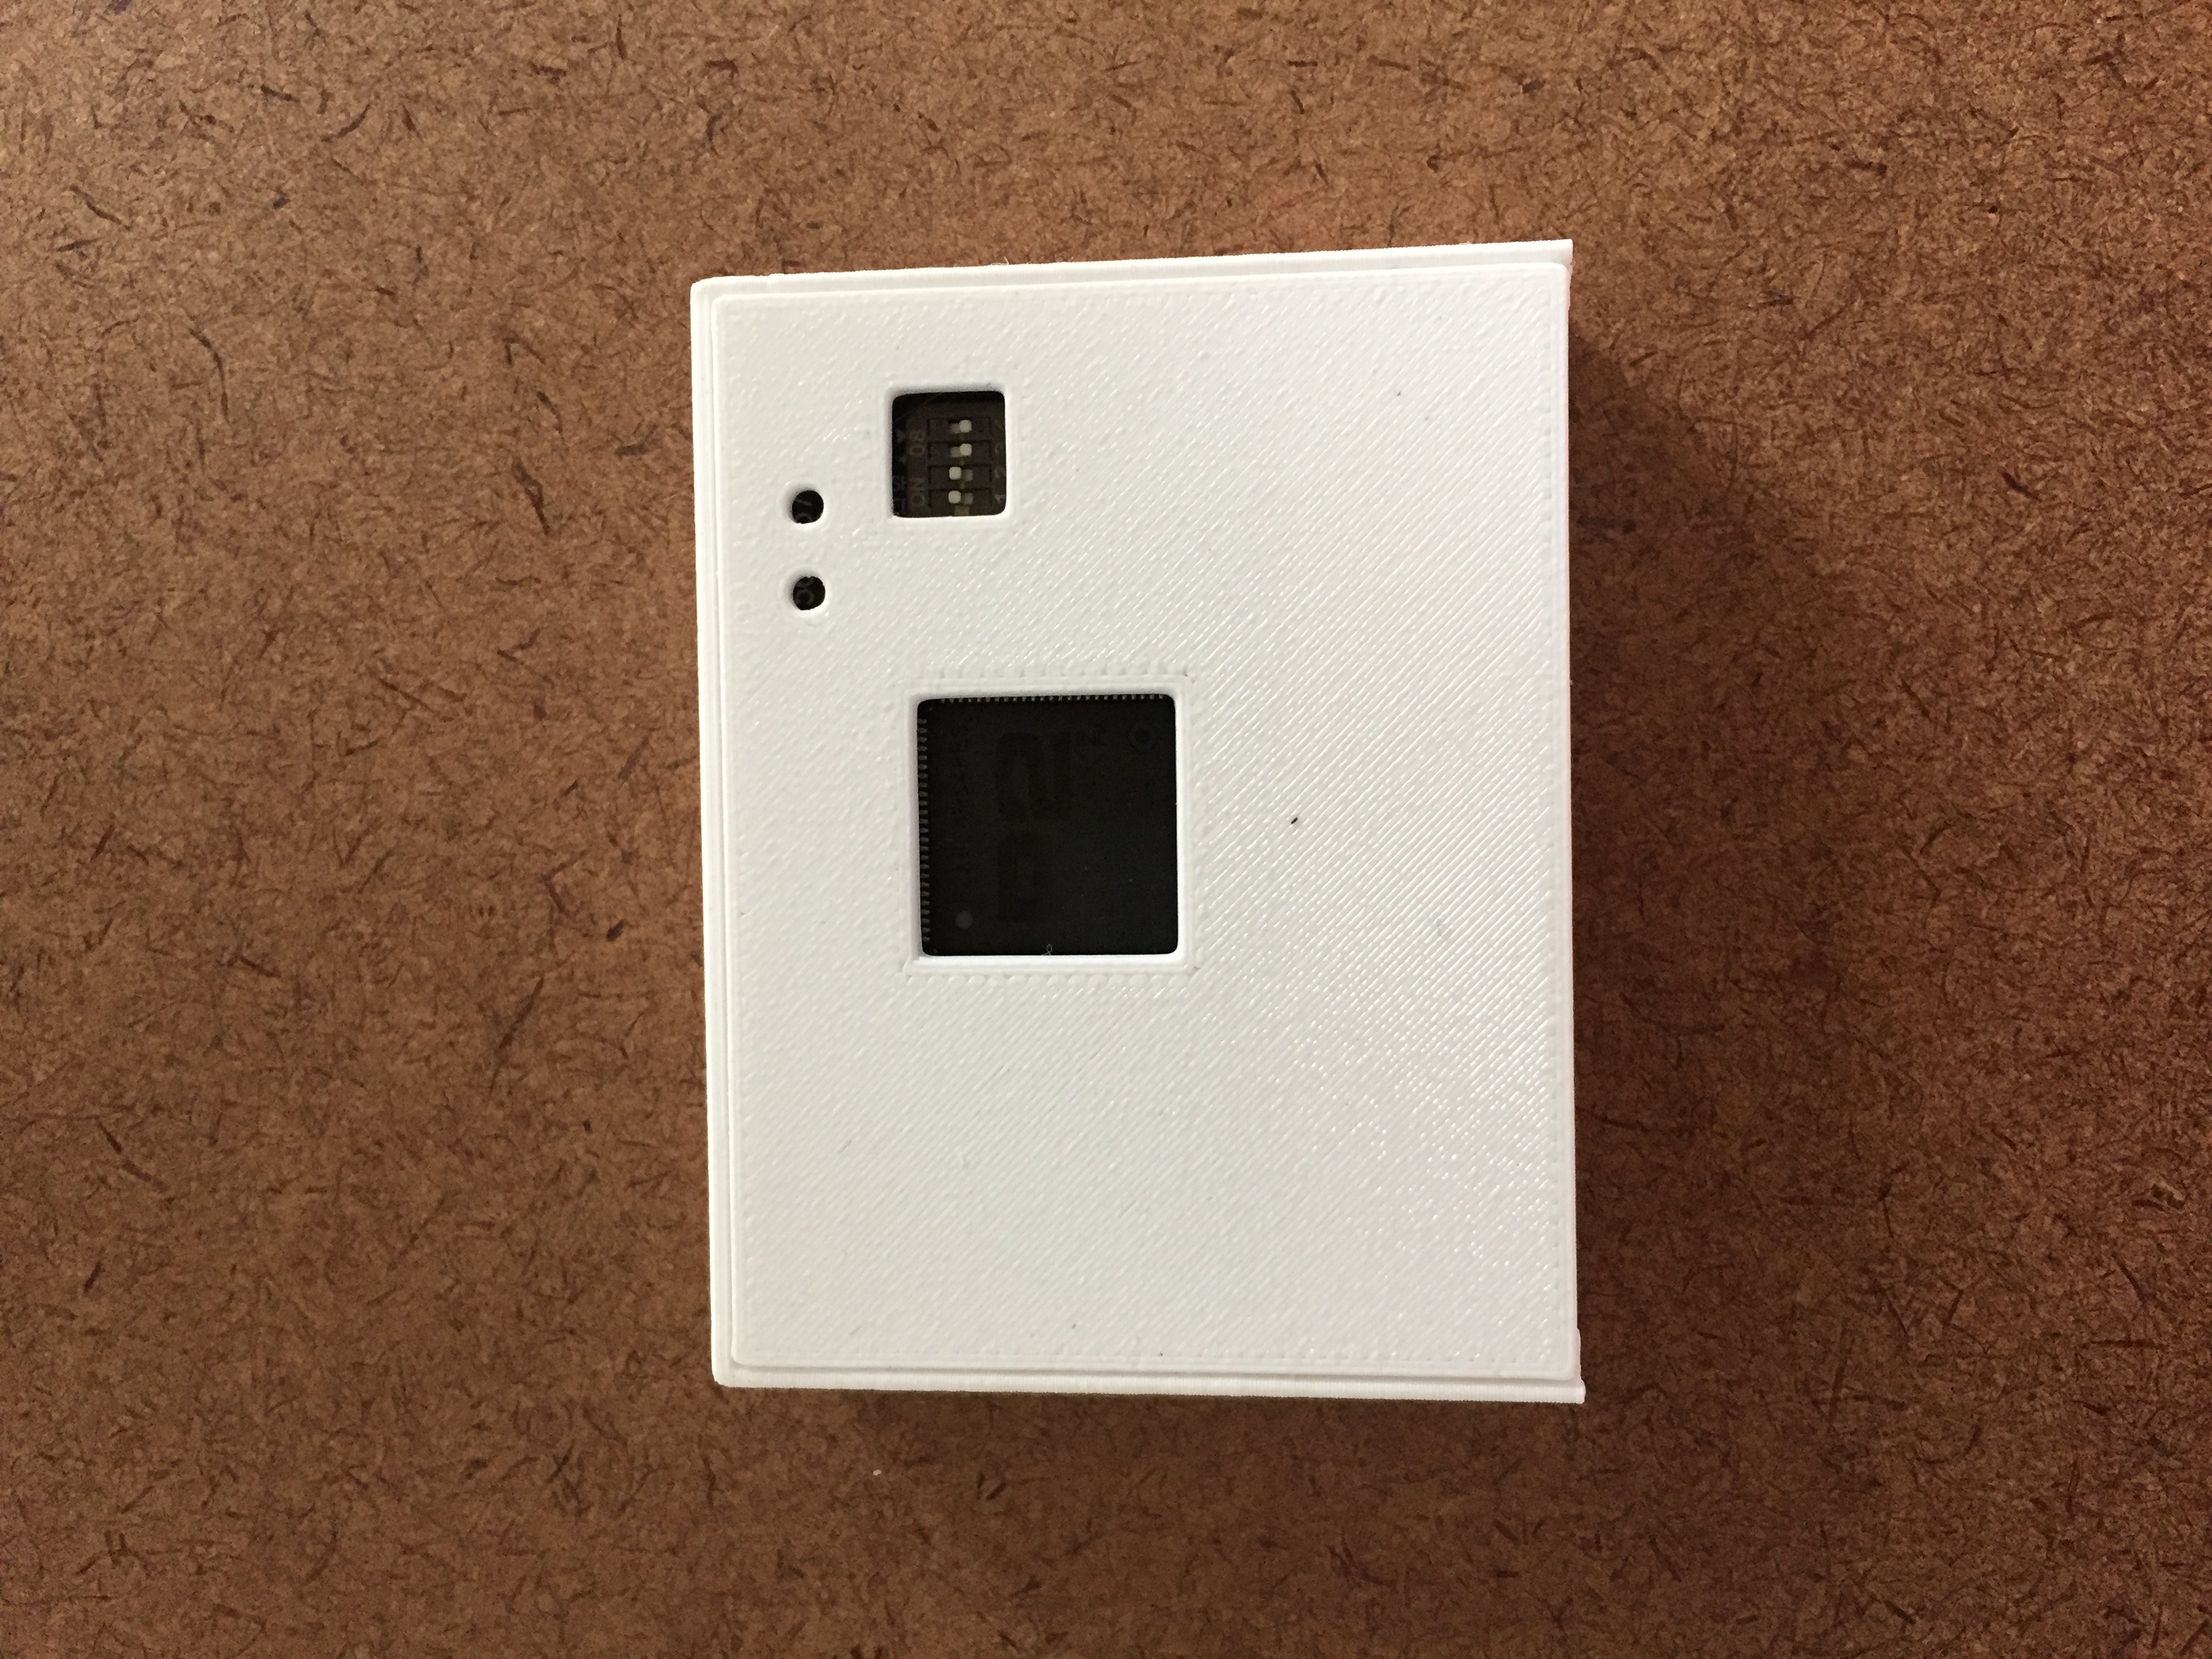
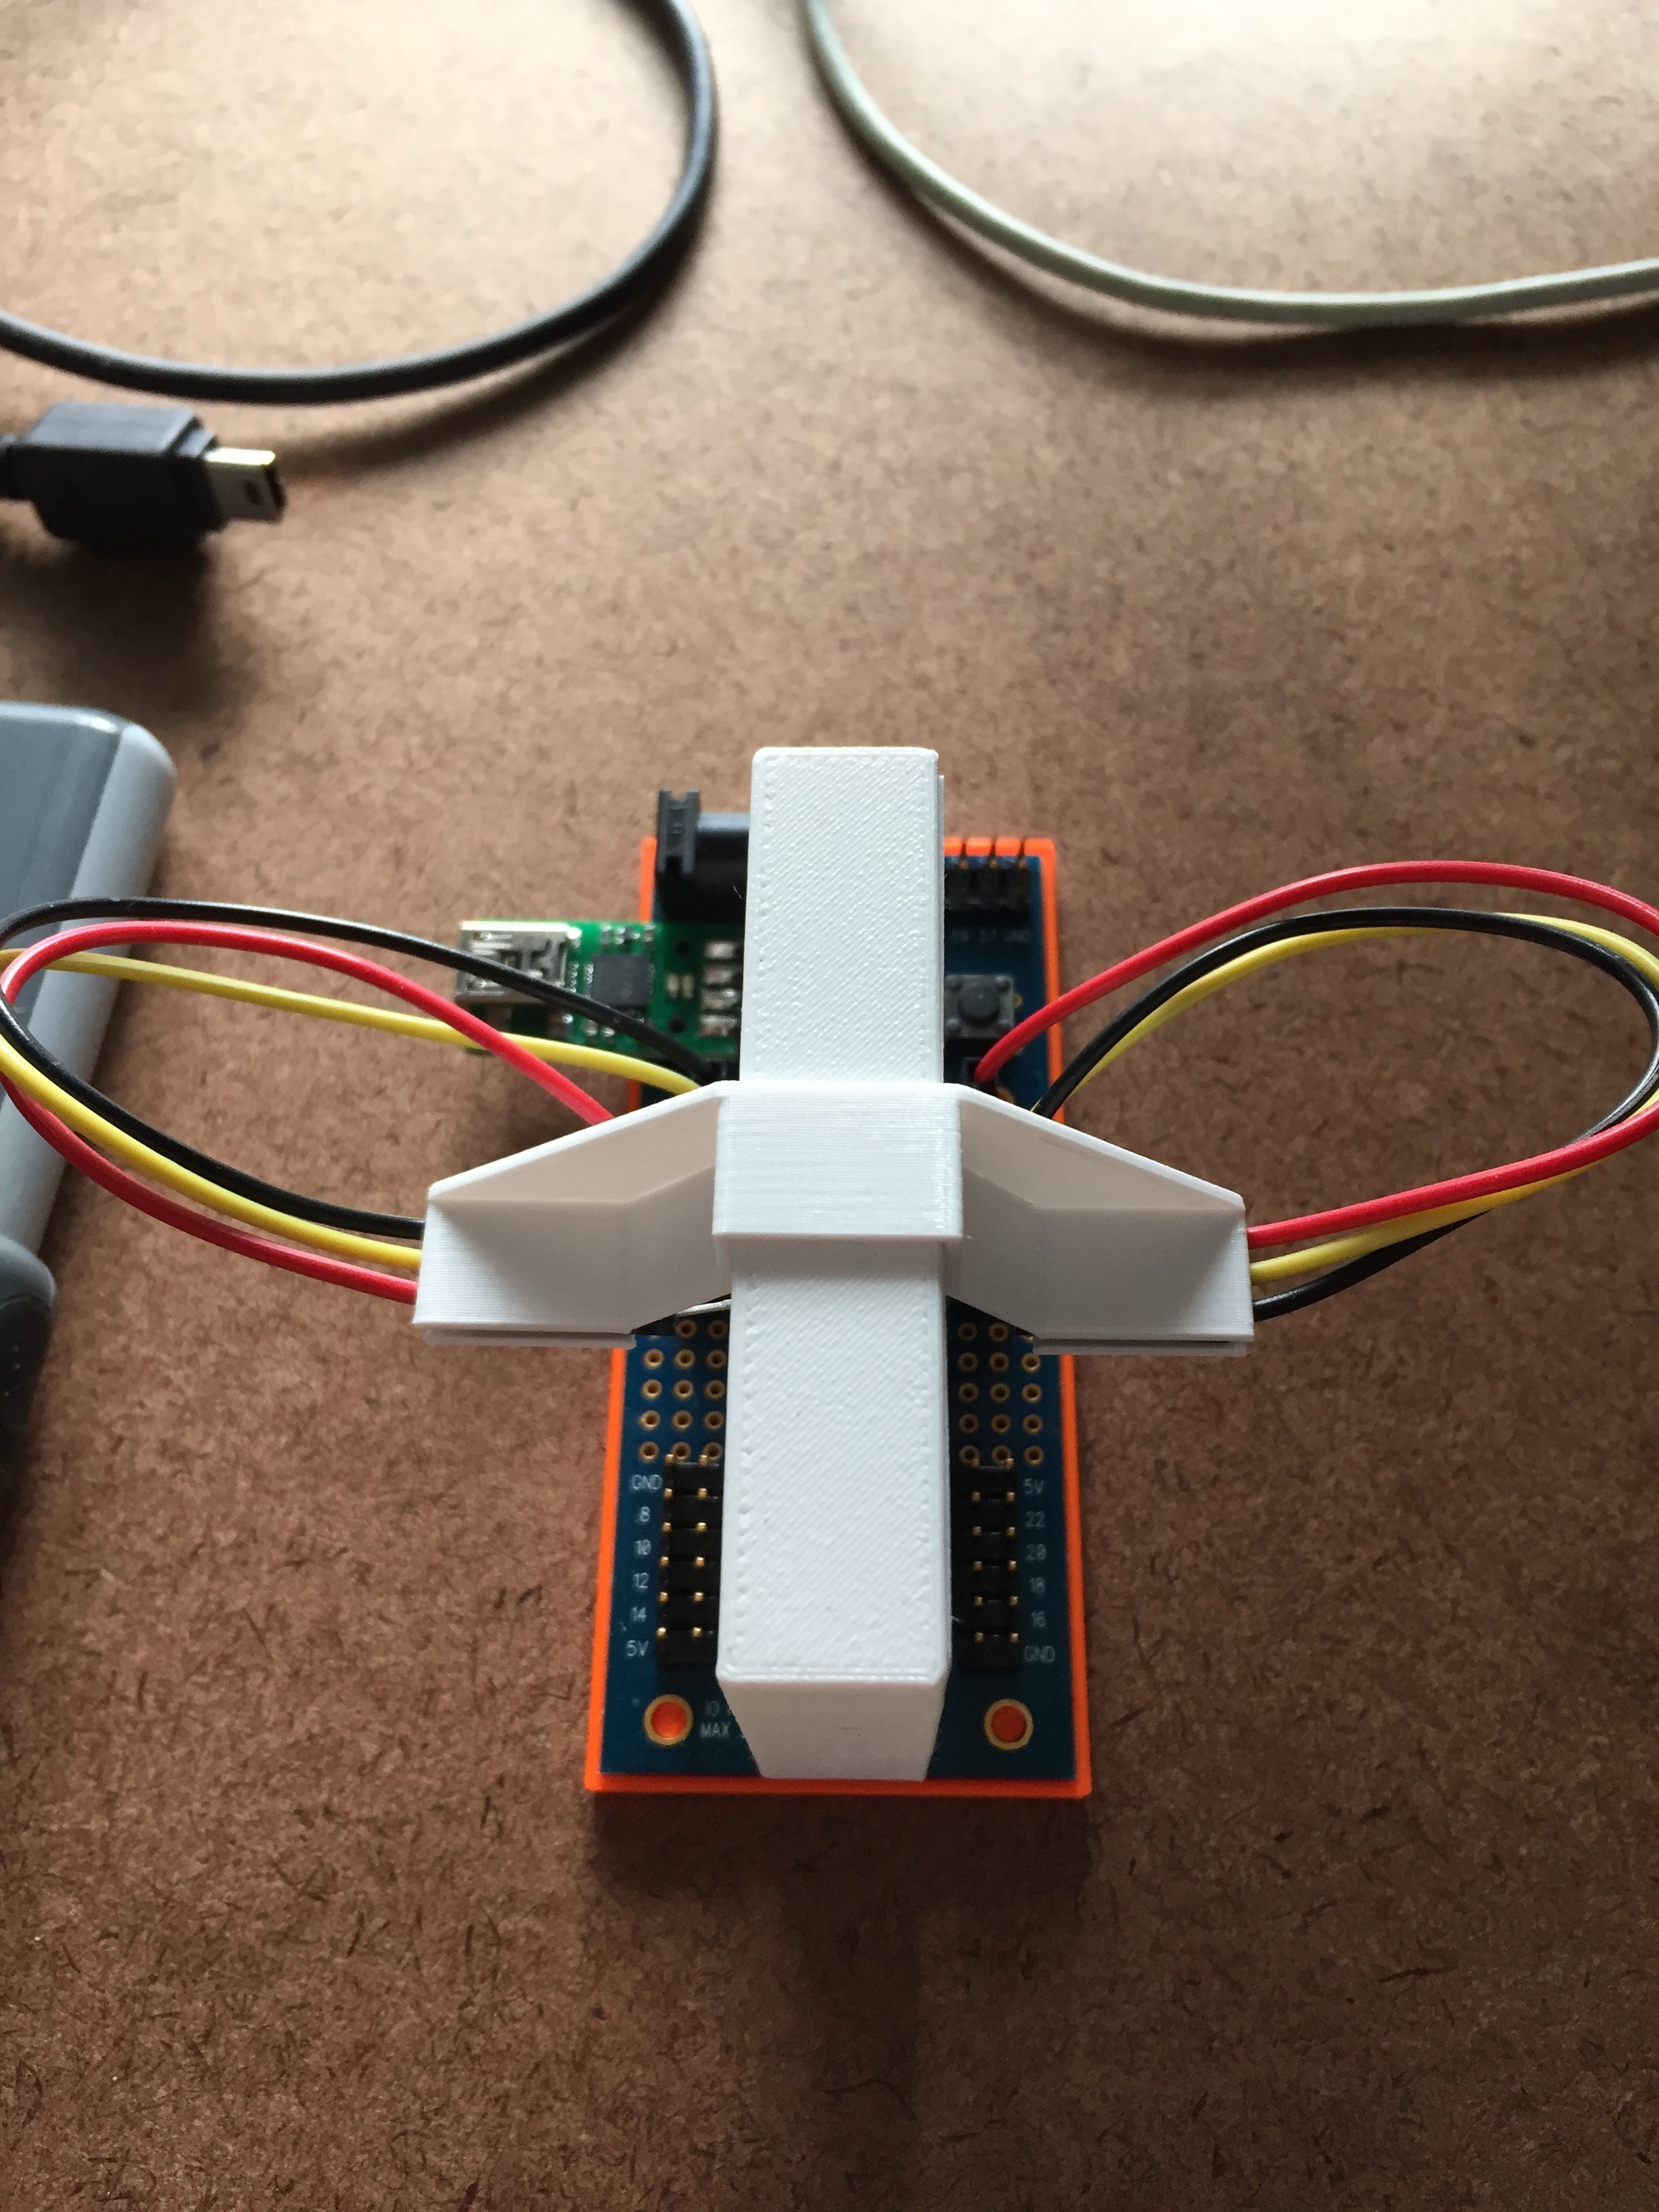
When the P2 Edge was first introduced on the Live Forums there were a few comments about the old game cartridges, so I challenged myself to try and create one for the P2 Edge. I'm finally happy with this version so I'm releasing it to the community. The zip file contains the STL files for printing the shell and the cover. It doesn't require any fasteners. The best way for removing the shell is to set it down on its face or front and while holding the P2 down through the hole in the shell, gently pull up on the shell.
I have two of the original arelims. Sorry, two of the original uncut P2 Edges so I use the cartridge to keep me from inserting it into the two supporting boards the wrong way. You may have noticed the sockets Parallax sells are actually keyed. There is a 2.5mm slot on one edge and a 4mm slot on the other edge. The cartridge has the appropriate ridges and will only fit the slot the correct way [if you don't jam it on the wrong way]. It is also small enough that I can use my accessory boards with it [even on the mini breakout board].
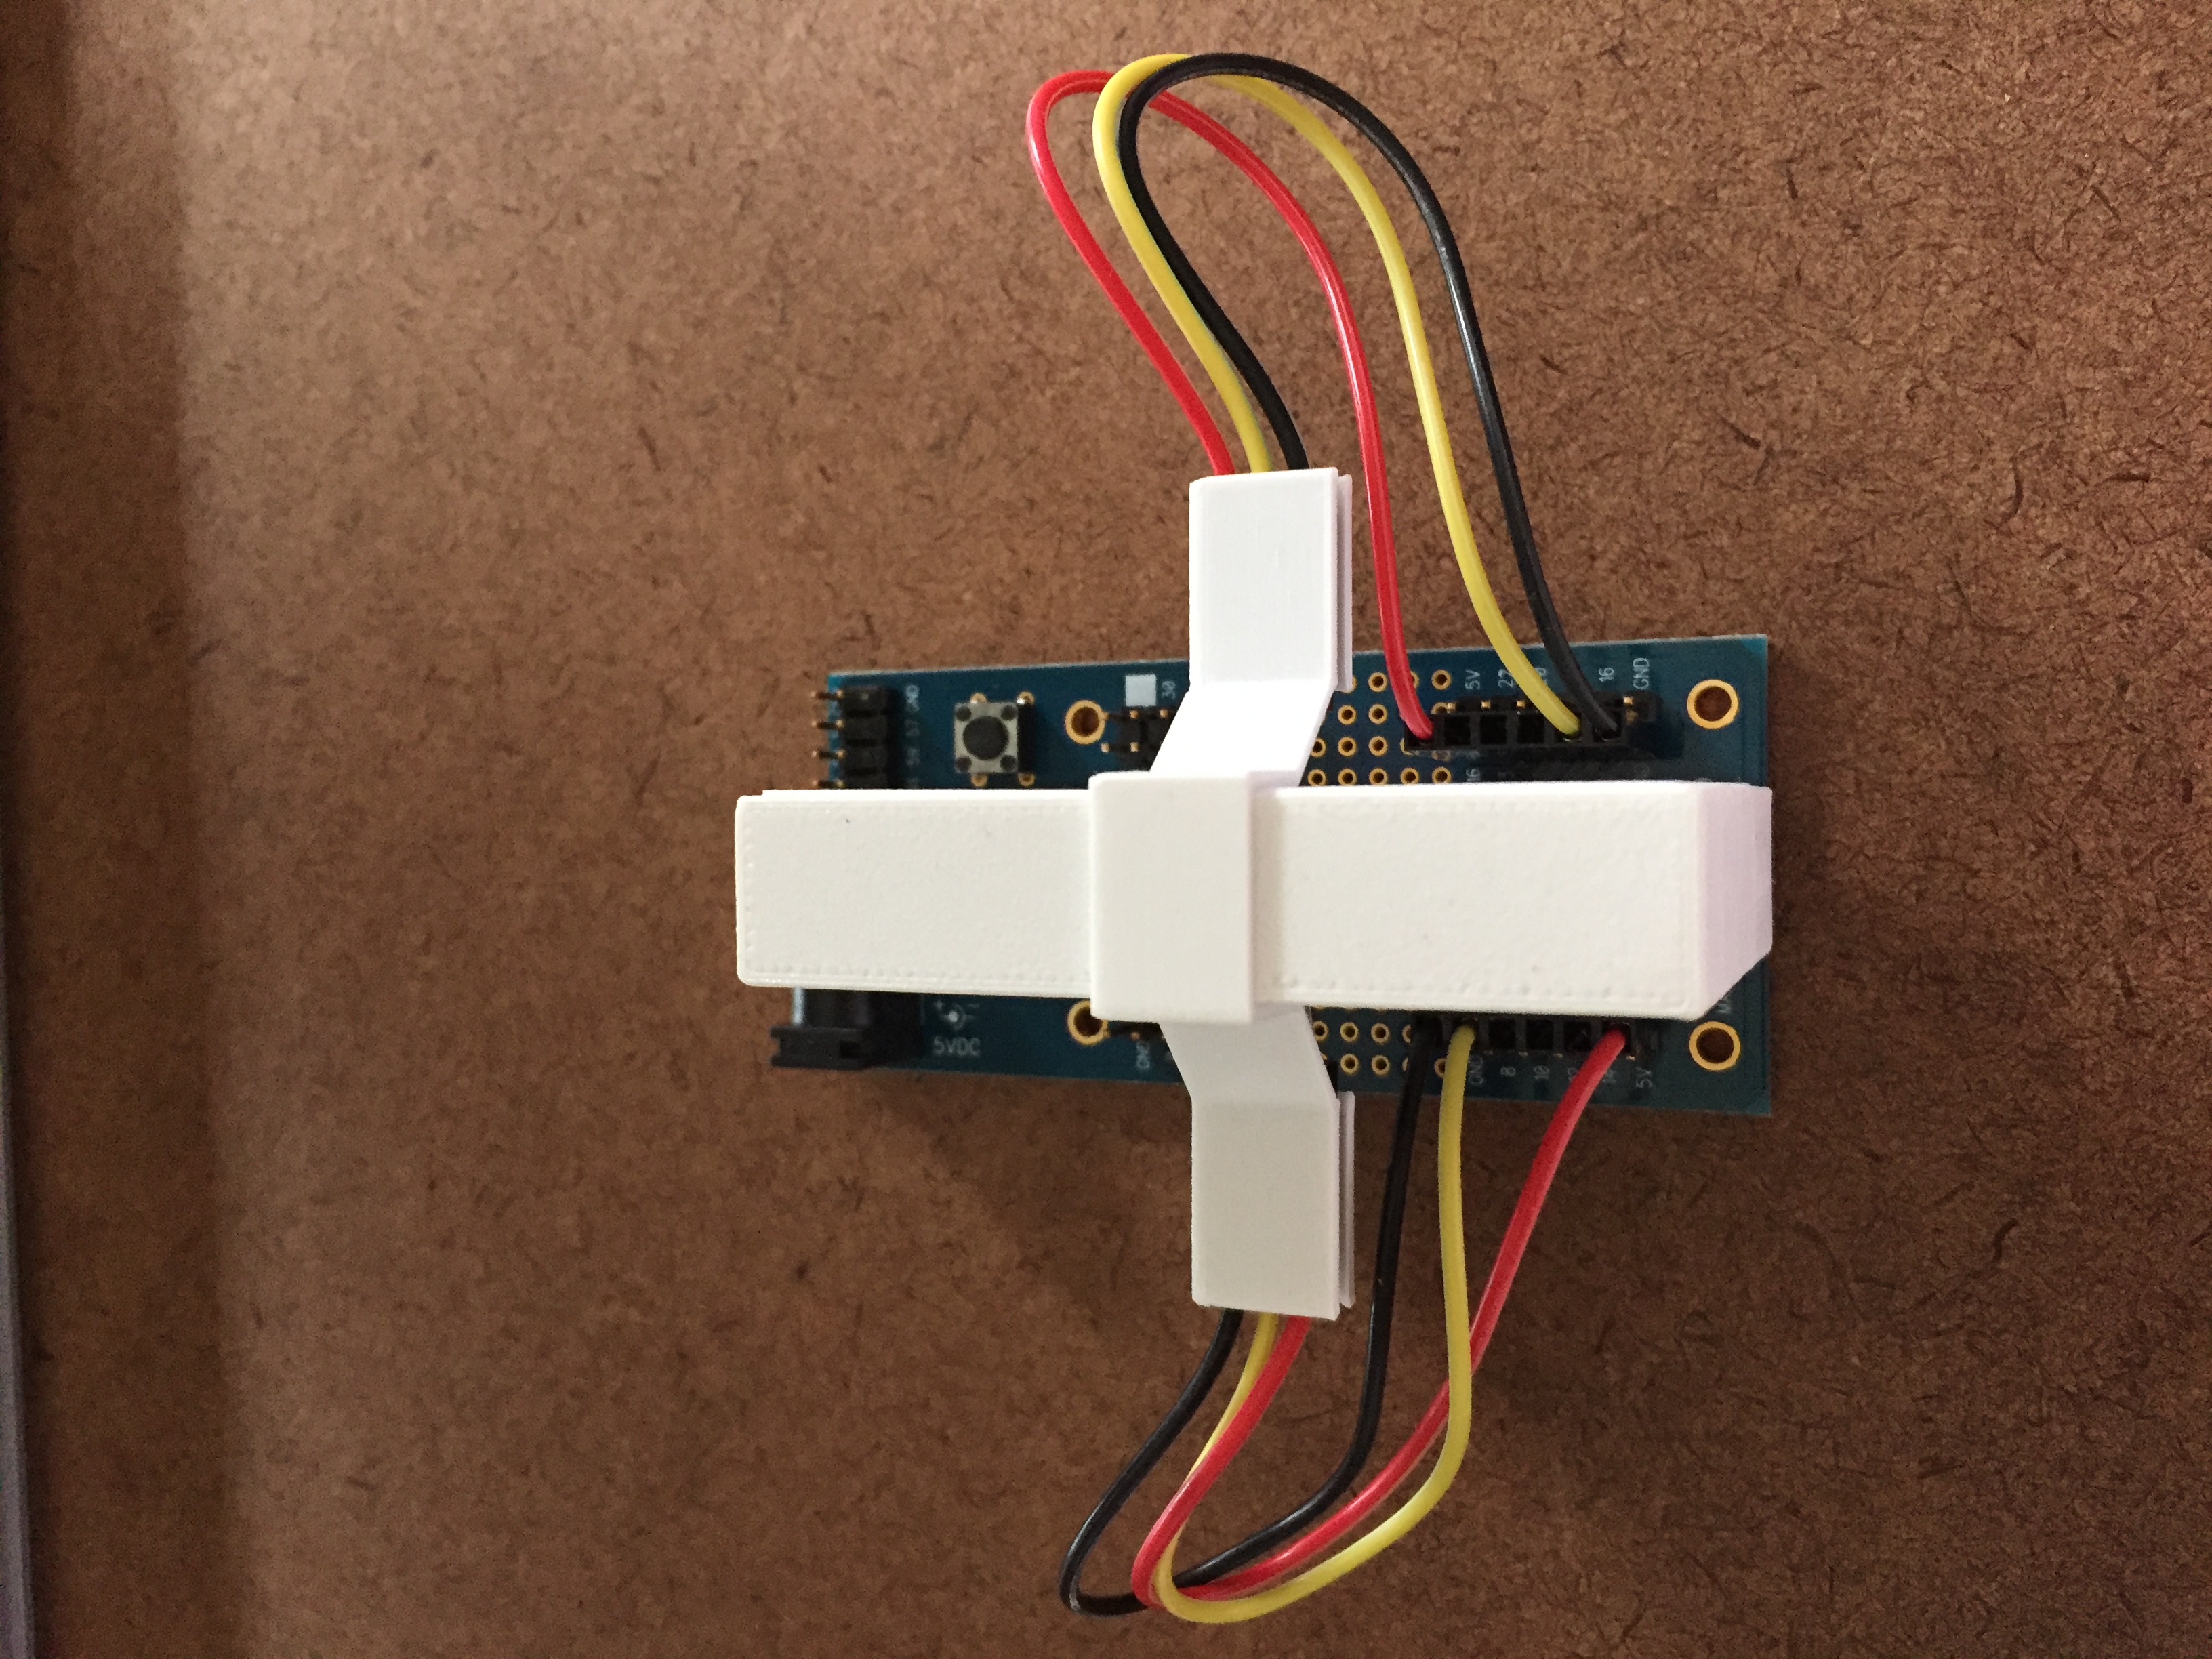
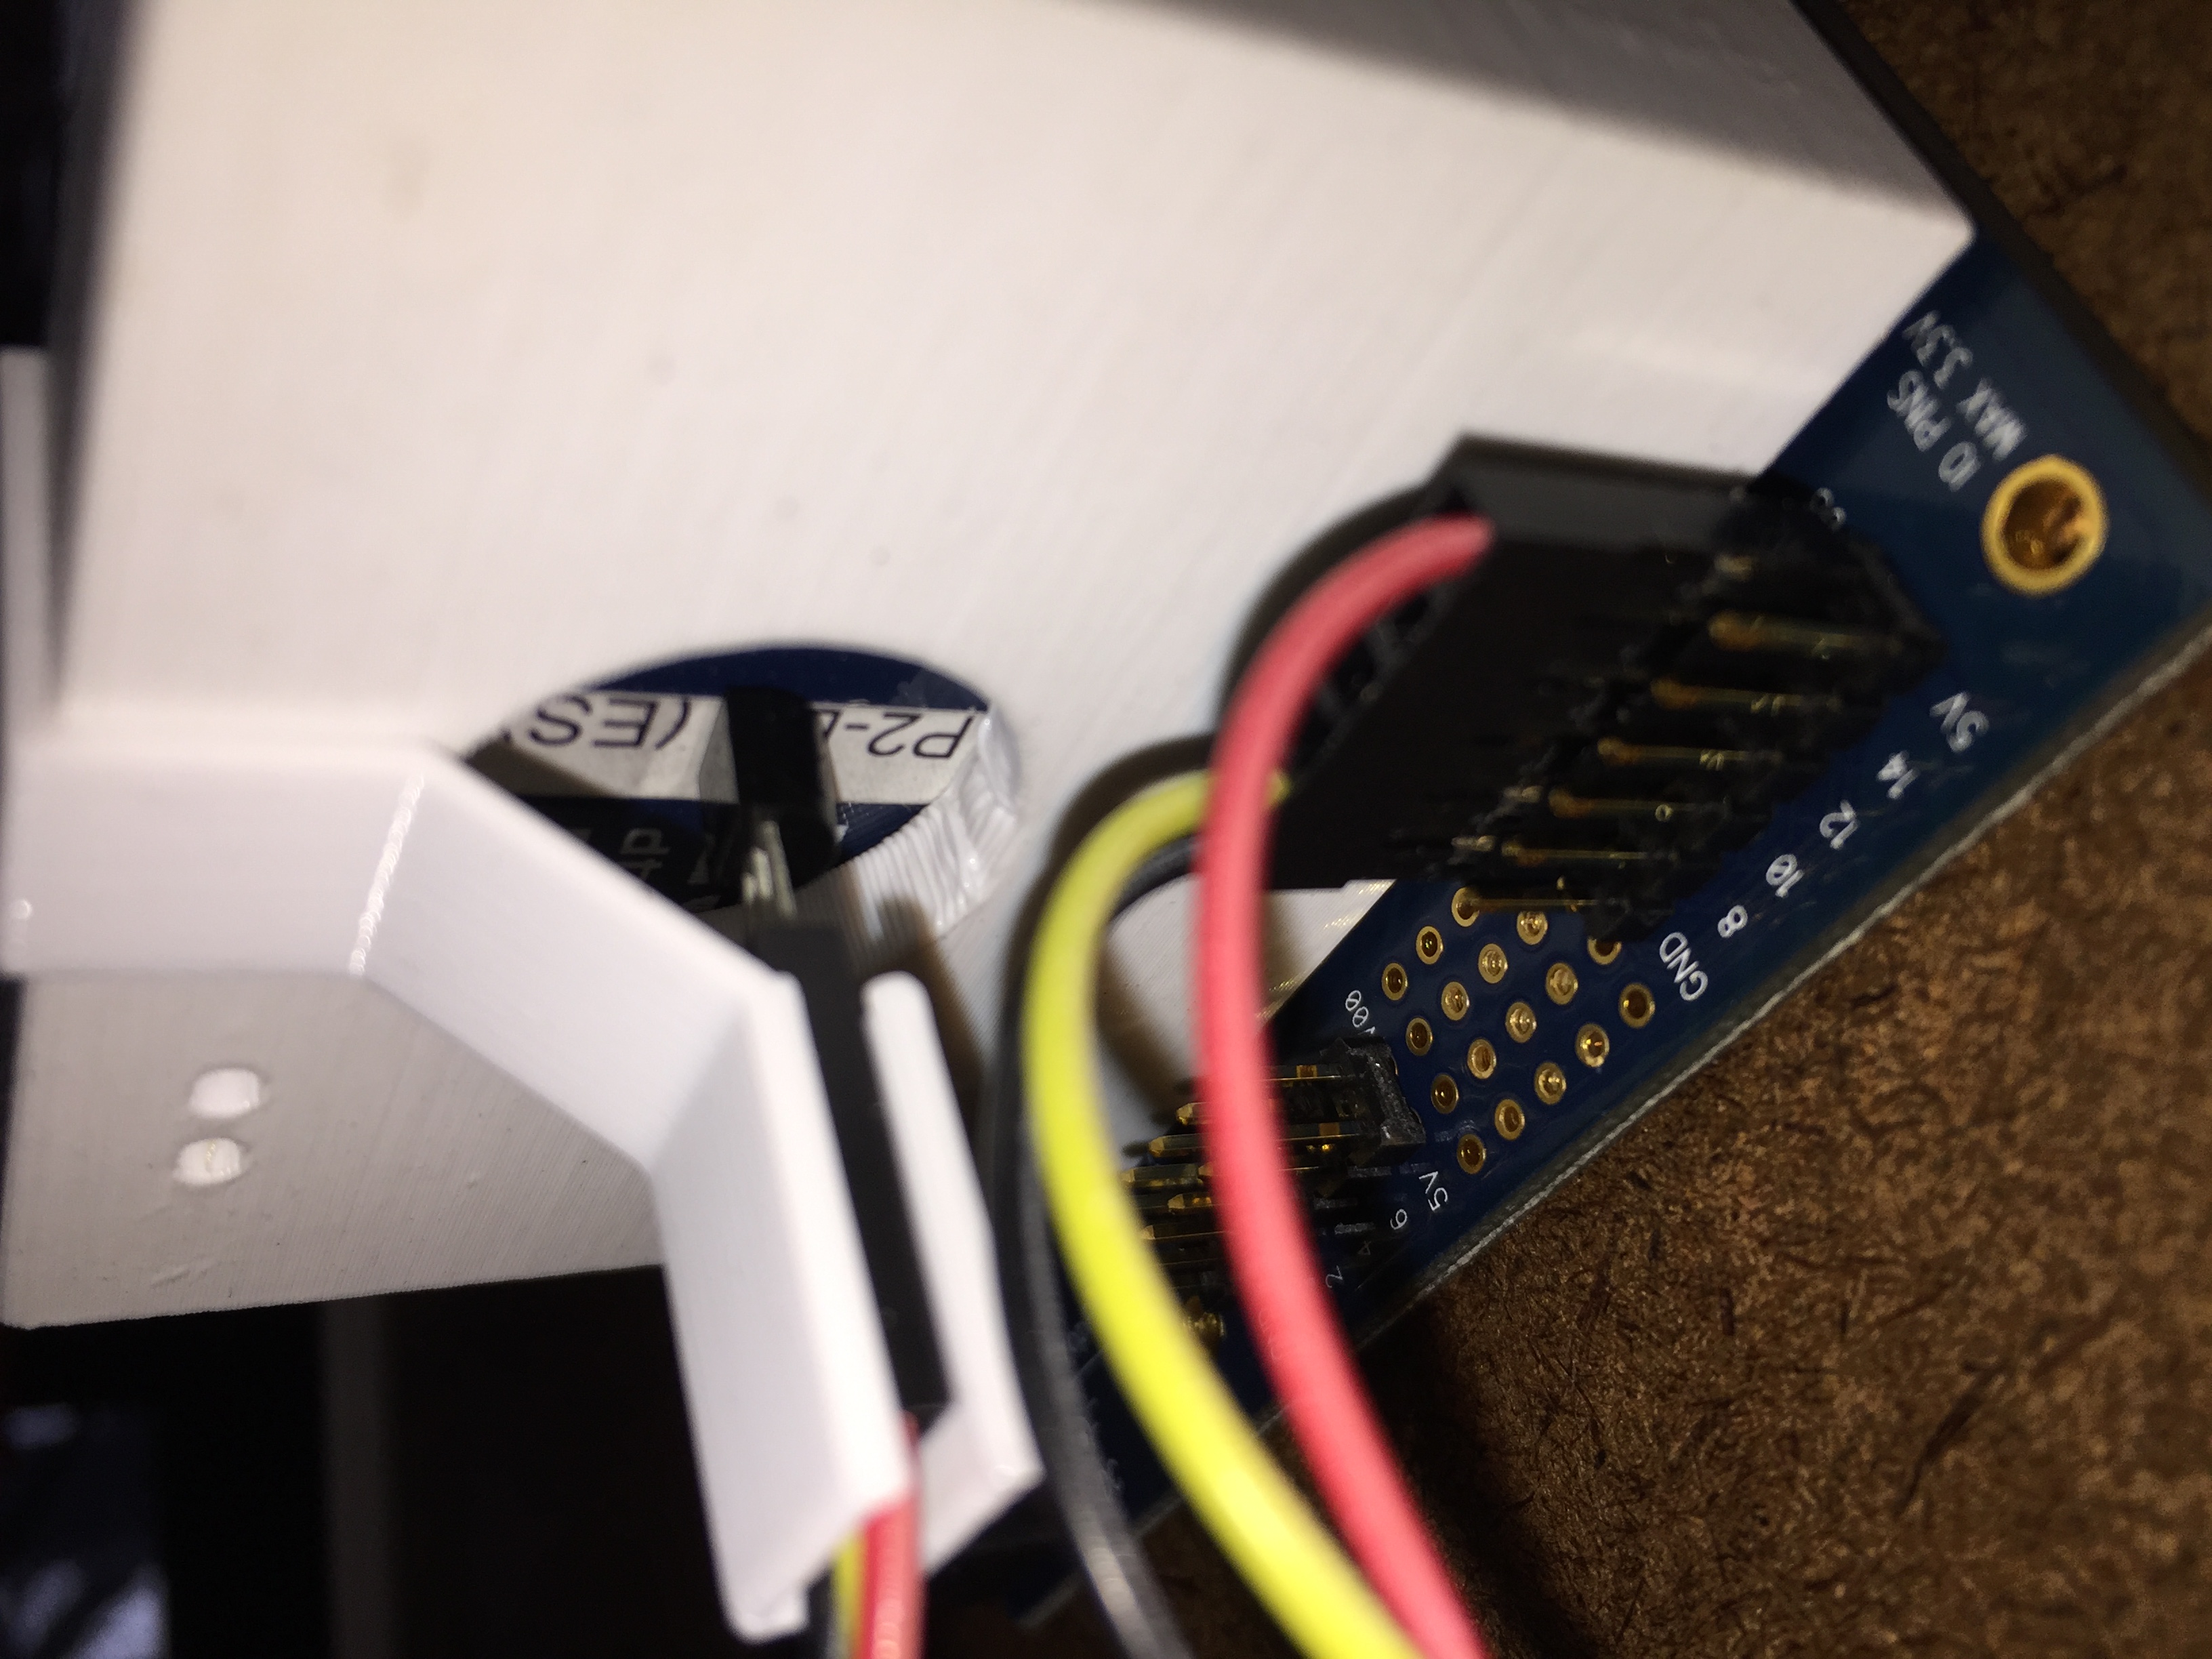
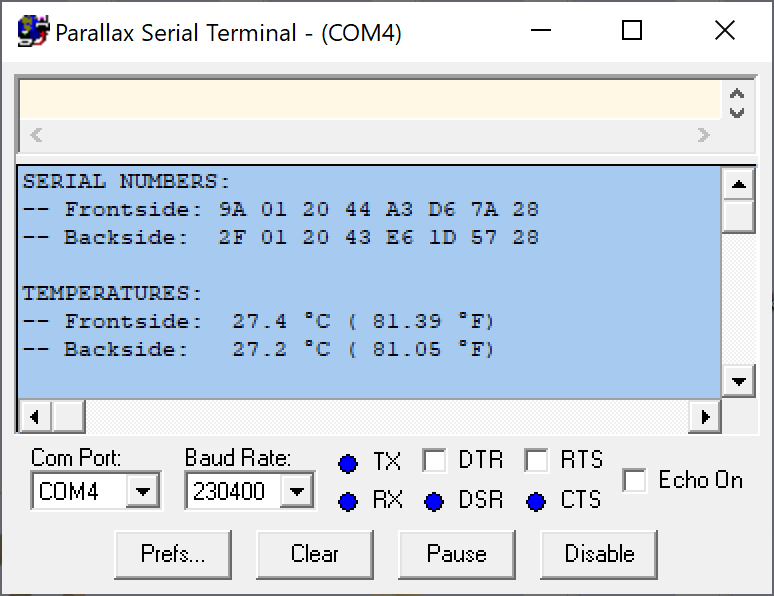
I'm currently using it with a "Halo" I've designed that lets me place two DS18B20 thermometers in direct contact with the top of the P2 chip and thermal area on the bottom of the PCB, so I can take its temperature in these areas. As soon as I finish documenting the code I will release that project as well. Enjoy!
Enjoy!
Comments
Nice. I had suggested a similar idea to Ken Gracey a couple weeks ago. The idea I had was for an injection molded cartridge that had a smooth place for the vendor to apply a product sticker. This would allow exchanges with customers w/o the customer being nervous about handling electronics -- it would be like an old-school game cartridge.
Exactly. I actually have another version without the front windows or the thermal hole in the shell. I just didn't want to run a P2 Edge in it.
All designs should include ventilation. Chimney effect is best.
Since this is for the P2 edge and the PCB wedges in, can I suggest a better and less confusing name, the P2 Wedge?
@Peter Jakacki I like that. The P2 Wedge. A little story behind the 'Me, too!" name. While I was designing the cartridge I was going through words that rhyme with P2 and this little song popped into my head. "Who wants a P2? Me, me,too me,too. Everyone's going to want one".
I am thinking of a little clamshell (conductive) plastic package that snaps over the P2 PCB. Add a label "Propeller Powered"
Just in case you're unaware (if so, I envy you) "Me Too" has specific meaning in much of society right now. It's probably not a good product name in the current year (probably current decade).
It looks really cool. I don't dislike the "P2 Wedge" name but it also doesn't strike me as the perfect name either. I'm not sure if wedging in a part is a good image for an expensive industrial controller.
P2 Edge Station
@PropGuy2 Good idea. I've added, create a "Propeller Powered" label to my list.
Thanks @Duane Degn . I'm aware. It's just a name. Although "The Cartridge" serves a purpose, I don't intend on marketing it. I've read a lot on Branding. I use to own a Chevrolet Nova. I loved it despite the fact that Nova meant "no go" in Spanish. Maybe I should use that as the first public method in my drivers, "PUB nova()". I choose to not let other people's darkness suppress my spirit. I learned the concept of "pushing back" while supporting Mission Control from the Mission Evaluation Room. You can sit there in silence and let the crew die, lose the station or allow the mission to fail OR you can "push back" and let your voice be heard. Thanks for looking out for me. Like my grandfather use to say when he was my age, "I'm old and I've earned the right to speak my mind". That being said, I intend no disrespect or harm against anyone. Maybe the label will have a rainbow on it. Everyone should be allowed to enjoy a beautiful rainbow, like we did as kids! Stepping off my soapbox now and getting back to inventing more cool stuff for the P2.
@PropGuy2 Good idea. I've added, create a "Propeller Powered" label to my list.
I'm working on one of those, too.
I like this idea, the P2 edge looks delicate enough that a stray 5v cable could easily damage it and this would help keep it safe.
The fact you've found that the connector is keyed is a huge bonus too, kudos to you CJMJ
PS Keep it simple, P2 Edge Cart - does exactly what it say on the tin ;-)
Are these the type of stickers you want to make?
You know I was just trying to find a place that did domed decals/stickers the other day, but the cheap sticker places don't seem to.
Those domed stickers were made by local guy who I helped with some laser cutting once. I can remember his name but not his forum pseudonym.
I'd like to get some 'MicroPython inside' stickers made. It may make sense to get some other variants at same time. TaqOz? Cordic? OzFFS? OzPropDev code?
I bought a couple of dozen of these from the guy in OZ for US distribution.. I can't remember his name right now. I'll drive deep into old thread if the search function isn't broke.
@"Duane Degn" YES!!! I would definitely like some of those stickers.
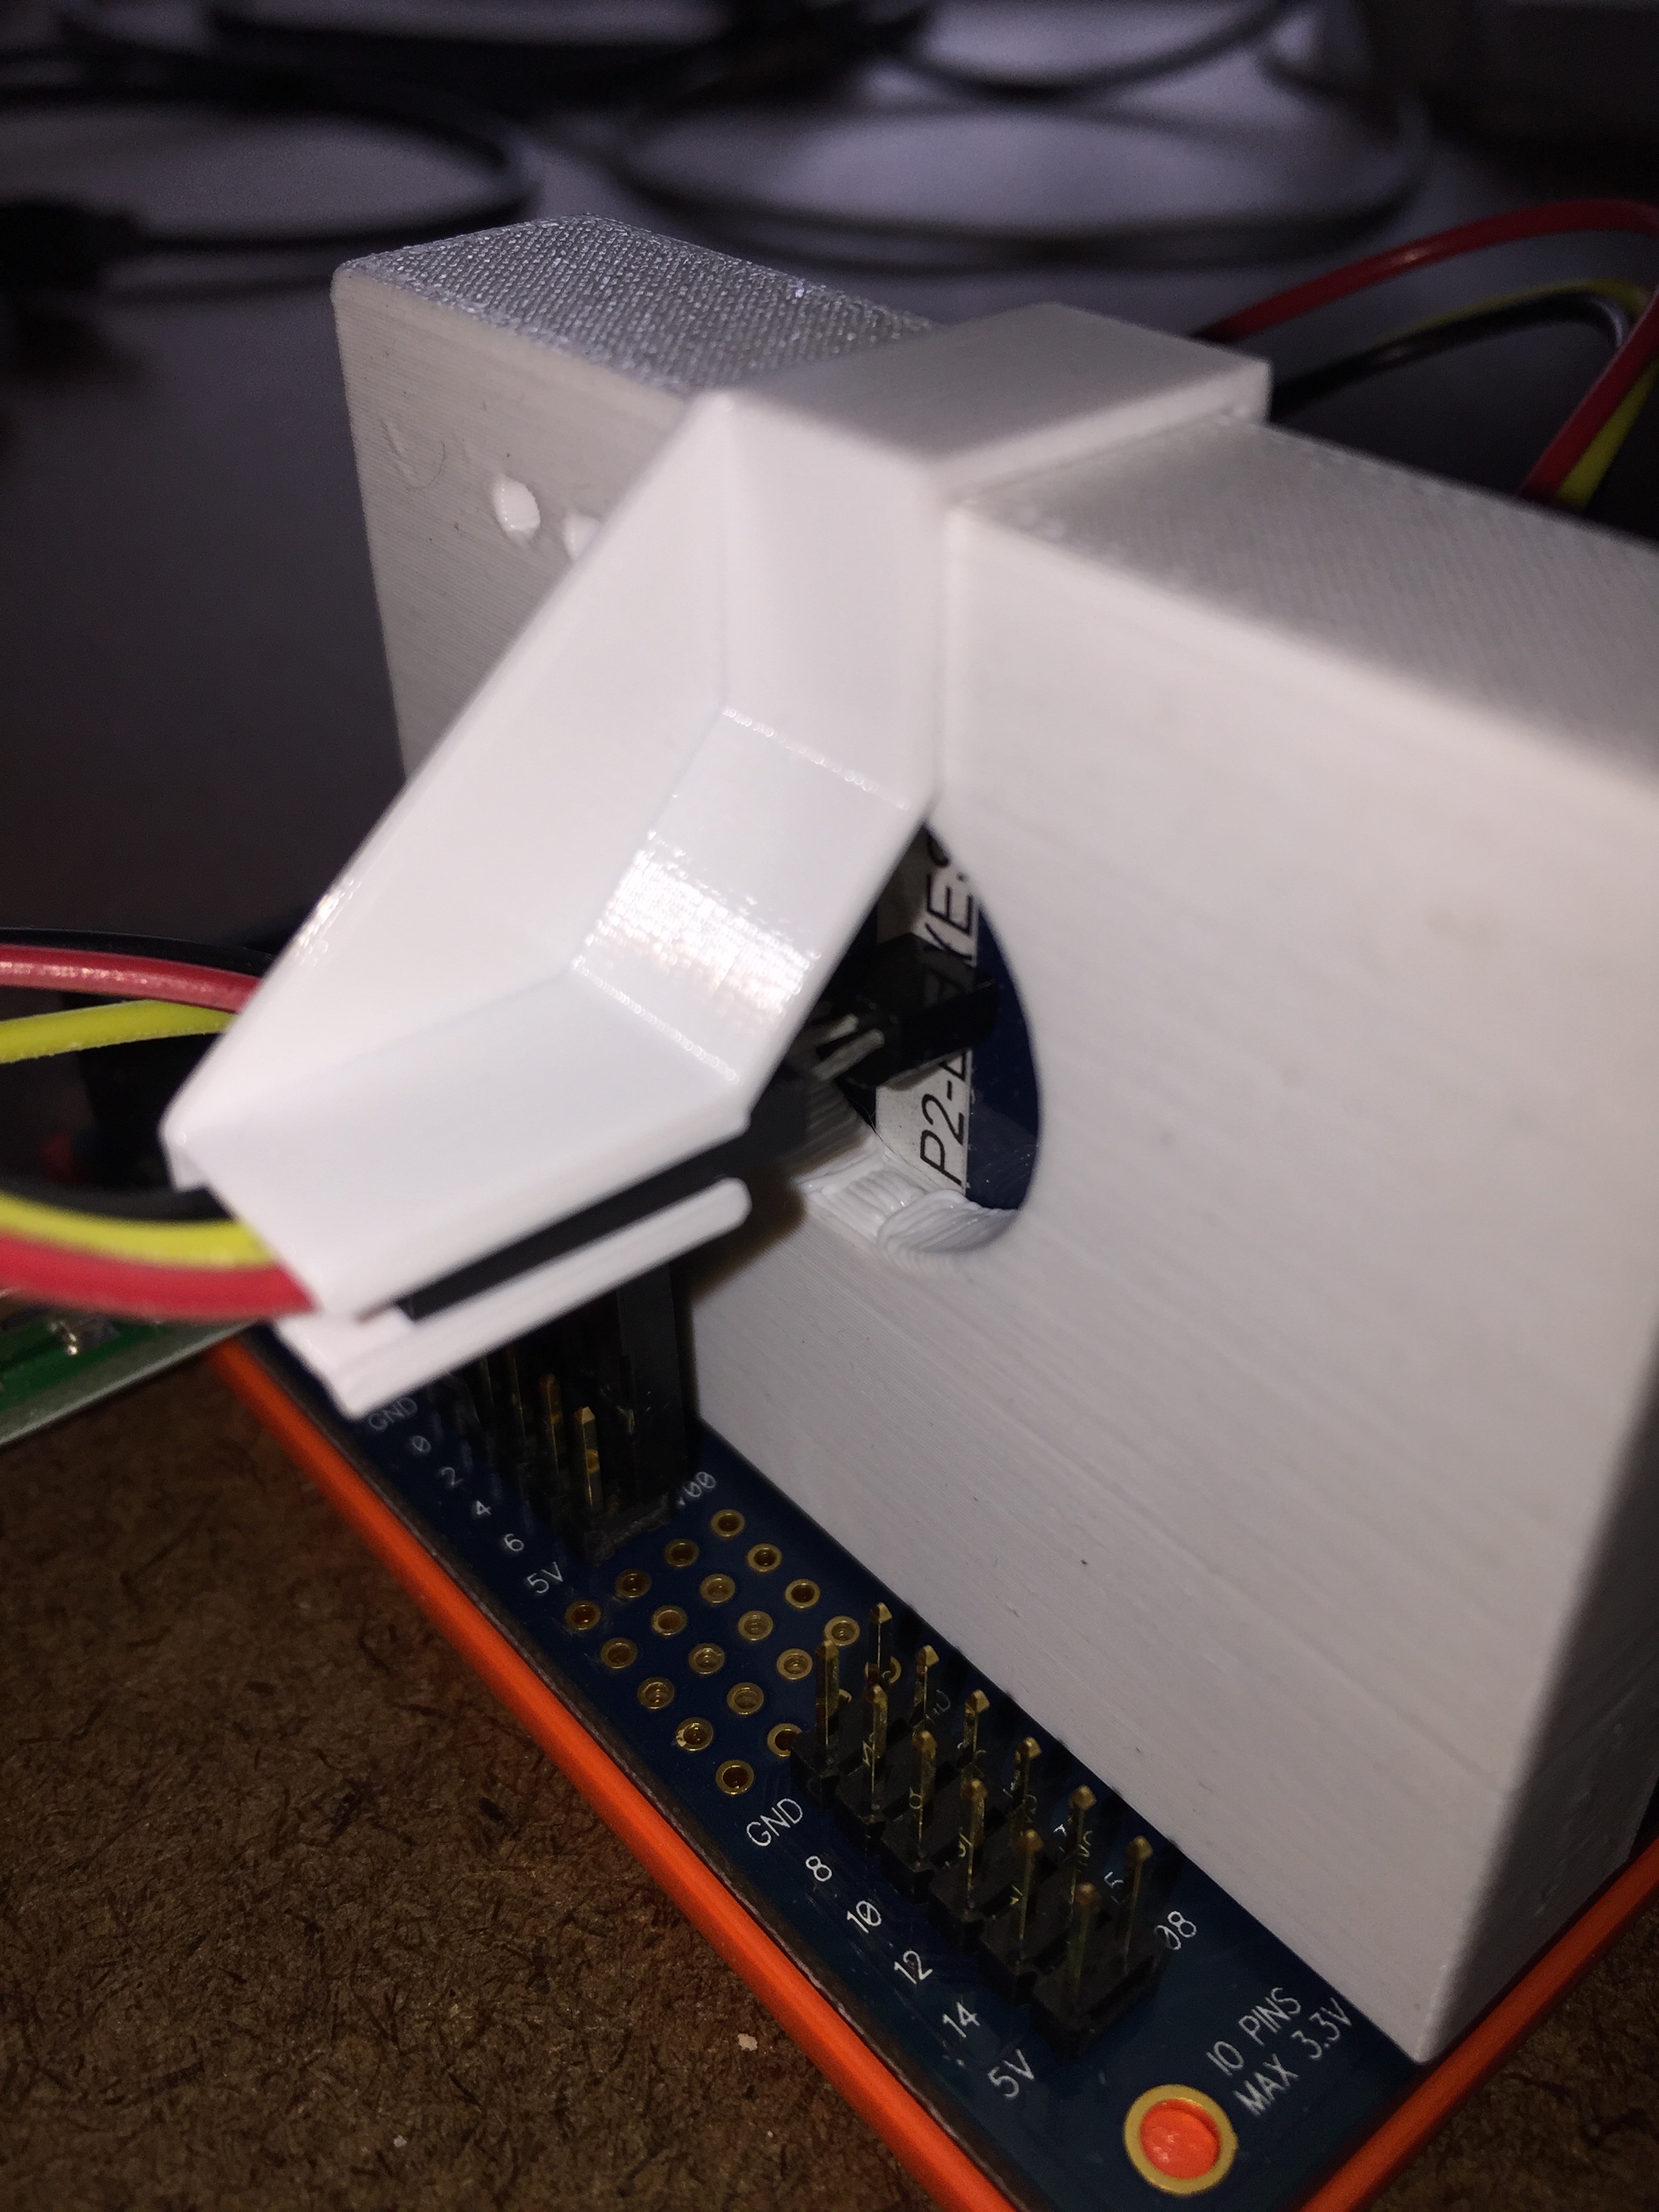
Here's the Halo as promised. I'm not 100% satisfied with it but it works. The zip file contains the STL file and software. Here's some assembly pictures.
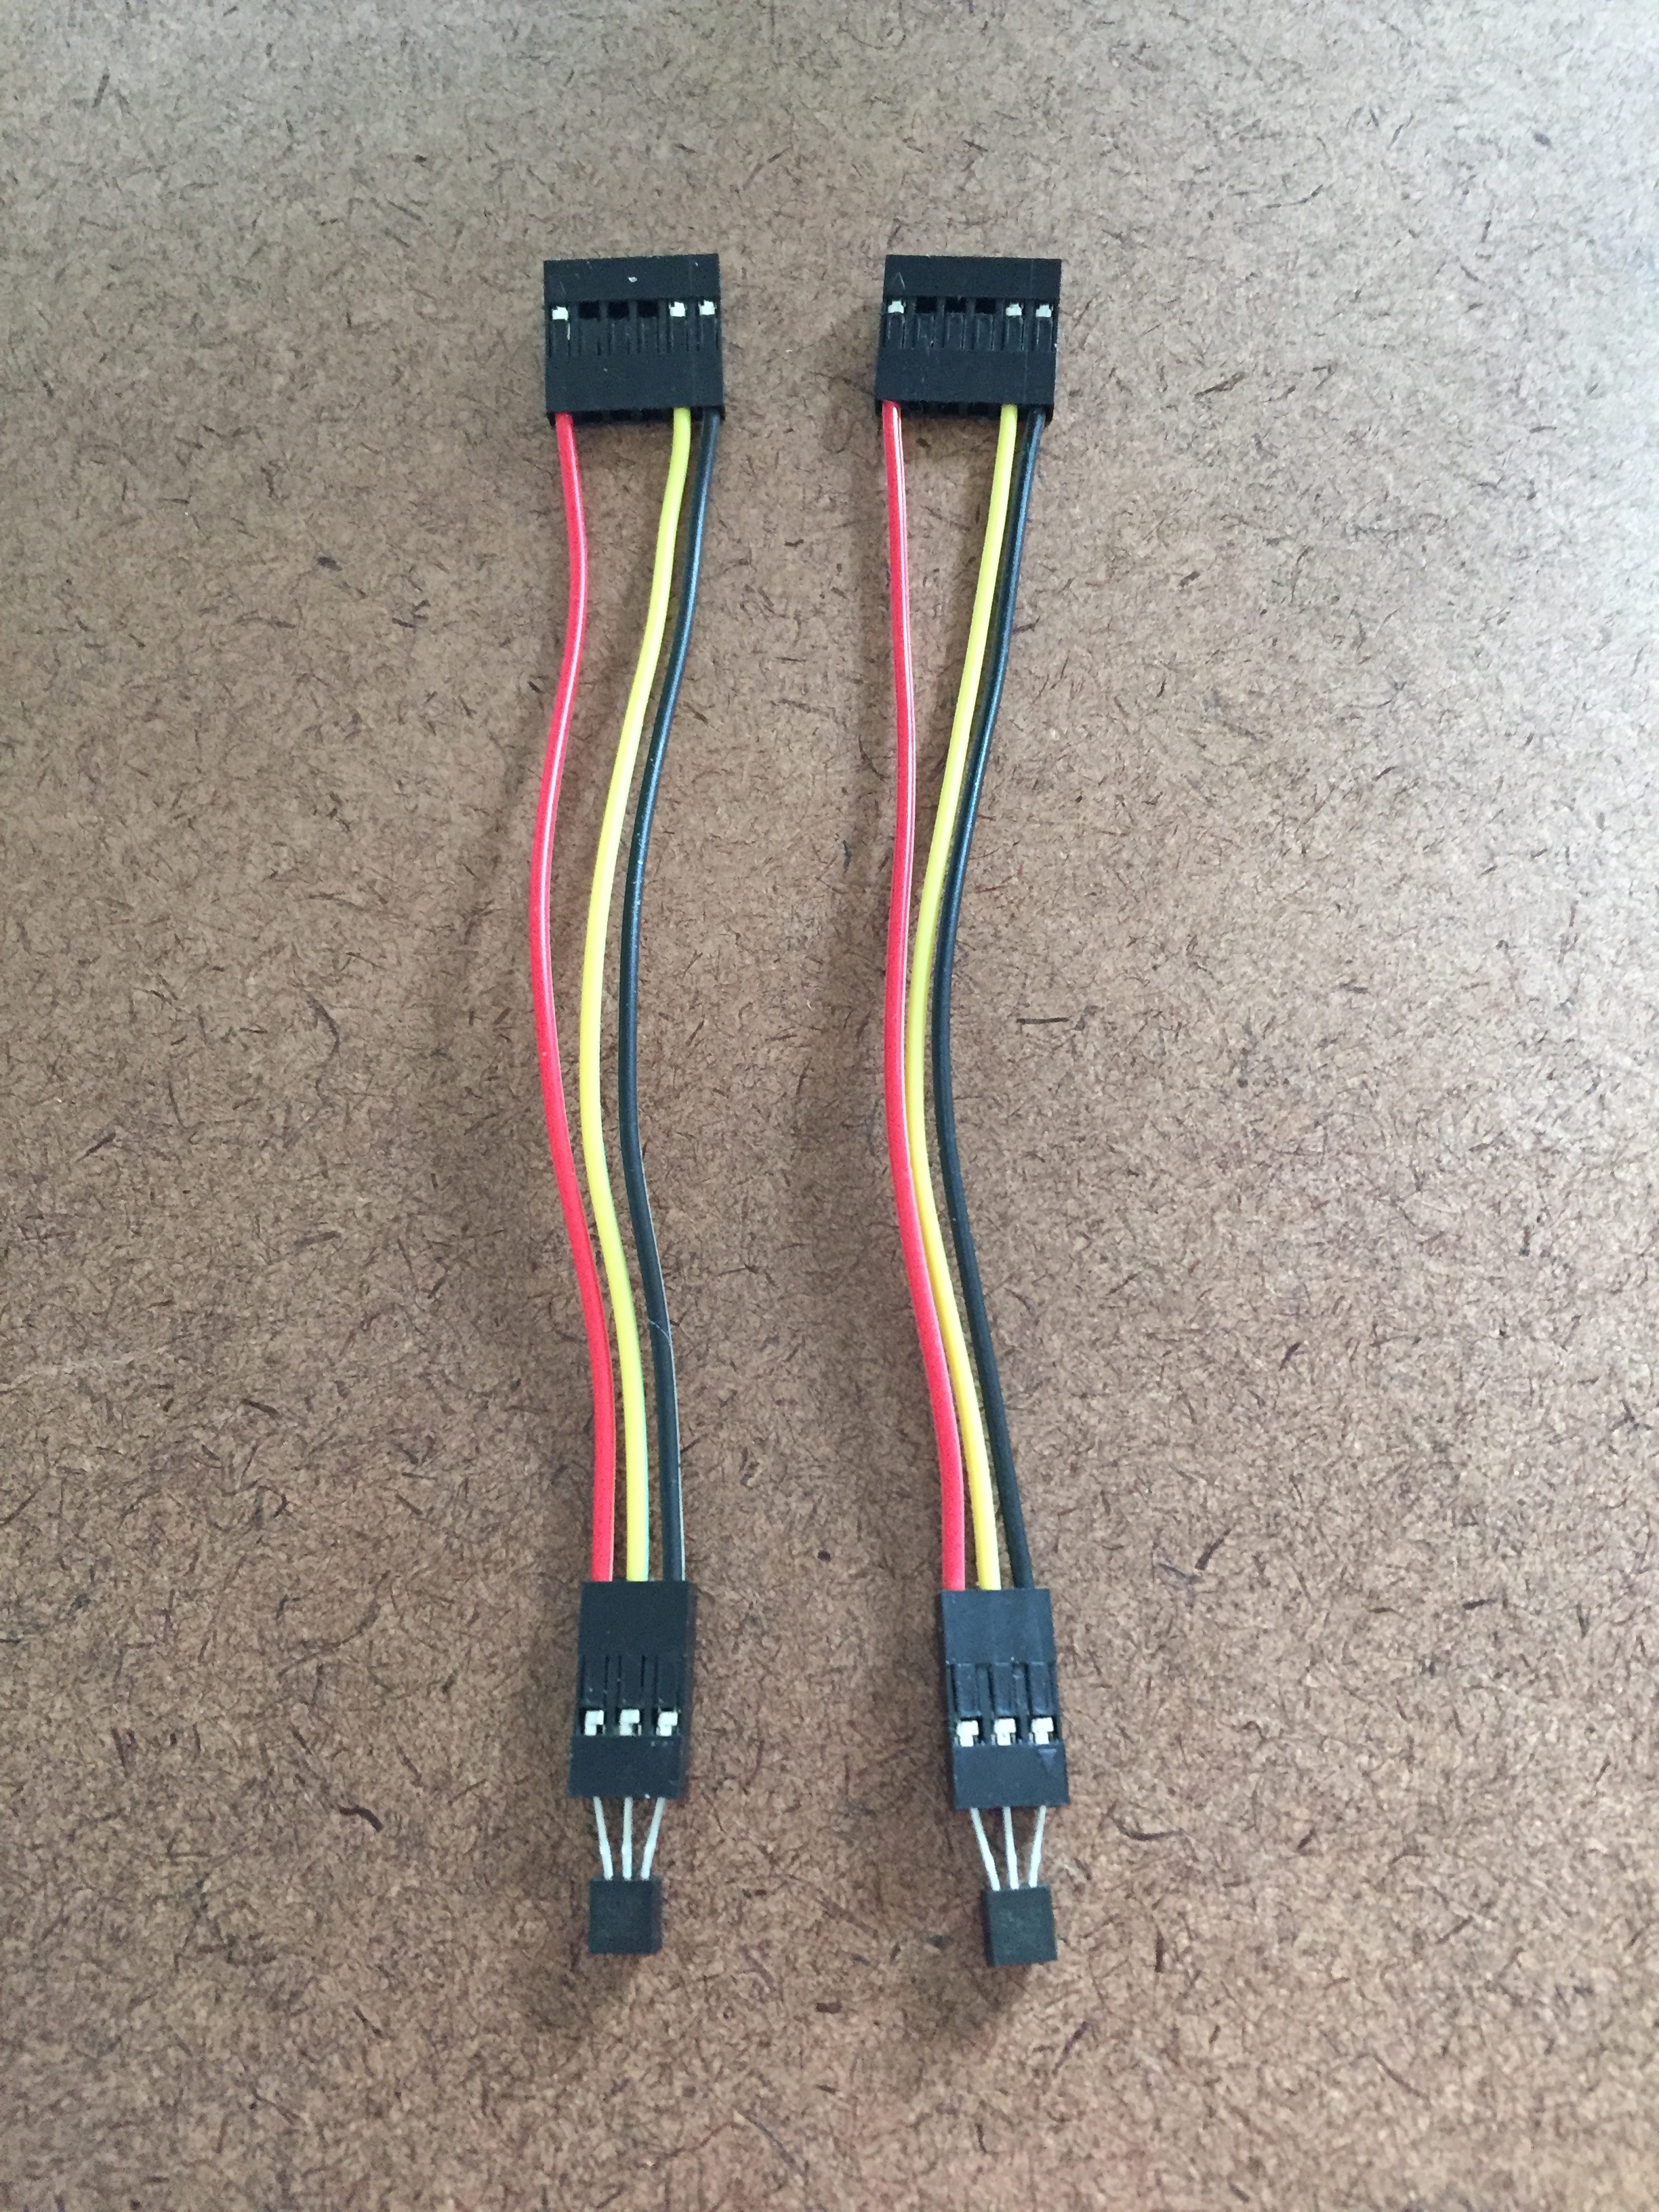
The assembled wire harnesses with inserted sensors.
The assembled Halo. Because the sensors are thicker than the slots you have to insert the wires into the slot from the side and then pull the 1x3 connectors into the slots up to the sensor. Be careful to not pull the sensors out of the connectors.
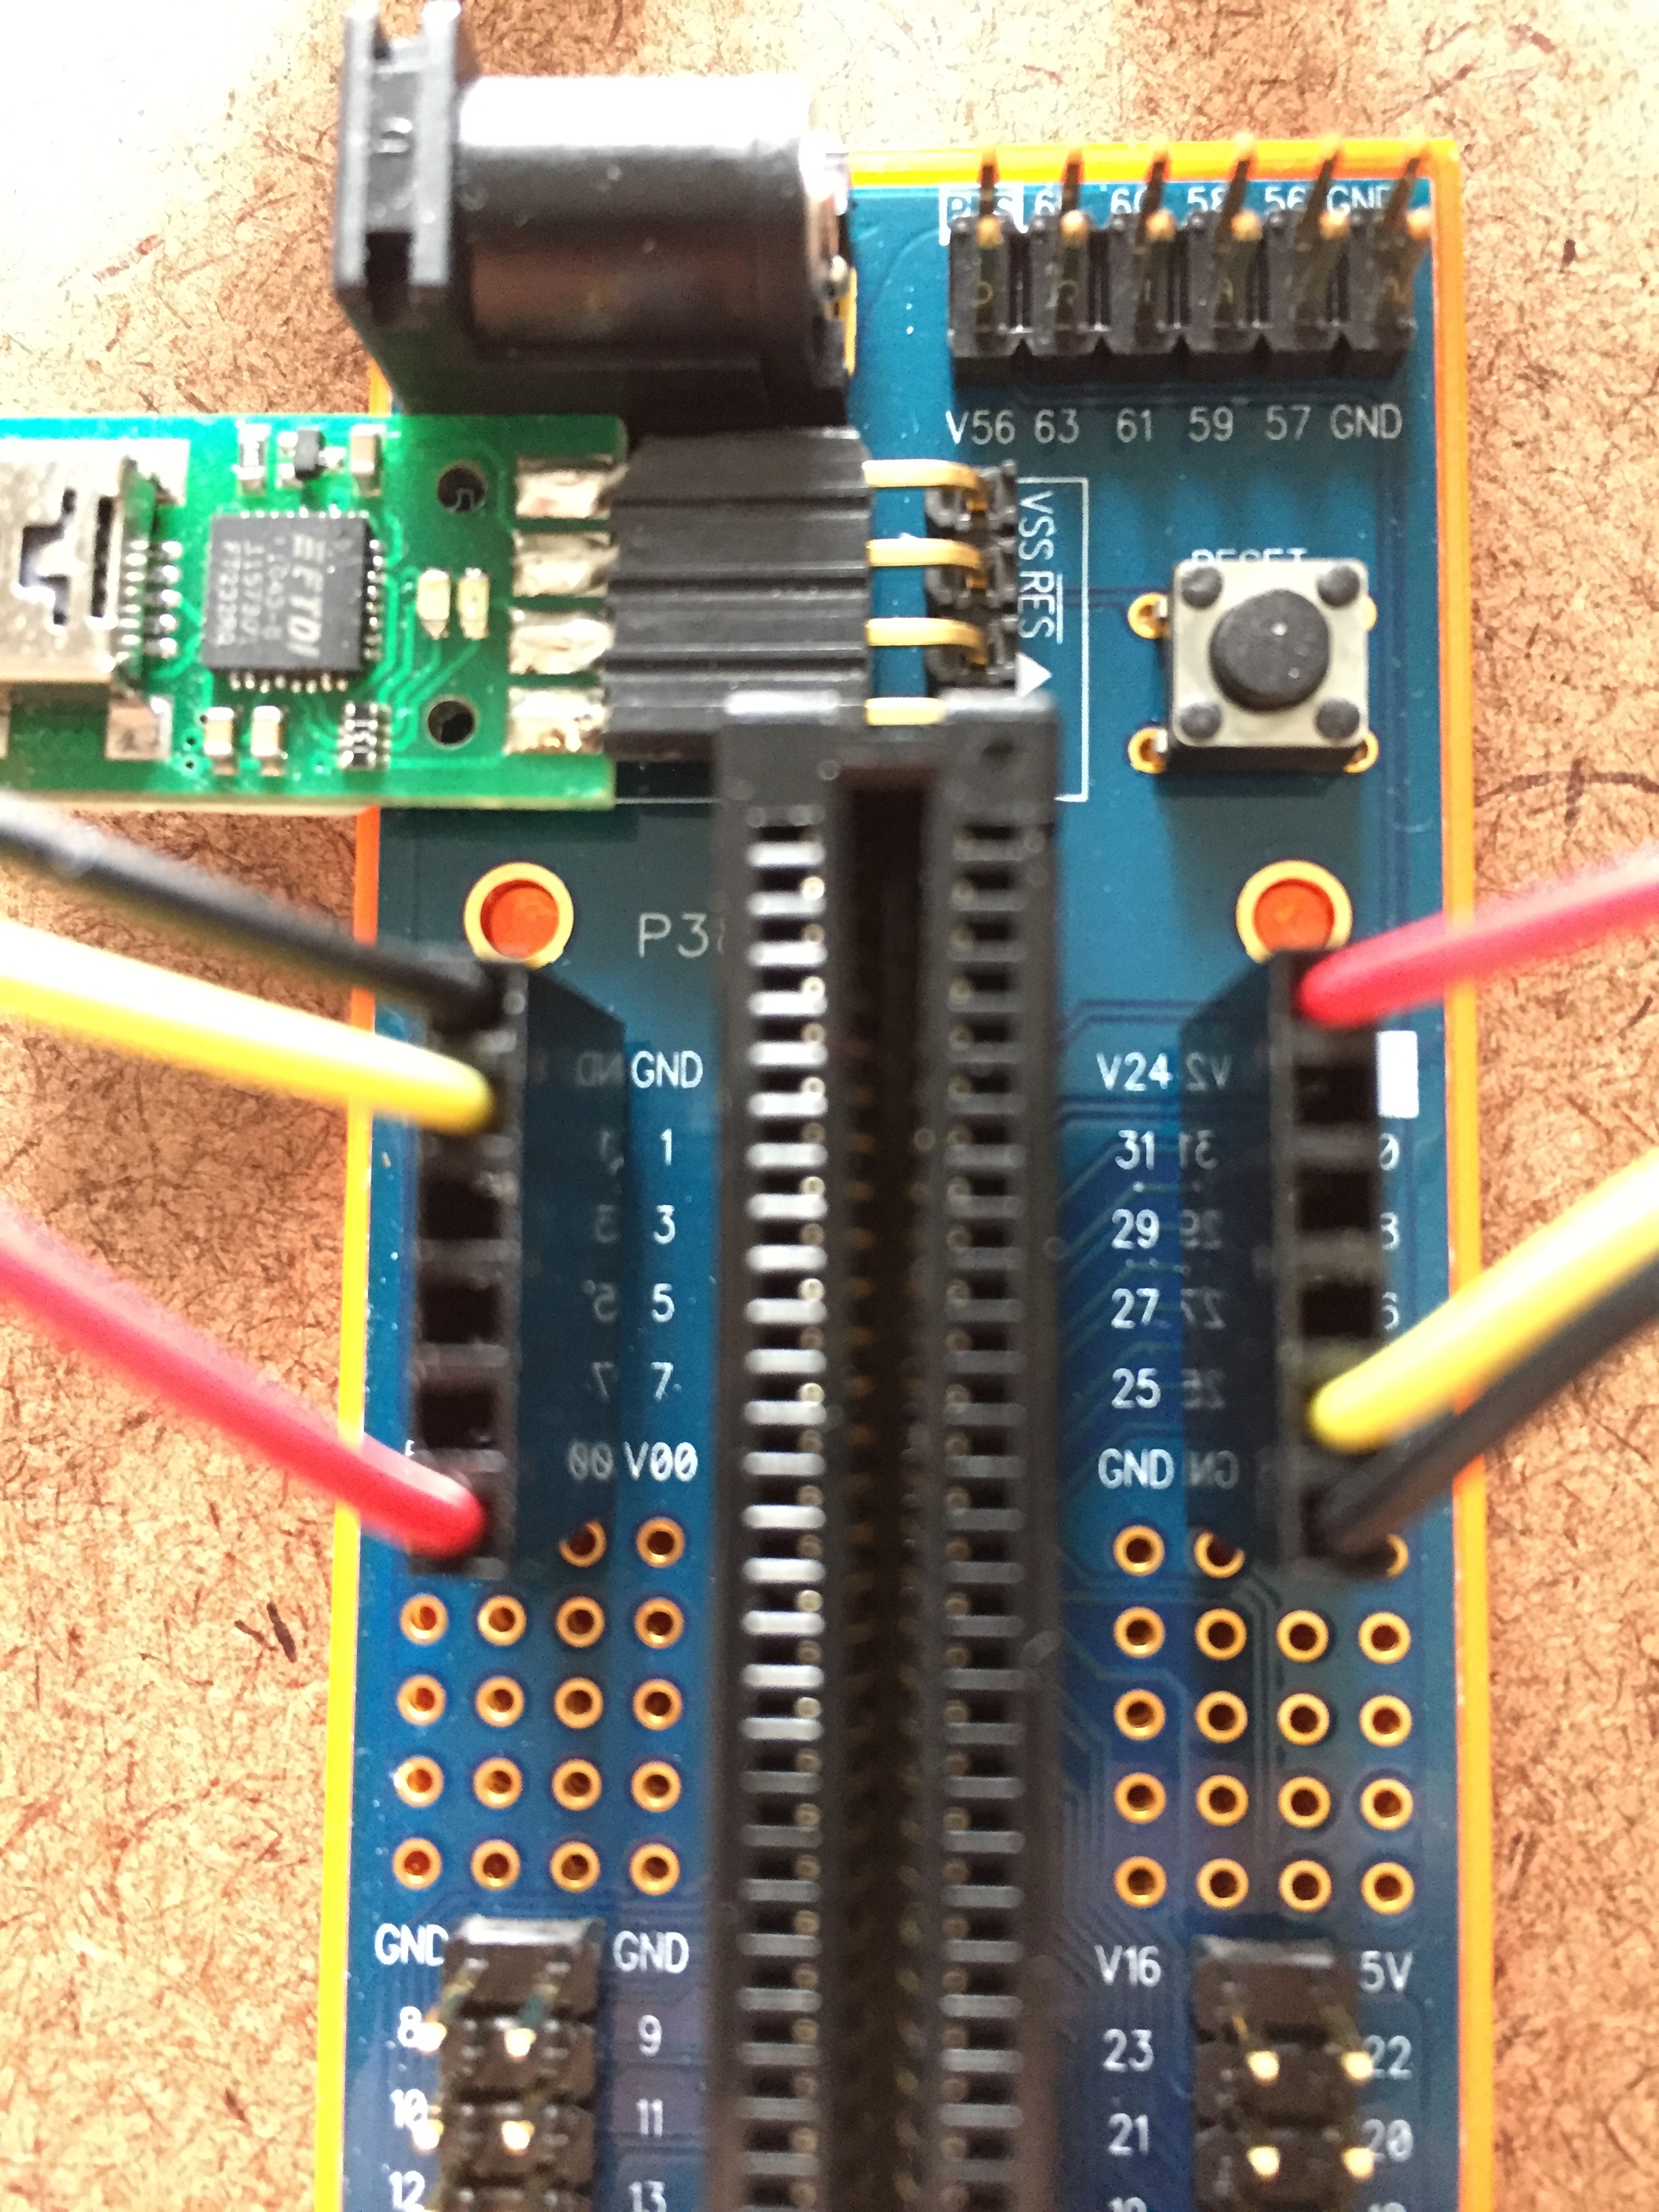
Plug the 1x6 connectors onto the Mini Breakout board as shown.
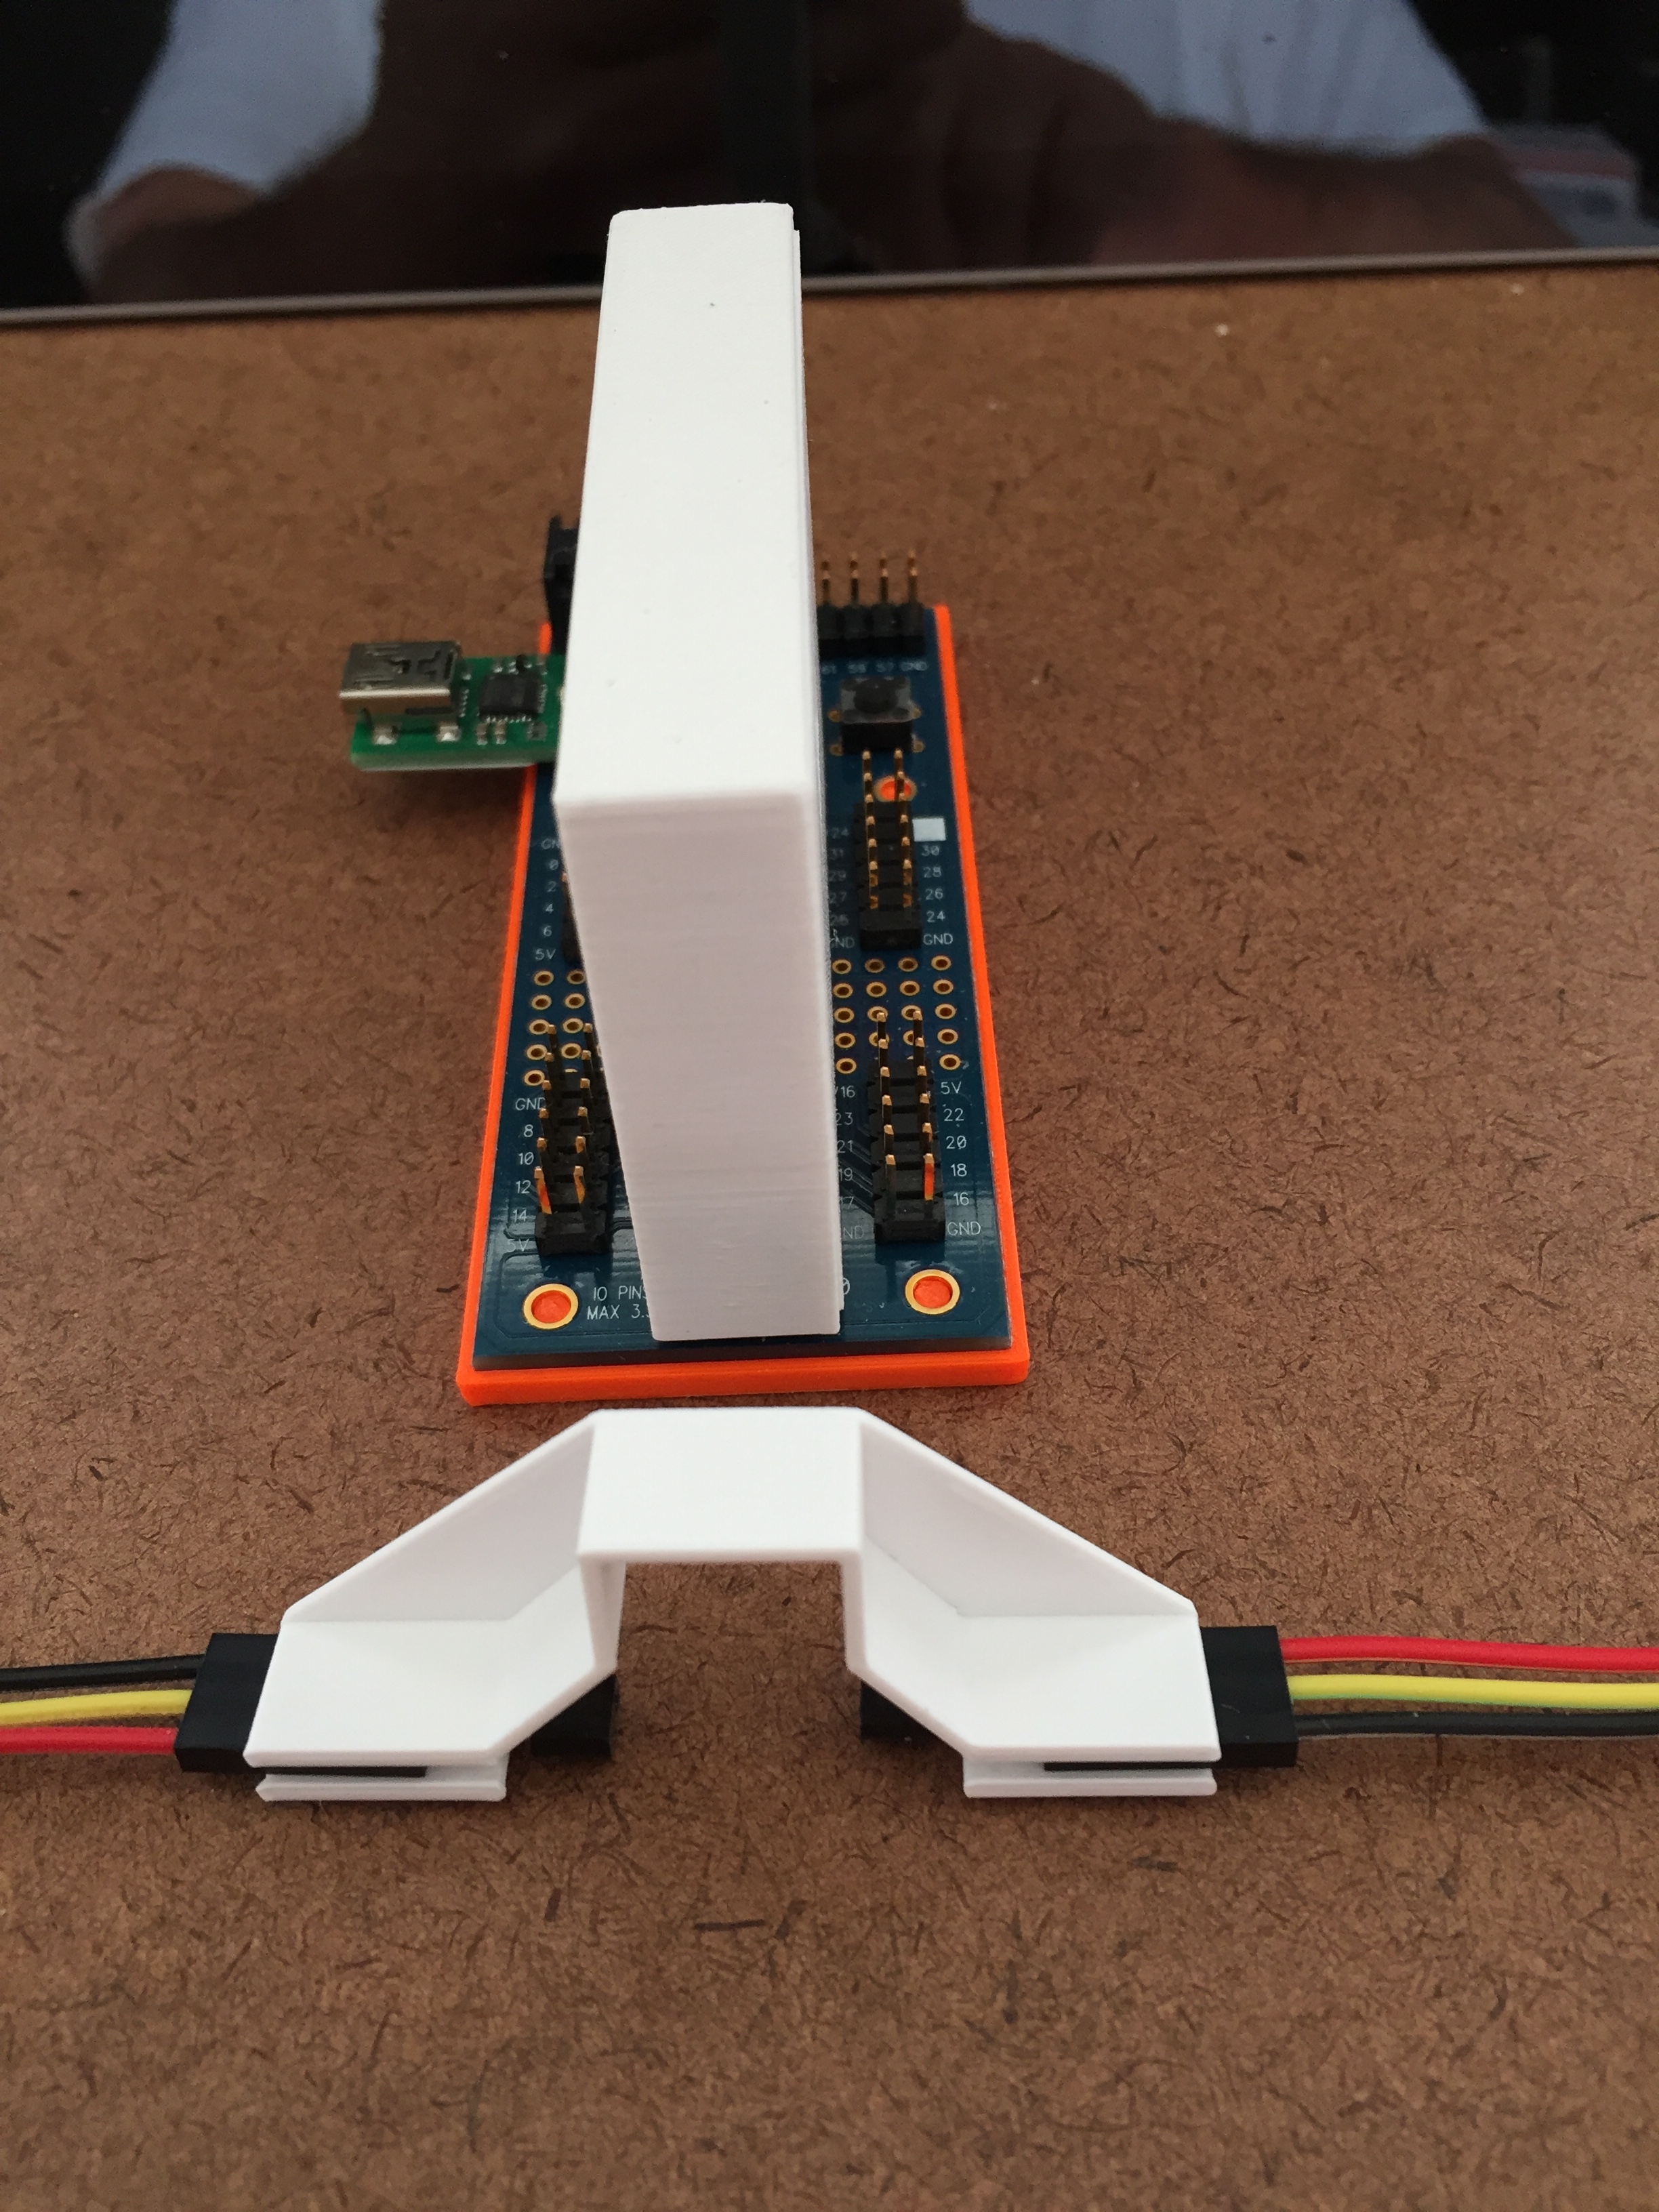
Place the Halo onto the Cartridge. I use a tiny piece of double side tape to hold the Halo in place. I actually use a hole punch on the tape.
Gently push the sensors until they touch the surface of the P2 Edge module. I twist the wires as shown to keep the sensors in position.
Enjoy.