How To Use XBee to communicate between ActivityBoard and ActivityBot
Hi,
This is a fun project that one can accomplish within an hour or two. Please post any issues you have with completing this project, because I bet I have also had the issues J.
For this project, I will assume the following is already completed:
What you will need:
How to attach your XBee modules:
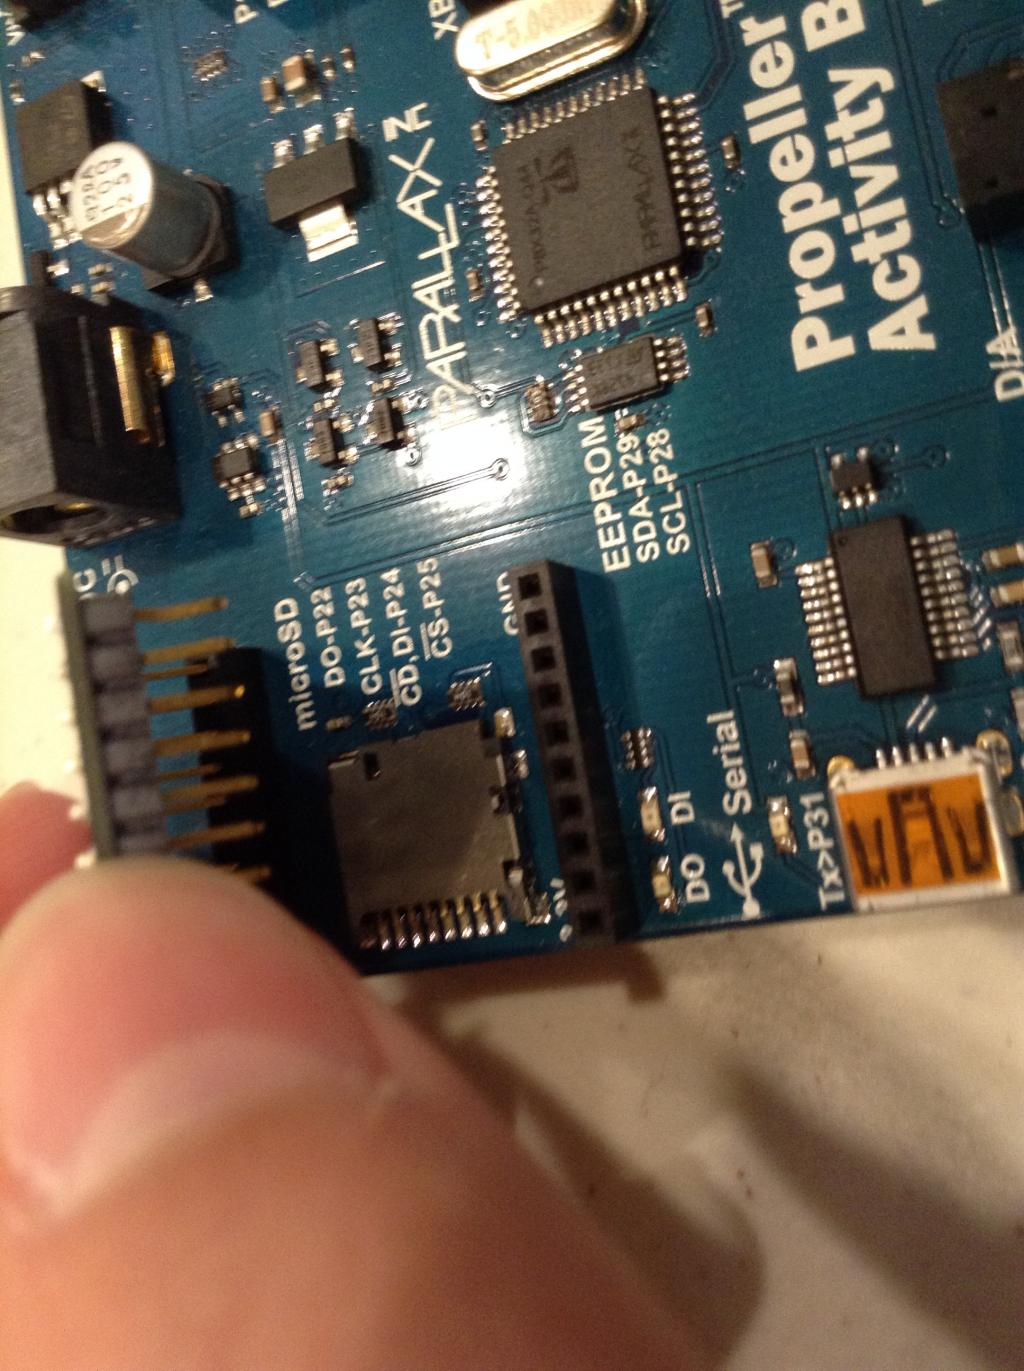
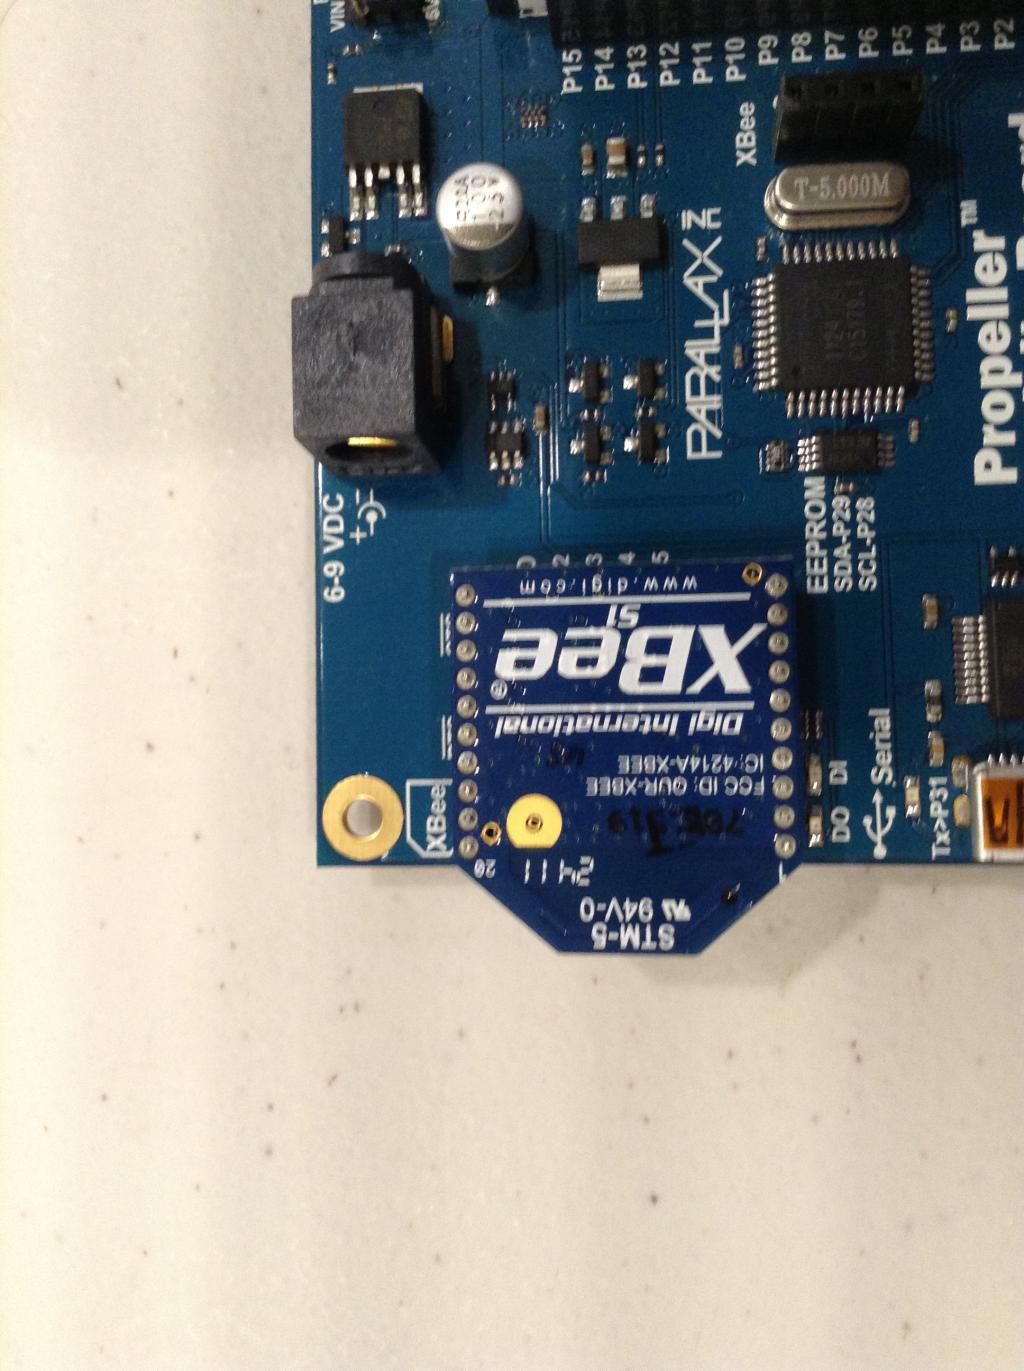
It is actually pretty simple to attach your XBee modules to the ActivityBoard. All you need to do is push the XBee module’s pins into the slots available on the ActivityBoard like below. One thing that you should be careful of though is that you install the XBee the right way on the board. A simple check that you can use is where the XBee is facing to. If the non-straight edge of the XBee module is facing inward to the board, you have attached the XBee backwards.
Below should be the final product (first thumbnail).
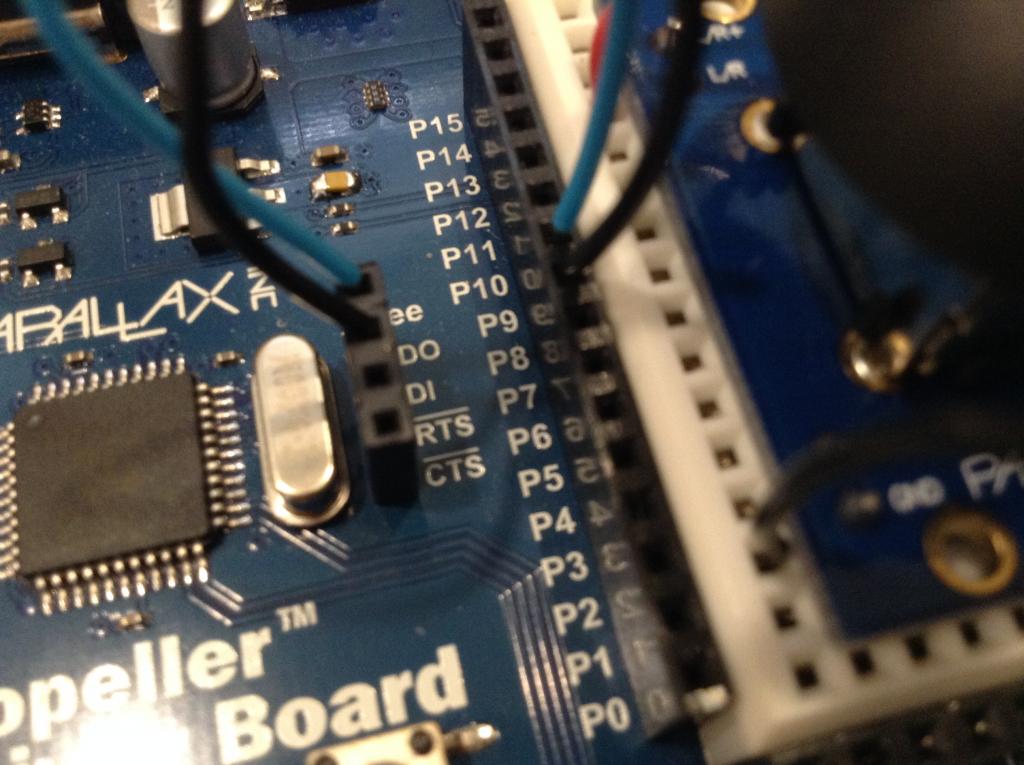
After you have attached the XBee you only have to attach 2 jumper cables to connect the DI and DO ( Data in and Data out ) pins. In my program, I specified these pins to be 8 and 9, and such had to attach the jumper cables from DI and DO to pins 8 and 9. On my board, I have attached DO to pin 9 and DI to pin 8 as shown below (second thumbnail)
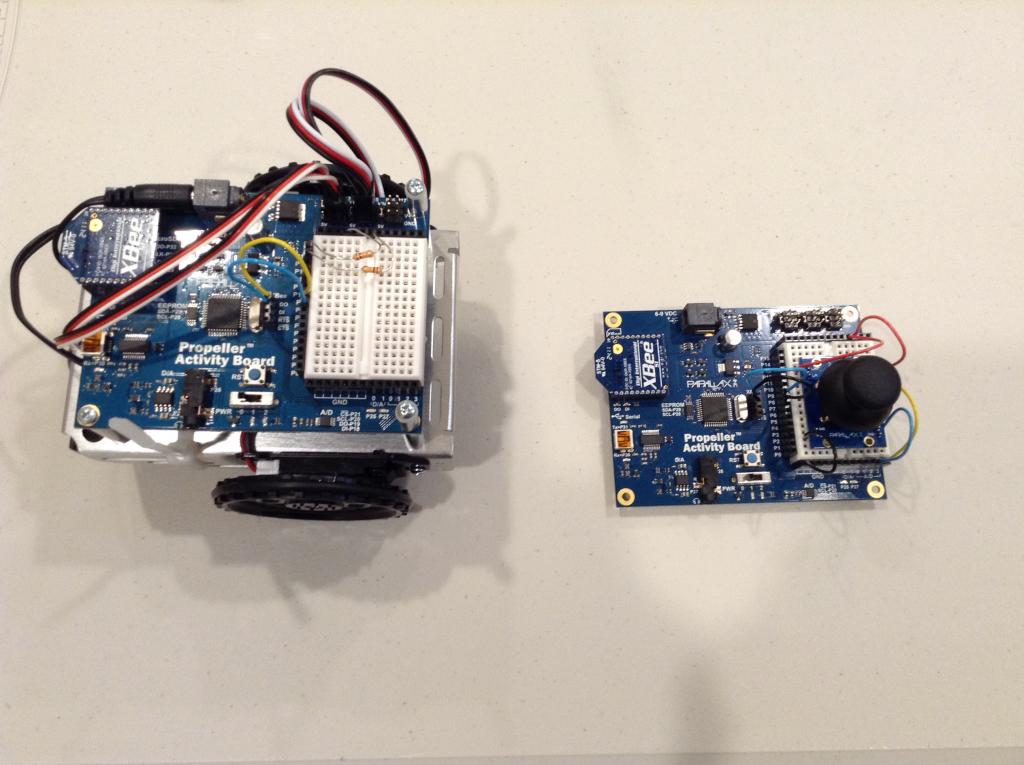
After you have attached the jumper cables, repeat this process for the other ActivityBoard. You’re final product should look like the picture below (third thumbnail).
At this point the hard part should be over. Now, all you have to do is program the robot. Below is the code for the ActivityBot (fourth thumbnail).
Below is the code that you must upload to the ActivityBoard.
Well, at this point you should be finished and able to control your robot without any issues.
Best of luck!
This is a fun project that one can accomplish within an hour or two. Please post any issues you have with completing this project, because I bet I have also had the issues J.
For this project, I will assume the following is already completed:
- You have assembled the standard ActivityBot. If not, follow this link to assemble it and learn the basics of programming. http://learn.parallax.com/activitybot
- You have an ActivityBoard with a 2-axis joystick installed. If not, follow this link to assemble the Joystick on the ActivityBoard’s breadboard. http://learn.parallax.com/propeller-c-simple-devices/joystick
What you will need:
- Computer to program robot and ActivityBoard
- 1 or 2 USB cables ( Your preference as only 1 is required )
- 2 XBee modules of the same model ( I have not tested different models, but maybe it would work )
- 4 Jumper wires
How to attach your XBee modules:
It is actually pretty simple to attach your XBee modules to the ActivityBoard. All you need to do is push the XBee module’s pins into the slots available on the ActivityBoard like below. One thing that you should be careful of though is that you install the XBee the right way on the board. A simple check that you can use is where the XBee is facing to. If the non-straight edge of the XBee module is facing inward to the board, you have attached the XBee backwards.
Below should be the final product (first thumbnail).
After you have attached the XBee you only have to attach 2 jumper cables to connect the DI and DO ( Data in and Data out ) pins. In my program, I specified these pins to be 8 and 9, and such had to attach the jumper cables from DI and DO to pins 8 and 9. On my board, I have attached DO to pin 9 and DI to pin 8 as shown below (second thumbnail)
After you have attached the jumper cables, repeat this process for the other ActivityBoard. You’re final product should look like the picture below (third thumbnail).
At this point the hard part should be over. Now, all you have to do is program the robot. Below is the code for the ActivityBot (fourth thumbnail).
//ActivityBot code here
[FONT=Calibri][SIZE=3][COLOR=#000000]#include "simpletools.h"                      // Include libraries
#include "fdserial.h"
#include "abdrive.h"[/COLOR][/SIZE][/FONT]
[FONT=Calibri][SIZE=3][COLOR=#000000]fdserial *xbee;[/COLOR][/SIZE][/FONT]
[FONT=Calibri][SIZE=3][COLOR=#000000]int main()                                    // Main function
{
  xbee = fdserial_open( 9, 8, 0, 9600 ); //Begin the serial connection ( this is why we needed the jumper cables connected to pins 8 and 9 )[/COLOR][/SIZE][/FONT]
[FONT=Calibri][SIZE=3][COLOR=#000000]  char data; //Create the variable that will be used to hold the incoming data[/COLOR][/SIZE][/FONT]
[FONT=Calibri][SIZE=3][COLOR=#000000]  while ( 1 ) //repeat this forever or until loss of power
  {
    data = fdserial_rxChar( xbee ); //set data to the data received from the XBee board

    if ( data == 'f' ) //If the data incoming is telling the robot to move forward
    {
      drive_speed( 64, 64 ); //move forward at 1/2 speed
    } else if ( data == 'b' ) //If the data incoming is telling the robot to move backward
    {
      drive_speed( -64, -64 ); //move backward at 1/2 speed
    } else if ( data == 'l' ) //If the data incoming is telling the root to turn left
    {
      drive_speed( 0, 64 ); //turn left in a spin turn at 1/2 speed
    } else if ( data == 'r' ) //If the data incoming is telling the robot to turn right
    {
      drive_speed( 64, 0 ); //turn right in a spin turn at 1/2 speed
    } else if ( data == 's' ) //If the data incoming is telling the robot to stop
    {
      drive_speed( 0, 0 ); //stop
    }
  }
}
[/COLOR][/SIZE][/FONT]
Below is the code that you must upload to the ActivityBoard.
//ActivityBoard code here
[FONT=Calibri][SIZE=3][COLOR=#000000]#include "simpletools.h"                      // Include simple tools
#include "fdserial.h"
#include "adcDCpropab.h"[/COLOR][/SIZE][/FONT]
[FONT=Calibri][SIZE=3][COLOR=#000000]fdserial *xbee; //Initialize the full-duplex serial connection over XBee[/COLOR][/SIZE][/FONT]
[FONT=Calibri][SIZE=3][COLOR=#000000]int main()
{
  xbee = fdserial_open( 9, 8, 0, 9600 ); //open the serial connection
  adc_init( 21, 20, 19, 18 ); //initialize the analogue connections for the joystick[/COLOR][/SIZE][/FONT]
[FONT=Calibri][SIZE=3][COLOR=#000000]  float lrV, udV; //create 2 float values for incoming joystick values[/COLOR][/SIZE][/FONT]
[FONT=Calibri][SIZE=3][COLOR=#000000]  while ( 1 )
  {
    udV = adc_volts( 2 ); //get values from the joystick
    lrV = adc_volts( 3 );[/COLOR][/SIZE][/FONT]
[FONT=Calibri][SIZE=3][COLOR=#000000]    if ( udV < 1.00 ) //if joystick going backward, send backward value
    {
      dprint( xbee, "b" );
    } else if ( udV > 4.00 ) //if joystick going forward, send forward value
    {
      dprint( xbee, "f" );
    } else if ( udV < 4.00 && udV > 1.00 && lrV < 4.00 && lrV > 1.00 ) //if joystick is in center, send stop value
    {
      dprint( xbee, "s" );
    } else if ( lrV < 1.00 ) //if joystick is going left, send left value
    {
      dprint( xbee, "l" );
    } else if ( lrV > 4.00 ) //if joysitck is going right, send right value
    {
      dprint( xbee, "r" );
    }[/COLOR][/SIZE][/FONT]
[FONT=Calibri][SIZE=3][COLOR=#000000]    pause( 50 ); //only need to check joystick values 20 times a second
  }
}
[/COLOR][/SIZE][/FONT]
Well, at this point you should be finished and able to control your robot without any issues.
Best of luck!


Comments
No problem!
Hope it helps you in your future endeavors
Today Courtney showed me this project in action and it was truly awesome! Excellent work, all around! We will be featuring it on Learn.parallax.com after she contacts you for approval. Way to go, my friend!
Ken Gracey
Thank you very much mr. Gracey!!! Glad I am able to help!
Let me know if there is anything else I can do to help out.
ValeT
http://learn.parallax.com/project/joystick-controlled-activitybot
Thanks Vale!
You'll get rich off of residuals.
Thanks for the kind words Publison!!
No problem! Let me know if there is anything else that I can do to help out!
I setup the joy stick and uploaded the program as described. The Activity Bot behaves strange! When I use the joystick to move forward it does but with some hesitation and any other joystick movement results in the Bot going round and round and any further joystick actions are erratic. What is going on? Checked the Xbee and Joystick operation and they seem to work as per the projects on Parallax.com. Thanks
First, make sure you are using fresh batteries and that none of your connections are loose.
If those are good, can you post an image of your board and robot setup? Did you make sure to do the calibration for the encoders when you set up your robot?
raoramana,
Is everything on the activitybot correct? Are your continuous servos on the right port? The spinning sounds like the connections might be swapped. Also, can you take the forward drive command from my program and put them into a while loop? Does that make the robot move forward fine?
Also, do your XBees lose connection randomly? This might also cause that issue.
Are the XBees working correctly?
Thanks Pat ang
Sorry for the late reply!
Pat Lang
Sorry, but I just got back from a vacation/trip. I will try to have the code up ASAP.
So sorry for the delay!!!!!
Have a great new year,
ValeT
This is the spin code for the joy stick board.
 {{ Reads 2 axis joystick,
   sends drive information to bot at address 1.}}

CON

  _clkmode = xtal1 + pll16x
  _xinfreq = 5_000_000

  ' Set pins and Baud rate for XBee comms
  XB_Rx     = 7       ' XBee Dout
  XB_Tx     = 6       ' XBee Din
  XB_Baud   = 9600
  MY_Addr  = 0
  DL_Addr  = 1        ' bot address

  'Constants used by joystick Object
  Xout_pin    =  0    'Propeller pin joystick X
  Yout_pin    =  2    'Propeller pin joystick Y

VAR
  long  drive, UD, LR
  byte  Stack[100]

OBJ
  pst        : "FullDuplexSerial"
  XB         : "XBee_Object"
  rc         : "RCTime"
PUB Start
         ' Configure XBee
  XB.start(XB_Rx, XB_Tx, 0, XB_Baud)                       ' Initialize comms for XBee
  XB.AT_Init                                               ' Fast AT updates
  XB.AT_ConfigVal(string("ATMY"), MY_Addr)
  XB.AT_ConfigVal(string("ATDL"), DL_Addr)
  cognew(sendcontrol,@Stack)       ' start cog to accept incoming data

Pub SendControl
        drive :=5
        repeat
          rc.rctime(0, 1, @UD)                                        'RC time joystick x axis
          rc.rctime(2, 1, @LR)                                        'RC time joystick y axis

          IF UD < 100
              drive := 1                                             ' 1 is forward
          IF UD > 130
             drive := 2                                               '2 is backward
         IF LR > 130  and UD < 100
           drive := 3                                                 '3 is left going forward
         IF LR < 100 and UD <100
           drive := 4                                                 '4 is right going forward
         IF UD >100 AND UD <130 AND LR > 100 AND LR <130
          drive := 5                                                  '5 is stop
         IF LR > 130 and UD > 130
            drive := 6                                                '6 is left going backward
         IF LR < 100 and UD > 130
             drive := 7                                               '7 is right going backwards
         XB.DEC(drive)                                                ' send drive value to BOEBot
         XB.tx(13)
This is the spin code for the propeller BOEBot
{{ Accept control information from node 0 joystick to drive propeller BOEbot.}} CON _clkmode = xtal1 + pll16x _xinfreq = 5_000_000 ' I/O and Baud rate for XBee comms XB_Rx = 6 ' XBee Dout XB_Tx = 7 ' XBee Din XB_Baud = 9600 ' XBee addresses DL_Addr = $ffff ' Send data to this address (both controller) MY_Addr = 1 ' This units address ' Servo outputs Left = 14 Right = 15 VAR long drive OBJ XB : "XBee_Object" system : "Propeller Board of Education" servo : "PropBOE-Bot Servo Drive" time : "Timing" PUB Start ' Initialize XBee Comms and stop wheels XB.Start(XB_Rx, XB_Tx ,0, XB_Baud) servo.wheels(0,0) ' Enable XBee for fast configation changes & ' set MY and DL (destinaton) address. XB.AT_Init XB.AT_ConfigVal(string("ATMY"), MY_Addr) XB.AT_ConfigVal(string("ATDL"), DL_Addr) repeat XB.RXFlush 'clear data drive := XB.RXDec 'accept drive values from node 0 case drive 1: 'forward servo.wheels(64, 64) 2: 'reverse servo.wheels(-64, -64) 3: 'right turn going forward servo.wheels(64, 0) 4: 'left turn going forward servo.wheels(0, 64) 5: 'stop servo.wheels(0,0) 6: 'right turn going backwards servo.wheels(-64,0) 7: 'left turn going backwards servo.wheels(0,-64)thanks Pat Lang
[ /code ] (without the spaces)
Yes, it is in the correct format now.
I am sorry that I have not had a chance to put up any code; I've been trying to fix my robot for an FTC competition
Thanks again. Pat Lang
Awesome!!! I am still REALLY new to Spin myself and would appreciate any simple code you can give me to learn spin.
No problem!!! I am glad something I am doing can help out other people!!!! I am also pretty new to programming, especially spin as shown above.
Maybe you could help me with an issue I am getting.....For some reason, my XBees are randomly losing signal ( i.e. the blue and red lights are turning off ) and the robot continues moving in the same position it was moving when it was working. Do you have any ideas as to why this is happening?
Thanks,
Vale
Same is actually happening for me when controlling the Activity Bot with my iPad (going through the WLan router) and I've not been able to find a solution. I'm not sure if it's the iPad that is losing the signal to the router or if it's the XBee. I might try to set up a point to point connection at some time to see if that works better, but as it involves a lot of reconfiguration of the XBee I've procrastinated it.
Do you have point-to-point connection?
Yes, I am using XBee to XBee. I have not been able to find a solution either, but I am thinking maybe there is a short? Although, I don't know why that would affect the drive.......
After that you have to make a new connection. Had the same thing happen when I setup my project some time ago.
The ATTM and ATTS commands is what you want to look at.
TCP timeout. Set/Read the timeout for connection on TCP client sockets. If 0, socket closes immediately after data sent. (6.4 seconds)
TCP Server Socket Timeout. Set/Read the timeout for connection on a TCP server socket. This is a socket whose connection was initiated at the other end. (1 minute)
Mike
Thanks! I will take a look into this and report back as soon as possible....