Introducing the ELEV-8 v2 Quadcopter Kit!
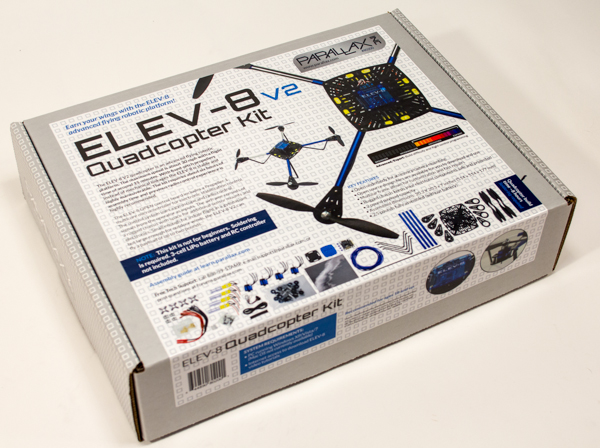
It's my pleasure to introduce to you the Parallax ELEV-8 v2 Quadcopter Kit (#80200)! Pre-order yours today; products expected to begin shipping Thursday, 7 August 2014!
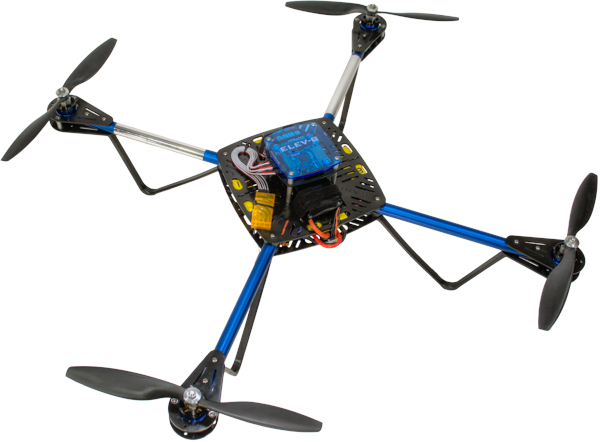
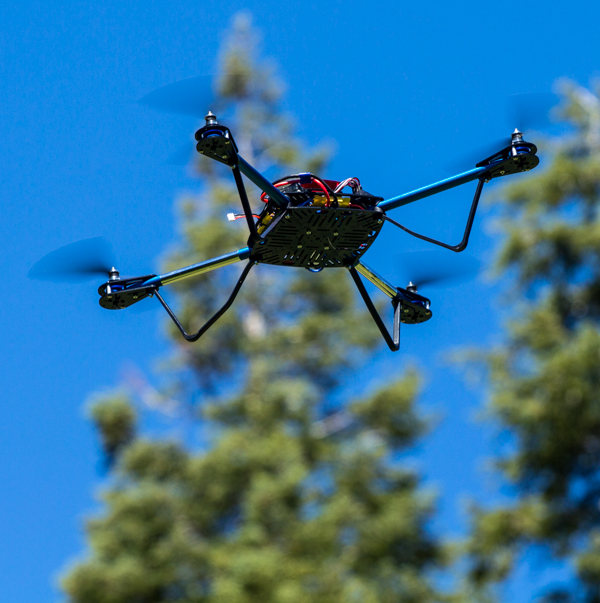
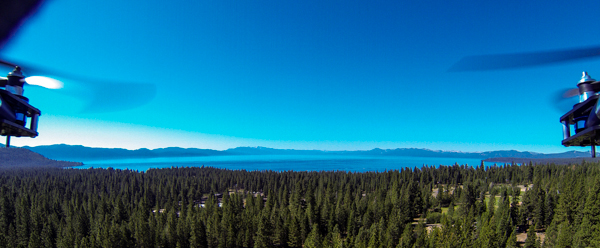
ELEV-8 your skills with this extremely durable and stylish multirotor; great for first-time flyers and experienced aviators alike. You'll be guided through every step of the assembly process with our exceptional online documentation and support. Easy to repair and open source, the versatile ELEV-8 has endless potential applications: from recreational flying, to unparalleled, hands-on UAV education, to professional aerial photography or video.
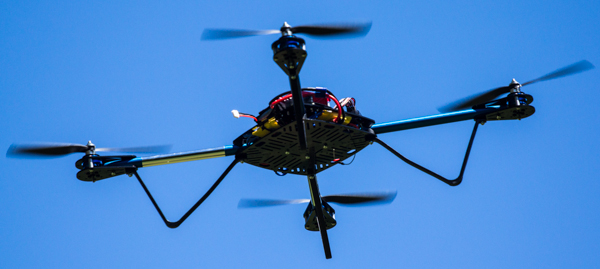
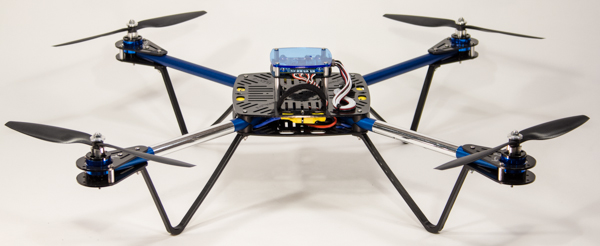
The ELEV-8 Quadcopter is lifted and propelled by four rotors (vertically-oriented propellers). Electronic Speed Controllers power each motor/rotor independently, so that by altering the relative rotational rates of these rotors, the ELEV-8 is able to move in any direction. A HoverflyOPEN Flight Controller powered by a Parallax Propeller 1 multicore microcontroller uses the same HoverCore Technology found in professional cinematic multirotors to provide reliable stabilization; creating a small, maneuverable, and agile aircraft.
I've spent most of my summer writing an unmatched Online Assembly Guide has been created exclusively for this product; broken down into nine sections with a total of thirty-nine easy-to-follow steps full of images, drawings, and videos. Of course, if any questions remain after looking through the troubleshooting, our customer support is standing by five days a week to help.
Comparison to Version 1: (Adapted from posts by tranger)
- Upgraded KA20-20L 1050 Kv Brushless Outrunner Motors - more powerful and smoother operation, wiht bolt-on propeller adapters
- Saddle Washers - better secure Blue Aluminum Booms to the Chassis, much more rigid than the frame
- Aluminum (threaded) Standoffs, 1/8" - Allow you to tighten the Blue Aluminum Booms to the Top Chassis Plate and achieve a tight assembly prior to putting the other plate on, making assembly much easier to handle, and wiring simpler (wires can be run between booms and chassis plates)
- Thru-holes with locknuts for the control board mounting (was tapped holes in the delrin base)
- Aluminum standoffs throughout
- Thru holes on the Landing Gear with locknuts (was tapped holes)
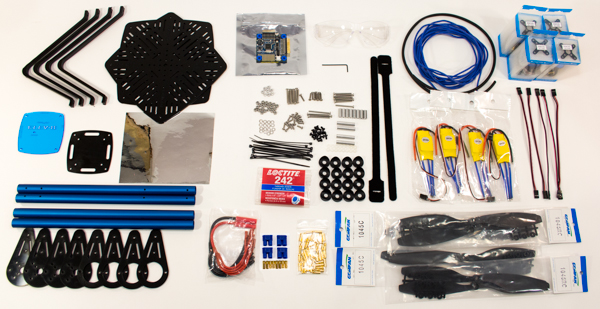
- Pre-made Power Breakout Cable - has 6 outputs (two extra for expansion and accessories)
- Styling - Parallax blue, black, and silver color coordination. Chassis plates have a smooth finish. Blue Flight Controller Cover Plate does not block status LED wavelengths, eliminating need for the light pipe
- No more LEDs - can still add them on, and may be sold as an accessory in the future.
- Open underbody and 16 ounce (0.45 kg) payload capacity leaves plenty of room for upgrades and accessories, such as a small camera and brushless gimbal.
- Robust and modular chassis keeps electronics well-protected yet allows for incredibly fast repairs; so you can be up and flying again just minutes after a crash.
- Open-source design files mean you can manufacture, customize, and upgrade components as you wish.
- Common #4-40 hardware is used throughout, so you can easily pick up extras or replacements at your local hardware store.
- Weve sourced every component for optimum performance; all thats left for you is to pick out an RC transmitter & receiver and Lithium-Polymer battery & charger. See the ELEV-8 v2 Assembly Guide for details and recommendations.
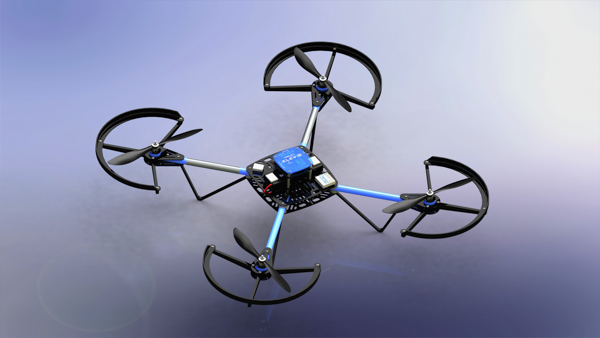
- Propeller Guards are available through downloadable CAD files (via the product page) that you can 3D print. Retail propeller guards are in development.
- Motor axis diameter (excluding propellers): 25.75 inches (654 mm)
- Outer diameter (including propellers) 36 inches (914 mm)
- As-sold weight (excluding battery and RC receiver): 40.7 ounces (1.15 kg)
- Ready-to-fly weight (including 3300 mAh battery and OrangeRX R620 receiver): 50.1 ounces (1.42 kg)
- Recommended maximum takeoff weight (MTOW): 66.1 ounces (1.87 kg)
- Approximate flight duration: 8-10 minutes (3300 mAh Battery) or 11-13 minutes (5000 mAh Battery). Flying at MTOW reduces flight time approximately 25%.
- Composite Propellers; 10 inch diameter, 4.5 pitch
- 30A Pre-programmed Electronic Speed Controllers (ESC) with battery eliminator circuit (BEC)
- Keda KA20-20L 1050 Kv Brushless Outrunner Motors
- Pre-assembled power breakout cable with six 3.5 mm Bullet Connector outputs
- HoverflyOPEN Flight Controller featuring an Invensense ITG-3200 gyroscopic sensor and powered by a Parallax Propeller 1 multicore microprocessor. The OPEN can control up to eight motors and is capable of altitude-hold using an ultrasonic sensor (sold separately). An expansion board with an accelerometer and GPS is in development.




Comments
How the heck can you sell that Quadcopter so cheap? What an awesome machine!.
Thru-holes with locknuts for the control board mounting (was tapped holes in the delrin base)
Aluminum standoffs - nice upgrade from nylon
Thru holes on the landing gear with locknuts (was tapped holes)
Pre-made wiring harness is great - it was the most difficult task when I built my V1
I like the online assembly guide, though found that having a paper copy was very useful during assembly - a pdf version would be a big plus. Numbering stuff is a good practice to get the thing working and also during repairs and re-assembly.
No led strips standard. I like those, especially for early evening flights.
Overall looks like a decent evolution of the product.
-Russ
Edit: Or is that what is in the "Build Your Own Quadcopter" book?
Not sure I got the name right, but they are plastic items that have a "saddle" area that fit the diameter of the booms. So when you are clamping the tubes you have a much larger contact area than before. They also added 1/8 high standoffs that appear to be threaded. That would allow you to tighten the booms to one plate and achieve a tight assembly prior to putting the other plate on.
Item 5 in the pic.
I had an absolute terrible time soldering 4 wires to one, without any kind of connector. Doing one at a time didn't work, keeping "alignment" and avoiding the already soldered wires from coming loose was a real PITA. I ended up wrapping small solid core wire around the bunch and soldering all at once. The most promising "tip" I found was to take the larger wire and separate the strands into sets of (4). Then you could solder each group to a single wire - one at at time.
-Russ
That is correct and the source is pretty well documented. On my quadcopter I loaded the code and tested the motors and set the gyro calibration, but didn't fly with it - yet. I did find some issues using my radio with the code. However, I am planning on trying to implement altitude-hold using Jason's code and an ultrasonic sensor. After I get caught up on a few other things.
-Russ
I soldered two to one, then two to one two more times. Two wyes of two instead of one wye of four.
You can see them at about the 3:40 mark in the video.
I found this picture later on in the guide - it looks like there are six(!) leads in each wye.
Thanks for the Summary. As I point out on the introduction to the assembly guide "If you prefer to work from a printed version of these instructions, scroll to the bottom right-hand corner of this page and click on the "Printer-Friendly Version" link (it may take several minutes for the page to load)." It will produce a print-out of the entire assembly guide
Maybe an LED accessory kit would be a good idea. Thoughts?
You and us both would like to see that; rest assured I understand and share your frustration. I'll look into the book.
That is very true; I'l probably cut it in the next reel. But, the fact that the ELEV-8 was unscathed except for two broken propellers is a selling point! Try that with a DJI...
That is a very accurate description of what our ideal gameplan could be (unofficially). Again, I'll look into the book.
Could you please clarify what you mean? If you think we overlooked something, I'd very much like to know about it.
I'll continue to update my first post in the thread with more details.
Everything flies better when properly balanced. Quadcopters are no exception. You want all motors to be lifting equally.
Here's an example. Suppose you hang a camera on one boom. That motor will be turning faster in order to provide more lift. It will be closer to stalling than the others. If you then descend quickly you may find that the quad flips over when you try to halt the descent. The reason is that motor, or rather the propeller, will stall, losing lift while the other motors work to flip it over. Or, the firmware will try to prevent the flip by reducing power to the other motors and you hit the ground hard. The latter is preferable, still not desirable.
If the workload of the motors is balanced, you will get maximum available performance. The other motors cannot 'pick up the slack'.
I see now that the power harness is pre-soldered with six leads. I think it would be good to show an image of that in the online manual where you solder on the connectors. I assume there are six leads in order to support a hexcopter upgrade? Showing an image of what it should look like at the end of each step is very useful.
While I agree that balance is important, I do things a little differently. First off, balancing can be achieved simply by shifting the battery around before strapping it down. The CG of every battery will be slightly different, so this is necessary even if the rest of the quad is perfectly balanced, so doing it before assembly is completed is redundant. With your suggestion, I will, however add instructions on balancing either to the Assembly Guide or the (not yet published) Flying Guide. So thank you for the suggestion.
There are images of all the connections you have to solder. Also keep in mind that customers who have the kit in front of them, unlike yourself, will be able to see every component in as much detail as they wish. As the manual explains why there are extra leads on the breakout cable "Two of its six outputs (an "output" is a pair of positive (red) and negative (black) wires) will be left unused; allowing for future expansions like lights, video equipment, etc." - Step 21. Or, as you point out, it would be prime for a hexacopter upgrade! And almost every step has an image at the end of it.
Since the battery is mounted in the center, and it's position can be adjusted, I do not feel it is redundant to balance before adding the battery. Put another way, my opinion is that the battery should not be the means of obtaining correct balance. It should be balanced first, then the battery should be placed so as to maintain that balance. Real aircraft can adjust their balance by the transfer of fuel from tank to tank, placement of passengers, or cargo, that does not mean that they don't balance it before adding the those things.
I am sure your way works just fine. I think that the intention is to educate. Part of educating is teaching a process. There is a "right" way to do things, and there are reasons for that way. Sure, you can skip steps, and maybe not tell any difference, I think it is better to be more thorough, attention to detail.
Indeed! That is why I think a picture at the end of THAT step would be great too! Also keep in mind that many people look through online manuals before committing to a purchase.
You say : "Since the battery is mounted in the center, and it's position can be adjusted, I do not feel it is redundant to balance before adding the battery" That statement seems a bit contradictory, so I'm going to assume you meant "can't". However, I'm going to disagree with you here. Long story short, I've taken the ELEV-8 v2 on over 50 flights, and never once have I not been able to achieve balance by shifting the battery around. One can in fact adjust it's position. (yes, the standoffs somewhat restrict movement, but still provide adequate flexibility. That said, I agree that it is important to keep balance in mind, and with your suggestion, I'll add some information about optimizing balance, either in the assembly or flying guide.
However, I don't agree that there is a "right" way to do things. It may have been done a certain way in the past, but that doesn't make it right (or, at least, make every other way "wrong"), and just saying " there are reasons for that way" gets you no further. There may be ways that work better than others, but part of why I, and I think many of you, enjoy flying is that there isn't a "prescription" for everything; its part science, part engineering, and part imagination and creativity. Last, but not least, I don't want to (or have the time to) tell them everything. If their hand is held throughout the process, they don't discover and learn some things for themselves. While I have had many a frustrating nights working on RC, that only made every time I got off the ground that much sweeter.
Would you mind clarifying what step (#) you are referring to?
"If you are not afraid to be wrong, you'll never come up with anything original" - Sir Ken Robinson
Cheers
He did not give an exact model number. For example, the 3DR IRIS starts at $750 which is not the same dollar amount.
https://store.3drobotics.com/products/IRIS
I looked around a little before I bought the Elev-8. The most attractive aspect was it appears to be a little more fundamental in the mechanical design. I mean, the booms are commonly available tubing and the Delrin parts look "makeable" given access to capable equipment. There are no swoopy covers or proprietary stuff that may be hard to replace, repair or modify. There is also plenty of user-available space. So overall, it appeared more robust and tinker-friendly to me.
I'll admit that I thought the controller was more "expansion ready" when I bought it, but I haven't missed that at all so far. Piloting is definitely a skill and I'm having fun learning. I've crashed several times (ok, many
Adding the sensors you mention is certainly less than $100. The difficulty (and challenge) of course is how to integrate them into the flight control. I initially thought the HoverflyOpen board was a bad choice because of it's closed software. However, I'm not so sure about that now. Jason Dorie's firmware is freely available and addressed that issue. Schematics are available for the board and a prototyping area is available to integrate new stuff. So you have tried and proven software to learn to fly with and experimental stuff for later on - what could be better?
When I looked at the packaged solutions they appear very closed to me. With the 3DR, for example, the enclosed control board and unfamiliar connectors make it look like upgrades will have to go through the OEM. What if you want to use a different brand of sensor? Maybe its no issue, but it looks like it could be.
There will come a time when I want to do autonomous flight. I may retrofit a different controller onto my Elev-8 or may buy a different aircraft. Either way, I'm very happy with what I've got and feel that I will have a much better understanding of just what is going on under-the-hood because of it.
-Russ
Sure, I'll take it!
- From a feature perspective, the 3DR model is more capable. If that's the only criteria, choose the 3DR model. Parallax is planning a hardware addition with IMU/GPS that will add on top of the OPEN board. We've not started this design, but we will this Fall. Perhaps one of our customers will do this for the community.
- The Parallax ELEV-8 is also open, top to bottom. The Hoverfly firmware provides a 100% tested, known, quality flight controller yet the corporate firmware is closed. You can use it to see that the ELEV-8 you built flies perfectly. Then, you can move on to Jason Dorie's code. The whole model is totally free, Creative Commons 3.0. Like tranger mentioned, you can replace your own parts.
- When you build it - like the ELEV-8, you'll understand all the pieces nicely. You're entering a new hobby and you're going to grow with it. My suggestion is to start from the inside-out - handle every screw, every piece of hardware, and every solder connection. I want total control over the soldering - this is a high-risk, high-liability hobby and I want to know that what I put into the air is airworthy. I have this confidence in Parallax's ELEV-8.
- We'll make you a better pilot. Heck, we only have a gyro on the PCB. Learn to fly this way and establish great skills before you move on to auto-level, GPS, etc.
- Service. We'll keep you in the air. All the parts are right here in Rocklin, CA and we can send them to you anytime. You can crash and repair an ELEV-8 and we'll keep you in the air. I think we offer the industry's best assembly instructions, too.
- Standard parts. We don't like proprietary stuff. The ELEV-8 was designed by a combination of marketers and engineers, with my input the whole way. You could fix this thing with a trip to Home Depot. No funny connectors anywhere.
- Quality. The whole kit, including PCB, is made in the USA. Motors and ESCs always come from China as far as I can tell.
This is just a quick look. I'm not trying to sell you anything. The best feedback is from other people on these forums.One market we are beginning to pursue is education. Their needs are quite different than yours may be, too. They need very detailed assembly instructions, support, and success. They don't need complexity, at least in the beginning.
Ken Gracey
I'm assuming iseries is talking about the 3DRobotics Arducopter Quad C Kit w/ optional GPS ($506).
It'd like to point out that the only part of the system iseries mentioned in his post is the Flight Controller. While important, it is but one part of a quadcopter
Support and Documentation:
- This is where Parallax really shines. We believe that the build experience means just as much as the final product. That's why I spent 2 months developing an extensive Online Assembly Guide, that can walk a first-time quadcopter builder through with ease. In my opinion, there's just no comparison to the documentation provided with any other quadcopter kit. As always, if you ever get stuck, our customer service is standing by the phone 5 days a week.
- We are also very transparent with all of the specifications for our quad. We give all sorts of specs, like maximum takeoff weight (which determines payload!), and flight time. We also publish technical drawings and CAD models right on the product page. Always look for specs when you are buying a quad.
The Frame:- Our hardware is standard #4-40 that you can find at your local hardware store if not already in your house. High-quality kits should use readily available hardware (avoid metric in the US).
- Our motor mounts protect the motors and booms in the event of a crash, and are easy and inexpensive to replace. In all of our test flights, we've never so much as dented one of the booms.
- Our main chassis is very large, which provides plenty of room for expansion and accessories. "Hacking" space as russ put it.
- Our landing gear will not shatter or break upon impact. It has a little bit of give to cushion those hard landings. The rounded design with delrin plastic slides easily on hard surfaces so the quad doesn't flip over if you land with some horizontal velocity.
- Ours comes with a full set of extra propellers.
Cheers,Kyle
I think you are taking this personally, and not getting my point, rather than the constructive, helpful criticism it is meant to be. I'll try one last time.
Yes I meant that the battery CAN be adjusted. You have been saying that you do this to adjust balance - although it seems that it only fore and aft adjustment is practical. Do you really re-balance and tweak the location of the battery before each flight? I don't and I'll bet most people don't either. If you balance the whole machine first, then place the battery in the center you will be sure to have the maximum available performance. You can individually balance each battery and put a Sharpie mark on the center, then line that up with the center of your already balanced quad.
Regarding the "right" way to do things - no one is ever forced to follow the directions. Many people take pride in abandoning the instructions and doing it their own way. Presenting a sound, methodical, and dare I say "correct" way to balance for optimum flight performance will not take away from an individual's sense of accomplishment or freedom of expression. They may completely ignore it and still have a quad that flies well.
You may have never had this experience because I think you are young, but in the "old" days, when we used to build our RC aircraft out of sticks we would separate the materials for the left wing and the right wing - swapping out the parts from one side to the other until they weighed the same. The result was less added weight was required later on to balance the wings. Not all builders would do that I am sure, but it was the "right" way to do it. The same goes for balancing helicopter blades. The "right" way is to balance the blades so that they are each the same weight, same span wise balance point and same chord wise balance point. I am sure few people actually do this but those that do have a better flying helicopter than those that don't.
I do actually balance and tweak the location of the before each flight. It takes me about 30 seconds to a minute. However, you are spot on about the limit to mostly just fore and aft balance with such a system, as well as the importance of "correct" directions (or at least the best they can be). You've very much convinced me that the assembly guide's (and my personal) methods could be improved. Since you seem quite knowledgeable and experienced in this matter (far more so than me, as we've learned), I invite you to write up an explanation of and/or instructions for balancing the ELEV-8, as this would ensure it gets added to the manual quickly and correctly. I sincerely appreciate your persistence and continued respectfulness.
EDIT: Of course, you would get credit for any contribution!
Cheers
Customer contributions!
Ken Gracey
Dang it, I should have seen that coming!