Small Propeller Project at Comic-Con
 JonnyMac
Posts: 9,620
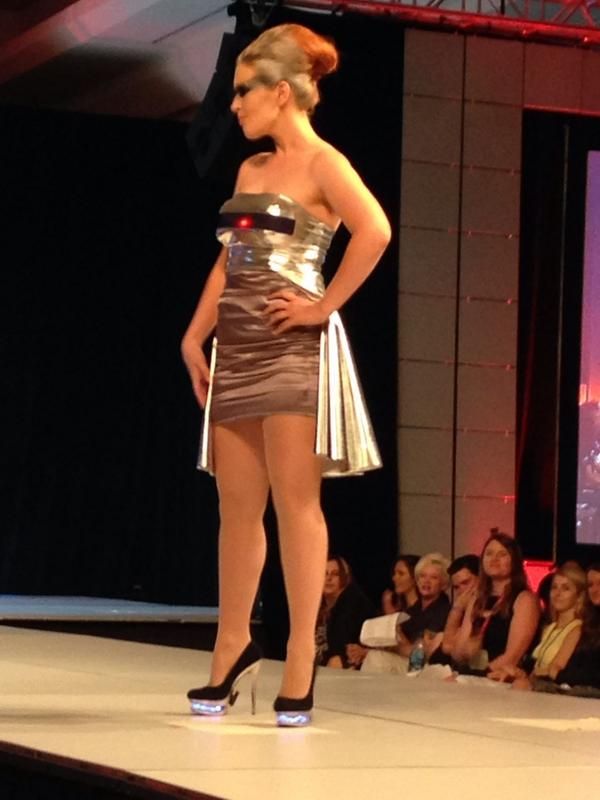
A few weeks ago, a mutual friend introduced me to Jinyo, one of the cast members of the SyFy show, "Heroes of Cosplay." When I explained what I do, Jinyo asked me if I could help him with a small project for San Diego Comic Con. That project just debuted in a fashion show. I was in his shop very late one night as he and his fiance, Victoria, were finishing the dress. Congrats to them for making it into the show at Comic-Con. They are very nice people and it was fun to work with them.
Admittedly, the electronics are pretty simple. That said, the only thing that matters is audience reaction, and in this video you can hear Chloe Dykstra (also on the show, and daughter of legendary "Star Wars" FX guru, John Dykstra), squeal with delight -- that nearly made me squeal with delight. The combination of the beautiful dress, the Cylon Eye, and the model's moves worked really well.
Sorry the video is small, it's on Instagram: http://instagram.com/p/q29SoJBOoq/?modal=true
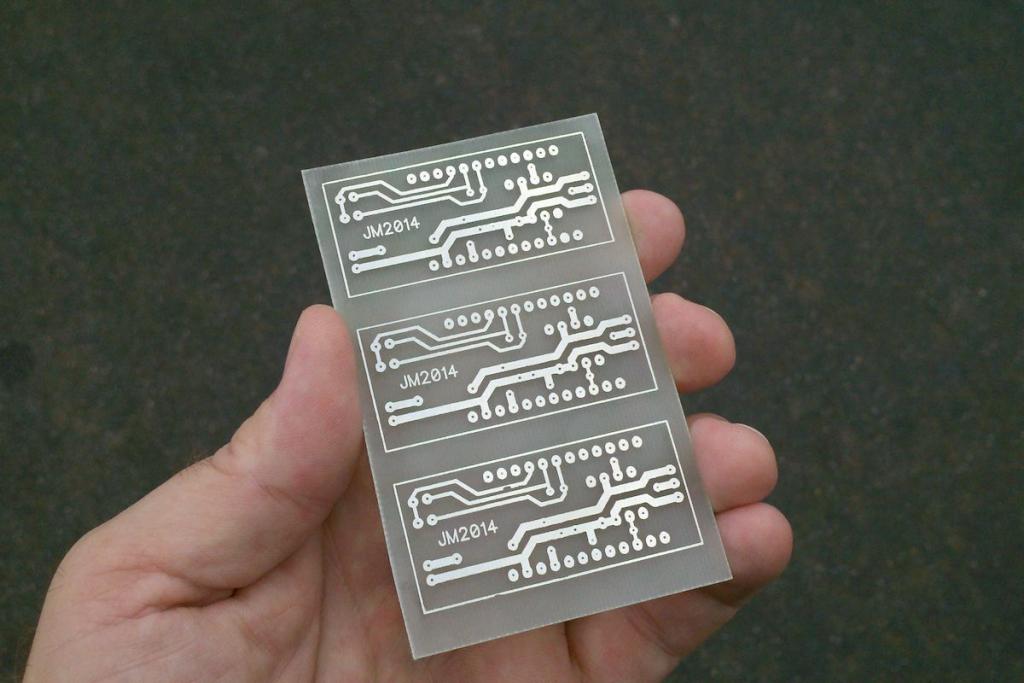
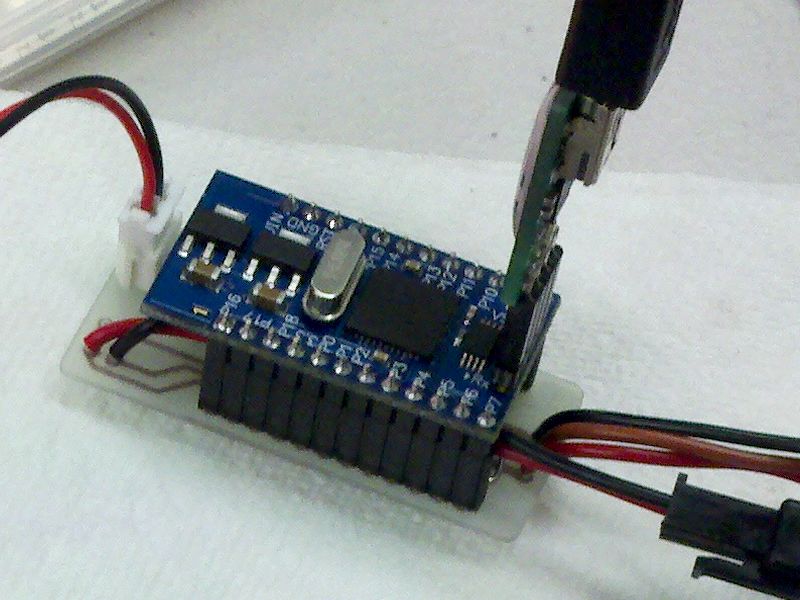
To keep things tidy I used a Propeller Mini. I used the "PCB Fab in a Box" kit from PulsaProFX.com to make a simple carrier board for a few pull-downs, a TC4427 (for level shifting and driving a signal through three feet of wire to a WS2812 strip), and a battery connection. There is a button that allows the model to change the state of the Cylon behavior. Jinyo coahed the model so that her head and the Cylon Eye across her chess are in sync for the "hunt and kill" mode. There's also a mode that allows the standard scanning routine to run at about 25% brightness; this is for being up close at dimly-lit parties (don't want to blind anyone!).
The program is straightforward: there is my WS2812 driver, a background cog to monitor the button, and the main cog which runs a finite state machine for controlling behavior. Using a separate cog allowed me to debounce the button and time the duration she presses it. There is a normal button press, and a long button press. The long press will return the state to zero (off), or enter party mode if the state is already off. Here's the button monitor.
Follow-Up: Just got a text from Jinyo. He didn't win any prizes, but the crowd loved it. A lot of people asked him about the tech which gave him the opportunity to talk about the Propeller. He said he talks about the Propeller and me in an interview -- will be looking for that online and will post a link when I find it.
Jenny (from Parallax) found another picture of the dress.
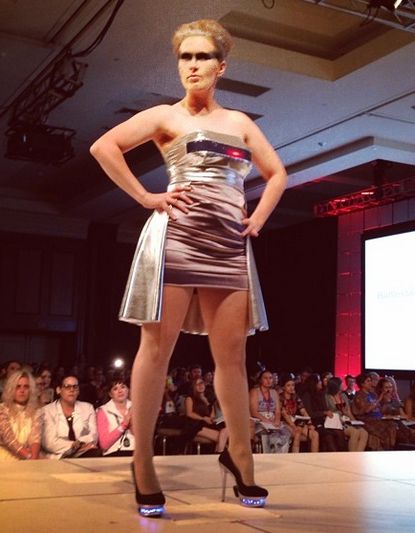
Found yet another picture of the dress; this photo by Yaya Han (Perhaps the most famous cosplayer in the USA) and a star of the show, "Heroes of Cosplay." I met her at a convention recently; he's a very nice lady. I may be working with Yaya and her fiance, Brian, on a project.
Admittedly, the electronics are pretty simple. That said, the only thing that matters is audience reaction, and in this video you can hear Chloe Dykstra (also on the show, and daughter of legendary "Star Wars" FX guru, John Dykstra), squeal with delight -- that nearly made me squeal with delight. The combination of the beautiful dress, the Cylon Eye, and the model's moves worked really well.
Sorry the video is small, it's on Instagram: http://instagram.com/p/q29SoJBOoq/?modal=true
To keep things tidy I used a Propeller Mini. I used the "PCB Fab in a Box" kit from PulsaProFX.com to make a simple carrier board for a few pull-downs, a TC4427 (for level shifting and driving a signal through three feet of wire to a WS2812 strip), and a battery connection. There is a button that allows the model to change the state of the Cylon behavior. Jinyo coahed the model so that her head and the Cylon Eye across her chess are in sync for the "hunt and kill" mode. There's also a mode that allows the standard scanning routine to run at about 25% brightness; this is for being up close at dimly-lit parties (don't want to blind anyone!).
The program is straightforward: there is my WS2812 driver, a background cog to monitor the button, and the main cog which runs a finite state machine for controlling behavior. Using a separate cog allowed me to debounce the button and time the duration she presses it. There is a normal button press, and a long button press. The long press will return the state to zero (off), or enter party mode if the state is already off. Here's the button monitor.
var

  long  btncog
  long  btnstack[32]


pri monitor_button(pin) | scan, t, btimer

  dira[pin] := 0                                                ' make input

  scan := %00                                                   ' clear scan
  btimer := 0                                                   ' clear timer

  t := cnt                                                      ' sync timer
  repeat
    waitcnt(t += MS_001)                                        ' wait 1ms

    scan := ((scan << 1) & %11) | ina[pin]                      ' update scan

    case scan
      %00:                                                      ' no press
        btimer := 0

      %01:                                                      ' new press
        btimer := 0

      %11:                                                      ' button held
        btimer += 1

      %10:                                                      ' button release
        if ((btimer => 50) and (btimer =< 500))
          if (state <> 12)                                      ' if not partying
            state := ++state // 7                               '  next state

        elseif ((btimer => 1000) and (btimer =< 3000))          ' if long press
          if (state <> 0)                                       '  if not off
            state := 0                                          '   kill it
          elseif (state == 0)                                   '  if off
            state := 12                                         '   party on!
Follow-Up: Just got a text from Jinyo. He didn't win any prizes, but the crowd loved it. A lot of people asked him about the tech which gave him the opportunity to talk about the Propeller. He said he talks about the Propeller and me in an interview -- will be looking for that online and will post a link when I find it.
Jenny (from Parallax) found another picture of the dress.
Found yet another picture of the dress; this photo by Yaya Han (Perhaps the most famous cosplayer in the USA) and a star of the show, "Heroes of Cosplay." I met her at a convention recently; he's a very nice lady. I may be working with Yaya and her fiance, Brian, on a project.


Comments
Man, I always hate you, you get to do all this fun stuff, and then you rub it in by telling us how much fun it was too! Oh, imperious leader we are but centurions although we are pleased it wasn't you in that outfit (relief).
Yeah, but that's fun of the "burn n learn" magic smoke variety
After seeing the video I though there was a motion sensor that controlled the display but after reading again I see it's pushbutton controlled.
These "one off" events are alway gutting. The last one I was involved in was the "League of Legends" world championship (2013) where I used a Propeller to control nearly 300 WS2801 LEDs on a consume worn by Wes Borland (Limp Bizkit).
Said the former Hot Wheels R&D guy to the Hollywood guy that works with hot models.
:frown:
PS - That is a very cool idea/implementation for a some wearable electronics, Jon!
I have a few pics for giggles.
How did you like the PCB Fab in a Box process you used? It looks like the boards turned out nice.
Thanks. Now that I have the hang of it, I like it and will be using it more frequently. When I first got the system I struggled a bit. Thankfully, the gentleman who created it is FANTASTIC by way of tech support. For me I think it came down to how I was cleaning and rinsing the boards. I am now using 00 steel wool and Dawn dish washing soap for cleaning. After I get the board as shiny as possible, I drop it into a bath of 99% alcohol until I need it (while the laminator is heating up). We have a lot of dissolved solids in the Burbank water supply and I think that may have interfered with toner adhesion on my first attempts. These boards I made for Jinyo were no problem at all -- from printing to finished PCB in about 20 minutes (I'm sure Frank is faster, but I still think 20 to have a finished PCB is just fine).
I would absolutely recommend the product. I'm getting to that point in my life that I don't like point-to-point wiring any more (if I ever did!). With a PCB program and a laser printer, the PCBFIAB kit makes life easy. I have more small projects planned for the cosplay world and now I'm going to make the PCBs instead of ordering them. Will probably have to chat with Frank on how to do double-sided PCBs. It's possible with the system, I just haven't tackled them yet.
And one more tip: I manually edited the pads to have 20 mil holes -- just to help guide the drill bit (I use a Dremel tool). I think on future boards I will bump this to 25 mils as some of those holes closed.
Sounds like you didn't swing a free ticket. Tickets to Comic-con are hard to get these days, as everything sells out in less than two hours when they go on sale.
Especially Hall H.
You pulled an erco maneuver and posted the link to PCB "Fab in a Box".
Now I'm $75.00 poorer.
Quick question?
After you have the prop mini and carrier board finished and working.
Do you wrap it in tape, put it in a bag or do something else to protect your circuit
while the model is using it.
I always struggle with housings and such.
It looks like for a short lived project like this one, something simple would be needed
to protect your electronics.
You do good work.
Erco, could your Stamp Printer drive a Dremel like tool? How do you program the movements?
Luckily Jon's board didn't need a lot of holes drilled still it's a pain to do.
She was originally to have a weapon holster on her right thigh. I made the wires between the controller and the LED strip and button about three feet long to accomdate running through the dress. It now appears that Jinyo use a smal pack on her back -- will ask him when he returns from Comic-Con. He has two more Propeller MInis so we'll put them to use in other projects.