An unlikely pairing ... rejuvenating a string of Christmas lights with a Flyback
 Beau Schwabe
Posts: 6,576
I discovered this last year, but had the need to do it again this year.
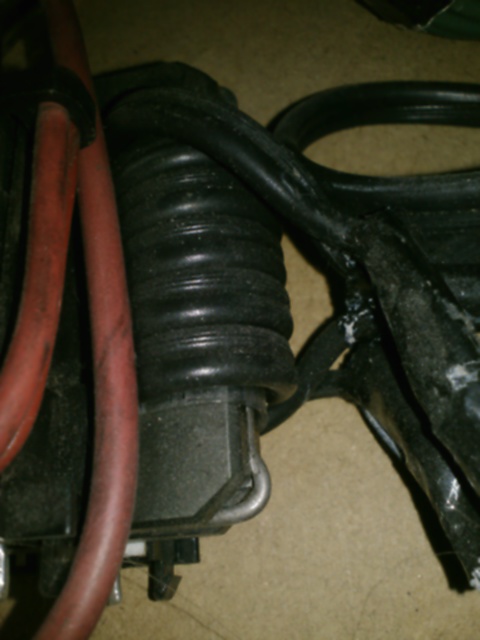
I have used the circuit below: (See: High Power Drivers)
http://wiki.4hv.org/index.php/Flyback_transformer
http://wiki.4hv.org/images/thumb/8/8a/Mazilli1.png/800px-Mazilli1.png
With slight modification to the circuit:
Omit the Zener diodes
replace 10k resistors with 6.8k resistors
replace 470 Ohm resistors with 1k resistors
Power the unit with 6 Lithium Polymer cells (22.2Volts)
Transistors used were four IRFZ44N's ... each transistor was paralleled and run cool to the touch in this circuit.
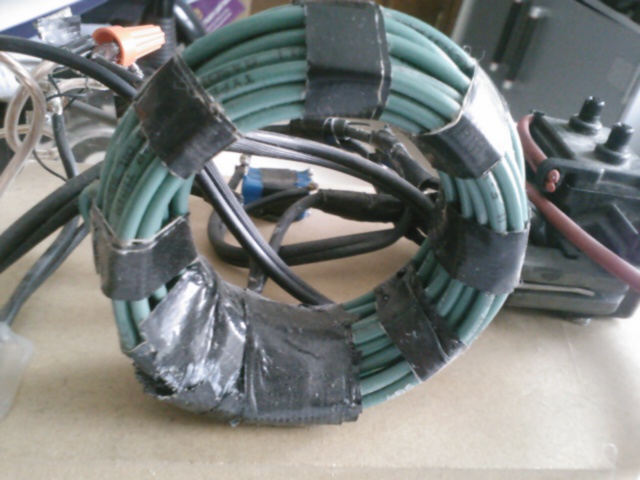
The center taped inductor is roughly 40 turns over a 2.5 inch diameter form

The primary is literally 10 total turns of wire center tapped. Balance is important here for good resonance, So I used 16 gauge lamp cord already paired together. I brought the opposite ends together 'after' winding to create a center tap. This provides a better mechanical as well as electrical coil balance as opposed to winding two separate 5T coils. Using the lamp cord to keep the windings together, interleaves the two 5T coils for better matching.

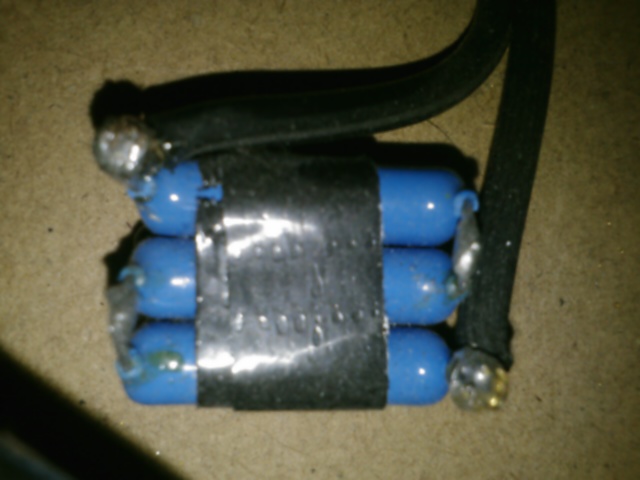
While the value of the capacitor isn't particularly important (i.e. the circuit will generally resonate at a frequency determined by the L and C value regardless and dynamically adjust to any load on the primary and/or secondary) what is important is the voltage rating. Even though there are only 10 turns total for the coil, I have measured in excess of 300V across the coil. I used three 1 uF 250 Volt caps in series to form a single capacitor approximately 0.33uF. This stays cool to the touch also.

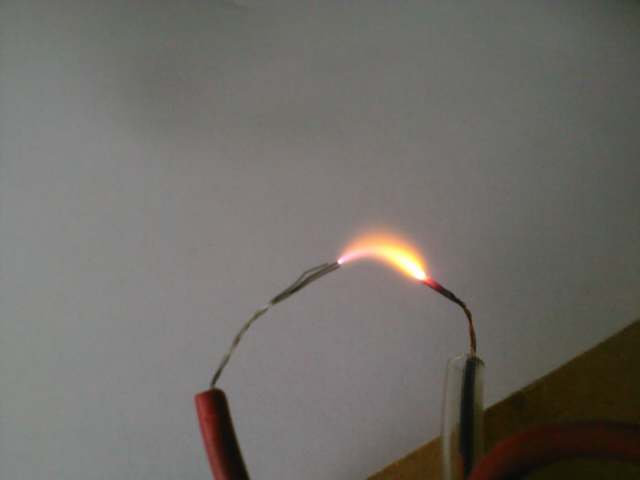
Anyway, the goal with this circuit is to obtain a plasma arc .... If you have some other means it will also likely work.

How to rejuvenate a strand of Christmas lights.
1) The strand must be completely out when you normally plug it into a house outlet
2) ALL bulbs must still be on the string
3) Apply the plasma arch to the AC plug leaving about a 1cm spark gap on one of the lead connections.
4) Make sure nobody is near the string under test
5) Turn on the plasma spark for about 10 to 15 seconds
6) Remove the connections to the AC plug and try the string of light as though you normally would.
7) The lights that need to be replaced should now be able to easily identify themselves by NOT being lit.
I have a few theories on how this works, but I have tried it on "several" Christmas lights and it works just about every time I have tried it.
Originally I was looking for an effect over Halloween implementing sparks in place of the lights on a string of lights, but serendipity led to this discovery.
Enjoy!
Disclaimer: With any High Voltage Experiments you should used extreme caution and take others around you as well as yourself into consideration.
I have used the circuit below: (See: High Power Drivers)
http://wiki.4hv.org/index.php/Flyback_transformer
http://wiki.4hv.org/images/thumb/8/8a/Mazilli1.png/800px-Mazilli1.png
With slight modification to the circuit:
Omit the Zener diodes
replace 10k resistors with 6.8k resistors
replace 470 Ohm resistors with 1k resistors
Power the unit with 6 Lithium Polymer cells (22.2Volts)
Transistors used were four IRFZ44N's ... each transistor was paralleled and run cool to the touch in this circuit.
The center taped inductor is roughly 40 turns over a 2.5 inch diameter form

The primary is literally 10 total turns of wire center tapped. Balance is important here for good resonance, So I used 16 gauge lamp cord already paired together. I brought the opposite ends together 'after' winding to create a center tap. This provides a better mechanical as well as electrical coil balance as opposed to winding two separate 5T coils. Using the lamp cord to keep the windings together, interleaves the two 5T coils for better matching.

While the value of the capacitor isn't particularly important (i.e. the circuit will generally resonate at a frequency determined by the L and C value regardless and dynamically adjust to any load on the primary and/or secondary) what is important is the voltage rating. Even though there are only 10 turns total for the coil, I have measured in excess of 300V across the coil. I used three 1 uF 250 Volt caps in series to form a single capacitor approximately 0.33uF. This stays cool to the touch also.

Anyway, the goal with this circuit is to obtain a plasma arc .... If you have some other means it will also likely work.

How to rejuvenate a strand of Christmas lights.
1) The strand must be completely out when you normally plug it into a house outlet
2) ALL bulbs must still be on the string
3) Apply the plasma arch to the AC plug leaving about a 1cm spark gap on one of the lead connections.
4) Make sure nobody is near the string under test
5) Turn on the plasma spark for about 10 to 15 seconds
6) Remove the connections to the AC plug and try the string of light as though you normally would.
7) The lights that need to be replaced should now be able to easily identify themselves by NOT being lit.
I have a few theories on how this works, but I have tried it on "several" Christmas lights and it works just about every time I have tried it.
Originally I was looking for an effect over Halloween implementing sparks in place of the lights on a string of lights, but serendipity led to this discovery.
Enjoy!
Disclaimer: With any High Voltage Experiments you should used extreme caution and take others around you as well as yourself into consideration.


Comments
I would love to see a picture of what the lights look like with the plasma going through them, if you have one.
"Heck with the lights! I want plasma arcs on my tree" .... Hmm, You wouldn't be able to do it very long without causing a potential fire. ;-/ The plasma gets hot. Where I was going with the Christmas lights was to place a homemade 50kV capacitor in parallel with the plasma output. This makes the Plasma int a Spark that has to charge discharge and is 'SLOW' enough that the heat would be less likely to ignite anything.
See video:
Going from this...
https://www.youtube.com/watch?v=hy2K2NvVooA
to this using the same power supply...
https://www.youtube.com/watch?v=9gcGCnnhdpw
The only difference is a home made Polypropylene 5x5 inch capacitor placed in parallel with the HV output of the flyback.
Martin_H,
"Wow, that's a crazy or brilliant solution, I'm not sure which. " - probably a little of both... I've always loved the old-school HV electronics, but who doesn't right?
Depends...
I'm stealing it!
I chose an Air core because they are just easier to wind.... The schematics called for an inductor, So I just tried a few... 40T around a 2.5 inch form seems about right for this design using a 10T center tap. It still blows me away a bit that all of the energy coming out of the FBT is a result of what you are putting into the 5T coil. Yet everything runs surprisingly cool.
"How is this better than the tongue-in-the-socket technique I'ved always u-s-s-s-s-s-s-s-ed??" -- You get to smell the ozone rather than taste it ... Nothing says you can't still use your tongue, I'm just not going to tell you exactly where to place it. :-)
All seriousness..... Over the weekend (well last weekend) the in-laws have a particular roping of lights they like, and since they are set in their way, they leave it up year round in the sun room. Since it's a rather permanent fixture, it's a rather monumental task to take it down and re-string it with new lights much less finding the lights that are bad. Since I don't like ladders and tend to avoid them at all costs, I was able to "hook-up" my device and "fix" the lights to a point where I could identify 14 bulbs that were out on the string.... Normally substituting one by one would have taken an extremely long time. Once the bulbs were identified and replaced, everyone is happy, and I get to be a "geek" hero. ....word get's out and I was asked to do a similar repair at the school on their Christmas tree where the entire top half of the tree would not light.... again, device to the rescue .... It doesn't hurt that my wife works at the school. :-) ... Again "geek" hero ....
Isn't that what it's all about anyway? We all just want to be a "geek" hero and look cool in the eyes of others? -- Have a great weekend everyone, and be safe!
I have used the ZFS mazillie driver many times to make monster FB drivers. Yea they can PUT OUT !
I have one Iam building to drive my CO2 laser .
Never used a Aircore inductor ... I may need to try this !
peter .
BTW) The wire I used for the air core was standard household romex solid insulated wire. (about 30 feet)
localroger ... there is a Marx generator I can attach to this supply where I can create 1 foot sparks, and I am wanting to build another tower that would allow 2 foot sparks. We should coordinate with a few Hams at a certain date and time to see If I can be heard. :-)
Here is a 13 stage Marx generator attached to the FBT power supply producing just over 7 inch sparks. I have a newer version than the one shown in the video using different home made capacitors with less loss. I can't take anymore video with it without protecting the camera. My phone went into a perpetual auto reboot every 20 seconds last time I took video. Keep in mind, the power source is the same as what you would power your laptop with. :-)
https://www.youtube.com/watch?v=vOB4DTinJqs
But Erco gets to flame throwers in his tree!
The amazement continues! Forgive the OT question, but what caps did you use? I mean both the old caps and the new homemade caps.
I built a Marx generator with blue Chinese disk ceramic caps (15 kV iirc) that quickly became so lossy with repeated discharges that pretty soon they would no longer hold a charge. In fact I put the whole Marx project on indefinite hold, awaiting a better cap. (The caps I used are fine for normal discharge currents such as one might find in the multiplier stack of an X-ray machine, but they just don't hold up to the high instantaneous currents associated with arc discharges at atmospheric pressures.)
BTW, a air core inductor would seem to be the ideal choice for driving an LCLR IH tank circuit, too. Thank goodness you suffer from blown Christmas lights.
"Phineas J. Whoopee, you're the greatest!"
The capacitors were made from using the polypropylene sidewalls of a kitty litter container. In combination with adhesive foil tape on either side forming a standard run of the mill parallel plat capacitor. The polypropylene was about a 6 inch square, while the metal foil formed a 5 inch square with rounded corners .... These caps have been pushed to 50kV without arching, but in practice they only see about 20-30kV.
The "new" caps use a cylindrical tube (fluorescent lighting protection plastic) about 6 inches long with metal foil on the outside for one terminal and foil on the inside for the other terminal. These are superior to the parallel plate version for several reasons and have less leakage.
What magic did you use to keep the inside foil tight against the protection sleeve? Or did you use adhesive foil again? (All I've thought of so far is tamping in bunches of wadded newspaper or TP - which would probably be ignited by corona discharge and produce a different sort of spectacle.
Note: to prevent arching, you need to stagger the inner foil to the outer foil ... I left about an inch.
Outer Foil xxxxxxxxxxxxxxxxxxxxxxxxxxxxxx ------------------------------------- Tube xxxxxxxxxxxxxxxxxxxxxxxxxxxxx Inner Foil xxxxxxxxxxxxxxxxxxxxxxxxxxxxx ------------------------------------- Tube xxxxxxxxxxxxxxxxxxxxxxxxxxxxxx Outer FoilYa might want to also run many small busses out of the layers ELSE you have a large inductor too and the ESR can really mess up the Uber high amperage you can draw .
I have maxwell ( now general atomics) Pulse rated caps for my Tesla Coil Venom . They are some of the best.
4HV and TCBOR and other tesla sites can be very usefull in building pulse rated (and RF rated ) caps ..
Beau I have made Wayyyyyyyyyy to many rolled Oil foil caps ..... what a messy mess
You may want to make a MMC out of CDE 2 KV caps ...... Its what I do for med TCs and are bomb proof ..
User Name . Door knob caps can be pulse rated but most I have found on ebay are not .....
the metal plating on each side of the dialectric can be eaten away by the current .
If was not in a dinky Apt with neighbors and My own fancy computers and test gear at risk ......... I would love to get back in to HV .
All this HV talk is what I played with ( and I use that term play loosely) all in my teens ......
Its a just luck I was not killed during my really early years ......
One TC used 30 Wine bottles . and 3 9 kV 60 mA transformers .
Just blasting out 5 footers at night in my home lab .......
Heck we ended up putting in a 100 Amp Feed in to my side of the guarge as the Pole pig needed more then a 15A GFCI to run on ........
Sunk 10 foot ground rods next to the driveway .
I have found some of my older VIds recently ! and as soon as I have some time I want to archive them ad post a few .
These are not multiple layers.... single layer with a surface area of about 20 square inches.... Just a parallel plate capacitor rolled so that the East end meets the West end or (North/South)
I've seen (pictures of) the CDE caps you recommend, Peter. They are pricey stinkers, though, especially if you need dozens or hundreds in your MMC. And who doesn't?
I can certainly relate to the apartment problem. <shaggy dog story deleted>
Here is where I experiment now. This is a view in the direction of the nearest neighbor: