

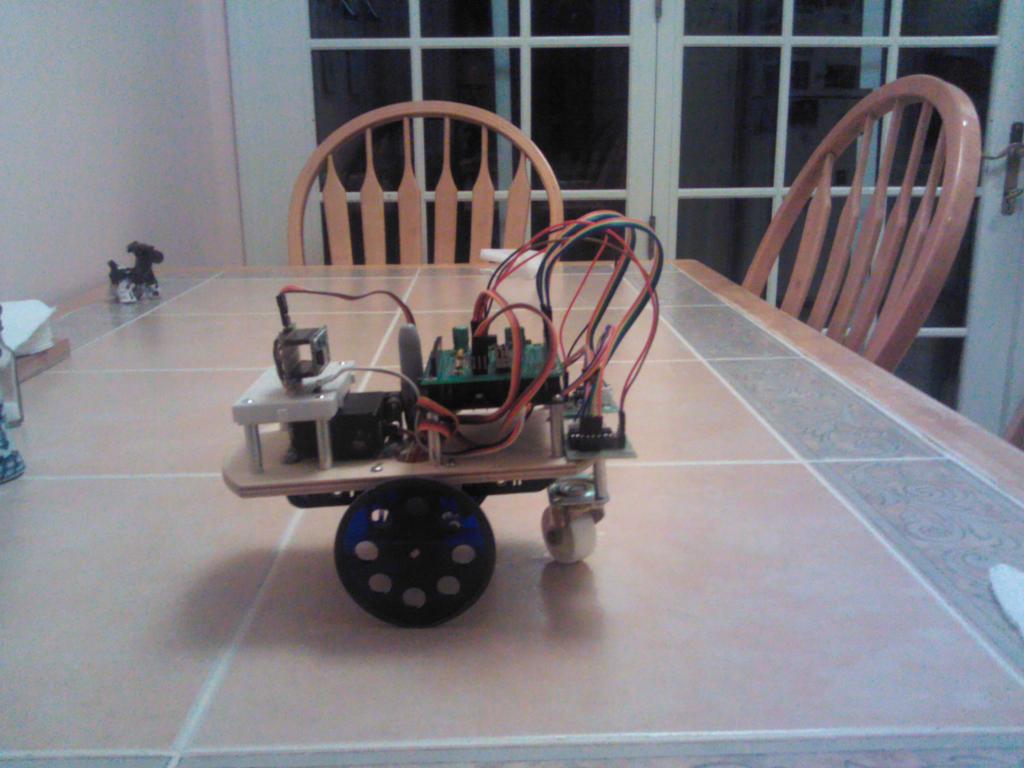
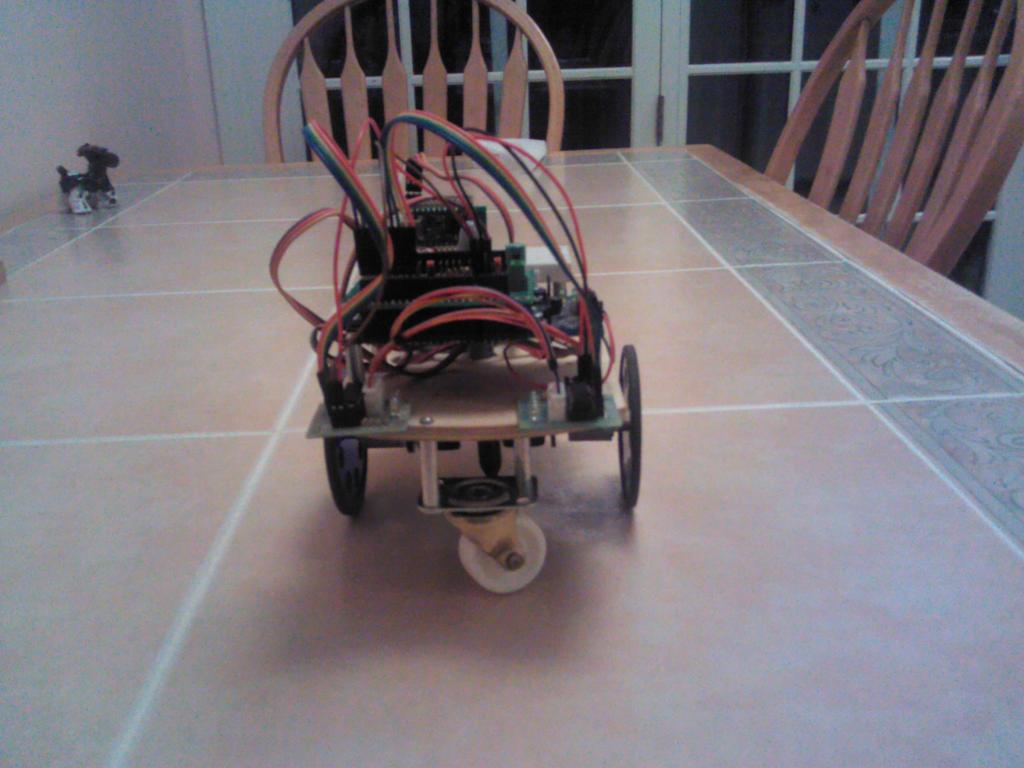
Drawbot using eBay stepper motors, the Little Robot Wheels, and PropForth (Video)

This project is my wireless drawing robot which uses PropForth and Nicholas G. Lordi's Robot Control Language. The robot is controlled wirelessly via Pololu Wixels, and because it uses FORTH is fully remotely programmable. Here's the bill of materials:
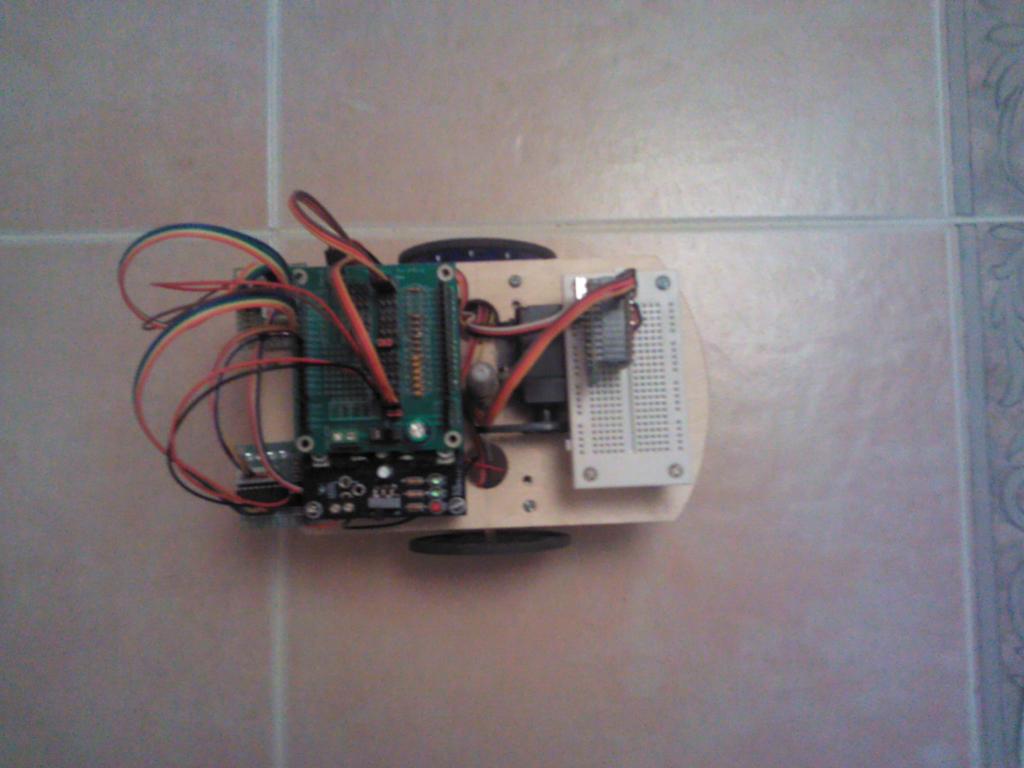
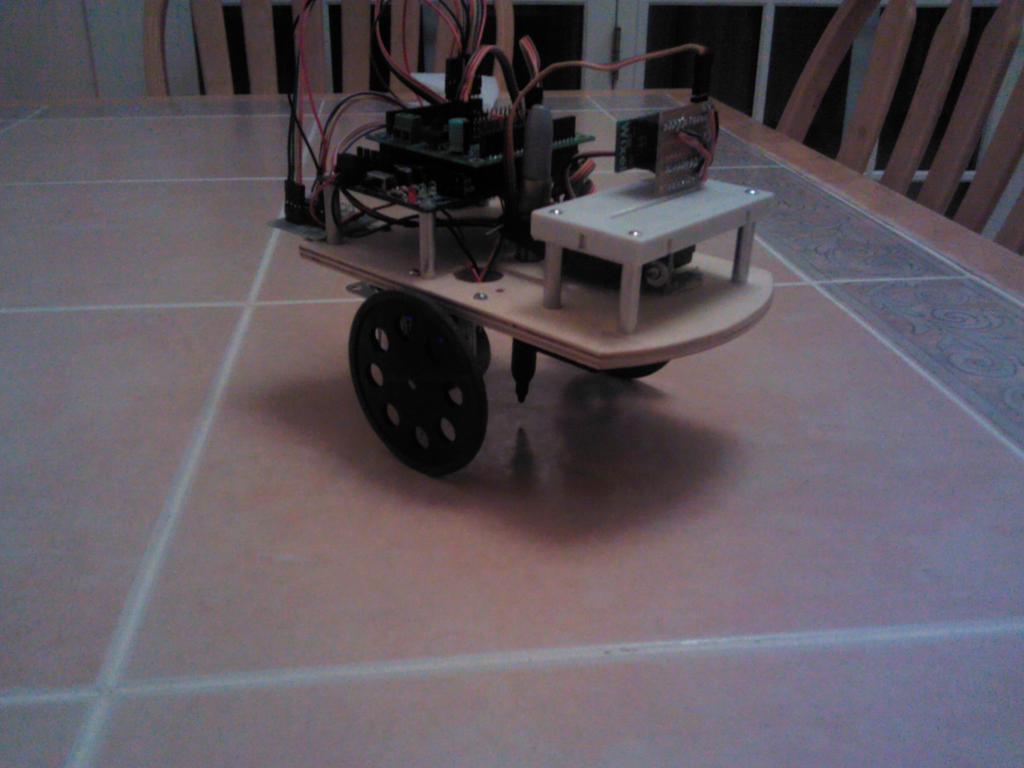
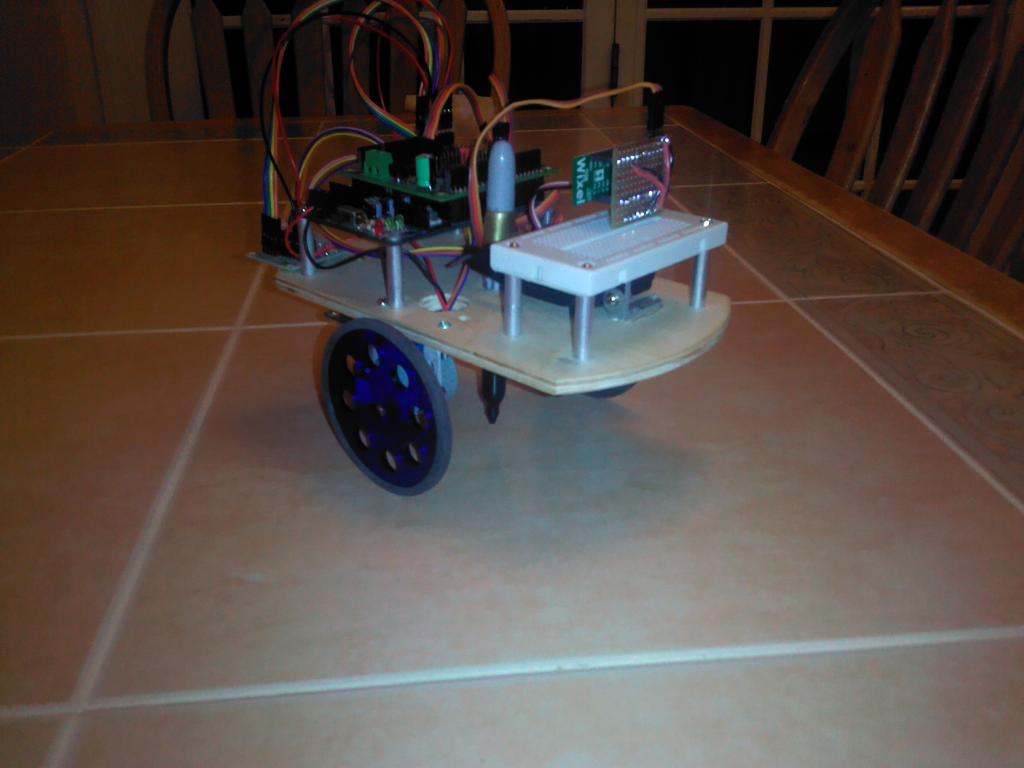
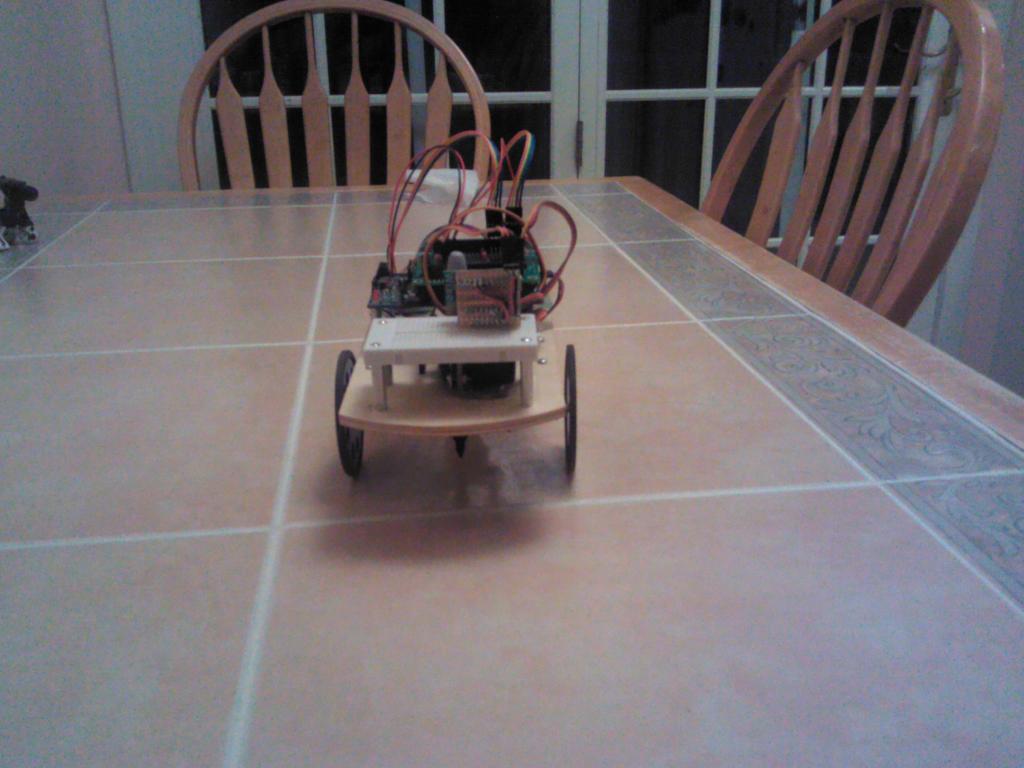
I had the Propeller Platform and Robot Control Board laying around from a dismantled project, so I repurposed them here. A quick start board and a little bit of breadboard work could save a fair bit of the budget. The two hardest parts of the project were cutting and drilling the plywood which took an afternoon, and the FORTH programming which has been several two hour sessions so far. Here are some pictures:


Between the transmitter, the motors, and the pen lifting servo this thing eats batteries. I generally get a couple of hours debugging per charge, so progress per day is limited. I'm nearly done with my demo program which has taken a fair bit of time because this is my first robot FORTH project. However, the ability of FORTH to act as a command interpreter coupled with wireless programming is really powerful. Here's my current source code which could use some better comments.
1   small sheet 1/4 Hobby plywood  ($3)
2   eBay steppers                  ($5)
2   Wheels from Propeller Powered  ($4)
6   Parallax L mounting brackets   ($2)
1   1.25" caster (sorry Tommy)     ($1)
10  1" Parallax standoffs          ($1)
1   standard Servo                 ($12)
2   Pololu Wixels for wireless serial ($20)
1   Propeller Platform                ($37)
1   Wulfden Robot Control Board    ($14)
1   Medium sized breadboard        ($4)
2   3 AA battery holders           ($6)
1  small piece of brass tubing     ($1)
1  paperclip
?  4-40 nuts and bolts
I had the Propeller Platform and Robot Control Board laying around from a dismantled project, so I repurposed them here. A quick start board and a little bit of breadboard work could save a fair bit of the budget. The two hardest parts of the project were cutting and drilling the plywood which took an afternoon, and the FORTH programming which has been several two hour sessions so far. Here are some pictures:
Between the transmitter, the motors, and the pen lifting servo this thing eats batteries. I generally get a couple of hours debugging per charge, so progress per day is limited. I'm nearly done with my demo program which has taken a fair bit of time because this is my first robot FORTH project. However, the ability of FORTH to act as a command interpreter coupled with wireless programming is really powerful. Here's my current source code which could use some better comments.
\ Before loading this program load PropForth servo library (change to cog 0, and Nicholas G. Lordi's Robot Control Language
\ start the drawbot by initializing the servo library and the robot command language. The 0 GF halts the robot.
: start_drawbot
    sm_start_servos START 0 GF ;

\ pen up using servo on pin 0
\ The hex magic number is the servo pulse width determined
\ by trial and error
: PU
    0 h15E0 sm_setpos 500 delms ;

\ pen down using servo on pin 0
\ Again, the hex constant was determined experimentally.
: PD
    0 hCE4 sm_setpos 500 delms ;

\ A set of draw moves.

\ Move without drawing 2 forward.
: SPACE
  PU 2 GF ;

\ Draw a line 4 long
: STROKE
  PD 4 GF ;

\ Draw a line 2 long
: DASH
  PD 2 GF ;

\ Go down one line and back to the start of the row.
: CRLF
  PU 90 GC 6 GF 90 GC 30 GF 180 GC ;

\ Draw a letter H
: H
  90 GCC
  STROKE
  PU 2 GB
  90 GC
  DASH
  PU 90 GCC 2 GF 180 GCC
  STROKE
  PU 90 GCC
  SPACE ;

\ Draw a letter E
: E
  90 GCC
  STROKE
  PU 90 GC
  PD 3 GF
  PU 3 GB 90 GC
  2 GF 90 GCC
  DASH
  PU 2 GB 90 GC
  2 GF 90 GCC
  PD 3 GF
  SPACE ;

\ An L
: L
  90 GCC
  STROKE
  PU 4 GB 90 GC
  PD 3 GF
  SPACE ;

\ and an O
: O
  90 GCC
  STROKE
  90 GC 3 GF 90 GC
  STROKE
  PU 90 GCC 3 GB
  PD 3 GF
  SPACE ;

: W
 90 GCC
 STROKE
 PU 4 GB
 45 GC
 DASH
 90 GC
 DASH
 135 GCC
 STROKE
 PU 4 GB
 90 GC
 SPACE ;

: R
  90 GCC
  STROKE
  90 GC
  DASH
  30 GC
  DASH
  60 GC
  1 GF
  30 GC
  DASH
  60 GC
  DASH
  180 GC
  DASH
  30 GC

: D
  90 GCC
  STROKE
  90 GC
  DASH
  30 GC
  DASH
  60 GC
  1 GF
  30 GC
  DASH
  60 GC
  DASH
  PU 180 GC
  SPACE SPACE ;

\ Draw the word HELLO
: HELLO H E L L O ;

\ Draw the word WORLD
: WORLD W O R L D ;

\ Yes, it's HELLO WORLD in FORTH
: HELLO_WORLD HELLO CRLF WORLD ;
1024 x 768 - 64K
1024 x 768 - 55K

1024 x 768 - 64K
1024 x 768 - 72K
1024 x 768 - 80K
1024 x 768 - 74K
Comments
How do you like Nick's robot control language? I haven't tried it yet, it is the way to go?
One thing that might help with battery use 4 AA NiMH instead of 3 AA alkaline -
We used a 4 AA battery holder, but Alkaline batteries being 1.5v meant we we over the five volt limit of some of the parts. Rather than getting a regulator, I tried 3 AA and a dummy (1-3/4" machine bolt). This worked fine, but only lasted a couple hours, as you have found.
Next we tried 4 AA NiMH cells. At 1.2v, four cells is delivers 4.8v, below the five volt limit for the parts. I have charged the first set twice since April, and the second set once, when I bought them in July. While I do most of my development powered by USB connected to the computer, I have been able to do demos and non tethered tests almost every day. So I think 4 AA NiHM last several times longer then 3 AA alkaline in this application.
You know erco will demand a video of it drawing a figure 8.
No need to apologize. At least, if for only a moment, you did consider the idea.
I just spent $30 bucks on a servo, + $5 on the 'axle assembly' parts, and roughly $5 for a tire. Just to avoid using a caster...
Anyway, thanks for sharing. And can't wait to see 'the eight'...
-Tommy
I've been about nervous about that too. One errant turn command coupled with a pen down and I'm in hot water! I've done most of my testing without a pen in the pen holder, then put one in when I'm reasonably sure a particular move sequence is working.
I really liked it once I figured it out and calibrated it. It’s easy to use for straight moves and angular rotations. I haven’t figured out arcs yet, but that looks possible with different speeds to each wheel. BTW I’m using two 3 AA battery holders for a total of 7.2 volts. I’m running everything off my boards 5 volt regulator, so given the drop across the regulator I think it is browning out before the batteries are discharged. Normally I run motors directly off batteries, but I've been a bit hesitant to put 7.2 volts through the steppers.
Thanks. Good tools helped. I have a drill press and bought a Dremel circle cutting jig. I drilled a hole in the center-line and cut arcs on the ends. It made it looks spiffy compared to the squared off ends I usually use. I also used both of tools on my delta robot which will isn't as far along as this project.
I made tweaks to the code by factoring out common moves. Here's the update:
\ start the drawbot by initializing the servo library and the \ robot command language. The 0 GF halts the robot. : start_drawbot sm_start_servos START 0 GF ; \ pen up using sevo on pin 0 \ The hex magic number is the servo pulse width determined \ by trail and error : PU 0 h15E0 sm_setpos 250 delms ; \ pen down using servo on pin 0 \ Again, the hex constant was determined experimentally. : PD 0 hCE4 sm_setpos 250 delms ; \ A set of draw moves. \ Move without drawing. : SPACE PU 2 GF ; : BSPACE PU 2 GB ; \ Draw a line 4 long : STROKE PD 4 GF ; \ Draw a line 3 long : EMDASH PD 3 GF ; \ Draw a line 2 long : ENDASH PD 2 GF ; : TICK PD 1 GF ; \ Go Clockwise Right Angle : GCRA PU 90 GC ; \ Go Counter Clockwise Right Angle : GCCRA PU 90 GCC ; \ Go clockwse 180 : GC180 PU 180 GC ; \ Go down one line andback to the start of the row. : CRLF GCRA 6 GF GCRA 24 GF 180 GC ; \ From here down build the letters using the primatives above as much as possible. : H GCCRA STROKE BSPACE GCRA ENDASH GCCRA SPACE GC180 STROKE GCCRA SPACE ; : E GCCRA STROKE GCRA EMDASH PU 3 GB GCRA SPACE GCCRA ENDASH BSPACE GCRA SPACE GCCRA EMDASH SPACE ; : L GCCRA STROKE BSPACE BSPACE GCRA EMDASH SPACE ; : O GCCRA STROKE GCRA EMDASH GCRA STROKE GCRA EMDASH GC180 SPACE SPACE SPACE ; : W GCCRA STROKE BSPACE BSPACE 45 GC ENDASH 90 GC ENDASH 135 GCC STROKE BSPACE BSPACE GCRA SPACE ; : R GCCRA STROKE GCRA ENDASH 30 GC TICK 60 GC TICK 30 GC TICK 60 GC TICK GC180 1 GF 60 GC TICK 60 GCC SPACE ; : D GCCRA STROKE GCRA ENDASH 30 GC ENDASH 60 GC 1 GF 30 GC ENDASH 60 GC ENDASH GC180 SPACE SPACE ; : HELLO H E L L O ; : WORLD W O R L D ; : HELLO_WORLD HELLO CRLF WORLD ;Lots of hours involved, clearly. Imagine the amazing things we forumistas could do if we join forces on one big project!
Erco, thanks for the watching the video and the kudos. I'll start working on a figure 8 shortly.
Still waiting nearly a year later, Martin_H!
can you please help out.
i can not figure out how to attach a wheel to the 28BYJ-48 motor.
i dont have anything that fits into his head.
can you please share a ebay link with gears,wheel that will fit 28BYJ-48 ?