New Encoder Upgrade Instructions for Eddie and MadeUSA Robots
Hi everyone-
This thread is for those of you who wish to upgrade your "old" Eddie or MadeUSA Robot to the new Quadrature Encoder (#29321).
As an upgrade, I've made the assumption that you have already completely built your Robot. If this is not the case, then you do not need to use this thread as a guideline. You can simply use the regular "stock" encoder, and follow its "normal" instructions.
In particular, this thread details the manner in which you can install the new Encoder WITHOUT having to remove the dowel pins (drive wheel pins). Removal of these pins is difficult unless you have a nice set of pin-punches. If you have a set of these tools, you can install the quad encoders in the normal way (basically the same method as how you originally built your robot).
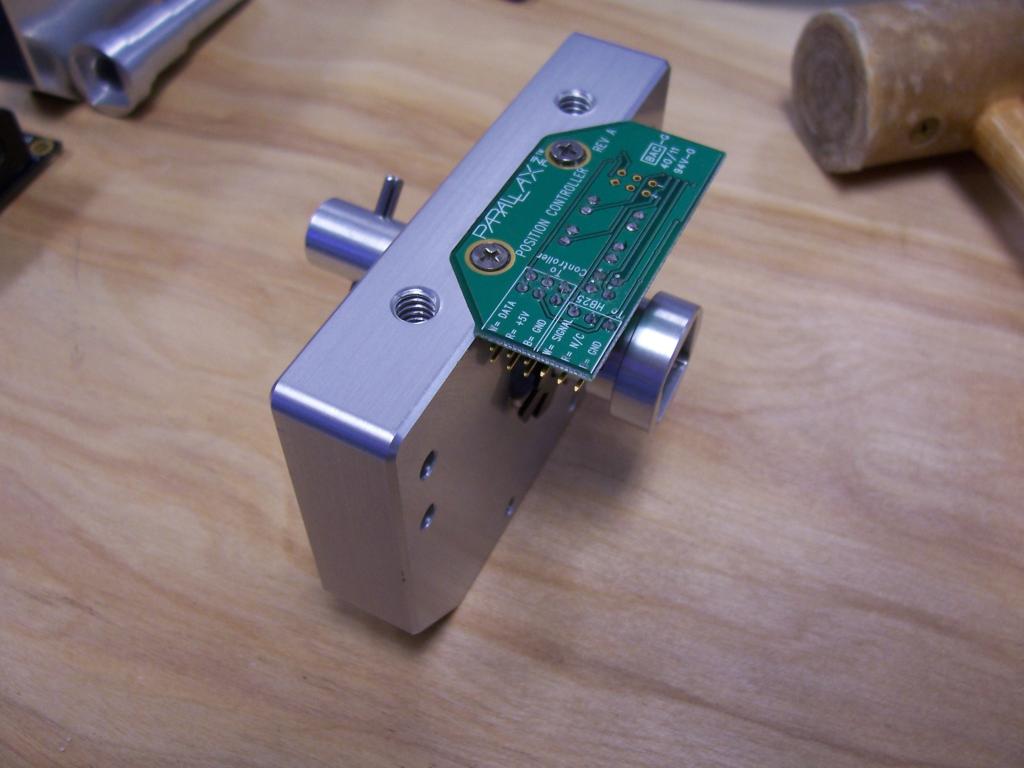
Step 1: Disassemble your motor drive assemblies to the point shown here...notice that you DO NOT need to remove the dowel pin.

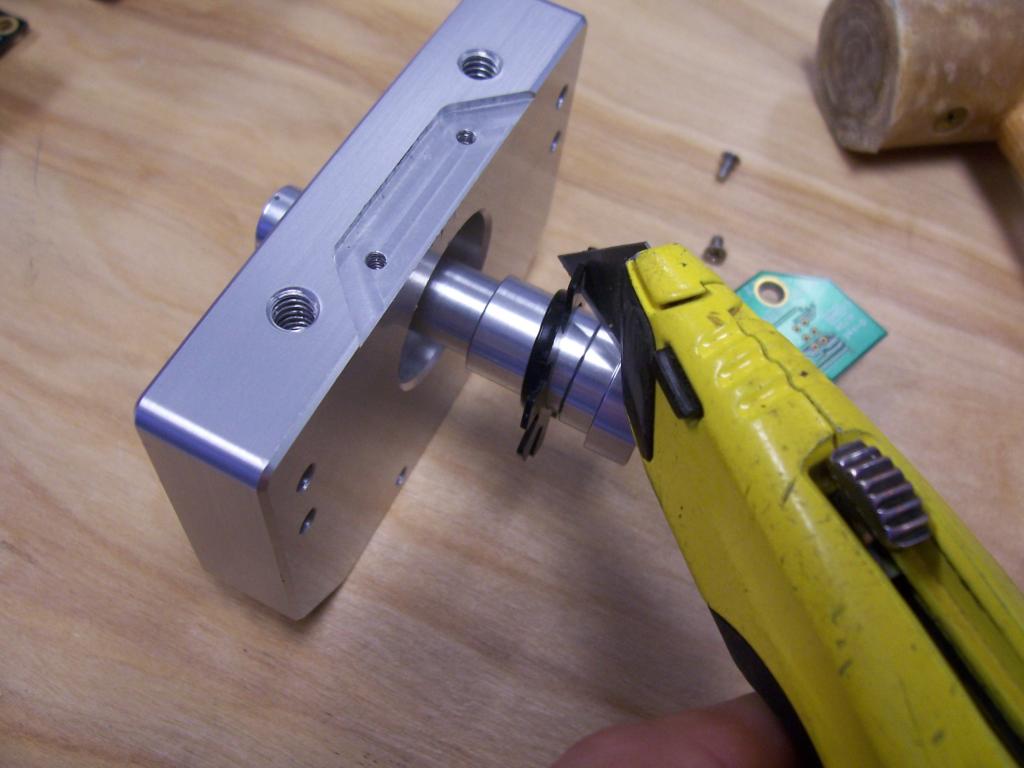
Step 2: Slide the axle as far as it will go (as shown below). Then use a utility knife or other suitable cutting tool to "slice" off the old encoder disk.

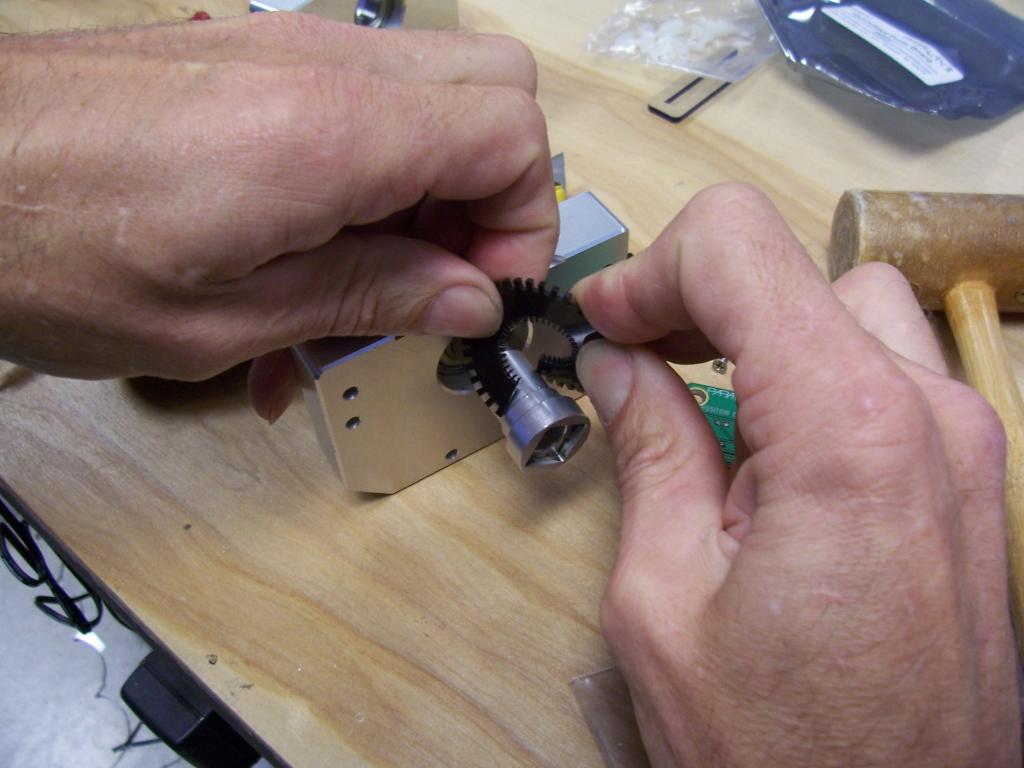
Step 3: "Twist" the Upgrade Encoder Wheel sideways so that you can slide it over and snap it onto the axle.

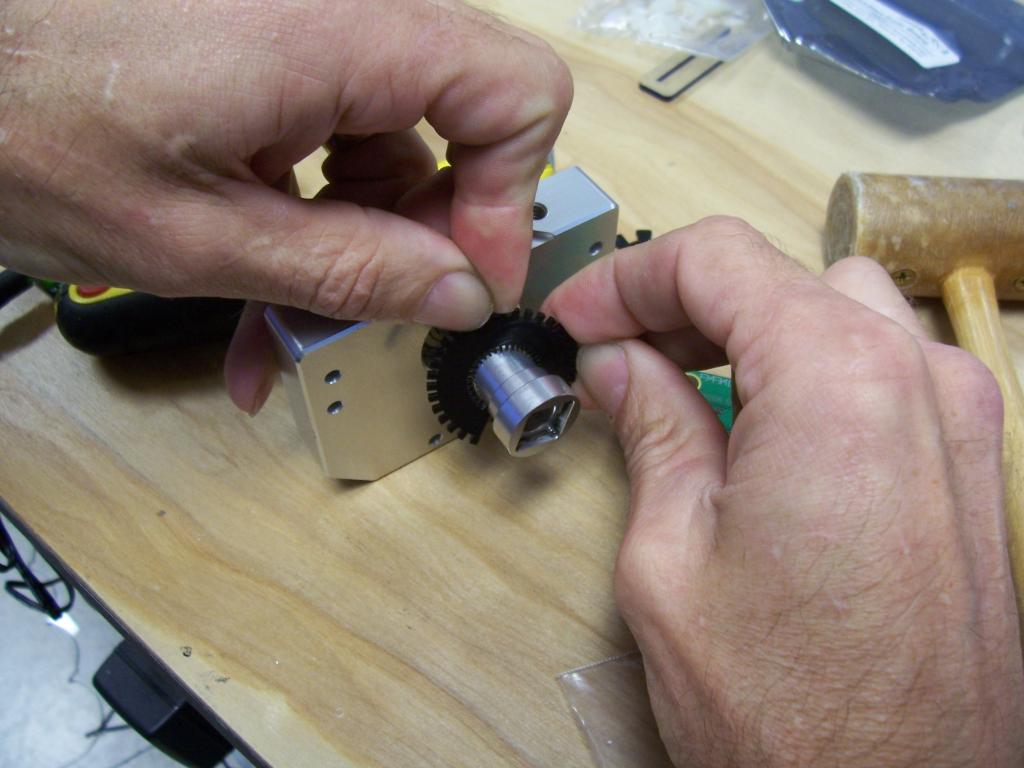
Step 4: "Reform" the disk so that it is flat once again.

...Continued...
This thread is for those of you who wish to upgrade your "old" Eddie or MadeUSA Robot to the new Quadrature Encoder (#29321).
As an upgrade, I've made the assumption that you have already completely built your Robot. If this is not the case, then you do not need to use this thread as a guideline. You can simply use the regular "stock" encoder, and follow its "normal" instructions.
In particular, this thread details the manner in which you can install the new Encoder WITHOUT having to remove the dowel pins (drive wheel pins). Removal of these pins is difficult unless you have a nice set of pin-punches. If you have a set of these tools, you can install the quad encoders in the normal way (basically the same method as how you originally built your robot).
Step 1: Disassemble your motor drive assemblies to the point shown here...notice that you DO NOT need to remove the dowel pin.

Step 2: Slide the axle as far as it will go (as shown below). Then use a utility knife or other suitable cutting tool to "slice" off the old encoder disk.

Step 3: "Twist" the Upgrade Encoder Wheel sideways so that you can slide it over and snap it onto the axle.

Step 4: "Reform" the disk so that it is flat once again.

...Continued...


Comments
Step #7: Place a Keeper Split-ring over the shaft and snap it into place.
Step #8: Now slide both the Keeper Ring and the Disk out to the end of the drive axle as shown.
Step #9: Place the other Keeper Ring over the axle (on the opposite of the Encoder Disk), snap it into position, and then slide all three pieces to the end of the axle, so that the but up against the axle sholder. Make sure that, when you rotate the shaft, that the Disk does not "wobble" - that is to say that it remains is the same plane as it rotates. Straighten or bend it into position as necessary.
Step 11: Reassemble your Robot drive system back to the way it was.
This should complete the hardware portion of your upgrade...
-MattG
-- Gordon
and thanks Jay.Beavers - Welcome to the Forums!
-MattG