

Plywood Prop Boe Bot, or why did I make this?

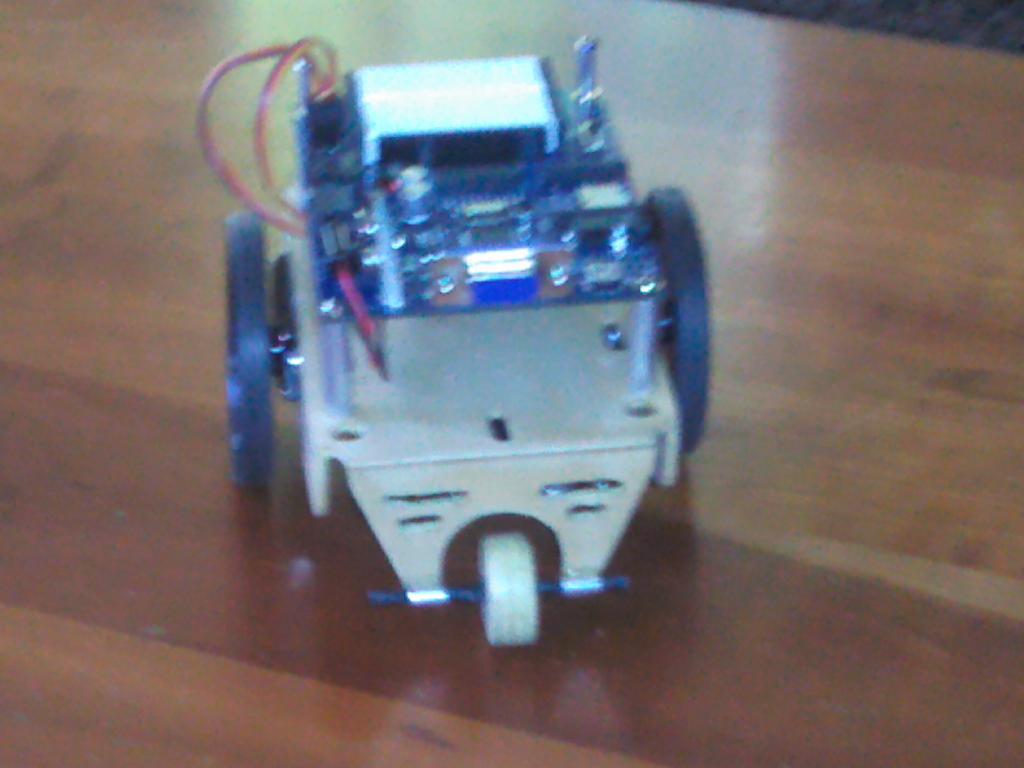
So I had some hobby plywood and other odds and ends. One thing leads to another and I built a robot. Here's a picture :

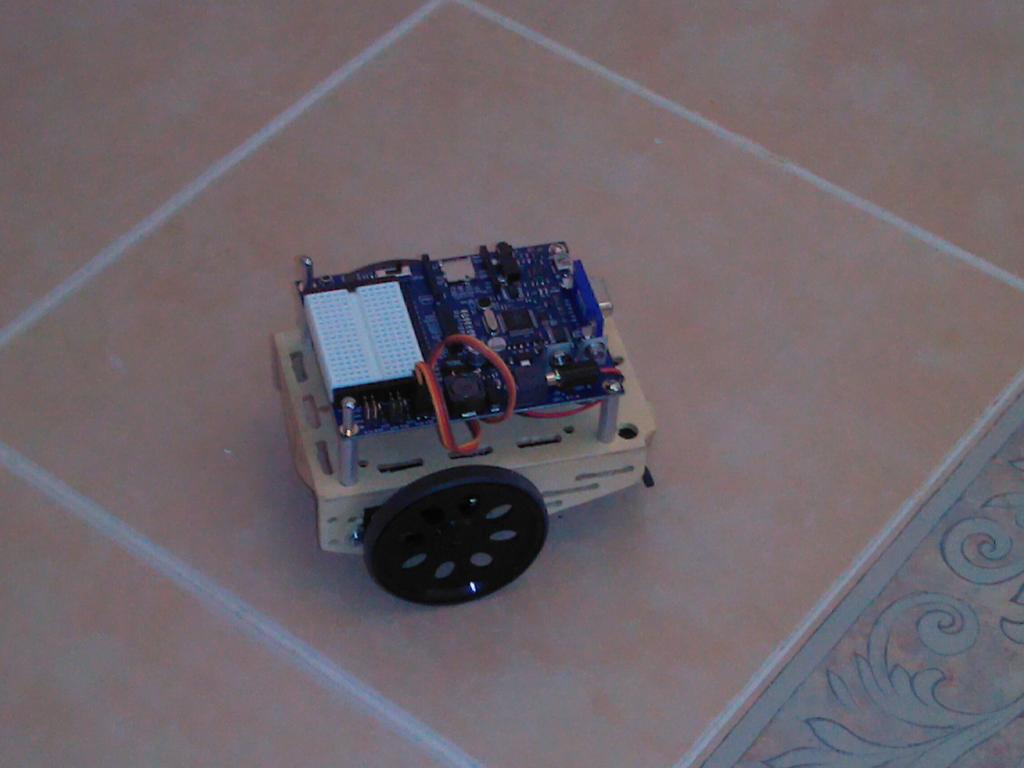
Here's the back :
Here's the back :
1024 x 768 - 54K

1024 x 768 - 57K
Comments
Nice work Martin, What did you use to cut all the slots?
-Tommy
Thanks for sharing.
I do think it deserves a better quality photo than the second photo you posted.
Do you have the outlines in a digital format?
It would probably be a nice starting point for others wanting to make small wooden bots.
Sounds like you caught something contagious from ERCO.
It is a very nice looking Bot.
Duane, it turns out that Parallax has a measured drawing of the Boe Bot chassis:
http://www.parallax.com/Store/Components/Hardware/tabid/156/ProductID/267/List/1/Default.aspx?SortField=ProductName,ProductName
So inspiration struck. What if I printed the drawing making sure that it was to scale? I then used some adhesive spray and adhered it to the plywood. I cut it out using my scroll, drilled the holes with my drill press, and cut the slots using the scroll saw. I then glued it together and finished it with varnish. The tail wheel is plywood circles glued together on an aluminum axle.
It took several hours start to finish and Parallax is in no danger from a wave of homemade chassis. The sane thing is purchasing the aluminum original, but I was curious if I could do it.
Because you could ... And it's WOOD!!!!
Nicely done!
The Wooden BoeBot is a beauty! erco will love it.
Great work as always, Martin_H !
I didn't like how the tail wheel turned out, so on the way home from work I stopped by the craft store, and bought a hardwood ball about an inch in diameter. A bit of work on the drill press yielded a suitable wooden Boe bot tail wheel. I then trimmed the axel a bit to make it look better and put a blob of silver solder on on end. I also attached a sensor I plan to use in my first project. Here's some pictures:
Larry, the wheel is where I diverged from the aluminum original. The original Boe-bot chassis has aluminum 90 bent degrees and drilled holes through for the axle. While I might have been able to cut and glue wooden bits to do that, they likely would have been much larger to be durable because wood isn't as tough as aluminum. But I have some narrow aluminum tube I use to make standoffs. So I took my pipe cutter and cut two roughly 1/4" sections which I epoxied in place with the axle threaded through them. I eyeballed it against a table right angle to make sure the whole thing was square to the frame. Once I drilled out the ball I could then thread the axle through it and the aluminum tube sections. The axle is just a small metal rod I salvaged from a kids toy, but a cotter pin would work too.
Also, a scroll saw is a great wood working tool and worth the modest investment (compared to a table saw). I find a lot of uses for mine. The blade has a tendency to wander slightly so up close it's obvious the the slots were cut by hand, but a few feet away the irregularities aren't noticeable. You also get better with more frequent use.
Erco, Woodrow's wooden wheels are great. I was really tempted to make wooden side wheels, but getting wheels both round and concentric to high tolerances is no easy task. The hole in my tail wheel is every so slightly off center and the wheel wobbles a bit. Add in two off center side wheels and it would look pretty crazy.
Did you make patterns to cut out the wood or did you just printed out the PDF? I have a fellow Propeller User nearby that has a Laser Cutter so if I had the plans I may have him do an acrylic BoeBot Body
The wooden tail wheel looks great.
When you cut the main body out on your scroll saw, did you use a piece of sacrificial wood under your plywood?
I find my plywood has very jagged edges unless I use a layer of sacrificial wood with my scroll saw. I'd love to hear any tricks you might know about getting clean cuts with a scroll saw.
Thanks Duane. I should have, but didn't. I did get some tear out, and got more drilling the starter holes than the scroll saw cutting. I use a fine blade which helps reduce tear out, but I put the bad side of all pieces facing inward so it isn't visible.
Next time I plan to use the spray adhesive and put a piece of backing paper on the other side of the plywood. I'm hoping that will reduce or prevent tear out.
I just printed out the PDF to scale and used the spray adhesive to glue it to the plywood.
-MattG