

Properpillar: New Project

I am going to document my little project, by doing this I hope to stay motivated to finish it and watch it grow. Hopefully my skills will grow also. It might just help a new member. I have found so much information on these Forums I'd like to put something into them as simple as it might be.
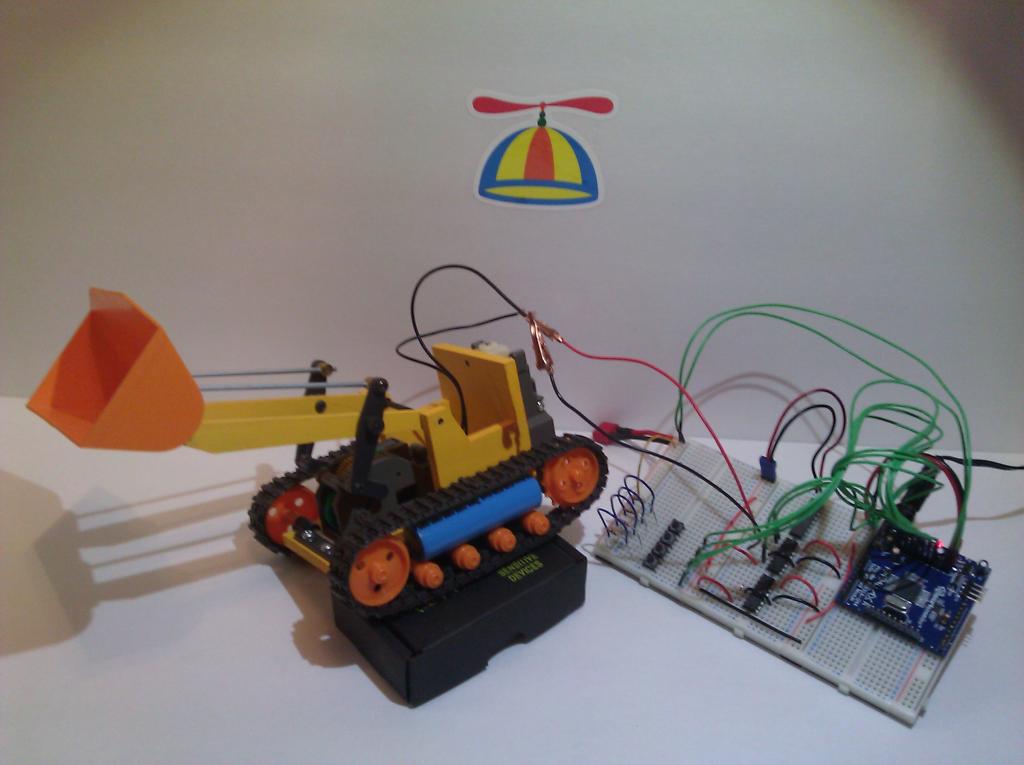
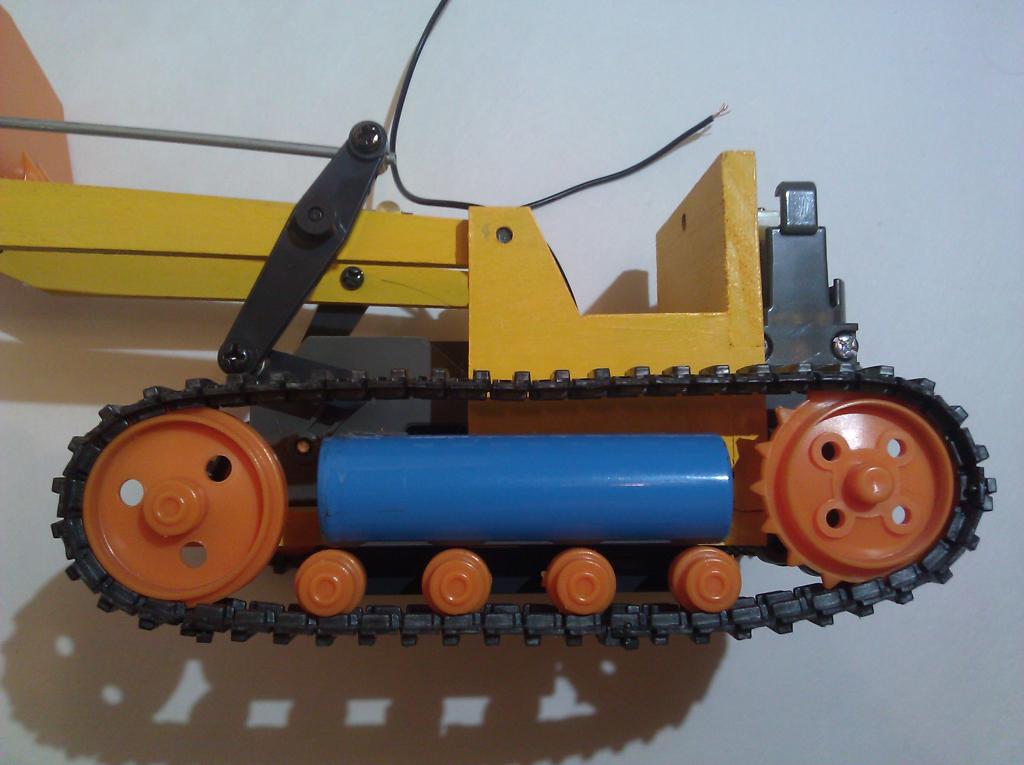
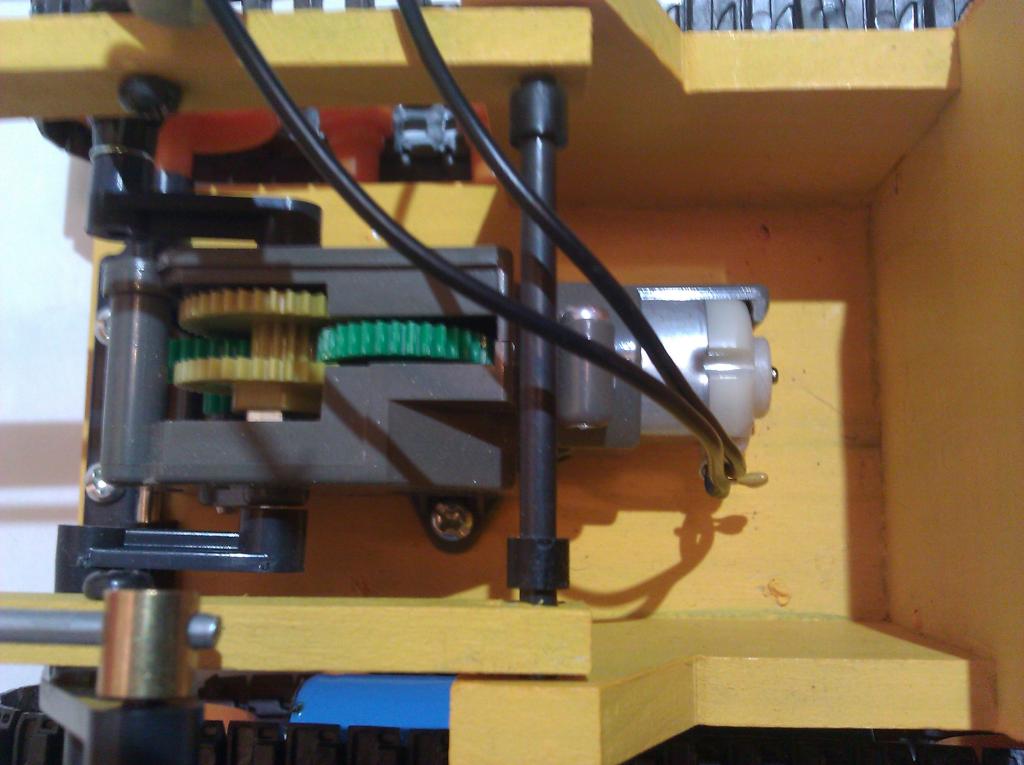
Drum Roll Please, Introducing the " Properpillar " (say it three times fast) the platform is a Tamiya Shovel/Dozer purchase at Frys. It has 3 motors 2 for the drive (skid steer) and one for the bucket. The current plan is to control it using a JR12X TX and a AR6000 RX used for radio control aircraft. I was going to use a IR remote but from what I understand IR doesn't work well outside and of course it must be tested in the dirt, the TX/RX combo will be a little more challanging for me programing wise as well. The motors will be driven by 2 L293D's. Power will be supplied by 2 Molicel 3.7v 2.4mAH Li-On cells for a total of 7.4 volts of ground pounding power.
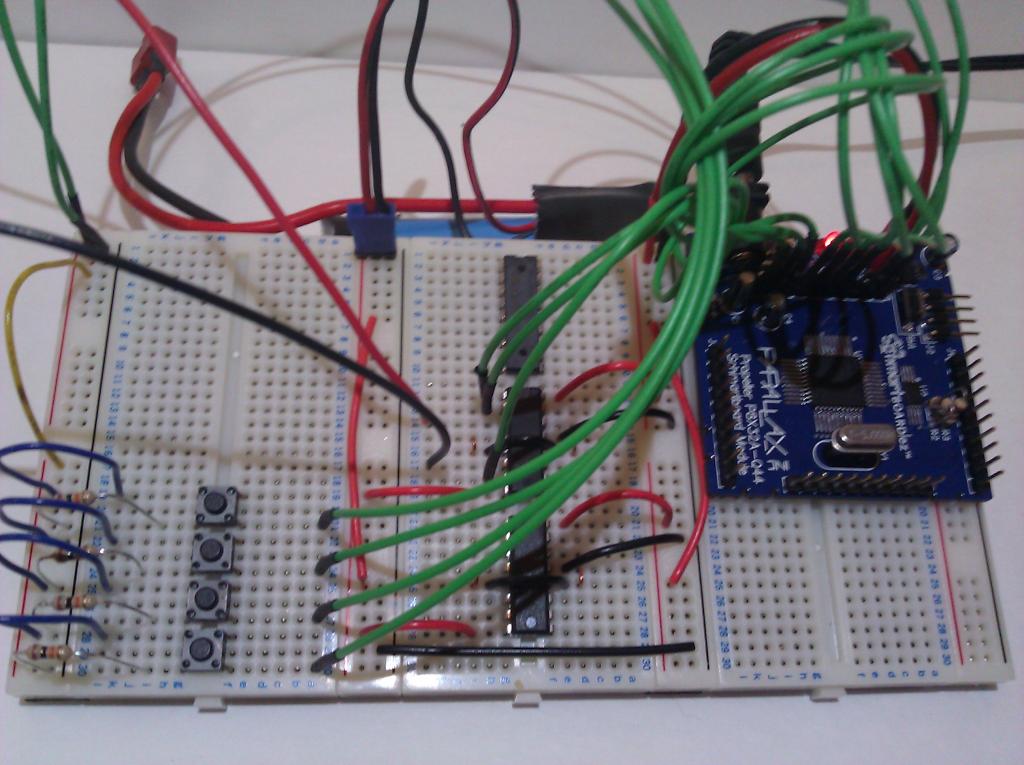
To get the ball rolling I will attatch what code I have now it uses one motor and 4 buttons it is very simple code with comments that are easy to understand I think, along with a schematic for your viewing pleasure. I will leave this code on the first post here. All updates will be posted below in a few boxes I will reserve for schematic, PCB, Pic's, youtube and evolving code.
A quick backgroud on me. Well (blush) I started with What is a Microcontroller picked up at radio shack in 2006 i think, moved on to the BOE-BOT then dodged the Propeller when it came out. I took a break for a few years and just last year I got the PE Kit and started my Propeller education in my spare time. I also have the HYDRA. I still don't know much about this stuff. I have played with Python a little. And thats about it for programming. My only electronics experience comes from what I have done with Parallax Products and my little Radio Shack Forrest Mims III Lab.
I'd like to invite all who have something to contribute to please do so. If you notice that I have done something worng electrically or in programming please let me know. I don't want to give out the wrong information to anyone who might read this. Also if you think you can elaborate on any topic and see an opportunity please do so it might just help out someone else beside me who might read this. Think of this as an open project. Don't worry about getting off topic if it's benificial.
Well with all that said, lets move on. The code below uses one motor and 4 buttons for control of the motor.


The Plan:(subject to change)
--Make my own PCB for the project using the Toner Transfer Method. * DONE*
--After the basic code is done and it is operational moves forward, backward, left, right and the bucketgoes up and down. *DONE* (USING TX/RX)
--Going to add an RCA jack and NES game pad plug, for a small game. Also program the ability to control the unit with the NES I don't want to always break out my radio, its nice to have options. I have provisions already on the PCB for the RCA/NES. I have installed a DIP switch with two two switches that I think I am going to use to select a mode of operation. I have also included 2 - 3 pin headers for a ping and a servo that I plan on mounting in the front.
--Need to work on PWM - 11/21/11
Current Status:
--Have it working with Remote Control it runs great added a second L293D (stacked) for the drive motors for a little more current. Video soon.
-- Working on PWM trying to learn how to tie it all together.
___________________________________________________________________________________________________
Thanks for reading
Blog for the Properpillar.
-Ron
PS: A BIG THANKS to Parallax for providing the Forum to document my project.
Drum Roll Please, Introducing the " Properpillar " (say it three times fast) the platform is a Tamiya Shovel/Dozer purchase at Frys. It has 3 motors 2 for the drive (skid steer) and one for the bucket. The current plan is to control it using a JR12X TX and a AR6000 RX used for radio control aircraft. I was going to use a IR remote but from what I understand IR doesn't work well outside and of course it must be tested in the dirt, the TX/RX combo will be a little more challanging for me programing wise as well. The motors will be driven by 2 L293D's. Power will be supplied by 2 Molicel 3.7v 2.4mAH Li-On cells for a total of 7.4 volts of ground pounding power.
To get the ball rolling I will attatch what code I have now it uses one motor and 4 buttons it is very simple code with comments that are easy to understand I think, along with a schematic for your viewing pleasure. I will leave this code on the first post here. All updates will be posted below in a few boxes I will reserve for schematic, PCB, Pic's, youtube and evolving code.
A quick backgroud on me. Well (blush) I started with What is a Microcontroller picked up at radio shack in 2006 i think, moved on to the BOE-BOT then dodged the Propeller when it came out. I took a break for a few years and just last year I got the PE Kit and started my Propeller education in my spare time. I also have the HYDRA. I still don't know much about this stuff. I have played with Python a little. And thats about it for programming. My only electronics experience comes from what I have done with Parallax Products and my little Radio Shack Forrest Mims III Lab.
I'd like to invite all who have something to contribute to please do so. If you notice that I have done something worng electrically or in programming please let me know. I don't want to give out the wrong information to anyone who might read this. Also if you think you can elaborate on any topic and see an opportunity please do so it might just help out someone else beside me who might read this. Think of this as an open project. Don't worry about getting off topic if it's benificial.
Well with all that said, lets move on. The code below uses one motor and 4 buttons for control of the motor.
{{======================================================================================
File:    L293dOneMotor010.spin
Version: 1.0
Date:    July 04, 2011
Author:  Ron Poutre
Email:   ronpoutre@gmail.com
Forum:   RonP

Description:

Experiment with motor motion using the L293D.

This is set up with a Parallax Propeller Schmart Board on a breadboard.

========================================================================================
                                 Connection Diagram
========================================================================================

        5v supply from board ───────────────────────────────────────────────────┐
            ┌─────────┐                                                         │
            P        5├──────────────────┐              ┌──────────┐            │
            R        6├─────────────────┐└──────────────┤1  (A)  16├─ Logic 5v ─┘
            O        7├────────────────┐└───────────────┤2       15├─ NC
            P         ├                │  ┌─────────────┤3   L   14├─ NC
            E        0├                │ (•)     GND ─┬─┤4   2   13├─┐
            L        1├                │  │motor1     └─┤5   9   12├─┴─ GND
            L        2├                │  └─────────────┤6   3   11├─ NC
            E        3├                └────────────────┤7   D   10├─ NC
            R        4├                      Motor 7.4 ─┤8   *    9├─ NC
            └─────────┘                                 └──────────┘

           3.3v            3.3v            3.3v            3.3v
            │               │               │               │
            │               │               │               │
           ┤               ┤               ┤               ┤
            │               │               │               │            R1-R4 = 10 kΩ
       P1 ──┤          P2 ──┤          P3 ──┤          P4 ──┤
            │               │               │               │
            R1 10 kΩ        R2 10 kΩ        R3 10 kΩ        R4 10 kΩ
            │               │               │               │
            │               │               │               │
           GND             GND             GND             GND

========================================================================================
                                 Components & Parts
========================================================================================

1 x L293D Quad Half-H Driver availale from Parallax
    http://www.parallax.com/Portals/0/Downloads/docs/prod/compshop/603-00019-L293D-Datasheet.pdf
1 x Tamiya Shovel/Dozer  (i got mine at Frys)
    http://www.tamiyausa.com/product/item.php?product-id=70107
3 x Motors = Right now I am using the motor(3v) that came with the kit I will be changing to
    a motor(s) rated for a higher voltage.
2 x Molicel ICR-18650J FSPE.70044 2.4 mAh 3.7v Li-On (salvaged from a RC RX battery pack)
    http://www.molicel.com/ca/pdf/ICR18650J.pdf         ** 7.4v **

========================================================================================
                                        Notes
========================================================================================
┌────────────────────────────────────┐
│             Truth Table            │   * Motor drawing about 325mA under load.
├────────┬──────┬──────┬─────────────┤     FC-130RA 10300 Mabuchi
│ Enable │ IN1  │ IN2  │  Function   │   *
├────────┼──────┼──────┼─────────────┤
│    H   │   H  │   L  │  CW / Right │
├────────┼──────┼──────┼─────────────┤
│    H   │   L  │   H  │ CCW / Left  │
├────────┼──────┼──────┼─────────────┤
│    H   │  L/H │  L/H │  Break      │
├────────┼──────┼──────┼─────────────┤
│    L   │Either│Either│  Stop       │
└────────┴──────┴──────┴─────────────┘
========================================================================================
}}
CON
  _CLKMODE      = XTAL1 + PLL16X
  _XINFREQ      = 5_000_000

' Constant Declarations

SM_ENA = 5       'Shovel Motor Enable 1,2 PIN
SM_IN1 = 6       'Shovel Motor Input 1    PIN
SM_IN2 = 7       'Shovel Motor Input 2    PIN

PUB Initialize
{{Set ina and dira registers}}

  dira[SM_ENA] := 1              'Sets PIN 3 to output Chip Enable 1,2
  dira[SM_IN1] := 1              'Sets PIN 4 to output Chip Input 1
  dira[SM_IN2] := 1              'Sets PIN 5 to output Chip Input 2

  dira[1..4] := 0                'Set PINs 1-4 as inputs → 4 Buttons for some human input

  Main                           'Go to Main method

PUB Main
{{Start Program}}

  Using_CASE                     'Go to selected method
  'Using_IF

PUB Using_CASE | Temp            'Example using CASE

  repeat
    Temp := ina[1..4]            'Place ina register 1-4 into Temp
    case Temp
      00 : SM_FWD
      00 : SM_BWD
      10 : SM_BRK
      01 : SM_STP
      other : SM_STP

PUB Using_IF                     'Example using IF

  repeat
    if ina[1] == 1
      SM_FWD
    elseif ina[2] == 1
      SM_BWD
    elseif ina[3] == 1
      SM_BRK
    elseif ina[4] == 1
      SM_STP
    else
      SM_STP

PUB SM_FWD
{{Shovel motor forward}}

  outa[SM_ENA] := 1              'HIGH Enable 1,2
  outa[SM_IN1] := 1              'HIGH Input 1
  outa[SM_IN2] := 0              'LOW  Input 2

PUB SM_BWD
{{Shovel motor backward}}

  outa[SM_ENA] := 1              'HIGH Enable 1,2
  outa[SM_IN1] := 0              'LOW  Input 1
  outa[SM_IN2] := 1              'HIGH Input 2

PUB SM_BRK
{{Shovel motor break}}

  outa[SM_ENA] := 1              'HIGH Enable 1,2
  outa[SM_IN1] := 1              'HIGH Input 1
  outa[SM_IN2] := 1              'HIGH Input 2

PUB SM_STP
{{Shovel motor stop}}

  outa[SM_ENA] := 0              'LOW Enable 1,2 PIN for stop

DAT
{{{
┌──────────────────────────────────────────────────────────────────────────────────────┐
│                            TERMS OF USE: MIT License                                 │
├──────────────────────────────────────────────────────────────────────────────────────┤
│Permission is hereby granted, free of charge, to any person obtaining a copy of this  │
│software and associated documentation files (the "Software"), to deal in the Software │
│without restriction, including without limitation the rights to use, copy, modify,    │
│merge, publish, distribute, sublicense, and/or sell copies of the Software, and to    │
│permit persons to whom the Software is furnished to do so, subject to the following   │
│conditions:                                                                           │
│                                                                                      │
│The above copyright notice and this permission notice shall be included in all copies │
│or substantial portions of the Software.                                              │
│                                                                                      │
│THE SOFTWARE IS PROVIDED "AS IS", WITHOUT WARRANTY OF ANY KIND, EXPRESS OR IMPLIED,   │
│INCLUDING BUT NOT LIMITED TO THE WARRANTIES OF MERCHANTABILITY, FITNESS FOR A         │
│PARTICULAR PURPOSE AND NONINFRINGEMENT. IN NO EVENT SHALL THE AUTHORS OR COPYRIGHT    │
│HOLDERS BE LIABLE FOR ANY CLAIM, DAMAGES OR OTHER LIABILITY, WHETHER IN AN ACTION OF  │
│CONTRACT, TORT OR OTHERWISE, ARISING FROM, OUT OF OR IN CONNECTION WITH THE SOFTWARE  │
│OR THE USE OR OTHER DEALINGS IN THE SOFTWARE.                                         │
└──────────────────────────────────────────────────────────────────────────────────────┘
}}
Some Pic's
I learned how to youtube.
Last Update: 11/21/11
The Plan:(subject to change)
--Make my own PCB for the project using the Toner Transfer Method. * DONE*
--After the basic code is done and it is operational moves forward, backward, left, right and the bucketgoes up and down. *DONE* (USING TX/RX)
--Going to add an RCA jack and NES game pad plug, for a small game. Also program the ability to control the unit with the NES I don't want to always break out my radio, its nice to have options. I have provisions already on the PCB for the RCA/NES. I have installed a DIP switch with two two switches that I think I am going to use to select a mode of operation. I have also included 2 - 3 pin headers for a ping and a servo that I plan on mounting in the front.
--Need to work on PWM - 11/21/11
Current Status:
--Have it working with Remote Control it runs great added a second L293D (stacked) for the drive motors for a little more current. Video soon.
-- Working on PWM trying to learn how to tie it all together.
___________________________________________________________________________________________________
Thanks for reading
Blog for the Properpillar.
-Ron
PS: A BIG THANKS to Parallax for providing the Forum to document my project.
1024 x 765 - 66K

1024 x 765 - 59K
1024 x 765 - 73K

1024 x 765 - 102K
Comments
I need to update the schematic in DipTrace.
PCB below done using the Toner Transfer Method. I also dyed it black.
As you can see there is some faults on the pre-etched picture I fixed them with a sharpie also went around the edges with the pen.
The final PCB is far from perfect but after tinning with solder I will fix any broken traces.
Properpiller002 - Archive [Date 2011.11.21 Time 01.50].zip The next version using Radio Control TX/RX UPDATED 11/21/11
I built a tracked 'bot using Tamiya construction crawler parts and a HomeWork board. He was controlled with a teevee IR remote. He's currently "in the shop" awaiting a new servo.
Well you get the idea. If this is your first homemade bot, I encourage you to keep it indoors as long as possible. It will stay cleaner, last longer, work better. IR control is a breeze indoors. It's easier to stay enthused about working on and improving a nice clean, new-looking bot. There are plenty of indooor challenges to master. Outdoors adds many more layers of difficulty.
Posted up this morning: http://www.gadgetgangster.com/news/46/432 -- for some well deserved time in the spotlight!
OBC
@Humanoido Thanks, as simple as the project might be I'll do my best to keep clear documentation I know how much It helps me when things are explained and commented well.
@erco Thanks, I was thinking about the dirt/dust issue I think when its finished I'll do a quick video demo in the dirt just to show its capability, plus I need to pull a stump out of the front yard then I'll be done with the off roading.
@OBC, Thanks WOW Gadget Gangster
@All, well the plan is growing. Now I am thinking multipurpose maybe a rotary switch to select different modes. (1)control from RX/TX (2)control from an NES game pad (3) autonomous with ping(servo and sensor in the bucket) (4)Play Pong on the TV... Well you get the idea... Show more of some of the Propellers capabilities.
Thanks again
-Ron
Your circuit board is beautiful!
What program did you use to create the transfer?
I've used Eagle a bit but discussion on the forum has convinced me to switch to DipTrace. (I didn't really like Eagle.) I have yet to use it to make a board. Your project is inspiring me to make a board myself.
Duane
Thanks
I used Dip Trace the free version. I have played with Eagle also its very powerful, but a bit more complex than Dip Trace IMHO. I have been meaning to include the Dip Trace PCB file. I am currently side tracked with trying to understand PASM. The PCB for this project is almost complete just a few components to solder on that I didn't originally didn't have on hand.
The initial test I did confirmed the PCB works. I had the bucket going up and down with RC TX, RX hooked up. That made me happy.
Ron