Shop OBEX P1 Docs P2 Docs Learn Events
Sharpie PCB etching — Parallax Forums

Sharpie PCB etching

davidsaundersdavidsaunders Posts: 1,559
edited 2011-04-28 18:48 in General Discussion
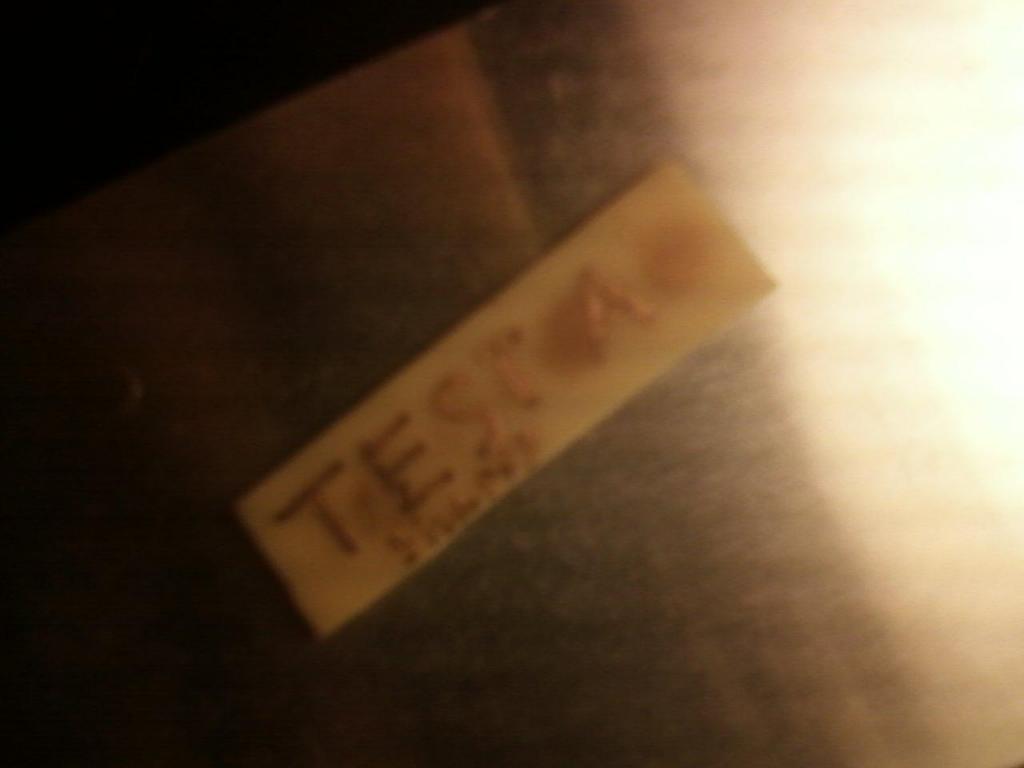
Being short on cash, I remembered reading somewhere that sharpie permanent markers are similar to toner. So I took a small peace of copper clad board and masked some text on it with a Sharpie, and it worked. I should note that I did not clean the board before masking so there are imperfections as a result.
And the picture of the finished result :) using a borrowed camera :
PCB-Sharpy.jpg
1024 x 768 - 32K

Comments

  • TtailspinTtailspin Posts: 1,326
    edited 2011-04-26 09:10
    Glad You found the Secret to Fast Prototyping. :)

    Sharpies work great for small uncrowded boards,
    I have noted some problems with the New Sharpies though, they seem to not be as "sticky", and tend to wash off in the Etching,
    The older Sharpies never washed off before... I hope this is not a permanent problem.
  • BeanBean Posts: 8,129
    edited 2011-04-26 09:17
    I heard that if you "bake" the board before etching, it won't wash off near as much.

    Bean
  • davidsaundersdavidsaunders Posts: 1,559
    edited 2011-04-26 09:18
    Thank you for the response. I did not know about this, and was pleased to make the discovery. How long has this been known? Where can I find more information??
  • David BDavid B Posts: 592
    edited 2011-04-26 10:07
    How long has it been known? I used to make boards with sharpies at least 20 years ago, after noticing that what the Radio Shack board kits supplied was basically equivalent to a sharpie pen.

    It worked pretty well. The worst problems I had were if using surplus boards, sometimes I'd get a batch with extra thick copper, and the longer etching times that they need would eat away under the pen markings and ruin the boards.

    With a clean board, a sharp pen and careful work, I was able to make boards with lines passing between the 0.1 pins of TTL chips.

    I've never gone to the steps of heating or mechanically agitating the etchant, but that may also help make a better board.
  • LeonLeon Posts: 7,620
    edited 2011-04-26 10:07
    Ordinary cellulose paint applied with a fine paint brush works better. I used to make quite complex PCBs at home using that technique many years ago. I now use photo-etch with transparencies printed on an inkjet printer.

    Join the Homebrew PCB Yahoo group for more information on making your own PCBs:

    http://tech.groups.yahoo.com/group/Homebrew_PCBs/
  • davidsaundersdavidsaunders Posts: 1,559
    edited 2011-04-26 10:11
    Thank you very much every one.

    I had tried this because I can not afford to replace the toner in my laser printer, so Toner transfer is off the table.

    Leon:
    I think I will join the Homebrew PCB Yahoo group.
    Thank you.
  • davidsaundersdavidsaunders Posts: 1,559
    edited 2011-04-26 14:37
    Due to the comments about having trouble with small closely spaced lines, I took a fine point sharpie and drew a series of parallel lines on a copper clad board, spaced for the pin spacing on the QFP44 Prop, and the came out clean (this time I cleaned the board first). I did heat the board for about 15 minutes, I do not know if this makes any difference.
  • TtailspinTtailspin Posts: 1,326
    edited 2011-04-26 15:45
    lol, Sharpies have been around for a long long time, I think they are even older then Bean... :innocent:

    Have You tried Diptrace? It is easy to learn.
    I Just draw up the circiut, take a copy to the UPS store, and They print it on Transparencies, or Photo paper.
    The Kid is proud of His knowledge about the Printers, so when I ask if He can "darken" them up for Me,
    He makes the Transparencies very dark, and I never need to use stacked copies or go over them with a Sharpie.
    And the Photo paper copies they make for Me, seem like they are the easiest ones to Iron on, 100% success.
    The copies are $1.20 each, for either the Transparency or Photo Paper, so it's inexpensive too.

    Regards,
    Tommy
  • BeanBean Posts: 8,129
    edited 2011-04-26 17:38
    Ttailspin wrote: »
    lol, Sharpies have been around for a long long time, I think they are even older then Bean... :innocent:

    Yeah, I used to ride my pet dinosaur to office-max to buy sharpies... ;)
  • MicrocontrolledMicrocontrolled Posts: 2,461
    edited 2011-04-26 18:31
    David B wrote: »
    How long has it been known? I used to make boards with sharpies at least 20 years ago, after noticing that what the Radio Shack board kits supplied was basically equivalent to a sharpie pen.

    Equivalent? When I got the kit from RadioShack, it WAS a sharpie pin, with the brand name stamped on the side of it!
  • $WMc%$WMc% Posts: 1,884
    edited 2011-04-26 20:03
    Equivalent? When I got the kit from RadioShack, it WAS a sharpie pin, with the brand name stamped on the side of it!
    '
    The Sharpie was used to fix trace lines that didn't iron out well.
  • Jorge PJorge P Posts: 385
    edited 2011-04-27 05:08
    I had tried this because I can not afford to replace the toner in my laser printer, so Toner transfer is off the table.

    I just purchased an ink refil kit for HP 21 & 22 ink, it seems to work ok, but a fair warning Wear Gloves!!! I washed my hands about 20 times with soap and water to no avail. I eventualy used rubbing alchohol with a brush to remove the ink from my hands. The full tri-color kit with black cost $19/US shipping included from amazon.com. The kit i got comes with 5 oz. of each color and 10 oz. of black.

    Also dipping a Q-Tip or a artists stump (tightly wrapped paper for sketching) in the rubbing alcohol, works good as a eraser for permanent ink.

    After getting the kit and playing with the actual ink cartridges, my curiousity was aroused as to the pinout of the variouse inkjet cartridges and if they can be controlled by the propeller. maybee a bot that has one of these cartridges attached could print out some schematics by rolling accros a PCB a few times.

    Tri color and black cartridges have 37 pins each that somehow control the flow of ink on the bottom??? Time to break one apart and see whats inside for a messy project.:nerd: I will post my findings in a different thread or as my first blog entry after I make a mess.:innocent:
  • Peter KG6LSEPeter KG6LSE Posts: 1,383
    edited 2011-04-27 05:52
    I used marks a lot brand . works a tad better ...

    But keep in mind I use a Printer now .....:)


    Peter
  • davidsaundersdavidsaunders Posts: 1,559
    edited 2011-04-27 07:54
    Jorge P wrote:
    I just purchased an ink refil kit for HP 21 & 22 ink, it seems to work ok, but a fair warning Wear Gloves!!! I washed my hands about 20 times with soap and water to no avail. I eventualy used rubbing alchohol with a brush to remove the ink from my hands. The full tri-color kit with black cost $19/US shipping included from amazon.com. The kit i got comes with 5 oz. of each color and 10 oz. of black.
    Wow, thank you I would have never thought to try inkjet. What paper do you use to keep it from soaking in, or bleeding?
  • Jorge PJorge P Posts: 385
    edited 2011-04-28 04:35
    I would assume you could use a type of iron on paper to get it transfered to the PCB, i've herad of people using them before someplace, or a glossy thin plastic sheet like the kind used for the rub on transfers EDIT: set your printer to glossy paper type when using glossy plastic, you may need to adjust the drying time too.. Just remember that the printed out traces would be backwords when transferd. I have never used this method, I just hand draw using a sharpie thats been refilled a time or two.

    If you have some thicker plastic or aluminum sheets, you can create some master drawing templates with the trace lines cut out thin enough to allow the ultra fine sharpies to fit in as a guide. It takes a steady hand and some time to draw them well but works. A single board would need a few templates.

    It's worked ok for me but I dont have very many thin lines, I use the fatter sharpies for most trace lines. The boards are just for my own use but you guys would probably want somthing a bit better looking for your more advanced schematics. I've only ever etched for the 386N-1 op amp and a few components, I used them for a mini guitar practice amp with variable distortion. They are only 1/4 watt output so headphones are the ideal speaker for them and I dont end up waking up the neighbors when I jam out. The nice thing is they fit inside the mini keychain size project boxes or inside a gutted out cassette.
  • davidsaundersdavidsaunders Posts: 1,559
    edited 2011-04-28 18:48
    While it may seem very odd; As a side project I am making what amounts to a permanent marker Etch A Sketch, a device using simple vertical/horizontal controls with a control to lift the pen, attached to two continuous rotation servos and one standard hobby servo, hooked to a Propeller Proto board for control, and all this for the purpose of using felt tip pens to etch PCBs. Though this is more for fun than anything I am interested to see what kind of results are possible.
Sign In or Register to comment.