

HB25 Mounting Bracket
 Matt Gilliland
Posts: 1,406
Matt Gilliland
Posts: 1,406
Hi all -
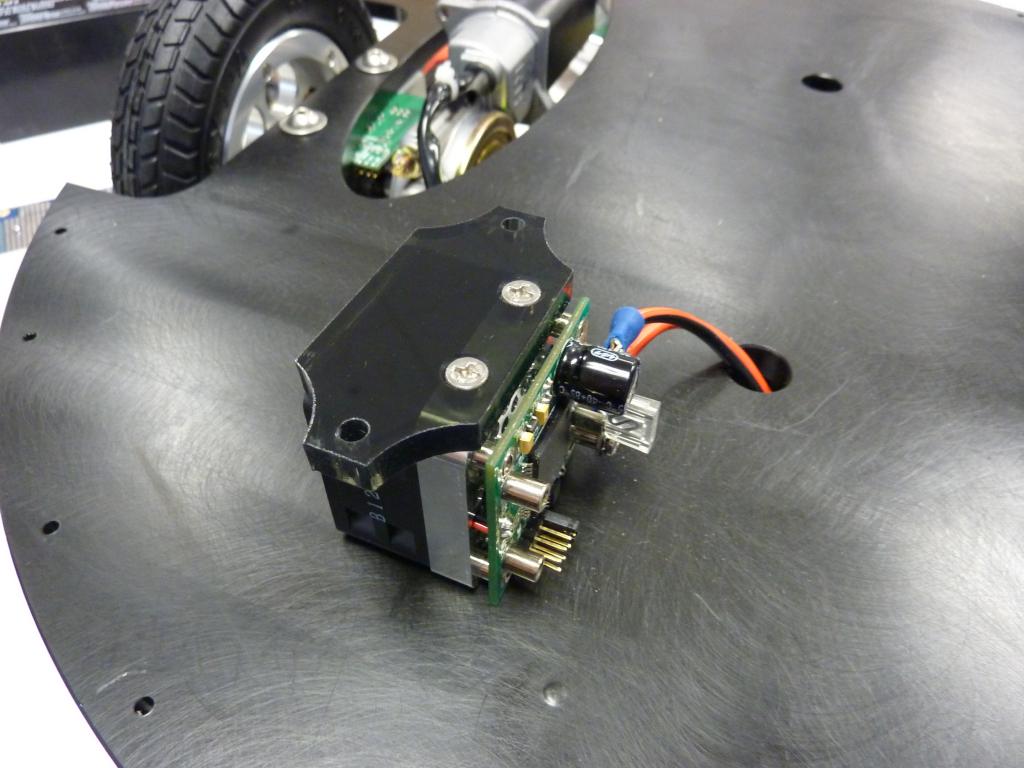
How are you'all mounting the HB25 Motor Controller to your robots?
There are two tapped holes in the side of the heat-sink that are intended for that purpose, however in some configurations alignment of these holes may be challenging.
Below is a bracket that we may begin including with the HB-25's. It's 1/4" thick Dark Smoke acrylic (which matches the new Battery Shelf).
Two flat-head screws secure the bracket to the Controller...

And two thru-holes (for #6-32 bolts) can act as a "drill" alignment to pilot drill a tap-able holes.

Incidentally, for those of you who have never worked with HDPE (high-density polyethylene) you are in for a treat!
You can't break it, chip it or crack it. It won't splinter. You can cut it with any standard wood working tool (handsaw, jig-saw, razor knife, router, regular drill bits, power planer, hand-planer - you name it.
One of it's really cool properties (to me, at least) is that you can drill a slightly undersized hole, and then *screw* a regular bolt (#6-32, #10-24, etc.) right into it - the screw cuts it's own threads! And, once you've got the screw all the way "in", the HDPE seems to "tighten back up" and holds it (the screw) like a continuous thread nylock nut.
The screw won't "back-out" due to vibration, etc.
Plus, if you do over tighen (and strip out the "tapped threads"), just use a small hammer and nail-set (or even a small screwdriver used like a nail-set), and "tap' around the hole (to "cave it in" a little bit") - voila! A new tap-able hole appears.
Also, HDPE really doesn't have any "grain". Which means that your drill bit won't *wander* trying to find the least-resistant path. Where you want the hole, is where the drill puts the hole.
-Matt
How are you'all mounting the HB25 Motor Controller to your robots?
There are two tapped holes in the side of the heat-sink that are intended for that purpose, however in some configurations alignment of these holes may be challenging.
Below is a bracket that we may begin including with the HB-25's. It's 1/4" thick Dark Smoke acrylic (which matches the new Battery Shelf).
Two flat-head screws secure the bracket to the Controller...
And two thru-holes (for #6-32 bolts) can act as a "drill" alignment to pilot drill a tap-able holes.
Incidentally, for those of you who have never worked with HDPE (high-density polyethylene) you are in for a treat!
You can't break it, chip it or crack it. It won't splinter. You can cut it with any standard wood working tool (handsaw, jig-saw, razor knife, router, regular drill bits, power planer, hand-planer - you name it.
One of it's really cool properties (to me, at least) is that you can drill a slightly undersized hole, and then *screw* a regular bolt (#6-32, #10-24, etc.) right into it - the screw cuts it's own threads! And, once you've got the screw all the way "in", the HDPE seems to "tighten back up" and holds it (the screw) like a continuous thread nylock nut.
The screw won't "back-out" due to vibration, etc.
Plus, if you do over tighen (and strip out the "tapped threads"), just use a small hammer and nail-set (or even a small screwdriver used like a nail-set), and "tap' around the hole (to "cave it in" a little bit") - voila! A new tap-able hole appears.
Also, HDPE really doesn't have any "grain". Which means that your drill bit won't *wander* trying to find the least-resistant path. Where you want the hole, is where the drill puts the hole.
-Matt
1024 x 768 - 85K

1024 x 768 - 100K
Comments
I had some spare extruded aluminum and mounted both HB-25's to that and then secured the whole thing to the base like you show in the second picture. It also acts as a larger heat sink.
When doing so I ran across a question that I didn't find mentioned in the HB-25 documentation. That question was if the Heat sink (with mounting holes) was electrically isolated or connected to one of the leads. It isn't mentioned in any of the HB-25 docs that I could find. I tested mine with a meter and also found a trace on the PCB from the battery ground to the heat sink and mounting screws. When working on wood and plastic it isn't a big deal. However if you start mounting them to metal it certainly can be. It really needs to be mentioned in the docs. Otherwise sometime, somewhere, I'll bet that someone will have a positive chassis (for whatever reason) and sparks will fly.
I still want to push for a revision in the position controllers to fix the "Run Away" robot problem. It would be an easy fix that is backward compatible with what has already been written for those controllers. I wrote about the issue here:
http://forums.parallax.com/showthread.php?125471-Possible-revision-for-27906-position-controller
Robert
Hi Robert,
I had the same question with you, but I had no idea how to test the electrically isolation of HB-25 controllers.
In my construction (a 4wd rover) the chassis is from aluminum and the Heat sinks with mounting holes of both HB25 controller are conected directly with the chassis. However I haven't noticed any problem untill now. Do you think that I must isolate the connection between HB-25 and chassis?
There is no problem with the heat sink and mounting holes being connected to the battery ground lead. The issue is that it needs to be noted in the docs and stand out so people are aware of it.
Robert
I also put them on the bottom side.
You've countersunk the Plexi to accommodate flat head screws. Was this accomplished on the laser cutter somehow, of did it require a separate machining operation? (If the former, can you divulge what settings you used?)
Thanks,
-Phil
@Roy / Tony ... thanks for the feedback on battery mounting. I've got some further ideas that I'll post here shortly too.
@Robert and NikosG... Good catch on the grounding issue. I tend to prefer isolation from the frame, so I'm thinking that the HB-25 mounting brackets will be modified slightly with a deeper counter-sink. The acrylic will electrically isolate the Controller from any metal frame mounting. This gives you the option to attach a separate ground from the HB-25 to your robots frame, should you so desire.
-Matt