

Lego Technic with non-Lego Servos and Microcontrollers

Lego Technic bricks and beams make an easy way to build structures. With no milling operations and you can assemble, disassemble, and reassemble until you get it right. For the past few months I've been experimenting with using Lego Technic with non-Lego servos and the Basic Stamp 2 and Arduino.
There's only one trick with interfacing non-Lego with Lego, you need to make the non-Lego component conform to the standard Lego spacing units. There are commercial adapters to do this, but it is cheaper to buy some used Technic off eBay and use glue with a Dremel to achieve the same goal.
It occurred to me that this information might be useful to forum members wanting to branch out from Lego, or those using Lego as a prototyping tool. So I thought I would document one project.
Step 1, I built a Lego jig to square the Technic bricks to the servo and keep the holes and lined with with the front in Lego units.
Step 2, I am gluing two Technic bricks to a servo. This allows me to either use beams or studs to attach to the servo. Note the use of the jig above to align the bricks.
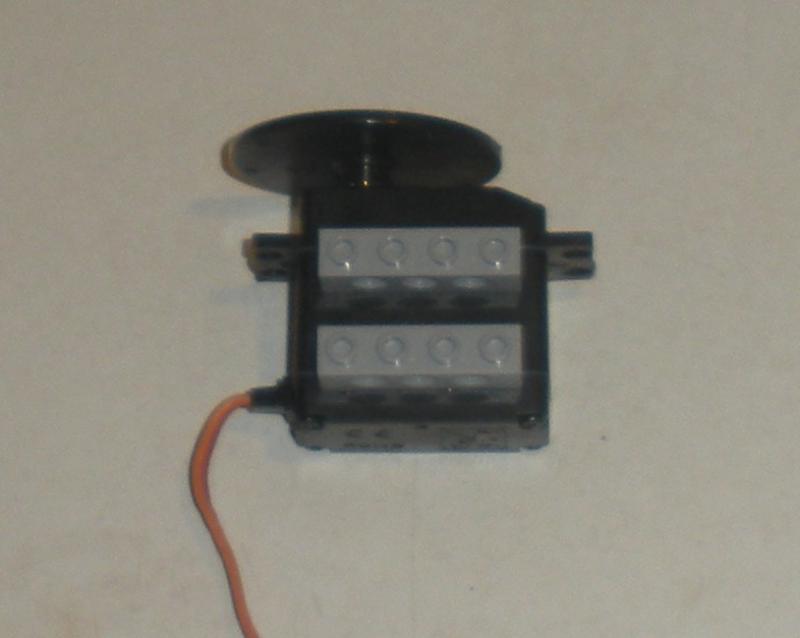
Step 3, here's the modified servo. I used hot melt glue because it is reversible, but epoxy would likely be stronger.
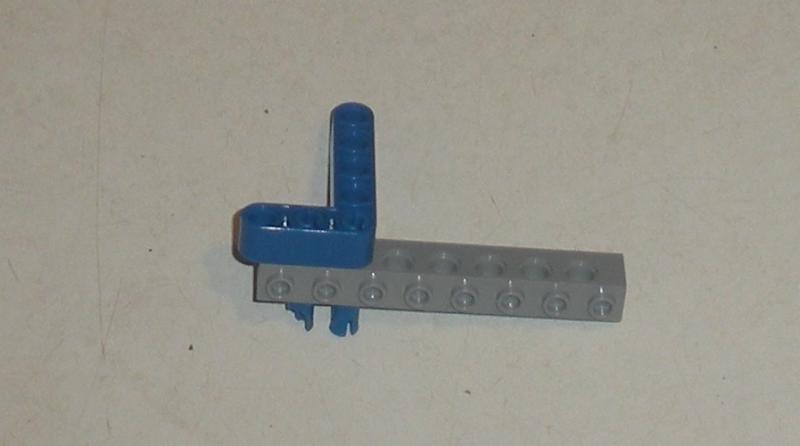
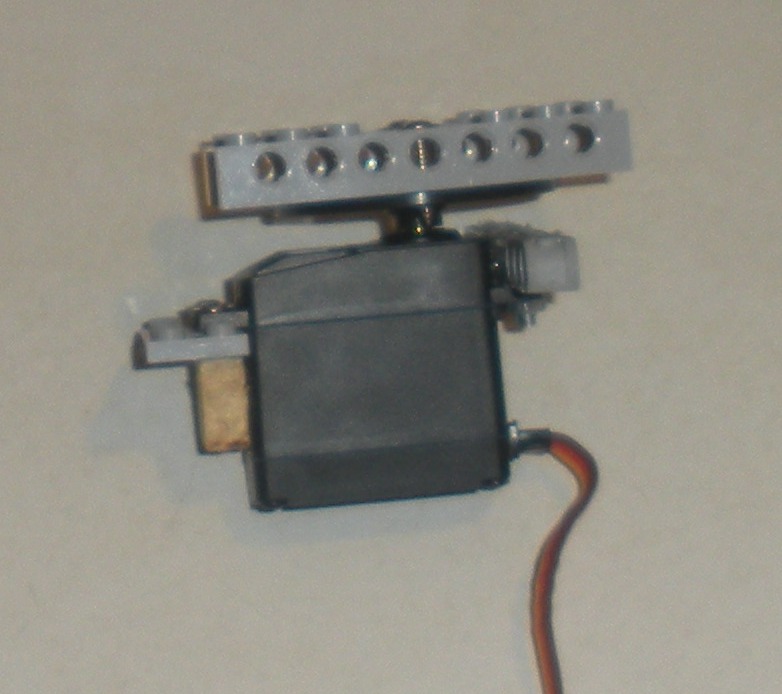
Step 4, in a second servo I screwed a Technic Beam to the front (keeping it centered in Lego units) and screwed a plate to the rear (using a Dremel to remove studs where the screws are). The servo is not an even number of Lego units long, so I made a wood shim to receive the screws and fill the missing space. I also screwed two Technic beams to the servo horn after using the Dremel to sand off the studs so I the screws won't interfere with the structure. I have two views of this servo.
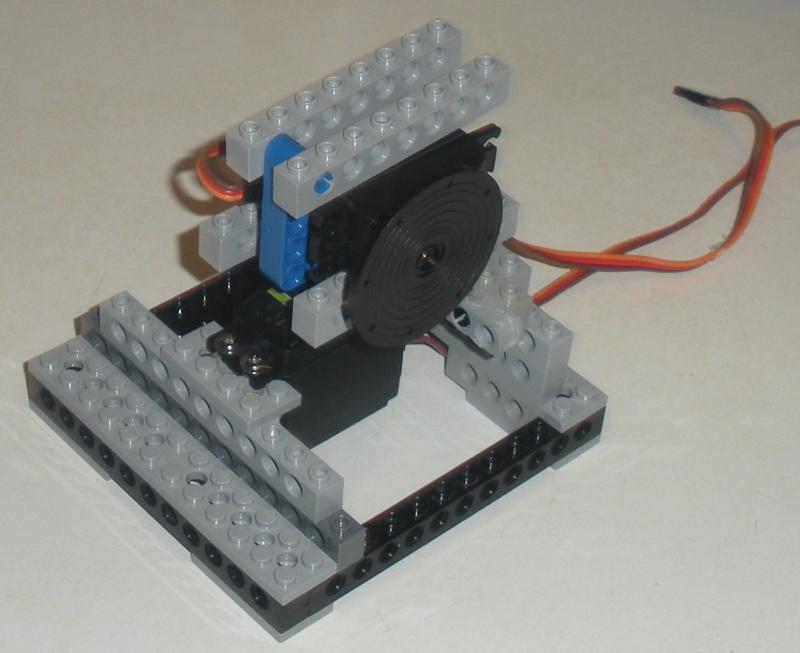
Step 5, I can now use these attachment points to integrate the servo's into a Lego structure. In this structure I have one servo for azimuth, while the other servo handles altitude and interfacing RC servos is a snap with a Basic Stamp.
If you use continuous rotation servos with this technique you can have a modular robot kit with minimal investment. Plus it will use standard TTL sensors which cost much less than NXT compatible sensors and there are more options available.
There's only one trick with interfacing non-Lego with Lego, you need to make the non-Lego component conform to the standard Lego spacing units. There are commercial adapters to do this, but it is cheaper to buy some used Technic off eBay and use glue with a Dremel to achieve the same goal.
It occurred to me that this information might be useful to forum members wanting to branch out from Lego, or those using Lego as a prototyping tool. So I thought I would document one project.
Step 1, I built a Lego jig to square the Technic bricks to the servo and keep the holes and lined with with the front in Lego units.
Step 2, I am gluing two Technic bricks to a servo. This allows me to either use beams or studs to attach to the servo. Note the use of the jig above to align the bricks.
Step 3, here's the modified servo. I used hot melt glue because it is reversible, but epoxy would likely be stronger.
Step 4, in a second servo I screwed a Technic Beam to the front (keeping it centered in Lego units) and screwed a plate to the rear (using a Dremel to remove studs where the screws are). The servo is not an even number of Lego units long, so I made a wood shim to receive the screws and fill the missing space. I also screwed two Technic beams to the servo horn after using the Dremel to sand off the studs so I the screws won't interfere with the structure. I have two views of this servo.
Step 5, I can now use these attachment points to integrate the servo's into a Lego structure. In this structure I have one servo for azimuth, while the other servo handles altitude and interfacing RC servos is a snap with a Basic Stamp.
If you use continuous rotation servos with this technique you can have a modular robot kit with minimal investment. Plus it will use standard TTL sensors which cost much less than NXT compatible sensors and there are more options available.
800 x 446 - 23K

800 x 744 - 41K
800 x 638 - 28K
782 x 694 - 94K

679 x 800 - 30K
800 x 653 - 42K
Comments
Step 7, I build a Technic truss using a 3, 4, 5 right triangle ratio and bolt a servo horn to one end.
Step 8, the servo drops into the space between the beams. I pin it to the truss and use plates to further secure it.
Step 9, I attach the truss to the altitude servo.
Step 10, I have a gripper and wrist assembly I've used previously. I add Technic plates until the gripper beam is centered and all space is filled. The truss elements surround the attachment and lend further strength to it. I cheat a bit here and use the Dremel to shave the plates as the spacing isn't quite an even Lego multiple.
Step 11, I need to attach a servo horn to the truss to allow it to connect to the elbow servo.
Step 12, the arm is assembled, but needs wiring before I can hook it up to a microcontroller.
Looks good & kind of heavy! Hope you're using metal gear servos!
You and I are on parallel paths; I'm working on 2 arms right now. It's a delicate balance to build an arm stiff enough to be accurate yet light enough to have a useful working load. You, Whit and I need to co-develop a simple claw/arm for the Scribbler! It doesn't need to be fancy, just 2 motors or servos to grab and lift, just like OWI's Kabuto Mushi (don't ask) robot, pic attached.
People have also reverse engineered the NXT device protocols and built their own NXT sensors, or used Lego servo motors with non-Lego robots. Google Arduway for an example.
@Erco, I can't tell you how many replies of mine have gone off into the bit bucket under similar circumstances.
For the elbow and shoulder servos I am using metal geared ball bearing high torque servos. You're right, the whole assembly is pretty heavy, but the servos are the bulk of the weight. If the shoulder servo proves unable to lift I plan to add a spring to assist.
A gripper for Scribbler and S2 has been on my list of projects, so a collaborative effort sounds fun. The gripper for this arm was originally for my Scribbler, but it is a little long, so I never got around to figuring out how to attach it. Also a big question is where as the IR in front would be blocked by it.