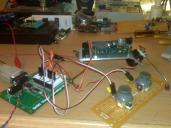
Meet Fizgig (a work in progress)
Hey all,
I've been drooling over the idea of a walking robot for years, and have never been capable of building one from scratch, or affording a kit like the penguin (drool). I've been looking for a use for a MoboStamp-pe i had laying around, and i came across this video of the illusive MoBug.
With Phil Pilgrims permission I went ahead and built my own! If you have a dremel, a drill, and a file you can too! You just need a strip of aluminum, (acrylic might work) and an old metal coat hanger.
So far i have some basic walk routines figured out using the avr co-processor code from this post. Thanks again Phil!
You'd be surprised how big of a step you can make with 2 servos, he actually gets around very quickly. Soon i hope to load him up with lots of cool sensors for autonomous navigation. My wife, who named him, demands that he has antenna as well. I hope by posting this now, it will make me feel more obligated to actually finish a project [noparse]:)[/noparse]
At this very moment i'm using a couple of old xbox joysticks and a stamp homework board to control the servos, so i can explore some more complicated maneuvers to see what he can do. The motherboard has pull-up resistors on the available pins, so it makes rctime hard, so the homework board was my quick fix. My walk routines are too sloppy for public consumption yet, but here is the code to control him with pots. Just use the schematic for the "prefered" pot circuit from the RCTIME portion of the bs2 helpfile.
tilt      PIN    10
stride    PIN     9

tval      VAR     Word
sval      VAR     Word

Main:
  DO
    HIGH tilt                             ' charge the cap
    PAUSE 2                             '   for 1 ms
    RCTIME tilt, 1, tval               ' measure RC discharge time

    HIGH stride                             ' charge the cap
    PAUSE 2                             '   for 1 ms
    RCTIME stride, 1, sval               ' measure RC discharge time

    DEBUG HOME, DEC sval,CLREOL
    DEBUG CR,DEC tval, CLREOL              ' display value
    PAUSE 50


    sval = sval */ 185 ' Scale by 0.724.
    sval = sval + 450 ' Offset by 500.
    PULSOUT 5, sval ' Send pulse to servo.

    tval = tval */ 185 ' Scale by 0.724.
    tval = tval + 400 ' Offset by 500.
    PULSOUT 1, tval ' Send pulse to servo.

  LOOP
  END


Comments
▔▔▔▔▔▔▔▔▔▔▔▔▔▔▔▔▔▔▔▔▔▔▔▔
·"If you build it, they will come."
What did you use for feet? I had a hard time finding something that provided adequate traction on the front legs.
-Phil
i have a 7v .7ah lion from a camera i plan on mounting in the underbelly as you did, its a lil bit thinner and lighter then the cr123's. im hoping i can figure out away for him to dock a set of antenna on to a charging clip or something.
the best thing found for traction is to cut the hanger at about a 45 degree bevel on the end, but it was rough on the hardwood. So i ended up drilling out some pencil erasers and cinching them tight with heat shrink tubing. They are just about as effective, without scratching anything.
i have him roaming around with ir now. it works pritty good, unless you have black furniture, lol. (took me a while to realize that, doh!)
heres a video: www.youtube.com/watch?v=n-Ujtqk0eWg
i attached the bs2 code, hes not very smart yet, so the code is priity easy to get.
it flows like this:
thanks forum! would have taken so much longer to get where i am.
-Phil
here's an interesting side bar, if you are looking to build a Lithium Ion battery charging circuit, this guy provides all the info you need:shdesigns.org/lionchg.html
Post Edited (skynugget) : 1/25/2010 12:04:41 AM GMT