

Chepo band saw upgrade
 metron9
Posts: 1,100
metron9
Posts: 1,100
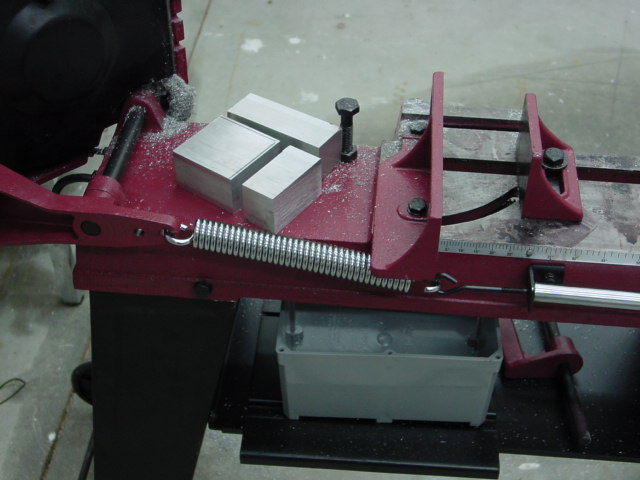
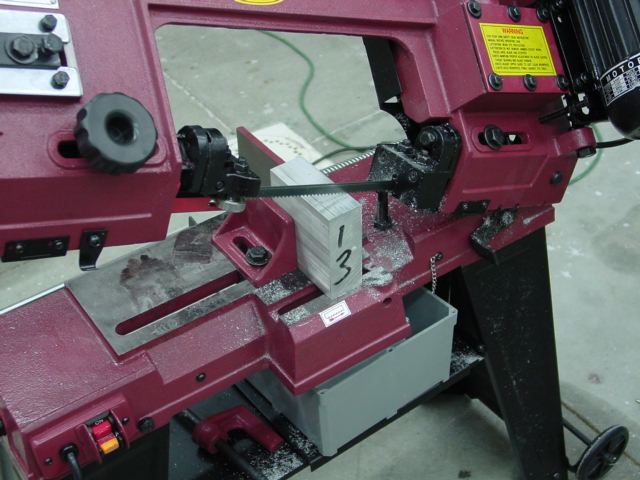
I bought a cheap $200.00 metal band saw similar to a Harbor Freight model for cutting aluminum bar stock. It is a horizontal saw and the blade pressure is controlled by a spring, tighter the spring the lighter the cut however this is not a very good way to do it as a 4 inch piece starts with a heavy pressure and the further it cuts the pressure gets lighter as the spring streches.
My solution to getting the maximum cut pressure without overtaxing the motor or breaking the blade is to incorporate a motor current sensor and a stepper motor to increase or decrease the spring tension based on the current draw of the motor.
Before I go much further, do you think this will work?
The motor is 110V 3/4 HP 4.8 AMP
I have selected two possible chips for the job, the ACS712· http://www.sparkfun.com/commerce/product_info.php?products_id=8882
a 5 amp with up to 5x over current ability. I assume this would be big enough to take the initial motor surge when turning it on.
Should·I add an inrush current limiter? http://www.ametherm.com/er/inrush-current-limiters-gp.html?gclid=CNa4gOjvp54CFQ0aawod1V7ilw
the Allegro ACS756 50 amp device. http://search.digikey.com/scripts/DkSearch/dksus.dll?Detail&name=620-1239-ND
Will I be able to sense the current well enough though on the 50 amp device is i am only using less than 5 amps
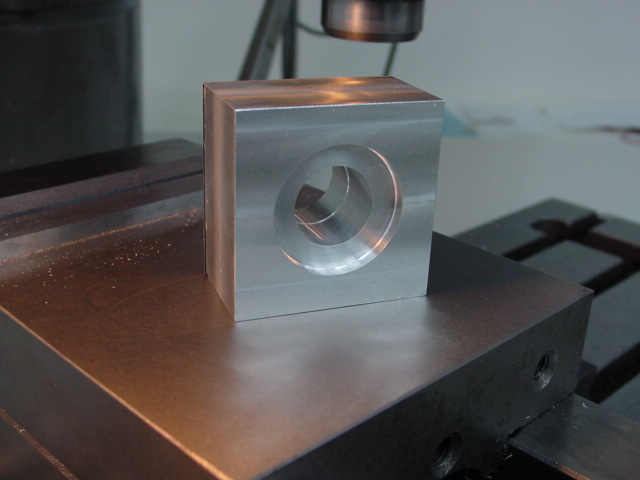
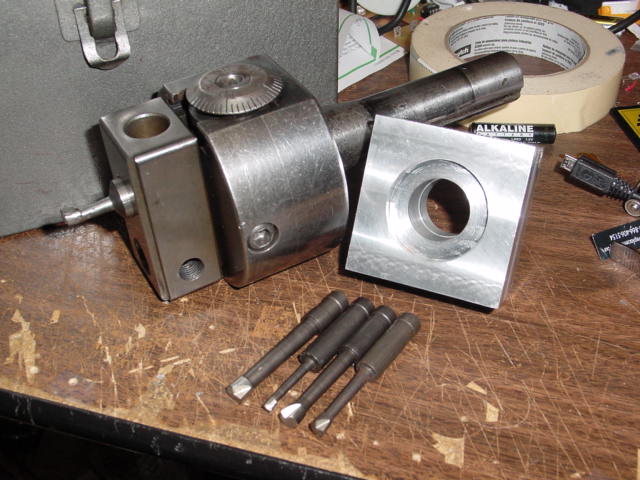
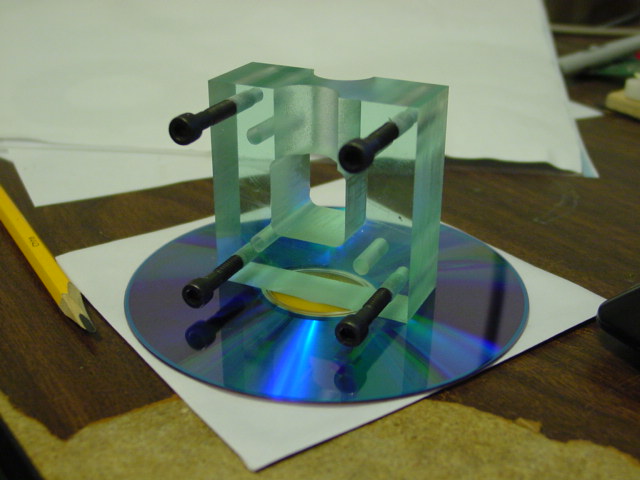
Pictures show some of the milling I have done thus far with the new bridgeport
The Saw starts at about 70 oz at the top of the 4 inch cut and down to about 30 and less as it finishes the cut. I am assuming I can set a maximum and minimum and measure the amount of current the motor is using to get a sense of the pressure, basically I would like to make the pressure the same for the full length of the cut.
perhaps there is a simple way to do this but it sounds like a fun project so learn about current draw and cutting power of a saw so that is my initial thought.
Comments suggestions?
P.S. I did put a 6 tooth carbon back blade on for aluminum, I also ordered a specific aluminum blade recommended from a good blade supplier a slight tooth difference from the standard 6 tooth one i put on. Also i got a wax stick for the blade. I understand the blade speed can be up in the 400 range feet per minute but this saw only goes 90 fpm. I am told a 4 x 1 1/2 cut on an industrial band saw takes about 10 minutes. My first cut·I cut across the 4 inch width at 60 fpm and it took almost an hour, very clean cut almost mirror finish so I know it can go faster. A 2 1/2 x 1 1/2·cut took 20 minutes as I added a bit of feed pressure still using 60fpm, have not tried 90fpm yet. Blade had no heating that I could tell with my laser temp indicator so i am sure I can go faster but the motor casing was around 160 degrees so that is a bit of a concern, not knowing what a typical 3/4 hp motor at maximum output will typically run.
▔▔▔▔▔▔▔▔▔▔▔▔▔▔▔▔▔▔▔▔▔▔▔▔
Think Inside the box first and if that doesn't work..
Re-arrange what's inside the box then...
Think outside the BOX!
Post Edited (metron9) : 11/26/2009 5:31:40 AM GMT
My solution to getting the maximum cut pressure without overtaxing the motor or breaking the blade is to incorporate a motor current sensor and a stepper motor to increase or decrease the spring tension based on the current draw of the motor.
Before I go much further, do you think this will work?
The motor is 110V 3/4 HP 4.8 AMP
I have selected two possible chips for the job, the ACS712· http://www.sparkfun.com/commerce/product_info.php?products_id=8882
a 5 amp with up to 5x over current ability. I assume this would be big enough to take the initial motor surge when turning it on.
Should·I add an inrush current limiter? http://www.ametherm.com/er/inrush-current-limiters-gp.html?gclid=CNa4gOjvp54CFQ0aawod1V7ilw
the Allegro ACS756 50 amp device. http://search.digikey.com/scripts/DkSearch/dksus.dll?Detail&name=620-1239-ND
Will I be able to sense the current well enough though on the 50 amp device is i am only using less than 5 amps
Pictures show some of the milling I have done thus far with the new bridgeport
The Saw starts at about 70 oz at the top of the 4 inch cut and down to about 30 and less as it finishes the cut. I am assuming I can set a maximum and minimum and measure the amount of current the motor is using to get a sense of the pressure, basically I would like to make the pressure the same for the full length of the cut.
perhaps there is a simple way to do this but it sounds like a fun project so learn about current draw and cutting power of a saw so that is my initial thought.
Comments suggestions?
P.S. I did put a 6 tooth carbon back blade on for aluminum, I also ordered a specific aluminum blade recommended from a good blade supplier a slight tooth difference from the standard 6 tooth one i put on. Also i got a wax stick for the blade. I understand the blade speed can be up in the 400 range feet per minute but this saw only goes 90 fpm. I am told a 4 x 1 1/2 cut on an industrial band saw takes about 10 minutes. My first cut·I cut across the 4 inch width at 60 fpm and it took almost an hour, very clean cut almost mirror finish so I know it can go faster. A 2 1/2 x 1 1/2·cut took 20 minutes as I added a bit of feed pressure still using 60fpm, have not tried 90fpm yet. Blade had no heating that I could tell with my laser temp indicator so i am sure I can go faster but the motor casing was around 160 degrees so that is a bit of a concern, not knowing what a typical 3/4 hp motor at maximum output will typically run.
▔▔▔▔▔▔▔▔▔▔▔▔▔▔▔▔▔▔▔▔▔▔▔▔
Think Inside the box first and if that doesn't work..
Re-arrange what's inside the box then...
Think outside the BOX!
Post Edited (metron9) : 11/26/2009 5:31:40 AM GMT
640 x 480 - 58K
640 x 480 - 60K
640 x 480 - 58K
640 x 480 - 61K
640 x 480 - 59K
Comments
I've got that same saw, albeit an earlier model. My solution to the variable spring problem is to use a light pressure, so the blade won't break or jump track, and just wait a little longer for the cut to finish. I'm not sure it's worth adding any high-tech equipment to control the feed rate. As we say, it'd be "gilding the lily". The Brits, I think, have it right, though, when they say, "polishing the turd." It's a cheap $200 bandsaw, after all. Save your high-tech-add-on money for a better one. (Some day, I'd like to have a Do-All vertical bandsaw with a built-in blade welder. Then I can repair all the blades the Harbor Freight unit breaks!)
BTW, since the blade tends to pull inward as it cuts, it's best to cut oblong stock flat, rather than standing up. You'll get a more accurate cut and waste less material that way.
-Phil
▔▔▔▔▔▔▔▔▔▔▔▔▔▔▔▔▔▔▔▔▔▔▔▔
PG
A weight on the saw frame let gravity provide the downward push and the cylinder regulated how fast the saw was fed into the material.
▔▔▔▔▔▔▔▔▔▔▔▔▔▔▔▔▔▔▔▔▔▔▔▔
Tom Sisk
http://www.siskconsult.com
·
▔▔▔▔▔▔▔▔▔▔▔▔▔▔▔▔▔▔▔▔▔▔▔▔
Think Inside the box first and if that doesn't work..
Re-arrange what's inside the box then...
Think outside the BOX!
Getting the head weight even is really the major goal I think. I will post my progress. have to get a turky stuffed this morning though...
▔▔▔▔▔▔▔▔▔▔▔▔▔▔▔▔▔▔▔▔▔▔▔▔
Think Inside the box first and if that doesn't work..
Re-arrange what's inside the box then...
Think outside the BOX!
It didnt work very well due to the band bending problem. (We took the 200 pieces of rack to a professional machine shop, and gave the saw to the maintenance lead man.)
If you can extend the blade guides closer to the piece being cut it will work better.
I agree that it isnt worth automating a $200 cheap saw. Here in New Englane we call it 'Shining Sh_T'
We have a cheap Jet version back at the shop and it works much better as the blade guides move closer to the cut part.
Our problem with that is we cannt find blades for it. A local wedling supply has them custom made ($25 each).
Anyone else know where to get Jet blades?
Thanks,
▔▔▔▔▔▔▔▔▔▔▔▔▔▔▔▔▔▔▔▔▔▔▔▔
Alan Bradford ·N1YMQ
Plasma Technologies
Canaan NH 03741
www.plasmatechnologies.com
Now I could not resist turning on the saw since i did stop by my other shop and pick up an ampprobe
Motor running no load with belt off 2.5 amps
with belt attached 2.75 amps
cutting 1 1/2 inch 6061 aluminum 3.25A at about 70 oz head pressure
the speed was actually in meters so it actually tops out at 180 feet per min
The cut is beautiful, cut the long way through it only took 13 minutes. The cut is very square almost as if it was already machined, I am very impressed.
Blade is 64 1/2 inch, Alan you are correct, I did move the guides in especially the one next to the motor pully away from the pully as the blade curves in at that point, Phil that may be the problem you have with the blade curving in or the back guide may not be parallel with the front. I am very impressed now after almost writing the thing off as junk. I still plan to do the counter weight so I can regulate the head pressure to a finer degree, that way I can lower the head pressure very easy for lighter stock.
WARNING if you get one of these, there are little wheels on the base motor end of the unit and a handle at the front of the saw, if you lift the handle to push the saw up on its wheels the head can spring all the way vertical and smash to the ground. Now I know why the model i bought off the floor had a big dent in the belt cover, i also dented it as I almost destroyed the thing when that happened. When I put a counter weight on it I will put a stop on the head so it can't go up more than 45 degrees in case someone else trys to use the crappiest wheels I have ever seen on a 200 pound piece of cast iron.
Blade I bought was from grangers, carbon back it says, was about $14.00 US.
▔▔▔▔▔▔▔▔▔▔▔▔▔▔▔▔▔▔▔▔▔▔▔▔
Think Inside the box first and if that doesn't work..
Re-arrange what's inside the box then...
Think outside the BOX!
on an angle??
Thanks
Second, adjust the 3 ball bearings on the motor side to as far away from the drive plate as it will go without hitting the front edge of the table. You can see in DCS06451 how the blade turns in and twists as it goes to the drive plate.
The front side bearing on both the back set and the front set are on eccentric bolts you losen the front bolt and then turn the bolt closeist to the bearing to move it closer or farther from the fixed bearing on the opposite side of the blade.
If you try and clamp the two bearings tight to make the blade straight you will use too much pressure on the blade. The bearings on the sides of the blade need to have at least .001 inch slop. If you can't roll the bearings by hand without moving theblade then they are too tight, if the blade is twisted the bearings are too close to the drive plate.
same for the back set of three bearings, the top bearing should just touch the blade and the side bearings should be able to be rolled without moving the blade.
The front and back sets of bearings can also move forward and backwards, it is importnant to have both sets parallel with each other as well as the blade parallel with the table below. Once you have the front set near the motor set then do the back set to line up the blade parallel with the table below.
Aluminum needs a 6 tooth blade, the blade that comes with the saw is way too fine for aluminum. Actually I broke the one that came with it because the aluminum gummed up the blade and stuck to it causing it to bind between the bearings that were in fact too tight. broke at the weld so perhaps the weld was bad.
Happy Cutting...
▔▔▔▔▔▔▔▔▔▔▔▔▔▔▔▔▔▔▔▔▔▔▔▔
Think Inside the box first and if that doesn't work..
Re-arrange what's inside the box then...
Think outside the BOX!
Post Edited (metron9) : 11/27/2009 3:53:47 AM GMT