I'm sure people have tried. It's not a very good choice since it's a parallel interface and would use up most of the Stamp's I/O pins. Much better would be an SPI or I2C I/O Expander. The 74HC595 is very good for output use and the 74HC165 is good for input use. For configurable I/O, something like Microchip's MCP23S17 (16-bit) or MCP23S08 (8-bit) would be good. They all would use SHIFTIN and SHIFTOUT to communicate which is available on all Stamps.
thanks for the information. but im suppose use this PPI for my project, and im not sure how the programming would work. can anybody point me to the correct direction?
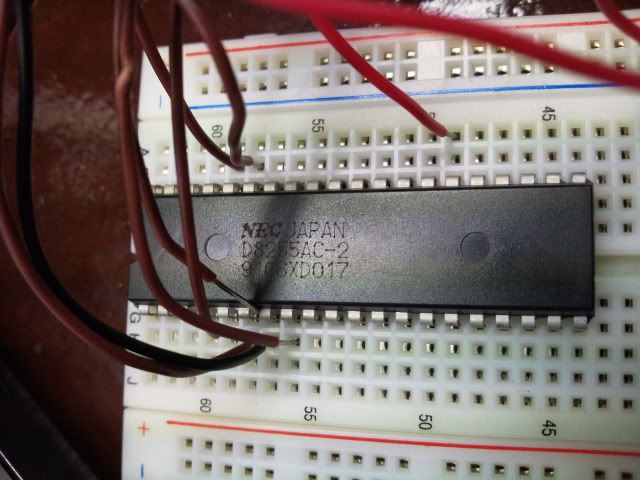
Do a web search for the 8255 or 82C55 datasheet. This will give you the information on how to manipulate the 6 control lines. Best thing to do is to connect the data bus to either I/O pins 0-7 or 8-15 with a 220 Ohm resistor in series from the Stamp I/O pin to the 8255 data bus pin. You'd then connect the six control lines (/CS, /RD, /WR, /RESET, A0, A1) to any six of the other group of 8 I/O pins.
You'd read the data bus by referencing INL (for pins 0-7) or INH (for pins 8-15) and you'd write the data bus by setting OUTL (for pins 0-7) or OUTH (for pins 8-15). You'd also have to change the I/O direction as needed (DIRL or DIRH).
You'd set the other control pins by using LOW or HIGH statements.
The introduction to programming a Stamp is "What's a Microcontroller?". There's also the "Stamp Basic Syntax and Reference Manual". Both can be downloaded from Parallax's website. Go to the main page and click on the Resources tab. The Manual is under Downloads / Stamp Documentation and the introduction is under Downloads / Stamps in Class Downloads.
Mr. Green.
You sound like the guy I need to talk to... but I need you to dumb things down for me a little if you have the patience. I am a complete beginner with high hopes.
I have the BS2 Homework board and I'm enjoying my new foray into this world.
I'm expecting to run 12 servos that could each receive different instructions based on one of 5 pedals being pushed. The 5 pedals will be configurable to represent a different combinations of servo instructions based on a grid of switches.
I think I know how to program this based on the PBASIC in the book but with the high number of inputs and outputs, it is clear I'll go beyond the existing breadboard. You mention in this thread "74HC595 is very good for output use and the 74HC165 is good for input use." I looked them up but I don't have a clue how to hook them up to the Homework board and translate them into additional I/O pins. I suspect I need an additional breadboard and a way to link the Homework board with the expanded breadboard?? Where do the two units you mention come in and how do I address the new I/O locations in the programming? I've been looking around for a rather elementary description of how to make this work without luck. Anywhere you can point me or any quick tips? Thanks for your patience!
The Homework Board is not going to be able to do what you want. A Stamp only does one thing at a time and servos require a control pulse about every 20ms that varies from about 1ms to about 2ms in length. While the Stamp is producing one control pulse, it can't do anything else. 10 control pulses in sequence can take up to 20ms leaving no time to try to read the pedals or to decide what to do. Using some kind of I/O expansion (like the 8255) just makes things worse since it takes more time to change an I/O pin. There are only two ways to get something like this to work:
1) Move the work of controlling the servos to another microcontroller. This is the idea behind the Parallax Servo Controller. It's discontinued, but there's a compatible replacement design using the Propeller that'll be available soon (days to weeks). The Homework Board would communicate with the Servo Controller via 2 I/O pins and SEROUT / SERIN statements. Your program just sends a desired servo position and the Servo Controller does the rest. Your Homework Board could handle the pedals and the decision making part. There are other controllers that are available now that can also take over the task like a ServoPAL (2 servos only ... you'd need 6 of them) or a PWMPAL (4 servos only ... you'd need 3 of them).
2) Use a different microcontroller for the whole project. The Propeller can easily handle up to 28 servos, all at the same time (which is why it's being used for the new Servo Controller). It can handle the 5 pedals and the decision-making as well. One of the forum members (hanno) is developing a really nice graphical programming system for beginners (like his 5 year old daughter) that could easily handle your project. There are some discussion threads showing examples of its use. It's in beta-testing now and should be available generally in a couple of weeks.
Great information Mike. Thanks for saving me a long journey to a dead end. I'll start looking into the options you listed and may come back with some additional questions. Thank you!
Continuing on the above, I think I found a Servo Controller that hopefully will work. The Lynxmotion SCS-32 seems powerful enough to do what I want and it is not too expensive... if you know about any limitations in connecting this to the BS2 Homework board please let me know.
The next issue I have is the inputs. As mentioned above, the pedals will acuate up to 6 of the 12 servos. Determining which servos to actuate will depend on the position of up to 24 switches. Basically, the switches can be used to "configure" the servos the pedals will actuate.
Anyway, this is a large number of inputs. I'm not quite getting the idea of serial inputs and how to use the 74HC165. Any additional insight on how I would do this? If there are any tutorials anywhere (with pictures) that could help me visualize how these are connected, I would really appreciate the reference... or maybe just a very clear description might do the trick.
The StampWorks Manual (do a search of the Parallax website) has examples of both input expansion (with the 74HC165) and output expansion (with the 74HC595). You can download it for free or buy a paper copy. You might browse the Nuts and Volts Columns index as well (click on the Resources tab on Parallax's main webpage).
Thanks again Mike. It spells it out nicely. Do you know if there is a limit to the number of 74HC165's that can be cascaded? It doesn't look like more than 3 I/O pins need to be taken up on the BS2 as they are cascaded.
I'd probably limit the number of either 74HC595s or 74HC165s to 8 or 10. At 16Kpbs for the BS2, that's maybe 200 sets of values per second with 10 and you need a byte from the limited variable space for each device in the cascade. Also, some of the lines are driven from one I/O pin (like the clock and parallel load and 8 to 10 is a reasonable limit to use on the number of devices driven by one I/O pin.
Perfect, I think I have my electronics design now... I should only need 4 or 5 at the most! Thank you!
Now if I can only get the mechanics to work! ...I'm sure I'll have some trouble with the programming too but I'm not anticipating too much trouble. I may be back.
okay i think im sure on how to extend the I/O ports, but currently programming wise im not sure on how to program my LCD to work from the extended ports, like use the port B of 8255 to control the LCD (:

 Carpark
Posts: 11
Carpark
Posts: 11

Comments
You'd read the data bus by referencing INL (for pins 0-7) or INH (for pins 8-15) and you'd write the data bus by setting OUTL (for pins 0-7) or OUTH (for pins 8-15). You'd also have to change the I/O direction as needed (DIRL or DIRH).
You'd set the other control pins by using LOW or HIGH statements.
The introduction to programming a Stamp is "What's a Microcontroller?". There's also the "Stamp Basic Syntax and Reference Manual". Both can be downloaded from Parallax's website. Go to the main page and click on the Resources tab. The Manual is under Downloads / Stamp Documentation and the introduction is under Downloads / Stamps in Class Downloads.
You sound like the guy I need to talk to... but I need you to dumb things down for me a little if you have the patience. I am a complete beginner with high hopes.
I have the BS2 Homework board and I'm enjoying my new foray into this world.
I'm expecting to run 12 servos that could each receive different instructions based on one of 5 pedals being pushed. The 5 pedals will be configurable to represent a different combinations of servo instructions based on a grid of switches.
I think I know how to program this based on the PBASIC in the book but with the high number of inputs and outputs, it is clear I'll go beyond the existing breadboard. You mention in this thread "74HC595 is very good for output use and the 74HC165 is good for input use." I looked them up but I don't have a clue how to hook them up to the Homework board and translate them into additional I/O pins. I suspect I need an additional breadboard and a way to link the Homework board with the expanded breadboard?? Where do the two units you mention come in and how do I address the new I/O locations in the programming? I've been looking around for a rather elementary description of how to make this work without luck. Anywhere you can point me or any quick tips? Thanks for your patience!
1) Move the work of controlling the servos to another microcontroller. This is the idea behind the Parallax Servo Controller. It's discontinued, but there's a compatible replacement design using the Propeller that'll be available soon (days to weeks). The Homework Board would communicate with the Servo Controller via 2 I/O pins and SEROUT / SERIN statements. Your program just sends a desired servo position and the Servo Controller does the rest. Your Homework Board could handle the pedals and the decision making part. There are other controllers that are available now that can also take over the task like a ServoPAL (2 servos only ... you'd need 6 of them) or a PWMPAL (4 servos only ... you'd need 3 of them).
2) Use a different microcontroller for the whole project. The Propeller can easily handle up to 28 servos, all at the same time (which is why it's being used for the new Servo Controller). It can handle the 5 pedals and the decision-making as well. One of the forum members (hanno) is developing a really nice graphical programming system for beginners (like his 5 year old daughter) that could easily handle your project. There are some discussion threads showing examples of its use. It's in beta-testing now and should be available generally in a couple of weeks.
The next issue I have is the inputs. As mentioned above, the pedals will acuate up to 6 of the 12 servos. Determining which servos to actuate will depend on the position of up to 24 switches. Basically, the switches can be used to "configure" the servos the pedals will actuate.
Anyway, this is a large number of inputs. I'm not quite getting the idea of serial inputs and how to use the 74HC165. Any additional insight on how I would do this? If there are any tutorials anywhere (with pictures) that could help me visualize how these are connected, I would really appreciate the reference... or maybe just a very clear description might do the trick.
Thanks again!!
Now if I can only get the mechanics to work! ...I'm sure I'll have some trouble with the programming too but I'm not anticipating too much trouble. I may be back.
any one can help me?