SpinStudio Connector
I found a program a few days ago called SketchUp, from Google. This is a free program to draw 3 dimensional models. I was quite impressed with the results that even someone like me, with no artistic ability, was able to achieve.
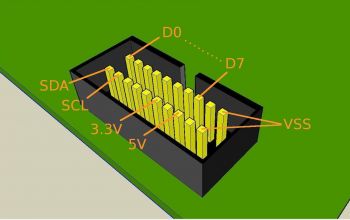
I had, in the past, tried to make a diagram to describe the pinout of the SpinStudio module connectors. The images I produced lacked appeal, and more importantly, they lacked clarity.
With this new tool in hand, I set out to finally produce an accurate representation of the SpinStudio Connector. I was pleased with the results. Once I had this image done, I decided to remake the MainBoard documentation. I converted my documentation to PDF form as well as made some corrections. The end result of my weekend of work is available on my website here --> ucontroller.com/documentation/mainboarddoc.pdf
In a related note. I've been asked several times "What are these holes for on the Module Circuit boards?" They are of course mounting holes, but I never explained how they could be best utilized. After experimentation with several different mounting solutions. I am of the opinion that I have settled on the best method of mounting (perhaps mounting isn't the best word, as the PCBs remain loose)
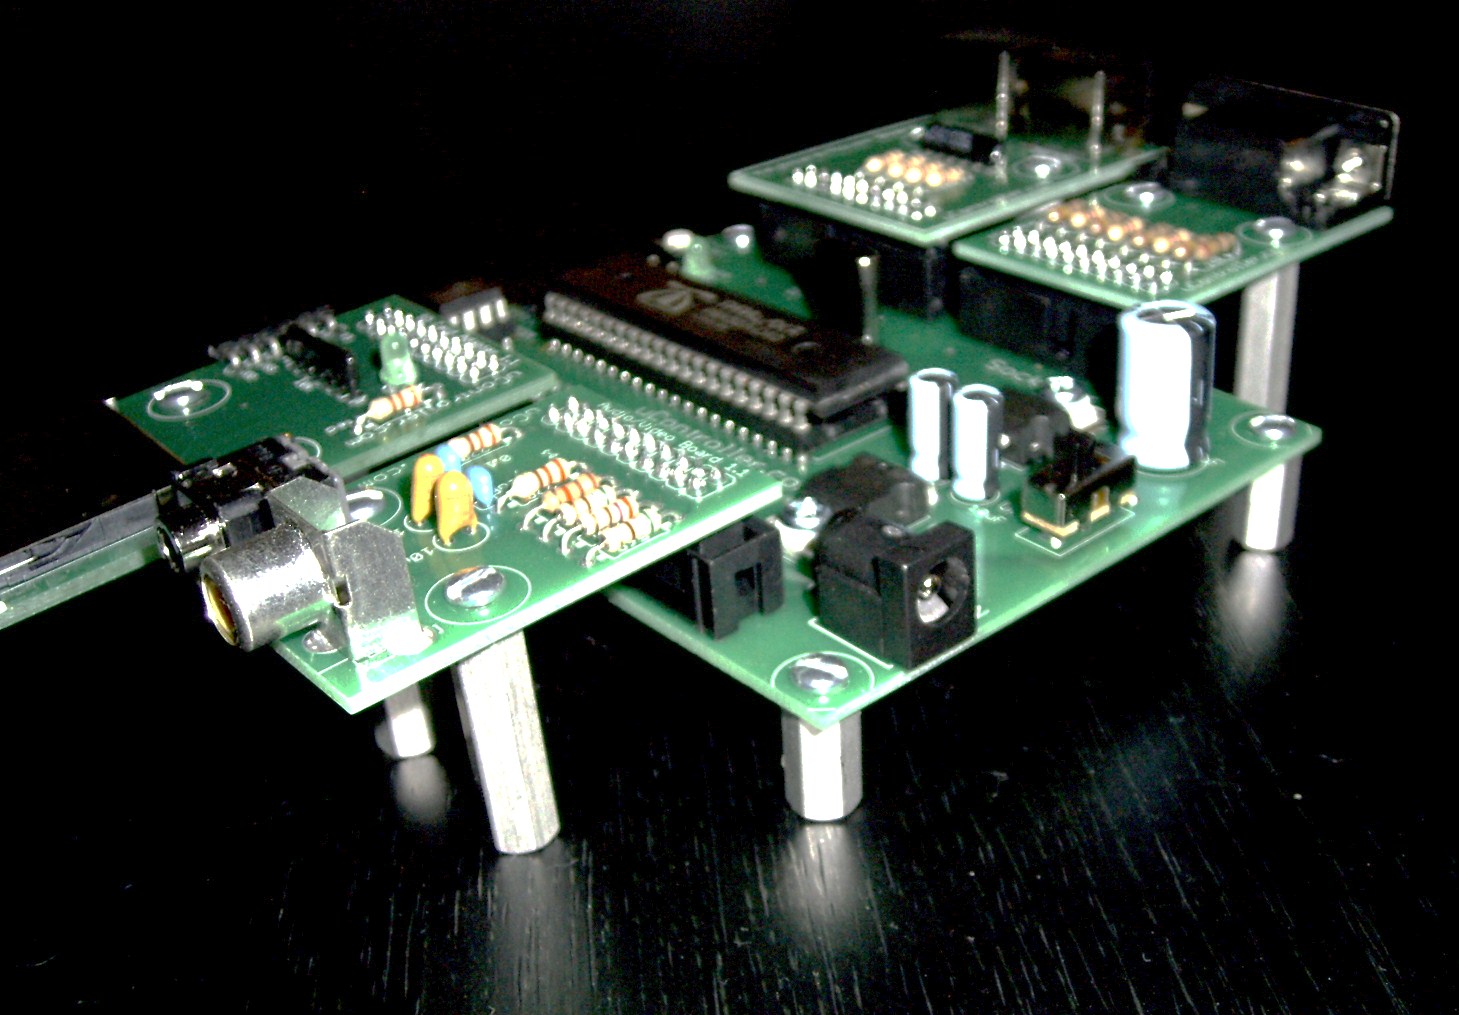
Using 1/2" spacers in the MainBoard mounting holes, and 1" spacers on the peripheral modules holds the boards in perfect alignment when plugged together. It supplies support to the modules that they need, especially modules that have cables plugged into them. I also have attached a photo of a SpinStudio with the proper spacers attached so you get a feeling of what I am explaining.
The IO/Servo module documentation was also converted to PDF and updated. There's a better description of the connections on that board with a black/white/color illustration created with another of my favorite (free) Graphics programs, The Gimp.
Thank you to all of you that have bought SpinStudio systems and modules over the last year!
▔▔▔▔▔▔▔▔▔▔▔▔▔▔▔▔▔▔▔▔▔▔▔▔
Brian
uController.com - home of SpinStudio - the modular Development system for the Propeller
PropNIC - Add ethernet ability to your Propeller! PropJoy - Plug in a joystick and play some games!
SD card Adapter - mass storage for the masses Audio/Video adapter add composite video and sound to your Proto Board


Comments
▔▔▔▔▔▔▔▔▔▔▔▔▔▔▔▔▔▔▔▔▔▔▔▔
Cheers,
Simon
www.norfolkhelicopterclub.co.uk
You'll always have as many take-offs as landings, the trick is to be sure you can take-off again ;-)
BTW: I type as I'm thinking, so please don't take any offense at my writing style