

Prop Watch
 Peter Jakacki
Posts: 10,193
Peter Jakacki
Posts: 10,193
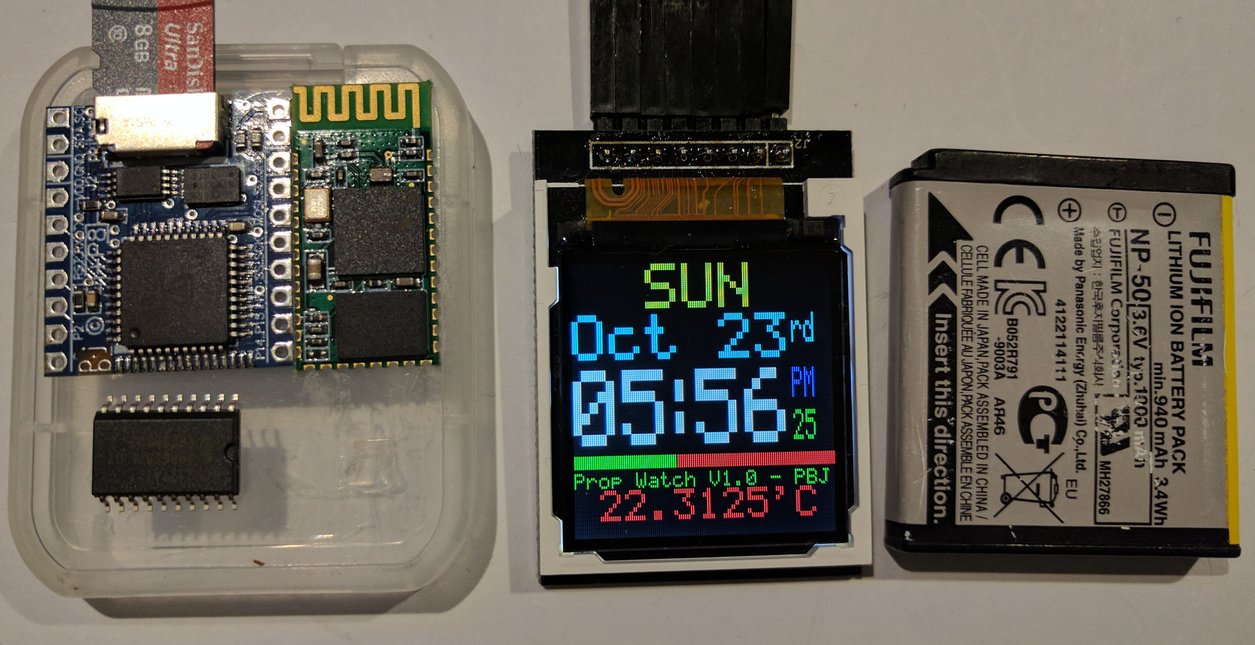
I've just posted in my Tachyon thread about how I have been using those cheap and small 1.44" TFT displays. Now I'm looking at packaging the components into a wrist band as a "Prop Watch". Since I am using Bluetooth I can communicate with Tachyon from my PC or even my phone and reprogram the functions. I also have some sensors so I'm including those too although I'd log all that info to the micro SD card as well. Perhaps I might even play music from it too! Maybe a small ESP8266 module as well.
One of the practical things I will be doing with it immediately is using it as my portable Prop programmer so that I can plug a cable into the Prop Watch and plug into production or field units and either copy or program the device using Tachyon's FAT32 file-system. This function also includes serial numbers and network addresses.
A small 5-way tactile switch will be my main control for the unit but all of it should fit neatly into a wristband with the electronics housed in an SD memory card case (for the moment) placed on the bottom of the wrist with only the LCD and the 5-way switch on top.
Comments
And even has a practical use. Unlike Apple watches and such..
Jim
I have a stack of these card holders from some cheap ebay cards I bought one time. I'm looking for a smaller battery but I will work with what I've got at the moment but if I separate the two halfs of the holder I can use it as a shell around the battery and the electronics. The Bluetooth has been stuck to the back of the P8 module and the ESP8266 module has been placed on top of the Prop chip so it is very compact at present. The LCD will also sit inside half a card holder but with a clear cover that I will fabricate. As for the strap I have toyed with the idea that if I use ribbon cable then when you put it on your wrist and as you connect the strap together you power it up!
Jim
Jim
Very interesting idea!
Could be cut with a dremel for the prototypes, then laser cut for production.
I have a 3D printer which I will eventually use once I have a better idea about form but I do like the idea of layers. As long as I get it functional first I can experiment. Thanks for the idea.
What would an edge on acrylic look like, cut by a laser? I feel very restricted in my creativity. You guys have the great options of CNC laser cutters and 3D printing machines, Oh well I probably would have trouble sleeping at night.
@Peter, Good luck on your project what ever route you go. I know you have to take ergonomics and ruggedness into your design, and that may take more than one material.
When Galileo wanted to make a telescope he ground the lenses by hand. My old friend who was into such things ground his own mirrors for a reflecting telescope in the 1980's.
Today the most spherical object in the world is ground by hand.
If you really want to make a thing. Get the materials. Attack them with a hacksaw a file and various grades of sand paper. Polish it up with some silver polish and elbow grease. Or at least that is what I used to do in perspex (acrylic) back in the day.
A go-to source for OTS wearable enclosures is OKW.
https://www.okw.com/en/Products/Wearable-enclosures.htm
(But I do like the idea of the repurposed SD card case!)
The micro can be responsible for powering up the Prop too as I decided to use side operated pushbuttons rather than the awkward 5-way switch. So 3 buttons on each side for a total of 6 should be sufficient to scroll through menus etc.
Let's see how this pans out, maybe I should source the bare LCD and make my own modules along with some micro pushbuttons on the edges. This could turn into a neat wearable.
BTW, besides simple serial it probably wouldn't hurt to include I2C as well although I would avoid SPI as that starts adding more external connections.
The battery can go into the opposite end of the strap. I also have a tiny ESP8266 smd module that fits over the top of the Prop chip and still sits flush with the micro SD while the Bluetooth module fits to the left of the P8 nice and compact.
Once I get this working I can look at doing a 3D case.
I have one of those- when it was time to upgrade it you took great care of me :-)
Thank you for that.
Now if only you would make one for a Prop... Stache was a fantastic idea.
This has been designed for the main purpose of programming a target Prop directly from a selected file, either directly into the EEPROM since my boards have those extra pins on the PropPlug header, or alternatively via the serial port. But I also use the display to read the firmware and status from the target as well as set serial and network numbers while logging all this on the micro SD.
I've just added a 10-pin row socket to the main edge of the P8 so that I can plug in a programming cable. It all seems to work at the moment although there's a EEPROM error (probably solder) but I've loaded Tachyon into RAM and added EXTEND to check it.
Just tested and the I2C is shared with the LCD clk and data. All I needed to do was set the LCD CE high and I could backup, so I will need to add a pullup there.
edit: I actually ended up putting a single row 10-pin header socket along the business side of the P8 which is what I use to initially talk to the Prop with but it looks like this might be a good entry point for my programming cable. I can also see that I could use this for serial protocol analysis and with the help of an A/D pod on the end of the cable I could also do metering and low speed scope!
As I added to the last post I can also see that I could use this device for serial protocol analysis and with the help of an A/D pod on the end of the cable I could also do metering and low speed scope! As way of a reminder to myself I'd like to add an IR LED, how do ya like them apples you miserable remotes!
The new integrated pcb will be even slimmer than what I have now so it will integrate the Prop, microSD, RTC, ESP32 (WiFi+BLE), and the 10-way interface strip. The RTC may be implemented with a small micro so it can monitor the buttons too.
EDIT: that price might not be $1.20 it seems but I have another link where the price seems like 50 cents going down to 10 cents in larger quantities but that doesn't seem to be right either?
The manufacturer seems to be Formike.
The Stache had (still has, for the Stamp only) a rudimentary interface. A bicolor LED and a single pushbutton serve to enter the user's choice of the program to load by number and the status, success or failure. It is easy for a field tech to operate. KISS. However, your plan to have a list of named files to scroll through and the status feedback and other functions looks great. One thing my customers ask for (for the Prop) is indeed the ability to provision a cellular modem/network at a field site. Keep it KISS if others need to use it!