

SRAM expansion board with SVGA 15bpp color graphics and text on P1V
 rogloh
Posts: 6,413
rogloh
Posts: 6,413
In my other recent thread about 2MB hub RAM running PropGCC code on a P1V, a question was asked about what hardware I was using so here are some more juicy details of what I've been playing with. I decided to start another thread on this as there is quite a bit to show and tell.
Brief background: Over many years I've been fascinated wtih getting video generation directly out of embedded microcontrollers and developed quite a collection of little home grown systems using discrete TTL logic, AVRs and Propellers etc with tightly timed software to do this but there was always something lacking; either limitations in resolution, color depth, memory bandwidth, or application memory size etc. I forever wanted something faster/better that I could still mostly create myself (no RasPi's for me!). When the P1V came out I knew there was still hope yet for me if I moved from software back into FPGAs again...
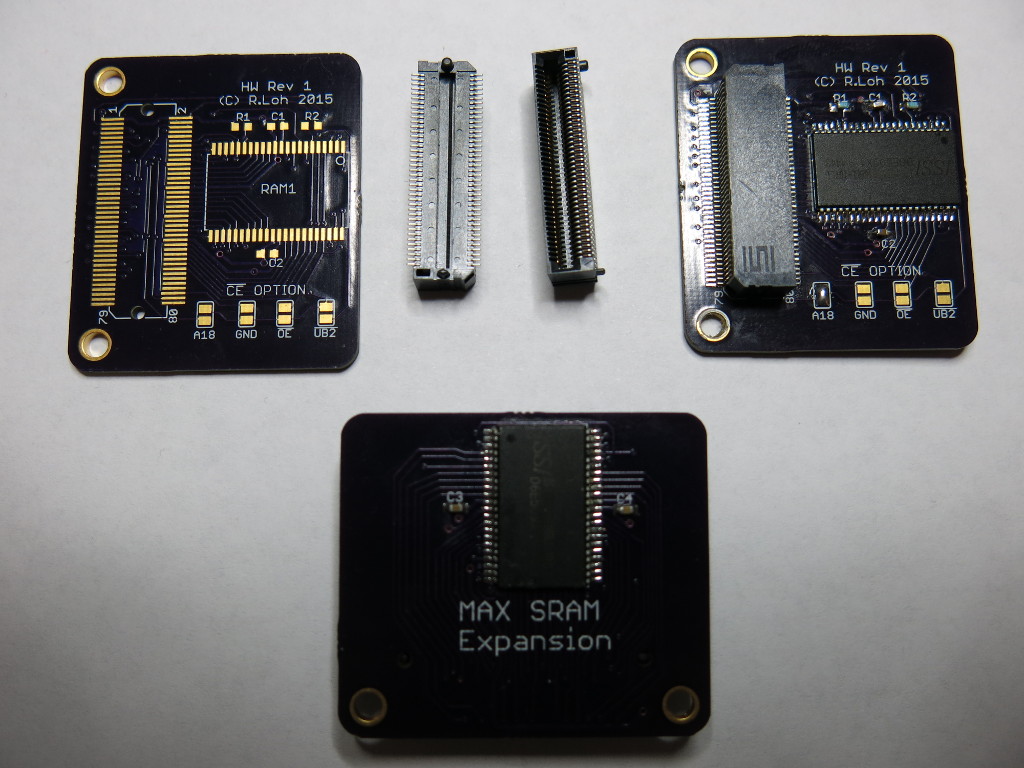
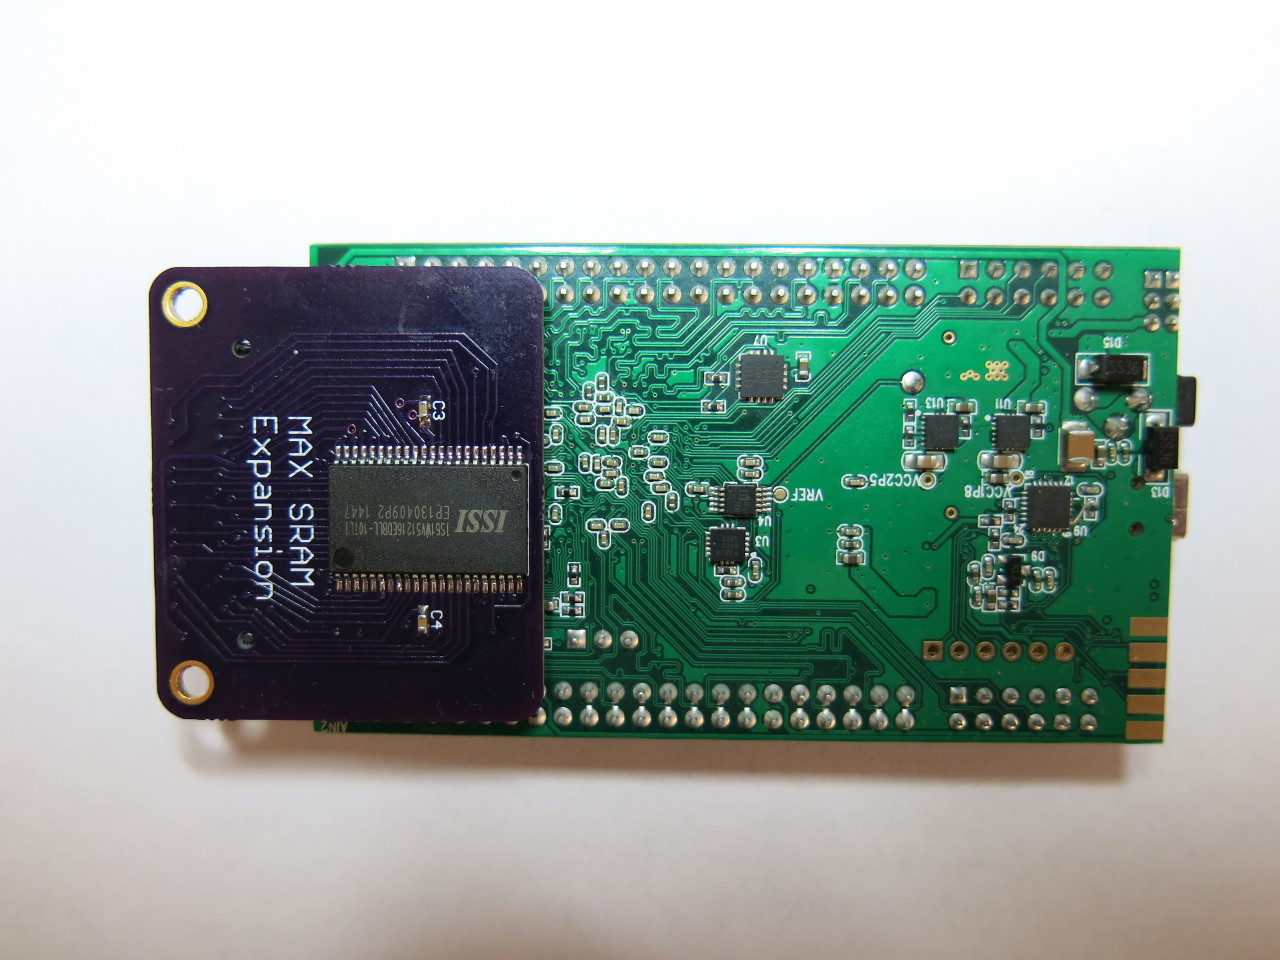
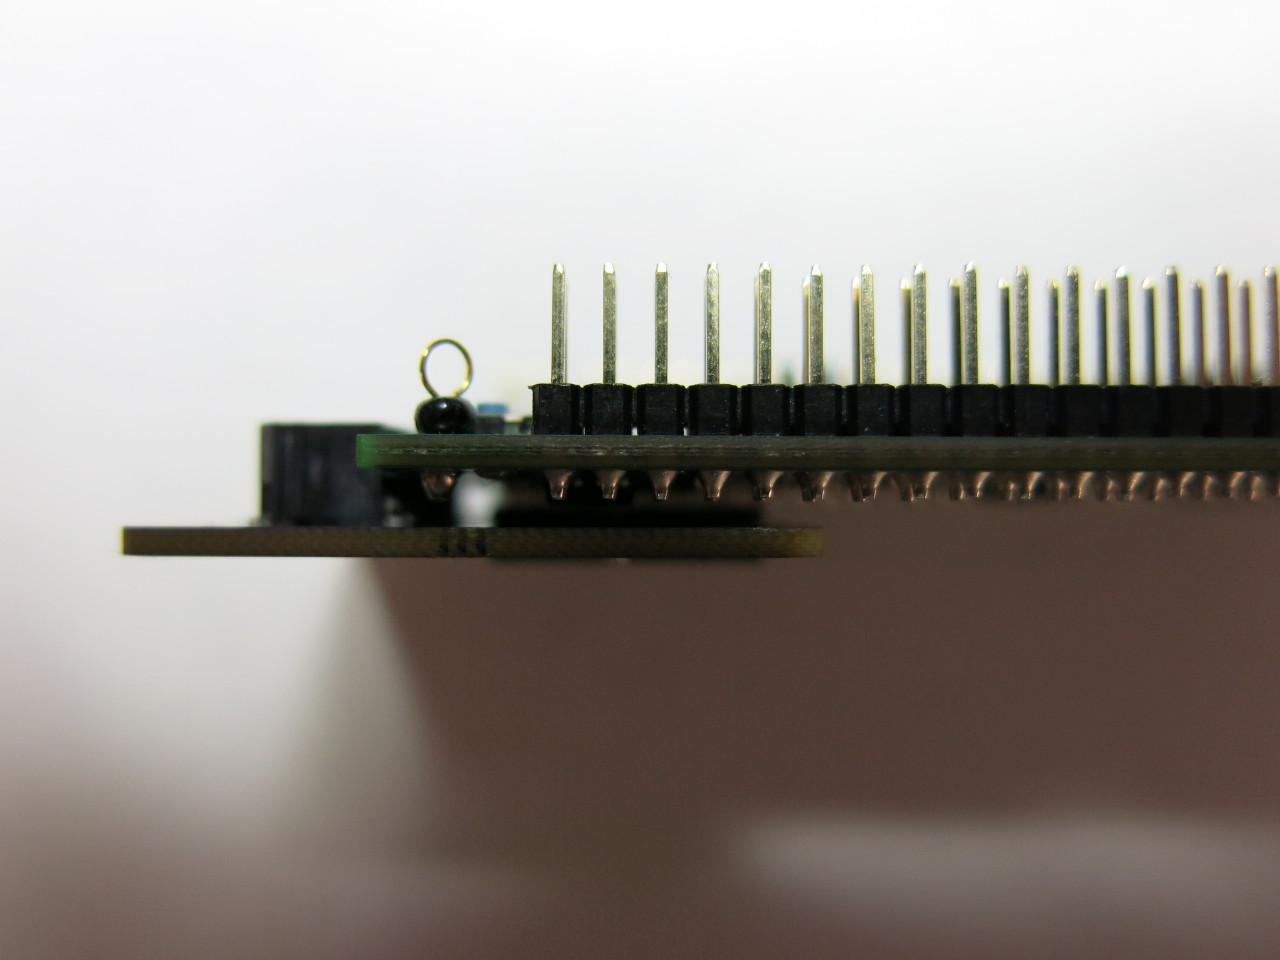
So in the last few months I've designed/assembled/tested a handy little SRAM memory expansion PCB that fits neatly under the BeMicro MAX 10 FPGA board (Tubular and Ozpropdev each assisted a little bit too along the way, thx guys). This PCB probably suits several other BeMicro boards too like the CV, maybe even their new A9, as they each seem to use a common high density (MEC6) connector interface with basically the same pinout.
My PCB supports up to 2MB of 32 bit wide RAM (byte addressable) using two 16 bit TSSOP-II devices and is connected to every single pin output by the FPGA on the BeMicro MAX10 MEC6 connector giving maximum memory expansion without any bus multiplexing.
The memory fitted on my particular board is high speed SRAM rated for 8ns access at 3.3V. With bus turnaround accounted for I am able to run my board with an 80MHz P1V propeller and get 8 independent read or write accesses per hub cycle out of it, which is ideal for what I require.
In conjunction with this I've also designed a video rendering engine in Verilog that integrates with the P1V hub and shares this 2MB SRAM with the 3 COGs in the MAX10 FPGA. Having 2MB now is great because it allows for really good looking 800x600x15bpp double buffered graphics plus a bit extra left over for a text buffer and fonts, all without burning any internal hub RAM. To save some LE's on the 8k LE 10M08 FPGA I removed the legacy video Verilog from my P1V COGs, because there is no real need for that any more. The WAITVID instruction has also been tweaked to wait for VSYNC instead which is handy to sync with a screen redraw.
My video engine supports both attributed color text and bitmapped graphics modes (one 16 bit word per pixel, one 32 bit long per character). I'll list a few more details below.
In its text mode the per character attributes are all fully independent and include: bright/dim, flash, hidden, underline, inverse, font1/2 along with separate foreground and background color. Text mode actually uses 9 bit color (3 bits per primary color), allowing the bright/dim attributes to be achieved by simple logical shifts of the 3 bits within the overall 5 bit dynamic range per color. All this information nicely fits within the 32 bits per character allowing clean atomic updates of each character when writing to the screen memory so there are no weird flashes during video memory updates.
Character scanlines for the fonts are selectable up to 32. There is a hardware cursor that can be set to flash and its starting scanline is also programmable allowing block or underscore types of cursors. Two different fonts are allowed per screen and the 9th bit of the character conveniently selects between them. You can use this feature for alternate shaped fonts such as italized or bold text for example, and still have the rest of the attributes available.
In graphics mode you can vary the start address where pixels are read from which then allows for some scrolling / page flipping effects. The graphics engine can also do pixel doubling giving 400x300 resolution which allows 4x as many screens in the same memory and will be good for some games that don't need full resolution.
All video register control is done by using simple COGINIT calls to the unused COG IDs on the MAX10. I found this is a very convenient way to control the system. For example COGINIT(3, param1, param2) can be used to enable the video engine and setup the mode and pass an address with the parameters. It allows any COG to control video and the hub nicely synchronizes the different COG accesses to my engine.
The hub uses 3 of its 8 slots for the 3 P1V COGs to read/write SRAM/hub memory on the MAX10 board. Four of the remaining time slots get used by the video engine for reading bitmapped graphics or text.
There is still one spare hub timeslot left which is handy as I plan to use it with a general purpose DMA engine. This DMA engine will support both audio sample streaming and graphics image copies (eg. sprites with transparency) in the background, giving the audio transfers priority when reading hub memory. Video memory copies will happen in the remaining hub timeslots unused by audio. I'm possibly interested in also doing short intermittent SPI or UART type transfers this way. This saves burning whole COGs for just simple UARTs etc and I can still use COGINIT with other COG IDs for controling the other various DMA engine(s) I may add.
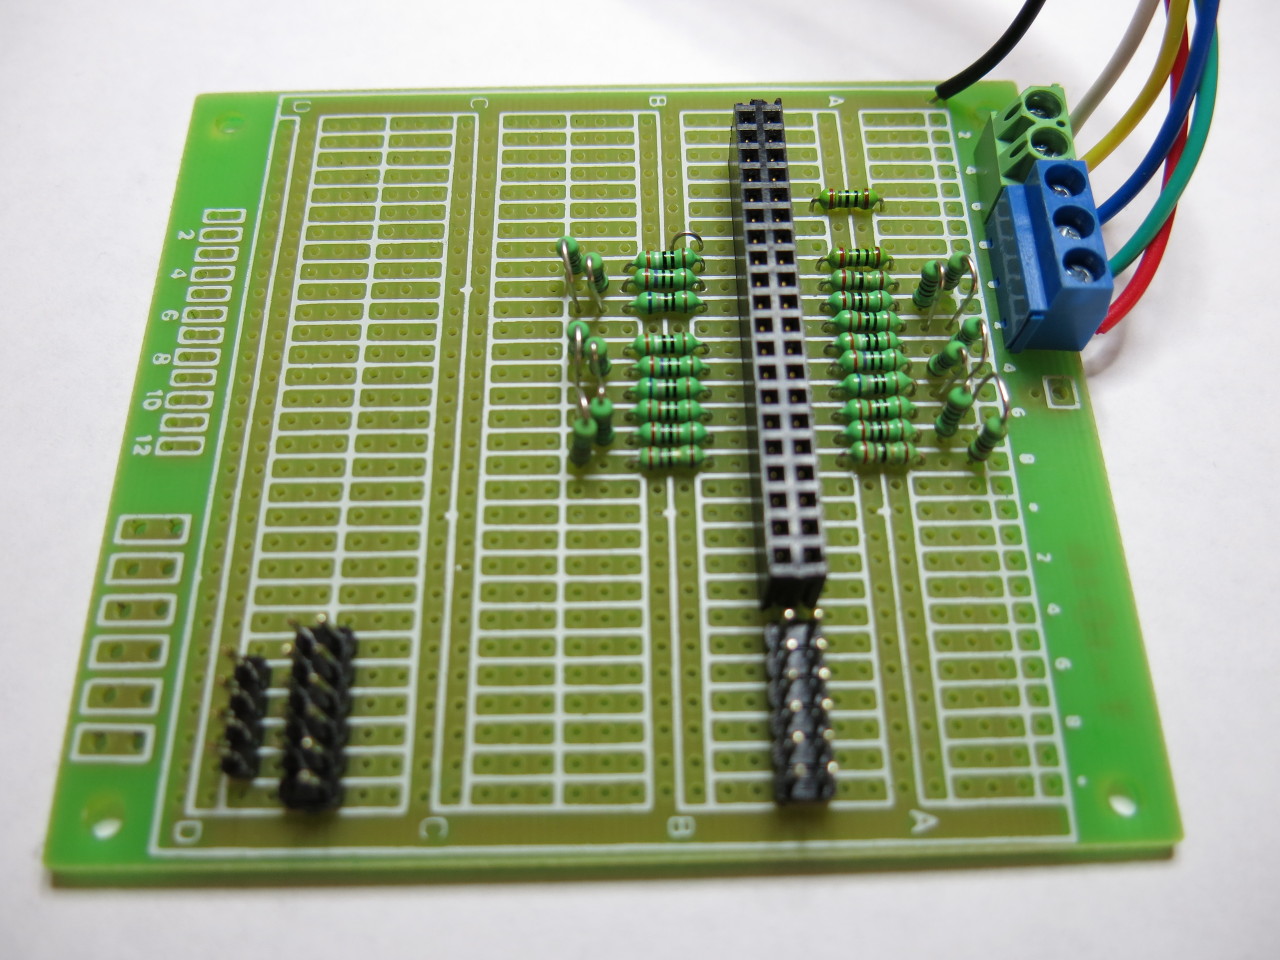
Once I had my SRAM board working a carrier board that fits the BeMicro MAX 10 was then built up for my experiments and right now it contains the RGB DAC resistors and prop plug interface. Utimately I may design a full PCB board for all this but for now it still suffices for my various experiments.
Propeller PORT A was mapped to all the BeMicro MAX10 board's PMOD I/O pins and for the propplug UART interface. The remaining pins of PORT A are mapped to the onboard peripherals like the accelerometer and 2MB SPI flash.
I kept Propeller PORT B free and fully available for 32 bit GPIO. PortB sits along on one side of the BeMicro MAX10 IDC pin header connectors, the second IDC header side is used for the RGB video DAC pins and still contains 8 spare differential pairs for connecting to a future LVDS LCD panel plus a few more for possibly some i2c capacitive touchscreen experiments. The expansion port obviously goes to my SRAM board. So everything seems to fit together really nicely now. All my Verilog so far with 3 COGs uses about 84% of the MAX10 10M08 device, so I still have a bit left to spare, and the remaining things I need to add should fit.
Once I got PropGCC working with this (my other thread) I quickly hacked up a simple gfx drawing code in PropGCC C to do Breshenhams line/circles and it works well and already quite fast in C at 5MIPs. Native COG PASM would be even faster, and if I get ambitious I might even put some simple line drawing and fill functionality in my sprite engine to max it out (@5Mpixel/second draw rate).
Attached are some photos of some of this work... apologies for the SVGA screen shot quality, my monitor is sometimes difficult to photograph with my room lighting. However in person I can assure you it all looks totally awesome and clear on my old Sony Trinitron and the 32 levels of primary color gradients are really nice and even.
Further plans...
- Add SD card to my carrier board
- Add PS/2 Keyboard and Mouse - trivial, though H/W USB would probably be nicer (maybe one day!)
- Incorporate my RDLONG WC/WRLONG WC/etc autoincrementing instructions back into the P1V Verilog to speedup LMM execution by 12.5%
- Extend DMA/sprite engine, add few extra video enhancements allowing multiple text/gfx regions per screen, more scrolling, masking ops
- Add a 24 bit AUDIO I2S DAC - some PMOD devices are available for this which will suit me
- Use the on board 2MB flash to boot a shell and write some simple OS code to load/run expanded LMM images from SD
- Get the onboard 8MB SDRAM up and allocate it to a single COG for the really large programs
- Enjoy!
Cheers,
Roger.
Brief background: Over many years I've been fascinated wtih getting video generation directly out of embedded microcontrollers and developed quite a collection of little home grown systems using discrete TTL logic, AVRs and Propellers etc with tightly timed software to do this but there was always something lacking; either limitations in resolution, color depth, memory bandwidth, or application memory size etc. I forever wanted something faster/better that I could still mostly create myself (no RasPi's for me!). When the P1V came out I knew there was still hope yet for me if I moved from software back into FPGAs again...
So in the last few months I've designed/assembled/tested a handy little SRAM memory expansion PCB that fits neatly under the BeMicro MAX 10 FPGA board (Tubular and Ozpropdev each assisted a little bit too along the way, thx guys). This PCB probably suits several other BeMicro boards too like the CV, maybe even their new A9, as they each seem to use a common high density (MEC6) connector interface with basically the same pinout.
My PCB supports up to 2MB of 32 bit wide RAM (byte addressable) using two 16 bit TSSOP-II devices and is connected to every single pin output by the FPGA on the BeMicro MAX10 MEC6 connector giving maximum memory expansion without any bus multiplexing.
The memory fitted on my particular board is high speed SRAM rated for 8ns access at 3.3V. With bus turnaround accounted for I am able to run my board with an 80MHz P1V propeller and get 8 independent read or write accesses per hub cycle out of it, which is ideal for what I require.
In conjunction with this I've also designed a video rendering engine in Verilog that integrates with the P1V hub and shares this 2MB SRAM with the 3 COGs in the MAX10 FPGA. Having 2MB now is great because it allows for really good looking 800x600x15bpp double buffered graphics plus a bit extra left over for a text buffer and fonts, all without burning any internal hub RAM. To save some LE's on the 8k LE 10M08 FPGA I removed the legacy video Verilog from my P1V COGs, because there is no real need for that any more. The WAITVID instruction has also been tweaked to wait for VSYNC instead which is handy to sync with a screen redraw.
My video engine supports both attributed color text and bitmapped graphics modes (one 16 bit word per pixel, one 32 bit long per character). I'll list a few more details below.
In its text mode the per character attributes are all fully independent and include: bright/dim, flash, hidden, underline, inverse, font1/2 along with separate foreground and background color. Text mode actually uses 9 bit color (3 bits per primary color), allowing the bright/dim attributes to be achieved by simple logical shifts of the 3 bits within the overall 5 bit dynamic range per color. All this information nicely fits within the 32 bits per character allowing clean atomic updates of each character when writing to the screen memory so there are no weird flashes during video memory updates.
Character scanlines for the fonts are selectable up to 32. There is a hardware cursor that can be set to flash and its starting scanline is also programmable allowing block or underscore types of cursors. Two different fonts are allowed per screen and the 9th bit of the character conveniently selects between them. You can use this feature for alternate shaped fonts such as italized or bold text for example, and still have the rest of the attributes available.
In graphics mode you can vary the start address where pixels are read from which then allows for some scrolling / page flipping effects. The graphics engine can also do pixel doubling giving 400x300 resolution which allows 4x as many screens in the same memory and will be good for some games that don't need full resolution.
All video register control is done by using simple COGINIT calls to the unused COG IDs on the MAX10. I found this is a very convenient way to control the system. For example COGINIT(3, param1, param2) can be used to enable the video engine and setup the mode and pass an address with the parameters. It allows any COG to control video and the hub nicely synchronizes the different COG accesses to my engine.
The hub uses 3 of its 8 slots for the 3 P1V COGs to read/write SRAM/hub memory on the MAX10 board. Four of the remaining time slots get used by the video engine for reading bitmapped graphics or text.
There is still one spare hub timeslot left which is handy as I plan to use it with a general purpose DMA engine. This DMA engine will support both audio sample streaming and graphics image copies (eg. sprites with transparency) in the background, giving the audio transfers priority when reading hub memory. Video memory copies will happen in the remaining hub timeslots unused by audio. I'm possibly interested in also doing short intermittent SPI or UART type transfers this way. This saves burning whole COGs for just simple UARTs etc and I can still use COGINIT with other COG IDs for controling the other various DMA engine(s) I may add.
Once I had my SRAM board working a carrier board that fits the BeMicro MAX 10 was then built up for my experiments and right now it contains the RGB DAC resistors and prop plug interface. Utimately I may design a full PCB board for all this but for now it still suffices for my various experiments.
Propeller PORT A was mapped to all the BeMicro MAX10 board's PMOD I/O pins and for the propplug UART interface. The remaining pins of PORT A are mapped to the onboard peripherals like the accelerometer and 2MB SPI flash.
I kept Propeller PORT B free and fully available for 32 bit GPIO. PortB sits along on one side of the BeMicro MAX10 IDC pin header connectors, the second IDC header side is used for the RGB video DAC pins and still contains 8 spare differential pairs for connecting to a future LVDS LCD panel plus a few more for possibly some i2c capacitive touchscreen experiments. The expansion port obviously goes to my SRAM board. So everything seems to fit together really nicely now. All my Verilog so far with 3 COGs uses about 84% of the MAX10 10M08 device, so I still have a bit left to spare, and the remaining things I need to add should fit.
Once I got PropGCC working with this (my other thread) I quickly hacked up a simple gfx drawing code in PropGCC C to do Breshenhams line/circles and it works well and already quite fast in C at 5MIPs. Native COG PASM would be even faster, and if I get ambitious I might even put some simple line drawing and fill functionality in my sprite engine to max it out (@5Mpixel/second draw rate).
Attached are some photos of some of this work... apologies for the SVGA screen shot quality, my monitor is sometimes difficult to photograph with my room lighting. However in person I can assure you it all looks totally awesome and clear on my old Sony Trinitron and the 32 levels of primary color gradients are really nice and even.
Further plans...
- Add SD card to my carrier board
- Add PS/2 Keyboard and Mouse - trivial, though H/W USB would probably be nicer (maybe one day!)
- Incorporate my RDLONG WC/WRLONG WC/etc autoincrementing instructions back into the P1V Verilog to speedup LMM execution by 12.5%
- Extend DMA/sprite engine, add few extra video enhancements allowing multiple text/gfx regions per screen, more scrolling, masking ops
- Add a 24 bit AUDIO I2S DAC - some PMOD devices are available for this which will suit me
- Use the on board 2MB flash to boot a shell and write some simple OS code to load/run expanded LMM images from SD
- Get the onboard 8MB SDRAM up and allocate it to a single COG for the really large programs
- Enjoy!
Cheers,
Roger.
1024 x 768 - 174K
1280 x 960 - 232K

1280 x 960 - 257K

1280 x 960 - 98K
1280 x 960 - 114K

1280 x 960 - 218K
1280 x 960 - 264K

1280 x 960 - 463K

1024 x 768 - 178K

1024 x 768 - 248K
1280 x 960 - 291K

960 x 720 - 123K
Comments
>propeller-load -broger roger.elf -r -t
Propeller Version 9 on /dev/ttyUSB0
header 00010000
determine sizes
0 I: vaddr 00000000, paddr 00000000, filesz 00000404, memsz 00000404
1 I: vaddr 000006c0, paddr 00000404, filesz 000000dc, memsz 000000dc
2 I: vaddr 000006c0, paddr 000004e0, filesz 0000003c, memsz 0000003c
3 Z: vaddr 0000051c, paddr 0000051c, filesz 00000000, memsz 00000004
4 S: vaddr 00010000, paddr 00010000, filesz 000016b4, memsz 000017c0
text size 000017c0, data size 0000051c, init entries 4, total 7436
load text
4 L: vaddr 00010000, paddr 00010000, filesz 000016b4, memsz 000017c0
load data
0 I: vaddr 00000000, paddr 00000000, laddr 000117c0, size 00000404
1 I: vaddr 000006c0, paddr 00000404, laddr 00011bc4, size 000000dc
2 I: vaddr 000006c0, paddr 000004e0, laddr 00011ca0, size 0000003c
3 Z: vaddr 0000051c, paddr 0000051c, laddr 0000051c, size 00000004
Loading the serial helper to hub memory
9736 bytes sent
Verifying RAM ... OK
Loading external memory driver 'hub_xmem.dat'
228 bytes sent
Loading program image to RAM
7436 bytes sent
Loading .xmmkernel
1984 bytes sent
[ Entering terminal mode. Type ESC or Control-C to exit. ]
hello, world!
Done
This is good stuff. Do you have a schematic of how you hooked up the memory? Better yet, are you going to have any memory cards to sell?
Are you going to release your verilog code for the project? Some great P1V educational value there.
Right now I am sort of gauging people's interest to decide where it might all go. To be honest it's really a specialty niche, and the boards are hard to assemble myself in numbers. In small quantities the total cost in fixed parts was less than USD$10 for the special MEC6 connector (~$5-6 from Samtec) and PCB. For the optionable parts, high speed SRAM varies in cost depending on capacity but was in a $20 ballpark for 2 MB of 8ns SRAM in very small quantities, though it's much cheaper for 1MB or less. However for small orders this is way too high for being able to turn any reasonable profit given the assembly and testing time etc. My eyes aren't what they used to be and I find the SMD connectors are a PITA to solder with a 0.635mm pitch. So it really may make sense for anyone keen enough to build up their own. OSH can make the boards pretty cheap since they are two layers only and quite small in size.
Probably Arrow/BeMicro should ultimately make/support something like this if there is customer interest and compatiblity across their products. That makes more sense to me - I really should sell it to them, LOL!
As to the Verilog, stay tuned, and I'm still tweaking it. We'll see where that leads too.
What sort of expansion boards are you doing?
Roger.
So in the sharing spirit please find attached the schematic and board files (Eagle 6.5.0) along with the schematic in pdf form.
Bear in mind the address pin numbering likely differs depending on your chosen SRAM size but I found these TSSOP-II SRAM packages are pretty much all compatible in general because the addressing order doesn't particularly matter on async SRAM. My design allows flexibility with both the total capacity and number of RAM chips fitted (1 or 2 devices determines 16/32 bit width). For the maximum case of 2MB (2 x 512k x 16 bit devices) there are insufficient pins for a dedicated chip enable pin and you have to make the chip enable one of 4 options. I just used ground and so had the individual byte lane enables basically act like chip enables (though this doesn't conserve power). You can also choose to tie !CE to !OE if you wish to conserve power instead. On my 2MB board I used two 8/10ns IS61WV51216EDBLL-10TLI memory chips which worked for me when running the propeller at 80MHz. To save cost you can get lower capacity parts (4 megabit parts are probably the sweet spot for high speed SRAM pricing).
For the high density connector I believe the Samtec part was this : MEC6-140-02-X-D-RA1.
Note that on the MAX10 the !OE pin on the 80 pin connector is pulled high externally with a pullup resistor on the MAX10 board itself at pin 3 so it should be safe but you should bear this in mind during reprogramming if your board's chip select is grounded because there is a chance it could drive data bus output during FPGA reprogramming if the !OE signal pin floats instead - I think some other BeMicro boards might do this.
Enjoy,
Roger.
Very interested to see where this goes.