

HM-11 & HM-19 Bluetooth
 JBWolf
Posts: 405
JBWolf
Posts: 405
Hello!
I could use a little help with programming the HM-19 Bluetooth module.
They say it is actually just an upgraded HM-11 to support BT5.0
I couldnt get HC modules or the HM10 to work with new iPhones... but the HM-19 shows up no problem.
Now I just the prop to receive variables sent from an iPhone app.
I cannot find any OBEX for the HM11 or HM19... was wondering if someone by chance had one or could help with getting started on making my own.
Thanx!
Comments
This module is just a serial device to the Propeller and all you need is a serial connection to receive the data from your phone.
The unit can be programmed using AT commands but out of the box it should work.
Unless you are using BLE, Bluetooth is the same.
Mike
I can send AT commands to the HM19 from the phone... but how do I go about receiving them on the prop?
The HM19 is a transparent device in that whatever is sent from the phone is passed on serially to the Propeller.
Only the Propeller can issue AT commands to the HM19 device.
The HM19 is serially attached to the Propeller running at 9600 baud by default.
Mike
You need a serial object such as Full Duplex Serial.
Hmm, I've tried passively listening with full duplex serial and trying to modify HC06 & HM10 code to either receive data sent from an iphone app, or send AT commands from the prop to the HM19... no luck at all.
I can connect to the HM19 fine with an iphone app... but I just cant get anything sent from the app to the prop so I can do something simple like turn on/off an led.
I dont know what to do now... could really use a pointer in the right direction. I have attached code for the HC06 and HM10 I was trying to get working with the HM19.
Goals: Rename the HM19, receive data sent from iphone app.
I'm using the HC06 in a project right now, but perhaps I can help. What App are you using on your phone to send serial data?
"DSD TECH Bluetooth" from app store
Have you tried connecting a serial terminal directly to your BT module? i.e. USB<-SER ; TX <--> RX and RX <--> TX ... just to see if there was any serial traffic on the receiving end of your BT
Note: Something I noticed and i did a few Google searches and found others with a similar problem with no apparent solution.
The BT modules are susceptible to random interference from their surroundings, meaning that the data on the receiving end can be invalid.
Most of the Apps don't send any kind of CRC checking (even a simple XOR/ADD) would be better than nothing. So you are left to roll your own
using an app like B4A or some other platform where you have better control of the outgoing data structure. Another option is if you can find
an app that lets you define your output values. ... such as Virtuino (Contrary to popular belief you don't need an Arduino on the receiving end),
just something that parses the data correctly. ... That said, here is the scenario I ran into:
If an ON/OFF switch is used with the default settings... 1=ON 0=OFF ... If the data received isn't valid the value returned is a ZERO. So if you have something ON it will seemingly randomly turn itself OFF because it returned a ZERO. That may not be desirable, since the same thing happens with a slider control where the lowest setting by default is usually a 0. So my solution for the ON OFF switch was to assign ON and OFF values to some arbitrary values other than 0 or 1, and Offset the sliders so that their lowest value was never a 0. Doing this prevented any "glitches" that I had previously encountered.
Well the problem is I dont have any resources at all to go by regarding interfacing the prop to the HM19... whether it be passively listening or interacting with AT commands.
So for someone like me who is trying to learn for the first time, there just isnt a 'next step' as I dont even have a beginning. I was relying on OBEX and since there isnt one, its a whole new ball game.
To be honest, I have no clue what " i.e. USB<-SER ; TX <--> RX and RX <--> TX" means
I am using the USB prop clip, and I am assigning the prop RX to the HM19 TX if thats what u mean... and have also tried pull-up resistors.
I have successfully got the HC05 & HC06 working, but a new iphone will not work with those, so I tried modifying those codes as much as I could with my level of knowledge... but im getn zip
Imagine you just bought a time machine relying on the flux capacitor and you want to add wireless, so you bought the wireless adapter, but you plug it in and you dont get wireless... thats kinda how im feeln right now. Just no visible path forward to solving this problem.
I have absolutely no problem whatsoever with putting in the time to learn, I'm definitely not trying to ask for someone to do the work for me... but I'm at a standstill on what to do next
"I am using the USB prop clip, and I am assigning the prop RX to the HM19 TX if thats what u mean" - Yes, that should work ... If you simply open up a Prop Terminal and set the baud to 9600 (I believe that is the default)
At this point you don't even need to run code in your Propeller. If you go to your Phone App and pair with the BT module, and pull down the "Relay" tab from the "DSD TECH Bluetooth" App, flipping the Relays On or OFF should send data to the terminal window.
This step confirms that you at least have a valid connection from your Phone to the BT module.
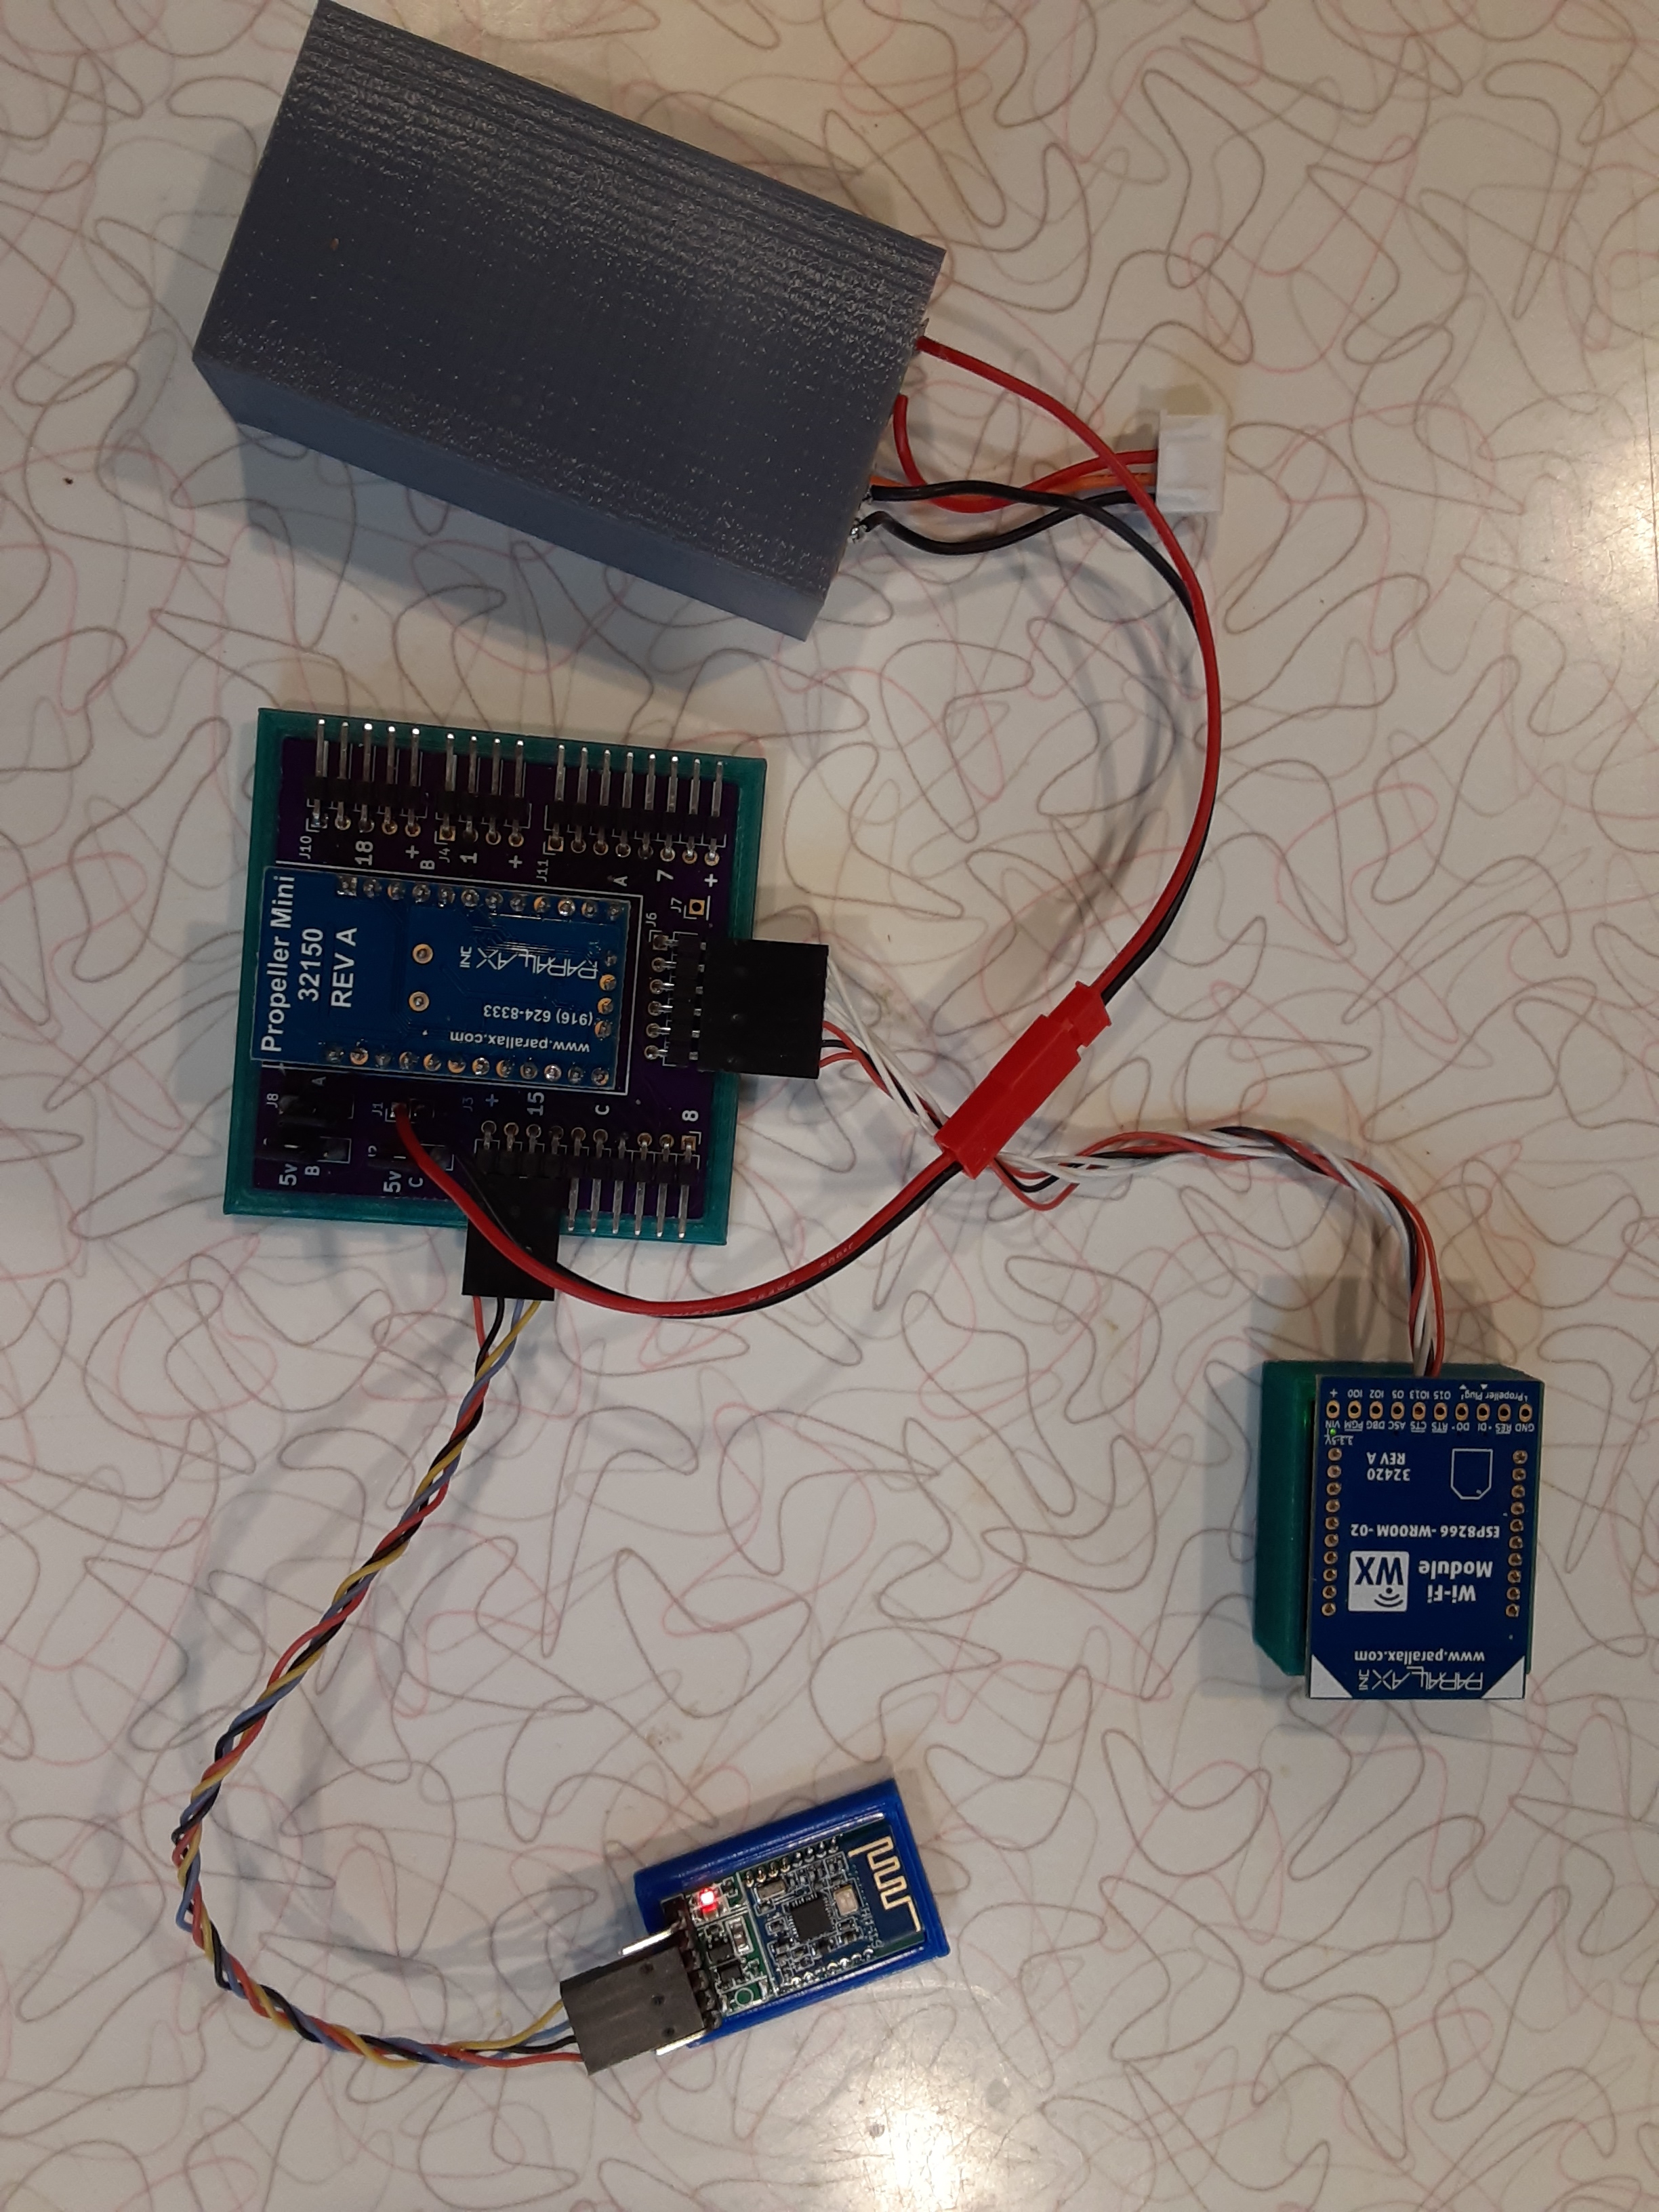
ok I can pair to the HM19, but ONLY when the prop is not connected to a PC via propclip.
If I connect the propclip, the HM19 Will not allow an iphone to connect.
I have tested this many times now.
I do have an LCD which I can use to display data received on prop from phone... but how do I go about putting the HM19 incoming data into a variable?
Iphones are difficult, I thought my RN42 would work out of the box, not so. But the RN52 works out of the box with no problem, Mostly used for audio, boom boxes etc. If you do Xcode you probably could work out the bugs.
I think some pictures may help. What is a Prop Clip?
This is an old bluetooth module:
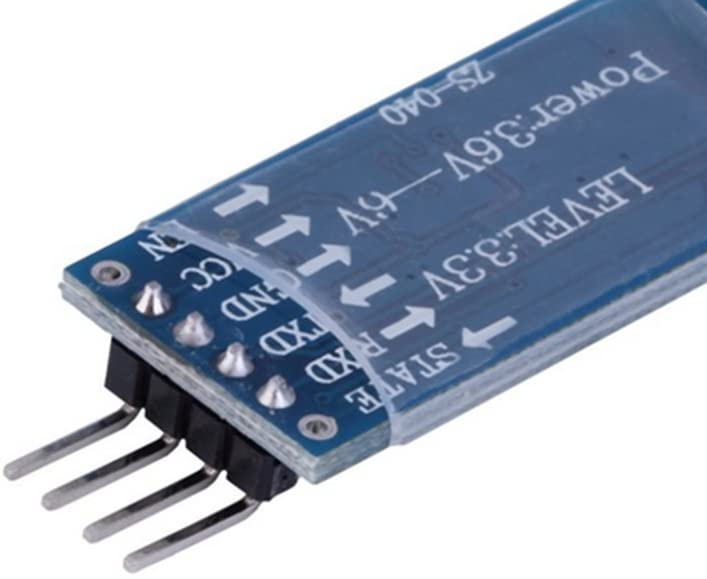
This is what you have:
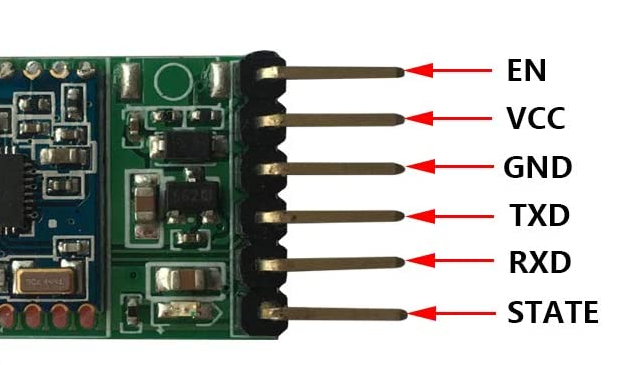
The pinout seems to be the same so wiring either unit should work the same.
Mike
You may also want to try this tool. BLE is not the same as Bluetooth. There are more options and channels.
nrf-connect
This tool will scan for BLE devices and show what services these devices offer.
Mike
Why can I not connect to the HM-19 with the prop?
I now have one of these units and it works just fine with the Prop.
With there app it comes with it has some relay functions and I asked them how the program works and they said they did not have access to that code so I don't know how the relay functions work or how to build an app that will do that.
Since this is a BLE Bluetooth module you can not just create a Bluetooth connection with it and have it send and receive data to it. BLE is based on Services and Characteristics that are exposed by the Bluetooth module. Like the Relay function is a services that is exposed by the module that you can read and modify.
Here is some code that will work with the app on your phone.
/**
 * @brief Create a Serial Passthrough to HM19 bluetooth
 * @author Michael Burmeister
 * @date April 27, 2021
 * @version 1.0
 *
*/

#include "simpletools.h"
#include "fdserial.h"

#define Rx 15
#define Tx 14
#define TRx 31
#define TTx 30

void doSpecial(void);
void doRelay(void);

unsigned char C;
int relay;

fdserial *cnn;
fdserial *trm;

int main()
{
  unsigned char L;

  relay = 0;

  simpleterm_close();

  trm = fdserial_open(TRx, TTx, FDSERIAL_MODE_NONE, 115200);
  cnn = fdserial_open(Rx, Tx, FDSERIAL_MODE_NONE, 9600);

  fdserial_txChar(trm, '>');
  pause(1000);
  fdserial_txChar(trm, '>');
  while(1)
  {
    if (fdserial_rxReady(cnn)>0)
    {
      C = fdserial_rxChar(cnn);

      if ((C > 'z') || (C < ' '))
      {
        doSpecial();
      }
      else
      {
        fdserial_txChar(trm, C);
      }

      if (C == '~')
      {
        dprint(trm, "AT\r\n");
      }
    }
    if (fdserial_rxReady(trm)>0)
    {
      C = fdserial_rxChar(trm);
      if (C == '!')
      {
        dprint(cnn, "AT\r\n");
        //fdserial_txChar(cnn, 0xfe);
      }
      else
        fdserial_txChar(cnn, C);
//      if (C == 0x0d)
//        fdserial_txChar(cnn, 0x0a);
    }
  }
}

void doSpecial()
{
  if (C == '\r')
  {
    dprint(trm, "<CR>\n");
    return;
  }

  if (C == '\n')
  {
    dprint(trm, "<NL>");
    return;
  }

  if (relay > 0)
  {
    doRelay();
    return;
  }

  if (C == 0xa0)
  {
    relay = 1;
    return;
  }

  dprint(trm, "<%2.2x>", C);
}

void doRelay()
{

  if (relay == 1)
  {
    dprint(trm, "Relay: %d ", C);
  }
  if (relay == 2)
  {
    if (C == 1)
      dprint(trm, "ON");
    if (C == 0)
      dprint(trm, "OFF");
  }
  if (relay == 3)
  {
    dprint(trm, "\n");
  }

  if (C > 0xa0)
    relay = 0;
  else
    relay++;
}
Here is a sample of the output when run with the terminal session
You need SimpleIDE to compile and run this program on your Propeller 1 board.
I used pin 14 as transmit and 15 as receive on my board. These can be changed by changing the value on the Define statements above.
You can not just send "AT" one letter at a time. The documentation says they must be send in 1 second otherwise it just becomes characters transmitted.
I setup the Exclamation point to send that AT command and it works just fine.
Since I am using the full duplex object someone could convert the above code to SPIN.
Mike